Whether you need to establish an alibi or jog your memory, it would be convenient to see data stamped directly on the photo. Unfortunately, Apple does not have a built-in timestamp for photos on the iPhone or iPad.

That’s not the end of the story on adding a date and time stamp to your iPhone photos, though. There are a few apps available that can help you out with the process. Some of these apps are free, while others are paid and offer more features.
How to Adjust Date & Time on iOS
iOS won’t let you add a date and time stamp directly to your photos. But, there is a record of when you took each image on your iPhone. This Date & Time is automatically embedded in each image you capture. While you can’t add the date and time to the photo, you can adjust it.
Note: This works for iOS 15 or later.
Here’s what to do:
- Open the Gallery app on your iPhone and tap on the photo that interests you.
- Tap on the i icon.

- Tap Adjust.

- Select the date & time you’d like to set.


If you need the date and time stamped on your photo, keep reading for other solutions!
How to Add Timestamps – Use Apps
If you prefer to see your information stamped directly on your photos, here are a few apps you can try. Each one will be a little different, but the overall goal of time and date stamping your photos will be achieved.
We’ve provided some of the walk-through steps, so consider which option would be easiest for you to operate quickly and efficiently.
PhotoMarks App for – $4.99
Although this app is not free, it is highly rated on the App Store, mainly because it’s user-friendly. This app will let you stamp your photos will all sorts of notes. This app also allows you to post directly to your favorite social network platforms, taking out all sorts of extra steps when you’re trying to share special memories with distant family.
Photomarks was created to make it easy to watermark your photos to provide some protection for your photos. This is especially useful if you’re a web designer or otherwise just want to put a watermark to protect your photos from being used on websites and social media without your permission.
Bear in mind: PhotoMarks is only available on devices that have iOS 9.0 or later.

Step 1 – Pay and Download
First, pay and install PhotoMarks from the Apple App Store.

Step 2 – Add a Stamp
Next, load an image from your phone and tap on the Text icon. Additionally, you can also take a new photo and tap on Text from the preview.

Tapping on the Text icon allows you to add the time/date stamp and customize the stamp. You might want to play around with some of the options to see what works best for your photos or for sharing them with others! Customization options may include:
- Position
- Rotation
- Scale
- Font
- Colors
- Transparency
- Special Effects
The DateStamper App for iPhone – Free
If you prefer to try a free app or feel like trying a few different apps before you make your final selection, you may want to check out DateStamper.
Available for iOS 10.0 and later, it allows stamping in bulk. It also uses non-destructive editing, which means you can always get back to your original photo.

Step 1 – Install App on Your iPhone
First, go to the App Store and download DateStamper. Install it on your iPhone and give all the necessary permissions.

Step 2 – Stamp your Photos with Dates and Times
Now it’s time to stamp your photos with a time and date. Choose a single photo or an entire album to apply the stamp. You may also want to use the app plug-in, which allows you to apply the stamp directly from your camera app as you’re taking pictures.

You can personalize the stamps with color, font, size, and position options. Furthermore, you can also edit time/date stamps that were already applied to photos.
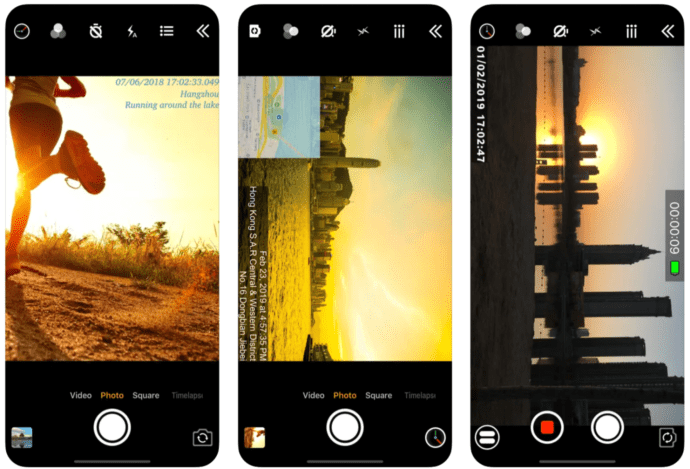
The Timestamp Camera for iPhone – Free
If you want access to a wide array of personalization options, you can get it with the Timestamp app. It’s free to install but may require in-app purchases to access some features beyond the basic time/date stamping feature.
If you have iOS 8.0 or later, you may want to give this stylish app a try.

Step 1 – Install App on Your iPhone
First, search and download Timestamp from the App Store. Install the app as directed and allow permission for this app to access your device.
Step 2 – Personalize and Apply Stamps
Now that you have the app, it’s time to stamp your photos. You’ll have the option to choose from a large variety of stamp designs, so take a moment to scroll around and check out your options. You may want to personalize your stamps in accordance with the activities shown in the photos, like food, working out, or taking notes.
Additionally, this app allows you to modify the time manually instead of simply reading metadata from the photo. You can also apply the date stamp to multiple photos using this app.
The Auto Stamper App for iPhone and iPad – $4.99
Auto Stamper allows you to track all sorts of significant life events with an easy-to-use stamp app. This app lets you make all sorts of personalized notes on your photos, but it’s not free. Still, if you have iOS 8.0 or later and want to give it a try, check out the steps below.

Step 1 – Install the App on Your iPhone or iPad
First, head to the App Store and download Auto Stamper. As mentioned before, you will have to pay a small fee to use this app.
Follow the installation instructions to get started and give the necessary permissions for the app to access your iPhone’s files.
Step 2 – Set Your Stamp Parameters
Next, set up your photo stamp. It automatically inserts the current date and time reflected on your phone, but you can add additional stamps to the same photo. You can add three other watermark types: GPS location, signature text, and logo.
Furthermore, you can also customize your stamp(s) by choosing the position, size, font, color, and opacity for each stamp. You can add event stamps in various font styles on one side while subtly stamping the date on another portion of the photo– this app truly lets you customize the experience! When you’re done, the Live feature will give you a preview of the photo with your customized stamps.
Timestamp Camera Basic – The “Free & Simple” option
If you’re looking for a free, no-hassle, basic timestamp option, this is the app for you. You can download this from the Apple App Store at no charge and instantly get timestamps on your photos.
Step 1 – Download from the App Store
Tap ‘Get’ and follow the iCloud verification prompts (Fingerprint, Face ID, or password), then allow your permissions. This app will ask for permission to access your photos, cameras, and GPS location.
You can deny it the option to track your location, but it won’t work without access to your photos and camera.
Step 2 – Take Your Pictures
All you have to do to get started is take your photos. If you’ve denied access to your GPS location, you may need to update your timezone, but you’ll only have to do this once. To do this:
- Tap the clock icon in the lower left-hand corner and scroll to your current time/date preferences.
Step 3 – Access the Timestamped Photo in your Photos App
The great thing about this app is it automatically timestamps your images and puts them in the Photos apps. There’s nothing you need to do. The Timestamp Camera Basic app acts just like your phone’s built-in camera.
Frequently Asked Questions
Sometimes it’s important to add date and time information to photos on your iPhone. If you didn’t learn everything you want to above, keep reading.
How do I find out when a photo was taken on iOS?
If you want to find out when you took an existing photo, you can. Here’s what to do:
1. Open the Gallery app and navigate to the photo you want to investigate.
2. Open the photo and tap on the i icon.
3. The date and time will appear.
Can I see the date and time on a photo someone sent me?
Unfortunately, no. You can see the date and time that someone sent you the photo (in iMessage, email, etc.). But you can’t see when that person originally snapped the image unless they tell you.
Downloading a third-party app isn’t always fun, especially for something as simple as a timestamp. Each of the options listed in this article is fairly easy to use and works well.
Related Posts
 How to Add Date/Time Stamps to Photos on Android
 Google Photos Backup: How to Back Up Photos Using Google Photos
 iPhone 8 Support End Date Information
 How to Airdrop Photos from iPhone to iPhone
 How to Download Photos from Google Photos
 How to Delete All Photos From Amazon Photos
 How to Import Google Photos to Amazon Photos
 Can TikTok Be Ordered By Date? Not Completely
 How To Order Your Instagram Feed by Date
Disclaimer: Some pages on this site may include an affiliate link. This does not effect our editorial in any way.


