Where once you would hear ‘see you on TS’ or ‘see you on Vent,’ it is now all about Discord. It has taken over from the incumbents as the number one voice and chat server platform for gamers and companies. It is free, very easy to use, voice quality is good, and there are a lot of features. If you want to get in on the action, this tutorial will walk you through how to add, manage and delete a server in Discord.
Discord has both a client app and a browser app. Both allow access to most settings, and both work equally well. As an admin, you have godlike powers over the server and can control what users can do, how they can interact, whether you use bots on your servers and all that good stuff.
If you want to set up Discord for your game or company, here is how to start.
Add A Server In Discord
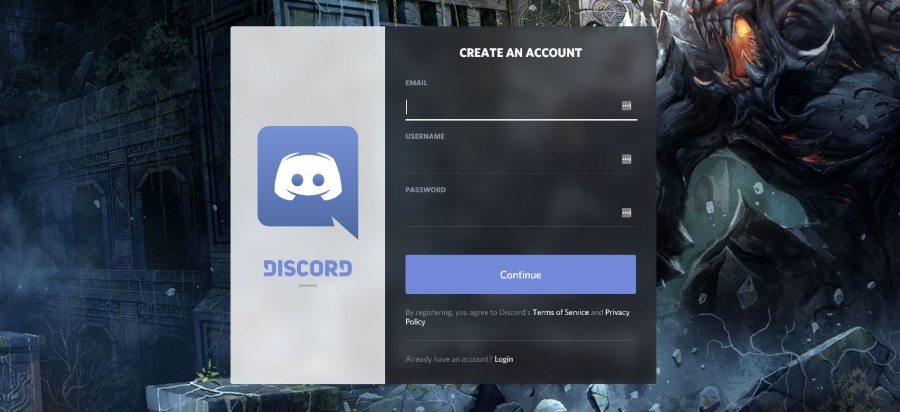
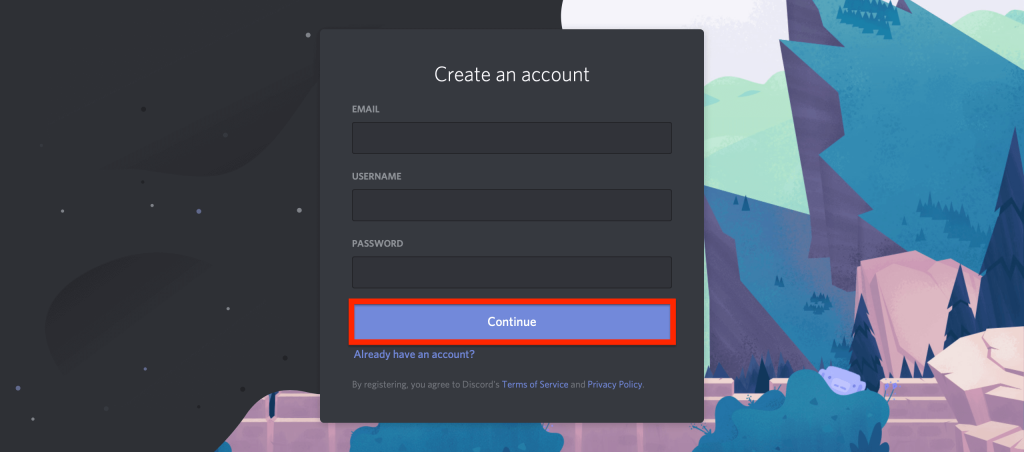
The first thing you are going to need is a Discord account. It is free but must register with an email address and create a username.
- Navigate to the Discord website.
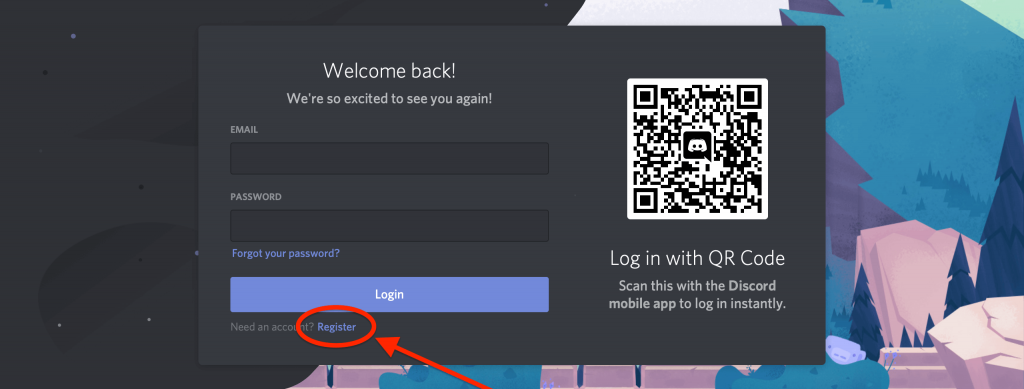
- Select the Register text link on the next page if you don’t already have a Discord account.
- Enter your email, create a username, and add a password.
- Select Continue and complete the login.
Once you have replied to the email verification, you can download the Discord client or use the web app.
Read: How To Create an Invite Link in Discord
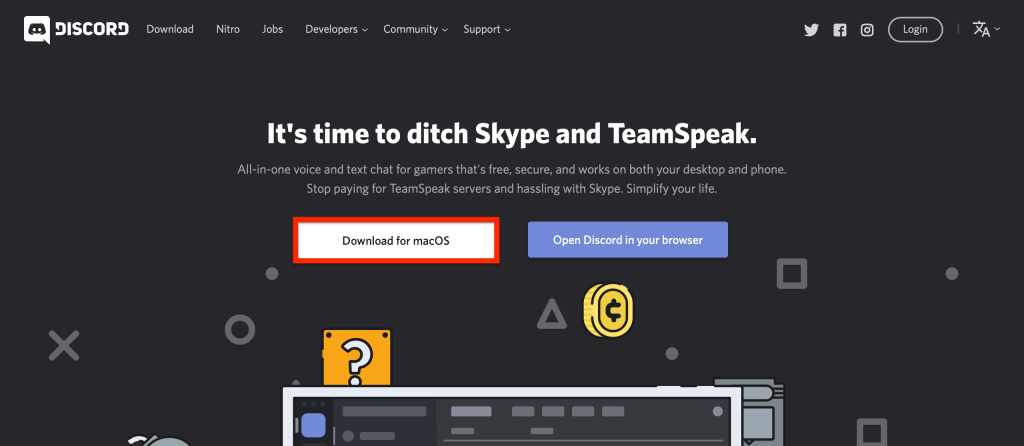
We’ll talk you through setting up Discord for macOS, but there are also Windows, Linux, Android, and iOS clients. You can use the browser app, too.
- Navigate to the Discord main page, select Download for macOS, or open Discord in your browser.
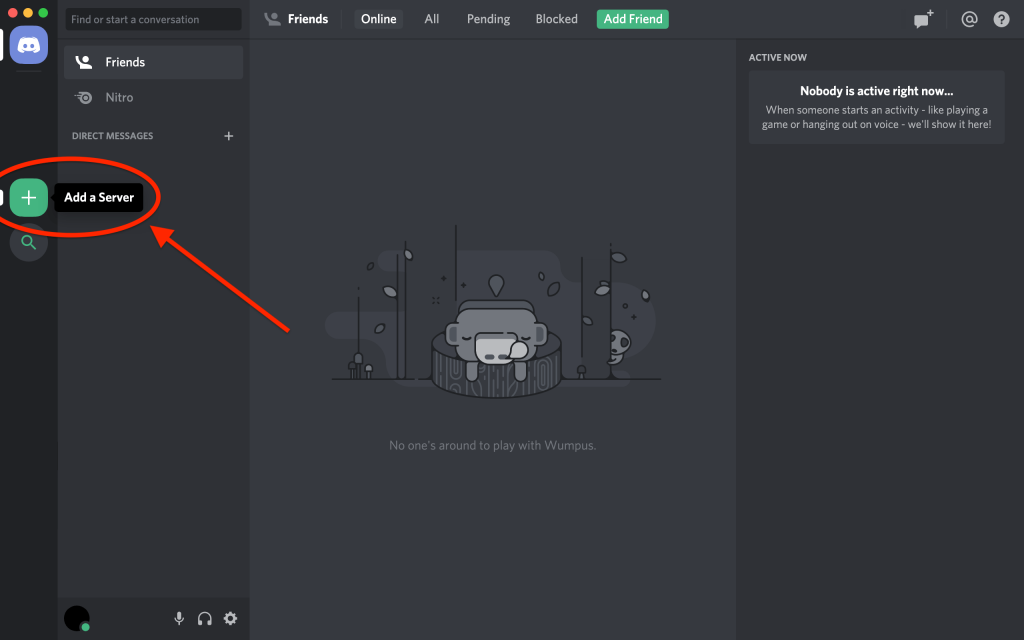
- Open the app and log in.
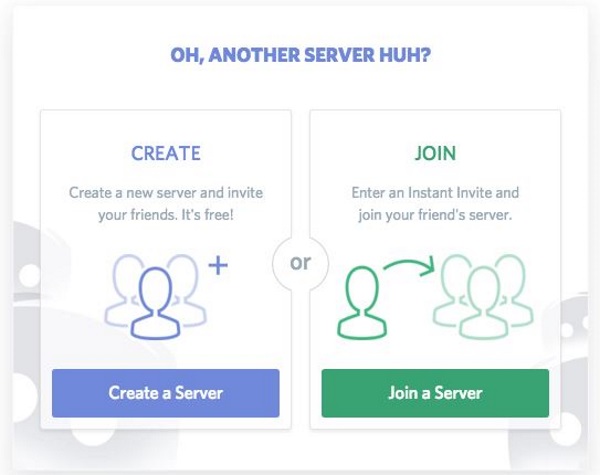
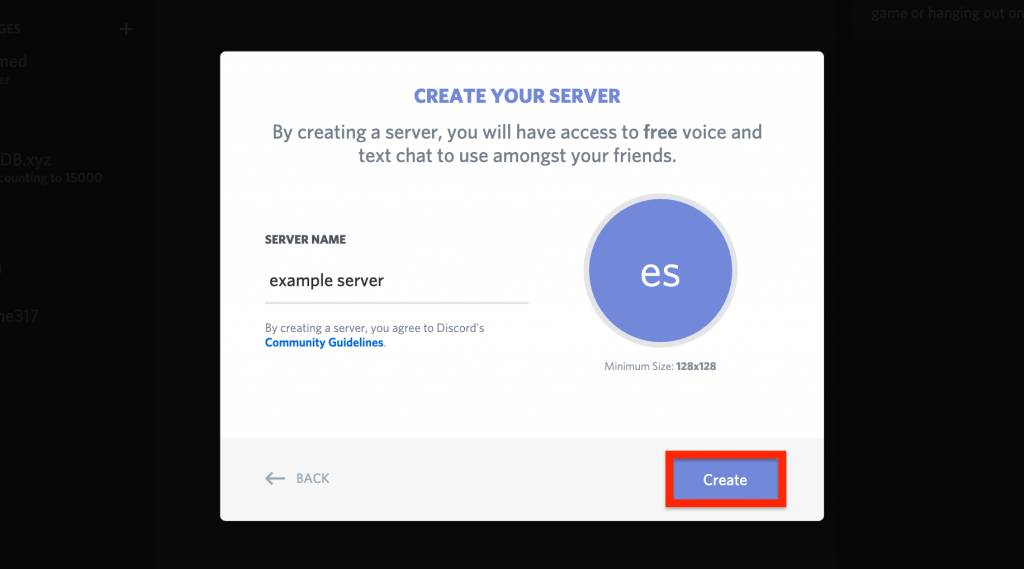
- Select the + icon on the left menu to create a server.
- Select Create a Server in the next window.
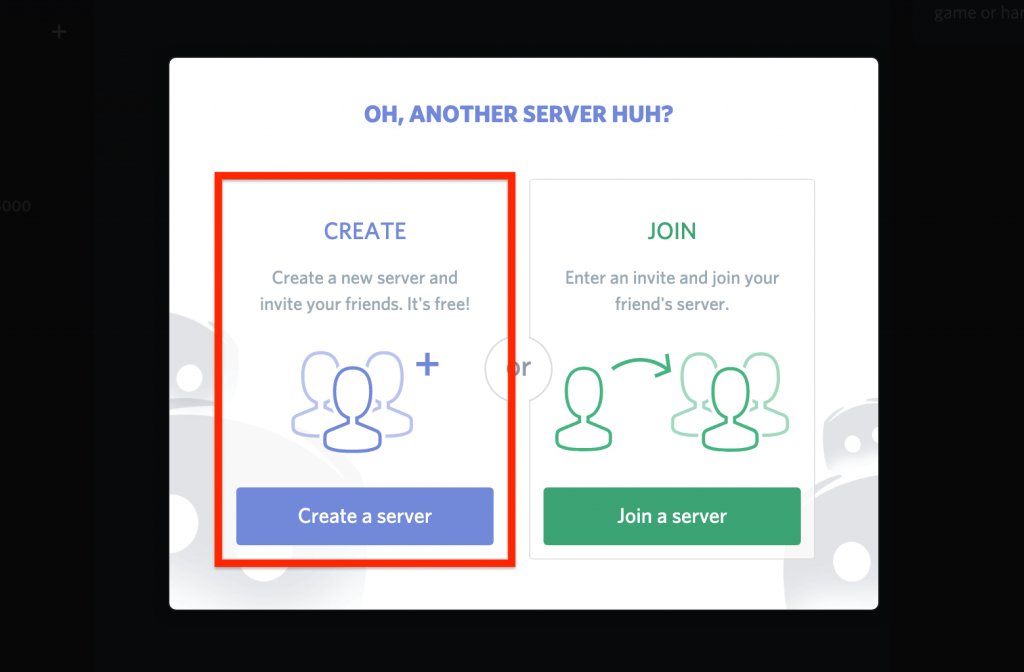
- Name your server and select the geographical location for the server in the next window. Location isn’t important, but you may choose one close to you.
- Add a server icon if you wish.
- Select Create, and your server should appear back in the Discord client.
That is all you need to know about creating a Discord server. The application does all the heavy lifting, and the wizard sets everything up with only minor input from you.
Managing Your Discord Server
It would be best if you did very little to manage your Discord server, as everything is handled. The one thing you will need to do is create roles for your users. You can assign roles to users, guests, officers, and admins in these clan levels.
- Select your server in Discord and then Server Settings.
- Select Roles from the list in the next window. There should be just ‘@everyone’ in the roles section.
- Select the + icon at the top of the roles section.
- Name your role and assign permissions with the toggles.
- Select Save once you’ve done that.
- Rinse and repeat for all types of roles you want to create.
Once created, you assign users roles from the Members tab within Discord. Select the member, select the ‘+’ sign next to their name, and assign the role accordingly.
First, though, we have to get some users.
- Go to your Discord app and hover over the person icon to the right of your chosen text or voice channel.
- Copy the link that appears in the popup window. Set it never to expire to make life a little easier.
- Send the link to all those you want to invite to your Discord server.
- If the person doesn’t have a Discord account, they will be prompted to create one and then be able to join your server.
- Assign a role to each new user as above.
Deleting A Server In Discord
If you don’t want a server, you can delete it. Deleting a server in Discord is not strictly necessary, but it helps with housekeeping and will help you use or manage multiple servers.
- Open up your Discord app and log in.
- Select the server name and then select Server Settings.
- Select Delete Server from within the server window. It’s at the bottom of the left pane.
- Confirm deletion if prompted.
That’s it. Your Discord server should now disappear from your server list, and you and your users will no longer be able to access it.
That’s about how to add, manage and delete a server in Discord. One of the great things about the platform is that it is so easy to manage. Go any Discord setup tips for us? Share them below if you do!
 More Android