How To Add a Watermark in Excel

Surprisingly, Excel doesn’t have a built-in watermark function. A lot of people just give up when they don’t see specific built-in features. However, most programs have workarounds that allow users to do more than the basics that their editing tools allow.
Because of this, and because of the way Excel is built, this means that you can use your own images, logos, or even text to create a watermark and add it to your project. The process is quite simple. Here’s the step-by-step guide.
1. Creating the Watermark
First you have to click on the Insert button on the top toolbar. After that, you have to select the Header & Footer menu.

The header should appear above the top row of your worksheet.
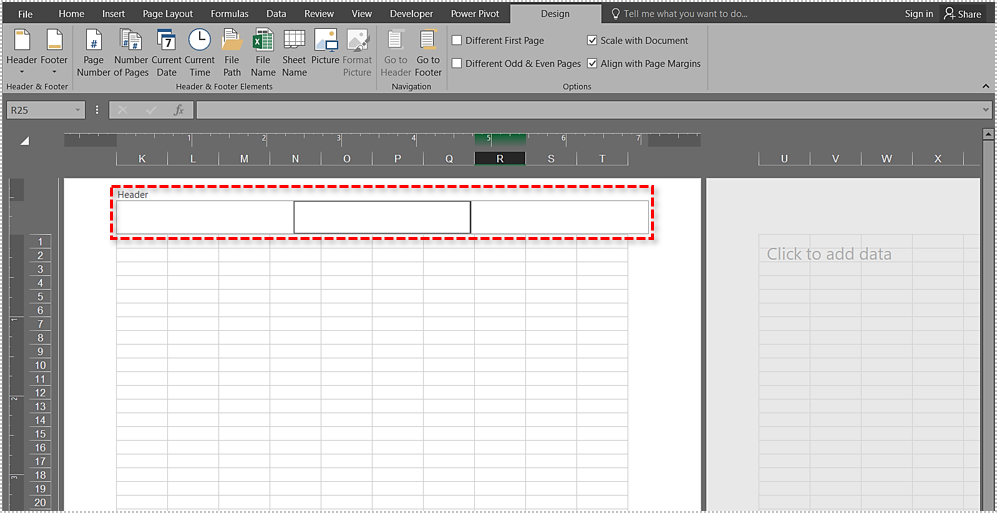
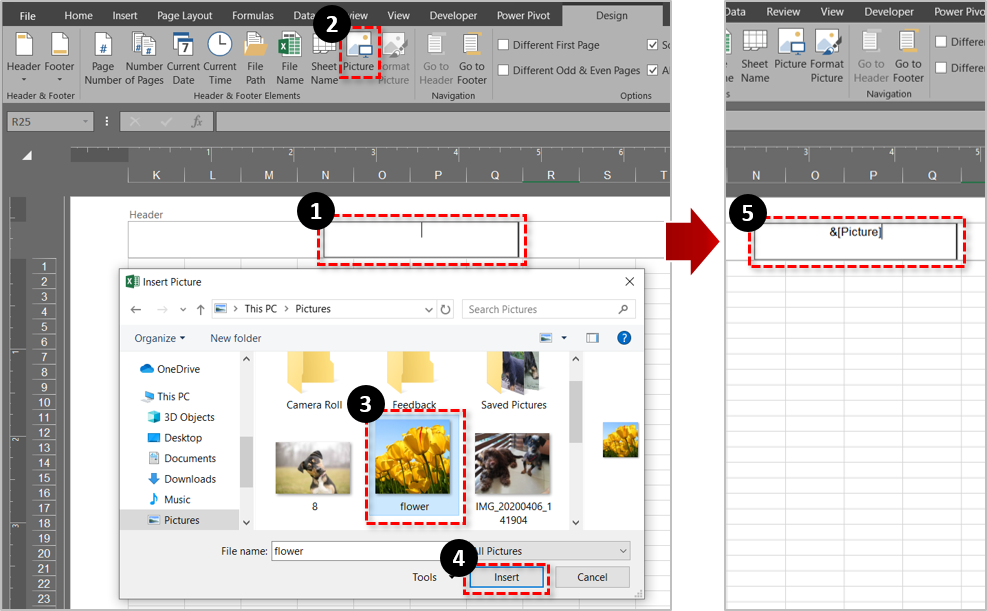
Click on the header and select Picture. Select the picture you want to use and click on Insert to add it to your project. In the header, you’ll also see the ”&[Picture]” text, which notifies you that the header now contains a picture.
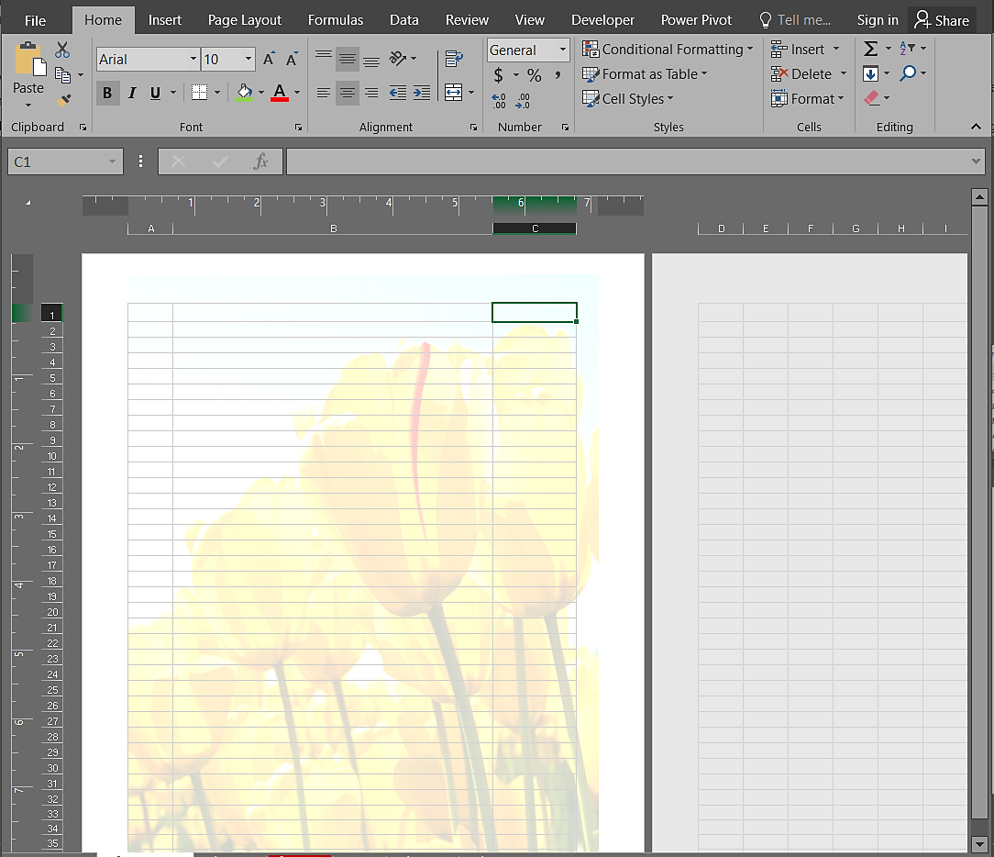
Once you click outside of the header, you’ll be able to see the chosen picture as a watermark. The watermark will appear behind the sheet data, so as long as it’s not too dark, you should be able to read the contents of the worksheet. If not, you will have to adjust the brightness of the watermark so that it doesn’t obscure the text.
For this example we’ve used a sample Windows 10 picture. Notice that the picture essentially becomes the background in this worksheet. However, if your image is small, the watermark won’t cover the entire page.

Of course, you can also do some editing on the watermark afterward.
2. Editing the Watermark
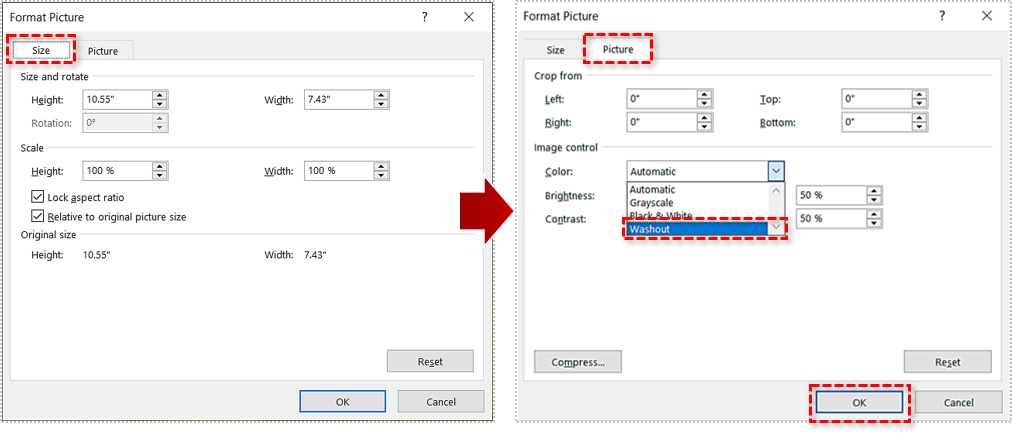
To start editing your watermark, click back on the header in order to open up the menu. Click on the Format Picture option in the Design tab.
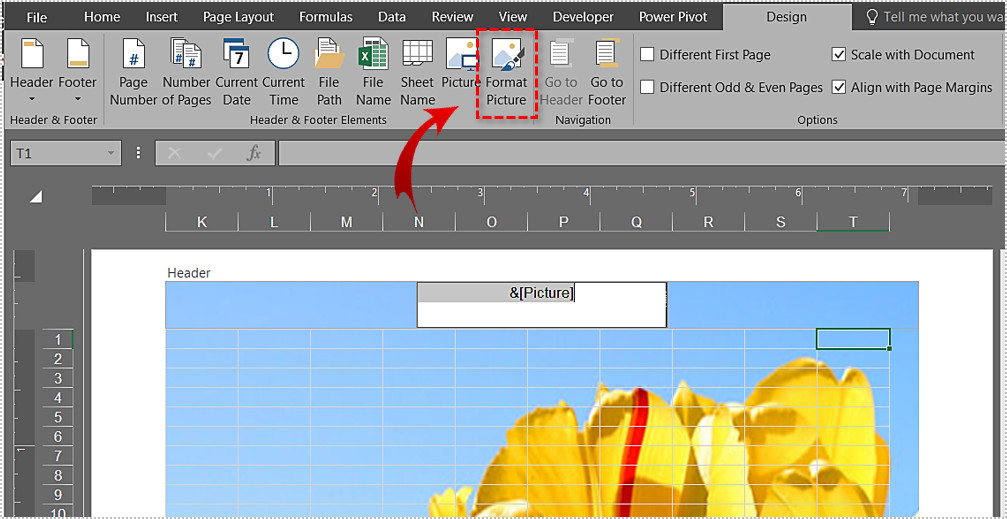
Customize the picture to the size and shape you want. You can also do advanced editing like changing the picture color, adjusting the brightness and contrast, applying the grayscale and washout effects.
If you are using text as a watermark, you can change it after you’ve already added it. However, this option is only available in Excel 2010 and later.
You can also reposition a watermark to make it centered. You won’t have to use tools for this one. Simply select the text in front of the ”&[Picture]” line in the header. Once you’ve done that, just press Enter to add a few more rows.
This allows you to center the watermark or slide it down to the bottom of the page. Unfortunately, this may take a few tries since there’s no preview mode.
After you’re done with customization, click OK in the dialog box and you’re done. The watermark should now be visible on all pages.
Notes on Watermarks for Excel 2010 and Newer
Just because you’ve added a watermark to your worksheet doesn’t mean that you can always see it. Watermarks are visible in Page Layout view, Print Preview, and on the printed paper. If you’re using Normal view, which most people do, you won’t be able to see your watermark on the page.