How to Change the Color of Something in Photoshop

If you’re trying out new variants for your online products, changing color is a handy feature on Photoshop. It’s quite useful as it can save time and lets you experiment before you make a final decision.
If you’re a Photoshop beginner, you may not be familiar with changing the color of different objects in photos. Here’s a quick guide to teach you how to apply this feature to your images.
Changing the Object Color in Photoshop
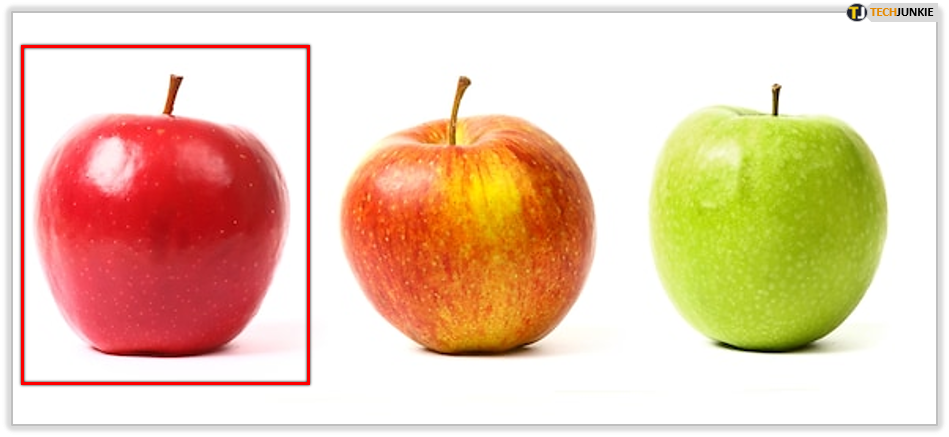
There are numerous ways to make objects in photos a different color. This possibility is particularly useful for online shop owners who, for example, sell the same T-shirt model in different colors. Do they need to take a photo of each T-shirt? No. They just need to learn to use different Photoshop tools. Here are the three simplest methods for replacing the color of an object.
1. Color Replacement Tool
This tool may help when you’re in a hurry, but it’s not particularly accurate. When you need a quick fix and precision isn’t your priority, it’s undoubtedly a good choice. Follow the instructions below to apply the tool:
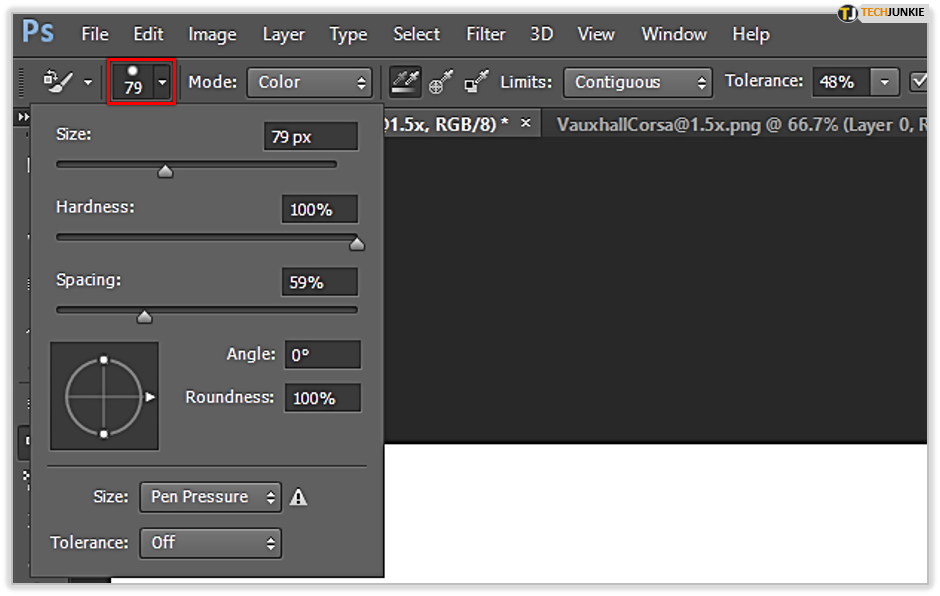
- Find the Color Replacement tool under the Brush Tool and select it.

- Select a suitable brush tip.

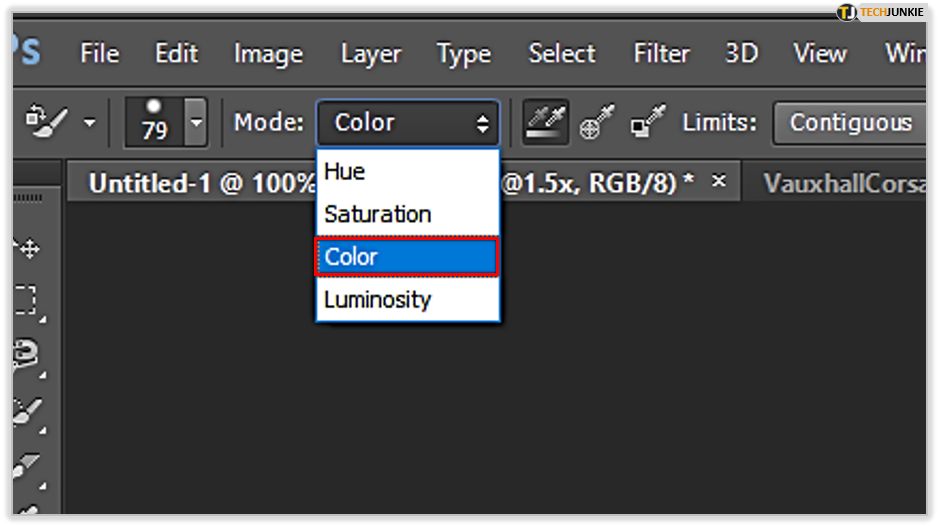
- Set the blending mode to Color.

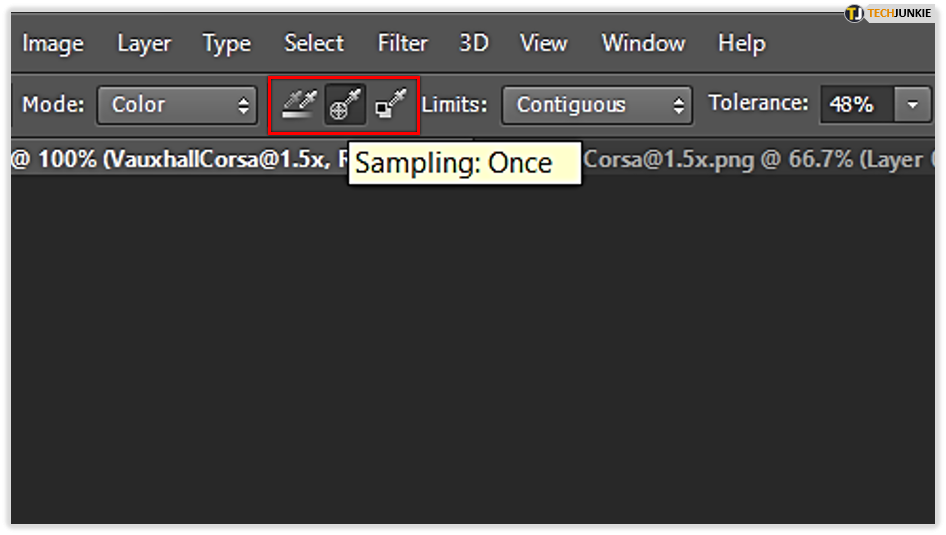
- Choose a suitable Sampling option – Continuous, Once, or Background Swatch. If you choose the Continuous option, you can drag your mouse over the image and replace the color at the same time. The second option allows you to sample and replace the color by clicking on it. The Background Swatch replaces colors in places that have the current Background color.

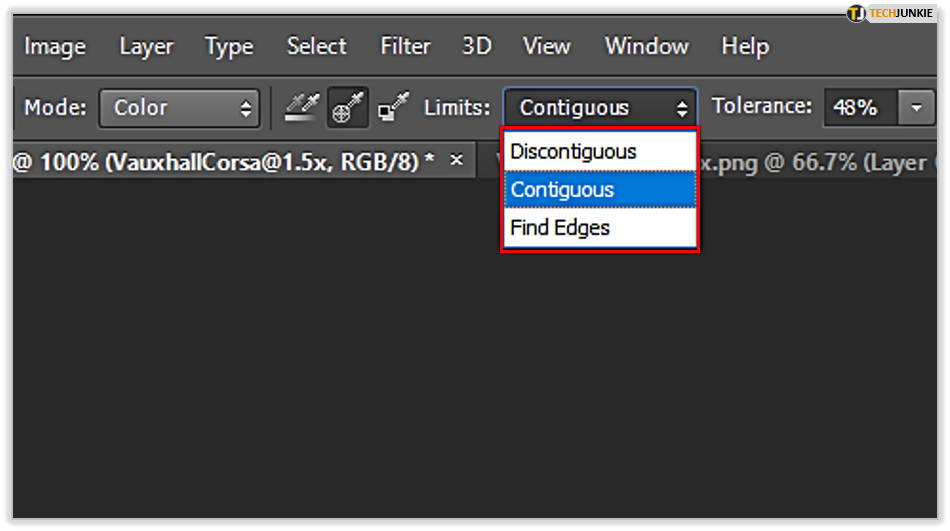
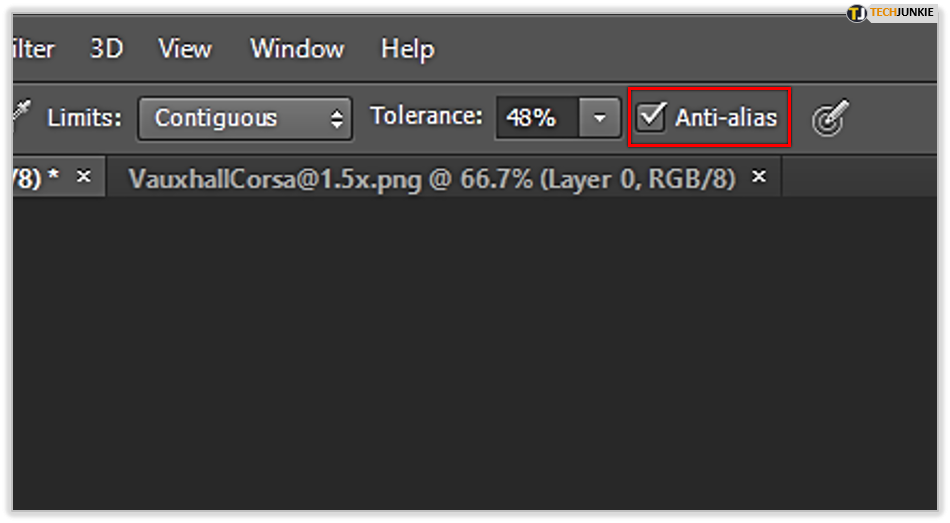
- Choose a suitable replacing option from Limits. The Contiguous and Discontiguous options will determine which pixels will receive the new color – the ones adjacent to each other or anywhere under the brush. If you select Find Edges, the pixels will receive the new color but keep sharp the edges of the object.

- The Tolerance option will depend on the new color you want to add to the object. If it’s similar to the existing one, select a low percentage. If it’s different, click the higher percentage.

- Selecting the Anti-alias option will keep your edges smooth.

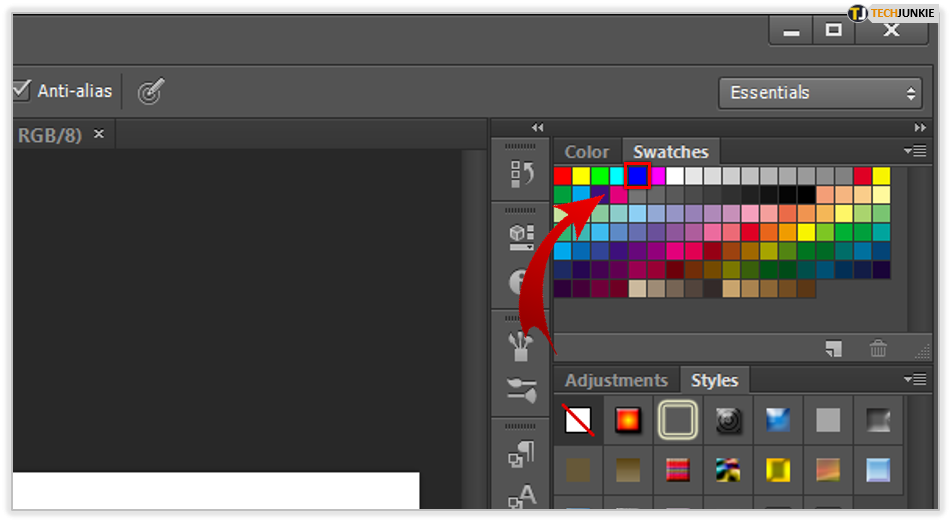
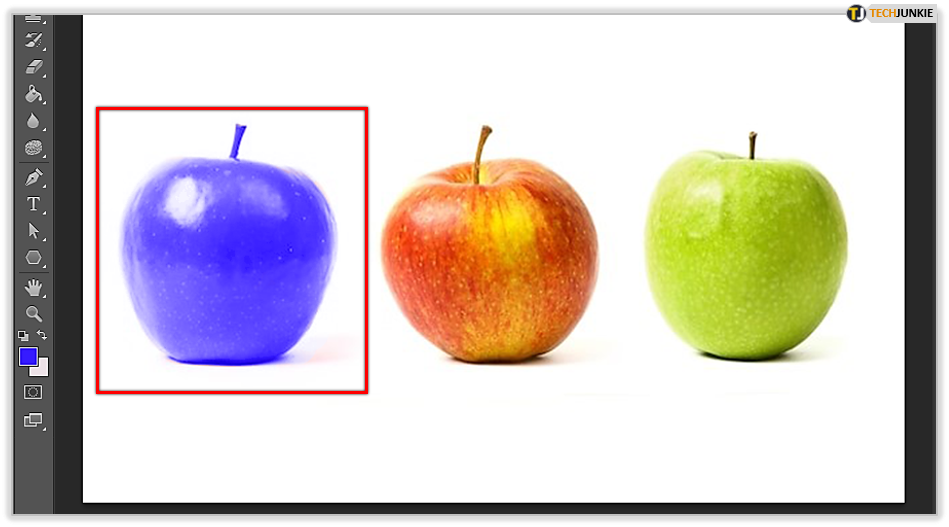
- Choose the new color for the object.

- Select the color you want to remove.

- Drag in or click the image to apply the settings.


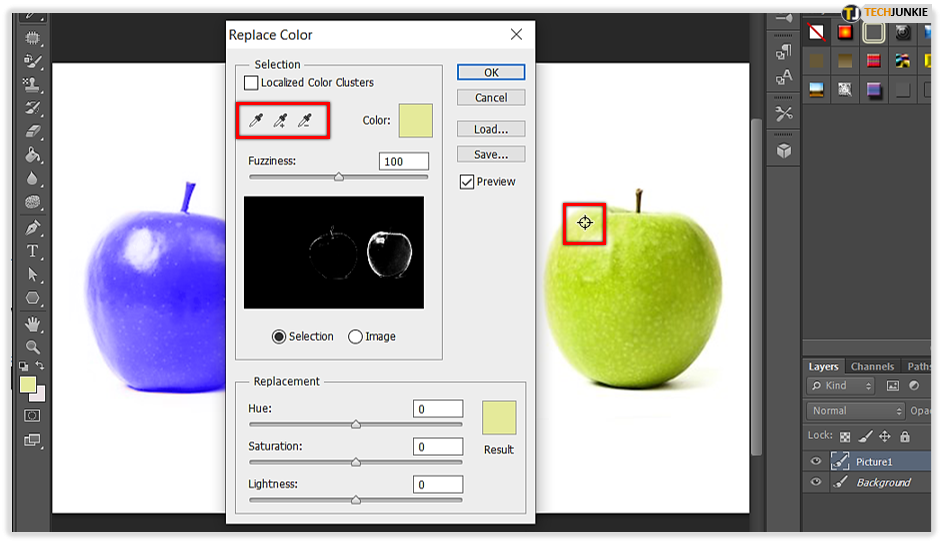
2. Replace Color Dialog Box
If you need to make a global color change, this option will work perfectly well for you. You may not have the hue and saturation settings, but you can still use the Replace Color Dialog Box for many purposes. Here are the steps you should follow:
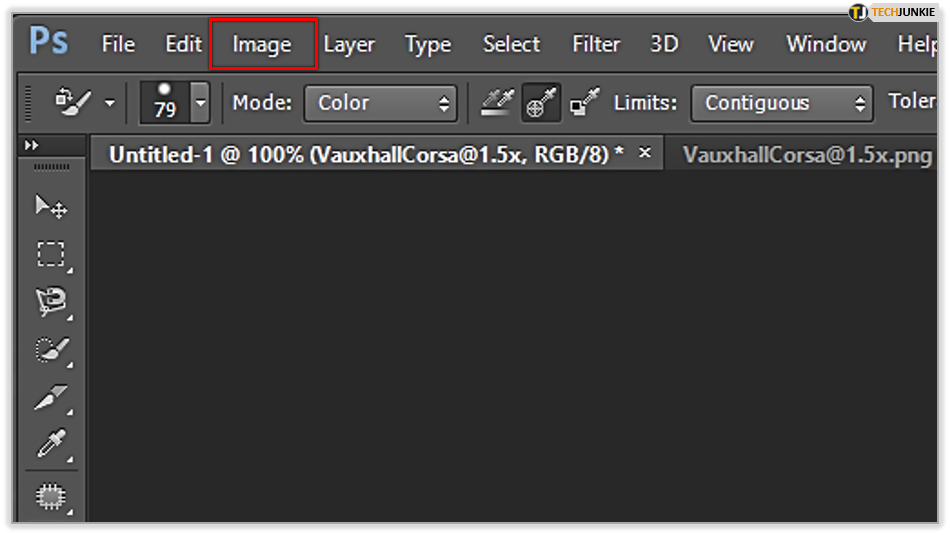
- Select Image from the bar at the top.

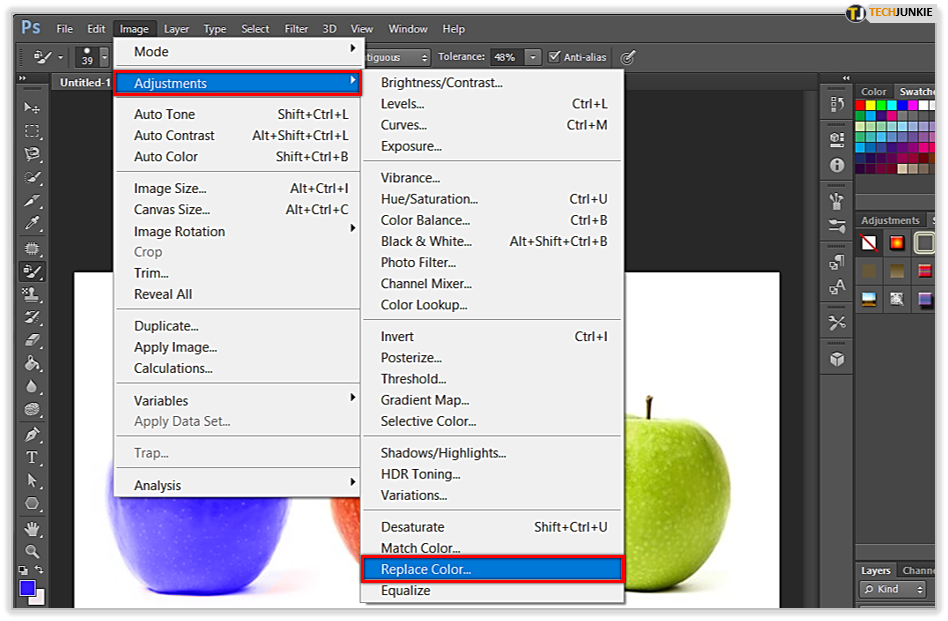
- Click on Adjustments and then select the Replace Color option.

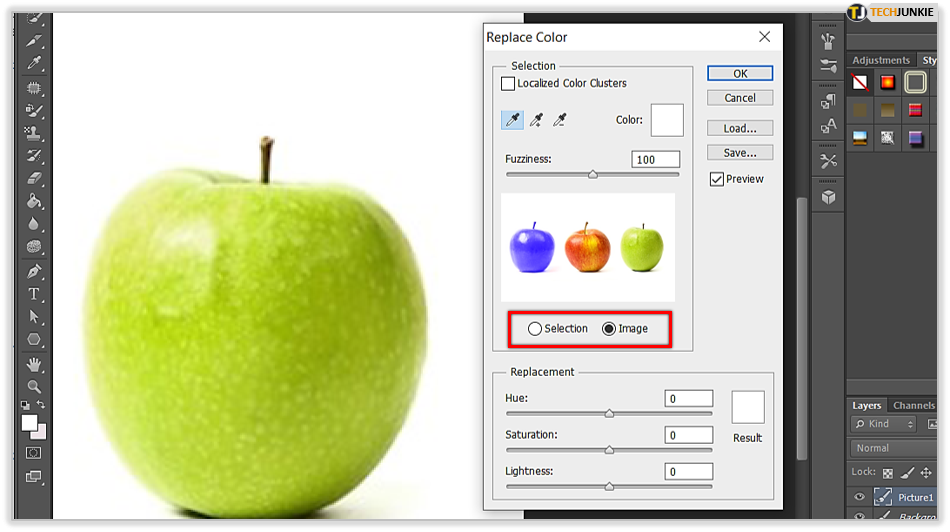
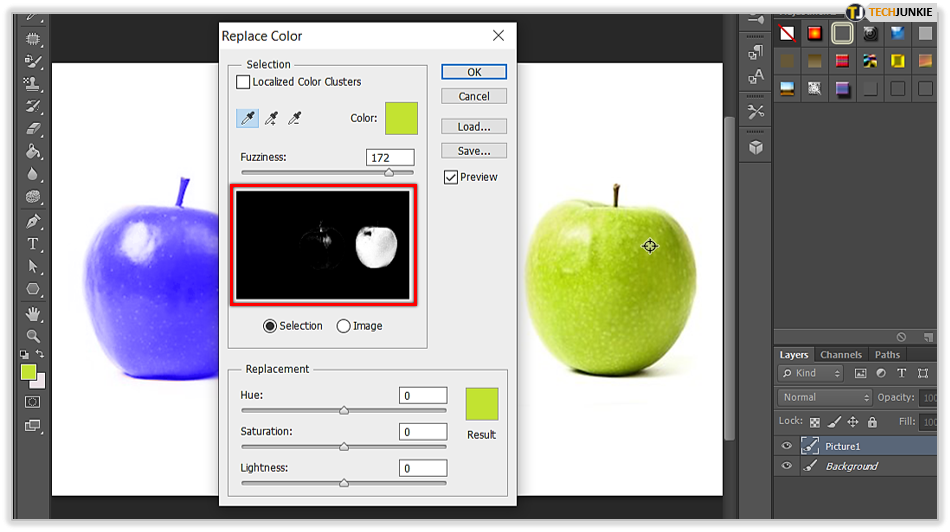
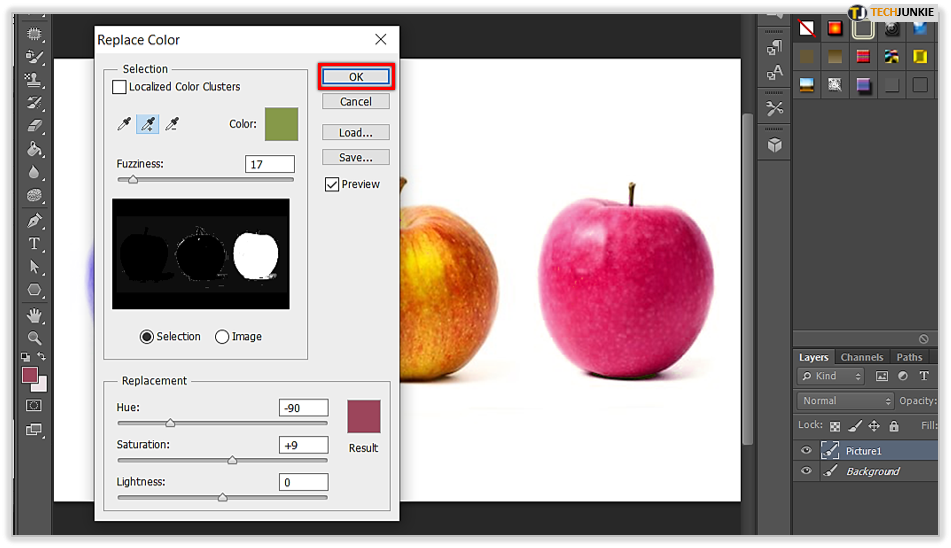
- Choose one of these options: Selection or Image. These are preview options. Selection will show you the selected, masked area in the preview box, while Image will display the whole image.

- Select the Eyedropper tool to choose the desired colors in the image. Click on the color in the picture to select it.

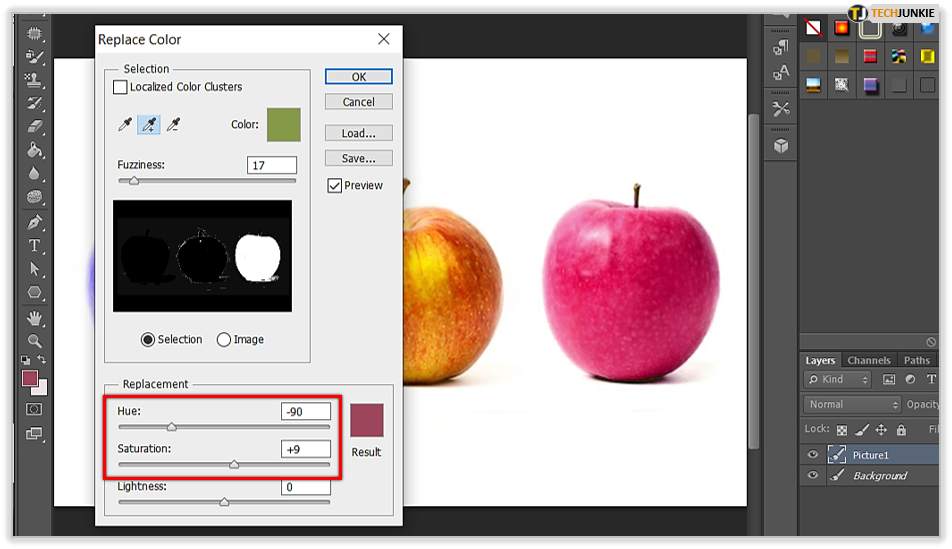
- If you want to improve the selection, you can refine it. You have three options here. You can select the color and target the color you’d like to remove with the Color Picker. When you do so, you’ll see that the mask updated. You can also add areas by using the Add to Sample Eyedropper tool. Finally, you can remove areas by using the Subtract From Sample Eyedropper tool.
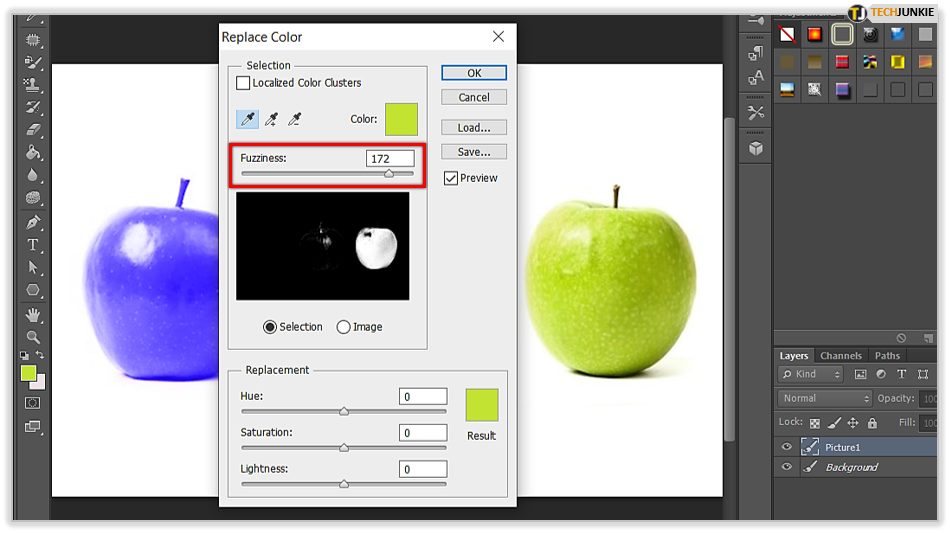
- Adjust Fuzziness. This way, you’ll control if any related colors will appear in the selection.

- Use the Color Picker or adjust Hue/Saturation or Lightness settings to find a suitable color to replace the existing one.

- When you’re done, click on Save your settings.

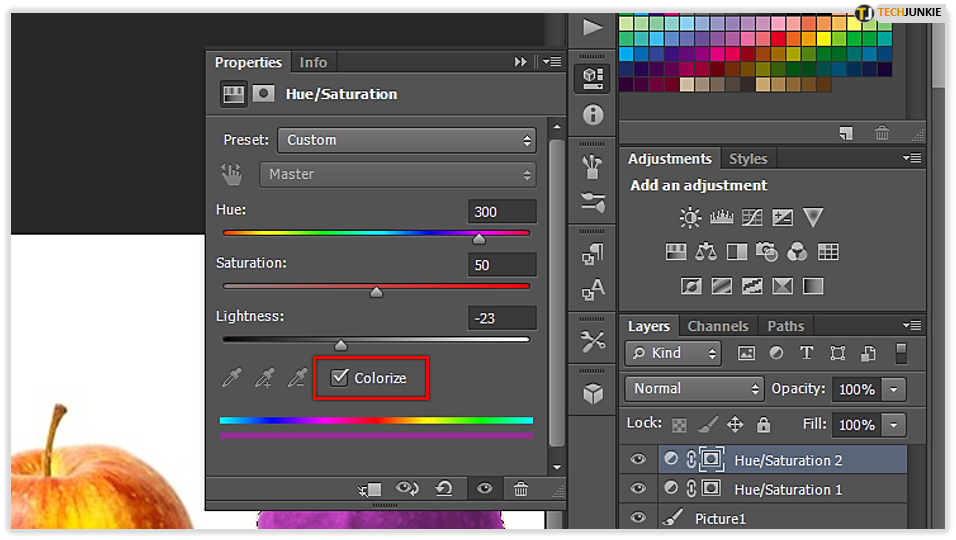
3. Hue/Saturation Settings
This option gives you lots of freedom with color manipulation and a great deal of precision. It allows you to brush up on the details once the colors have been replaced. Plus, the color replacement is absolute – it’s not tinting, but real color change.
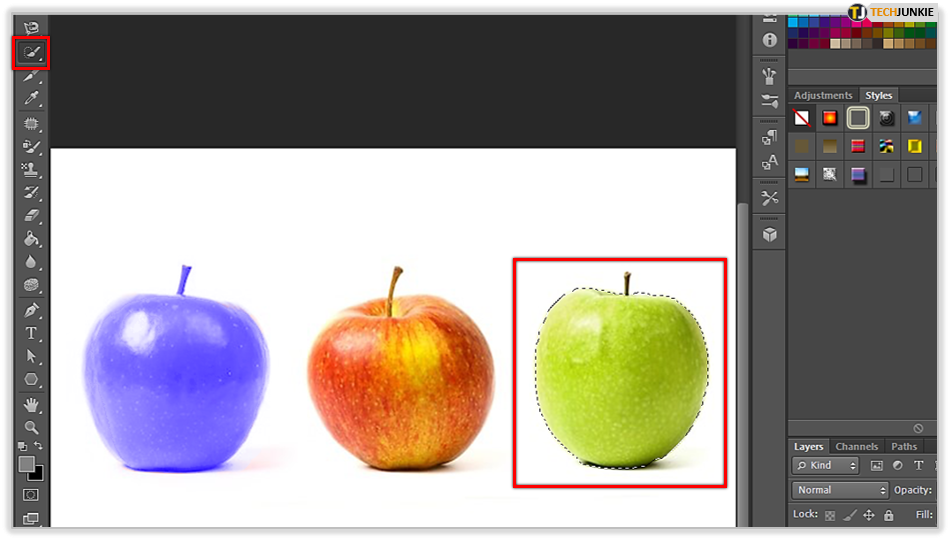
- Mark the desired object whose color you want to change. You can do this by using the Quick Selection tool – it works very well.

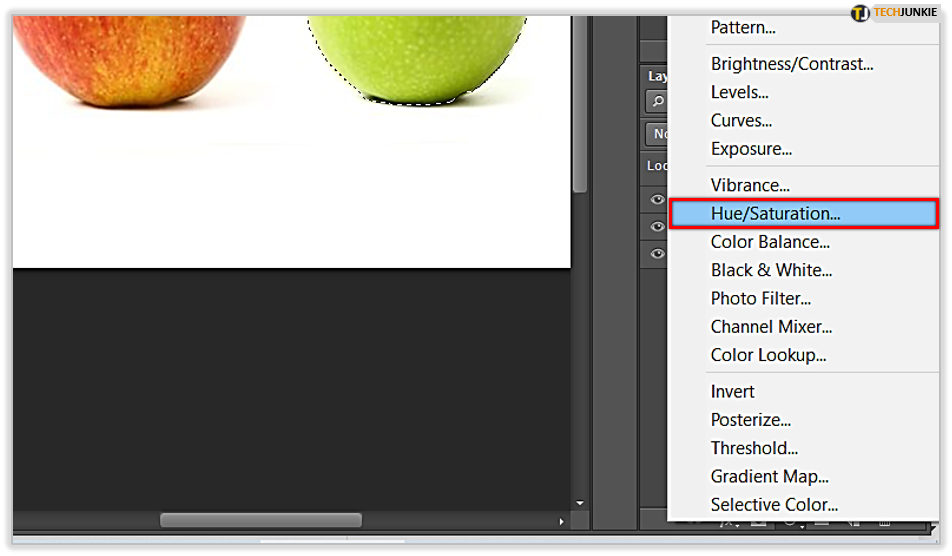
- Select the Hue/Saturation option from the Adjustments section.

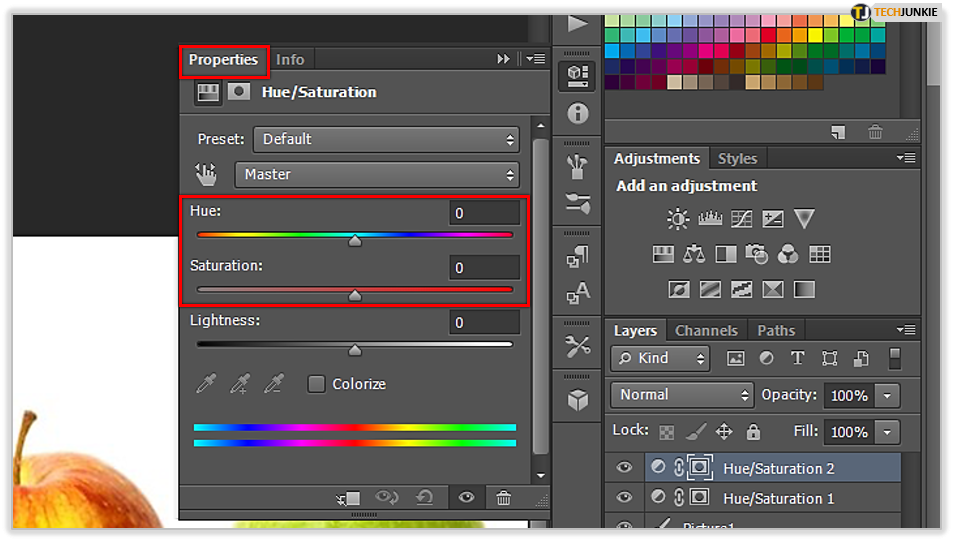
- Go to the Properties tab and find Hue and Saturation.

- Adjust these settings to get the desired color. To completely replace the original shade, you can choose the Colorize option and change the settings to get the desired color. Generally, you should change the Lightness option if you want to keep the original contrast of the image.

Simple Techniques for Everyone
There are a few advanced techniques for changing the object color, but these three are more than enough for beginners or those who only use Photoshop occasionally. The method will probably depend on how much precision you need and what the purpose of your images is. Follow the steps outlined above, and you’ll see how simple it will become once you get enough practice.
Why do you change colors on your images? Which of these methods works for you? Share your experiences in the comments section below.