


How to Change Your Mouse Speed in Windows 10

The mouse is one of the primary ways we control our computers, and like any manual control, everyone has their own preference for how things work.
Mouse speed is one factor that users may want to adjust to their liking. Getting things tuned to your own personal preferences is a big part of ensuring a comfortable and productive computing environment for you.
Fortunately, if changing your mouse speed is something you want to do, you just need to follow a few simple steps to get going.
In this article, I will show you how to adjust your mouse performance characteristics, including the mouse pointer speed, in Windows 10. (Don’t despair, Mac users — we have an article for you, too.)
How Do I Change My Mouse Settings?
Open Mouse Settings
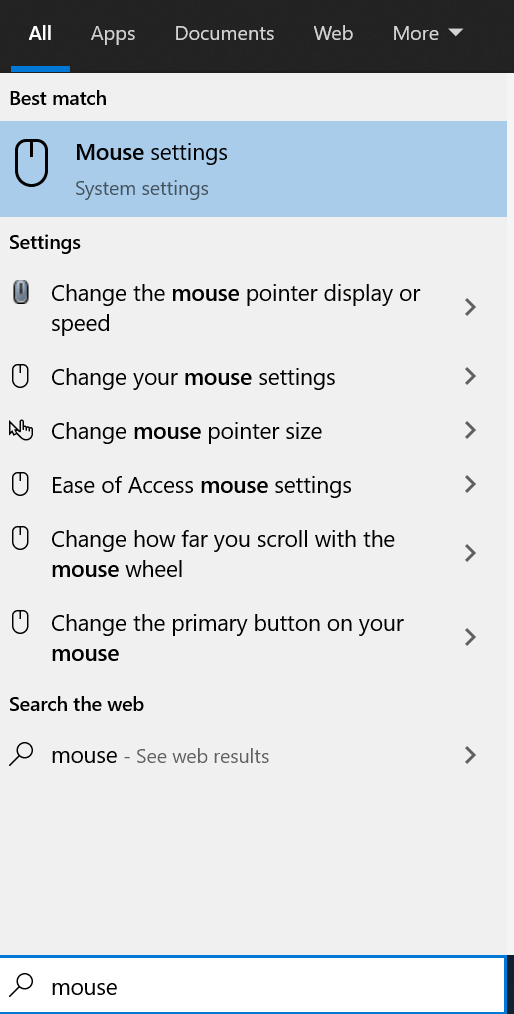
The easiest way to find your mouse settings is to type the word “mouse” in the Windows search box and hit return. This will bring up the top-level Mouse settings dialogue.
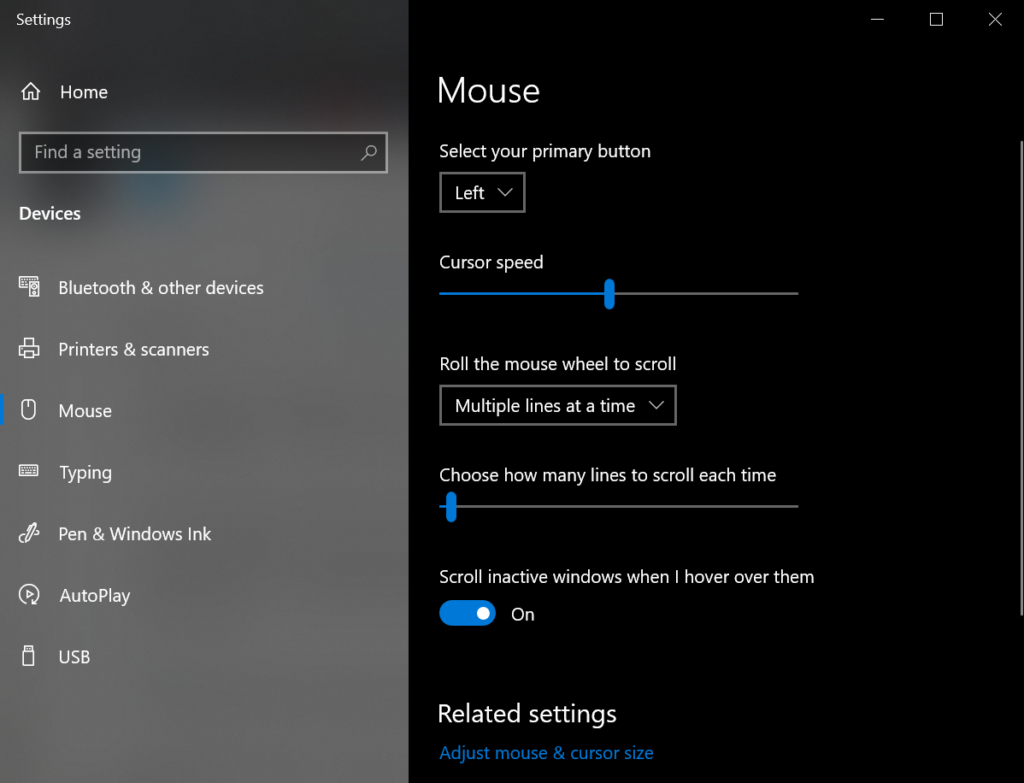
This option provides you with the ability to modify four mouse settings — so you’d expect to control the really critical stuff here, right? Nope.
Adjust the slider to change the speed
In this window, you can change which button you want to use as your primary button, your cursor’s speed, how many lines at a time the mouse wheel will scroll, and whether inactive windows will scroll when you hover over them.


So how do you get to the good stuff?
On the right-hand side (or at the bottom depending on how big the sceen is), click “Additional mouse options.” This will open up a new window with more options for customizing your mouse settings.
Let’s go through the tabs one by one and I’ll show you how to optimize the mouse settings for your personal preferences.
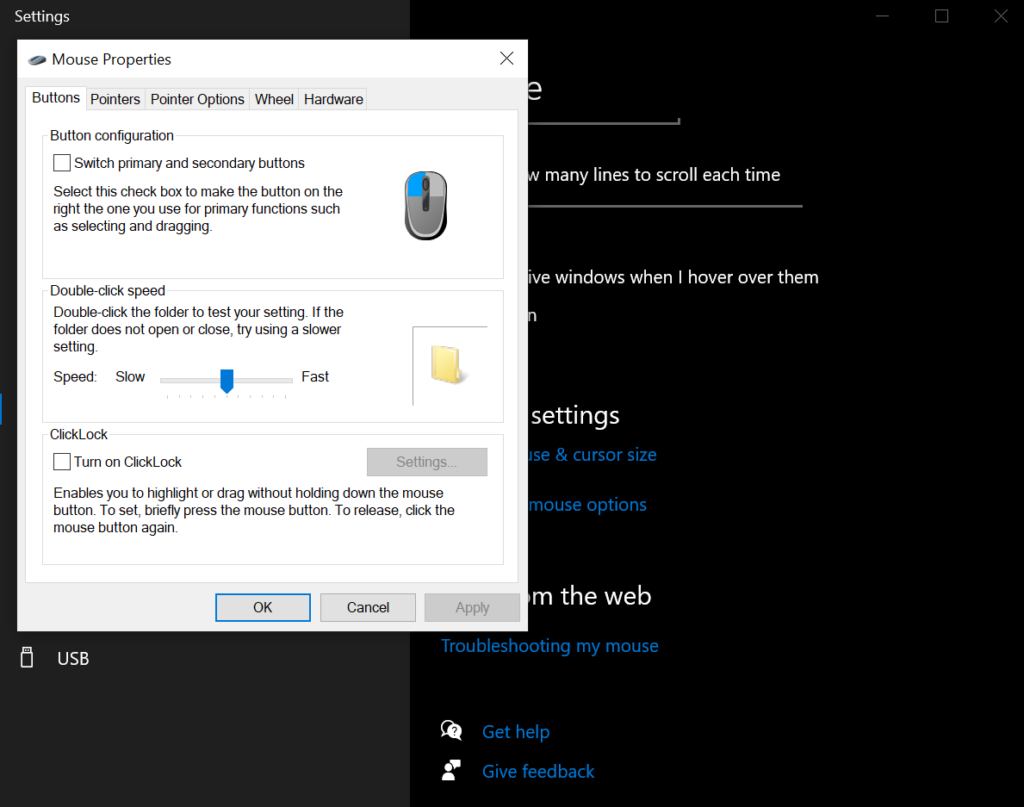
Buttons
The button configuration checkbox lets you reverse your left and right mouse buttons. This can be particularly very helpful for left-handed users.
The double-click speed slider is very handy. It lets you configure how much delay there can be between two clicks before Windows decides that you weren’t trying to double-click. Great for people with quick reflexes who accidentally open tabs all the time.
The folder to the right of the slider lets you test each setting. Adjust the slider, then double-click the folder at your normal double-click speed.
The ClickLock checkbox allows you to adjust your settings for being able to highlight and/or drag without having to continuously hold down the mouse button. If ClickLock is turned on, you can press the mouse button, then drag, and press the mouse button again to end the drag.
Pointers
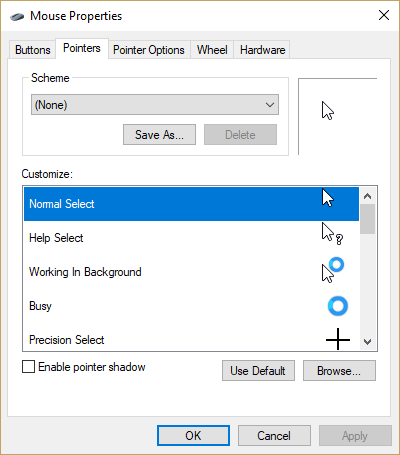
The pointer tab is where you can change the way your mouse pointer appears. You can select from a variety of preset schemes with the Scheme dropdown or individualize each pointer with the Customize option.
The Enable pointer shadow checkbox creates a subtle but visible “shadow” underneath your pointer, increasing its visual contrast against the background.
Pointer Options
This is the meat of the mouse settings control panel, as these are the settings with the largest impact on your overall mouse performance.
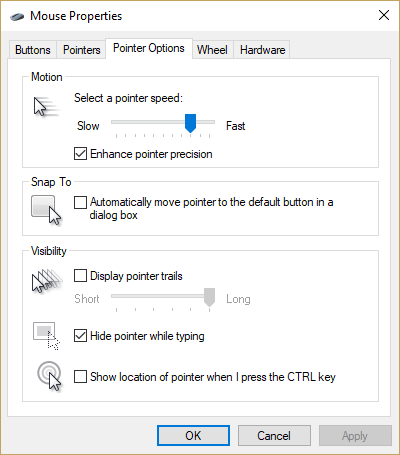
The Motion slider lets you set the speed of the pointer, the bar ranges from slow to fast. Experiment with this and find the setting which feels right for you. It is an entirely subjective decision; there are no wrong answers here and your needs may change based on what you are trying to accomplish.
The Enhance pointer precision checkbox lets you configure whether or not Windows tries to detect how precise you are being with your mouse movements. When the checkbox is on, Windows slows down the pointer speed dramatically when you move the pointer slowly. If the checkbox is off, Windows uses the pointer speed you set with the Motion slider without making any adjustments whatsoever.
Basically, if you are doing picky mouse-placement work, such as graphic design, having this checkbox on can be very helpful. You can move the mouse quickly across the screen to get to an area, and then move the pointer slowly in that area to make a finicky adjustment or selection. Gamers should leave this option off, as it can cause problems in using the mouse for targeting or movement within a game.
The Snap To checkbox allows you to decide whether or not Windows will automatically move the pointer to the default button in a dialogue box. For example, if you open a File Open dialogue box, the pointer will automatically move to the “Open” command box in the window.
The Display pointer trails checkbox sets a visual effect that causes pointer movement to leave a trail behind it. This can make spotting the mouse pointer much easier, at the cost of making you feel like you’re watching a psychedelic movie. For some users, this feature is a lifesaver, however, as it really increases the visual impact and detectability of the pointer. You can use the slider to adjust the length of time that the pointer trail displays to fine-tune the length of the trail that is caused by this effect.
The Hide pointer while typing the checkbox allows you to turn off the pointer when you are using the keyboard. This is great for word-processing and data entry work where the pointer is just in the way.
Finally, the Show location checkbox activates a nice feature where pressing the Ctrl key provides visual feedback about the pointer location — very handy if you tend to “lose” the pointer in a crowded display and don’t want to have to jiggle the mouse for five seconds to find it.
Wheel
The wheel tab provides controls for the mouse wheel if you have one.
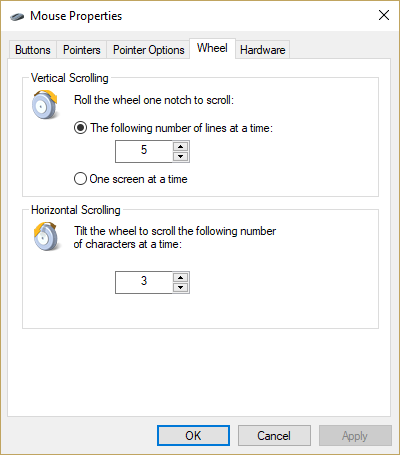
The Vertical Scrolling control lets you set how many lines the vertical scroll will move when you use it within a document or web page. Alternatively, you can set the vertical scroll to be a full screen at a time.
The Horizontal Scrolling control lets you tilt the wheel (if your hardware supports it) to move the pointer a certain number of characters per tilt.
Hardware
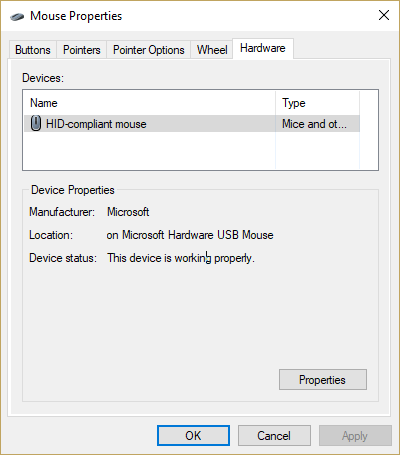
The Hardware tab gives you access to the hardware settings for your mouse, including your driver software and versioning. You will not generally need to adjust these settings unless you are trying to diagnose a hardware or driver problem with your mouse.
Final Thoughts
With all of these controls at your disposal, getting the perfect mouse user interface experience is as easy as sitting down for a few minutes and experimenting with the settings that work best for you. Happy mousing!
Have any other tips for optimizing your Windows 10 experience? Share them with us in the comments!


3 thoughts on “How to Change Your Mouse Speed in Windows 10”