


Chromebook Guide: How to Screenshot

If you’re new to using a Chromebook, you’ll want to know the basics. Taking screenshots on a Chromebook is actually an easy task. We believe it’s one of those things you should know how to do, since screenshots get used for many reasons.
Getting right down to it, here are the best ways to take screenshots on your Chromebook.
Fullscreen
When you need to take a screenshot of the whole screen of your Chromebook, you’ll do this:
- Press the Ctrl key +
 the switch window button on your Chromebook’s keyboard.

Next, in the bottom right-hand corner of your Chromebook’s screen, you’re going to see a notification that tells you your screenshot has been taken and that you can choose to save it to your Chromebook’s clipboard if you wish, or click on the notification to immediately open the location where the screenshot has been saved. 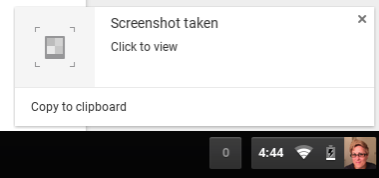
Otherwise, you’ll press “Ctrl + v” on your keyboard when you need to paste the screenshot, if you’ve copied it to your Chromebook’s clipboard. Please note that screenshots are saved directly to your Chromebook’s “Downloads” folder.
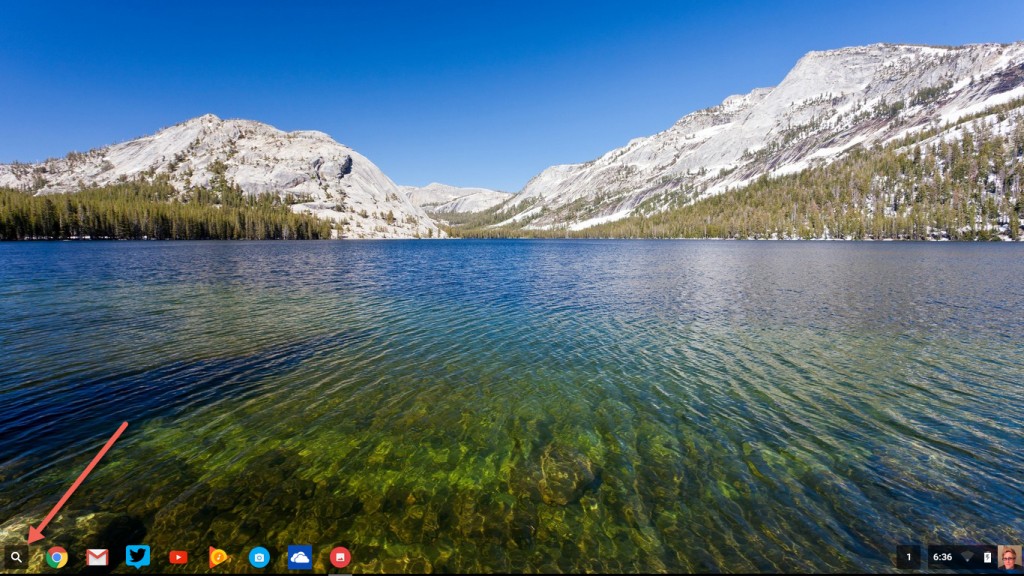
To get to the Downloads folder on your Chromebook:
- Click on the Launcher (the magnifying glass icon in the lower left-hand corner).
- When the Google Window opens, click on the Files folder, which brings you to where you can access your downloaded files.


Partial Screen
If you only need part of your screen captured, you’ll want to take a partial screenshot like this:
- Press Ctrl + Shift + the switch windows button on your Chromebook’s keyboard.
- A crosshair symbol will appear on your screen and you’ll select the area of the screen that you need screenshot.


Again, you’ll see the same notification as before in the bottom right-hand corner of your Chromebook’s screen.
Editing Images
Chromebooks have a built-in image editing application. Once you’ve opened a screenshot or another image on your Chromebook, in the upper right-hand corner you’ll see “Edit,” “Print,” “Trash,” “Thumbnail,” and “Slideshow” icons. Pretty self-explanatory. 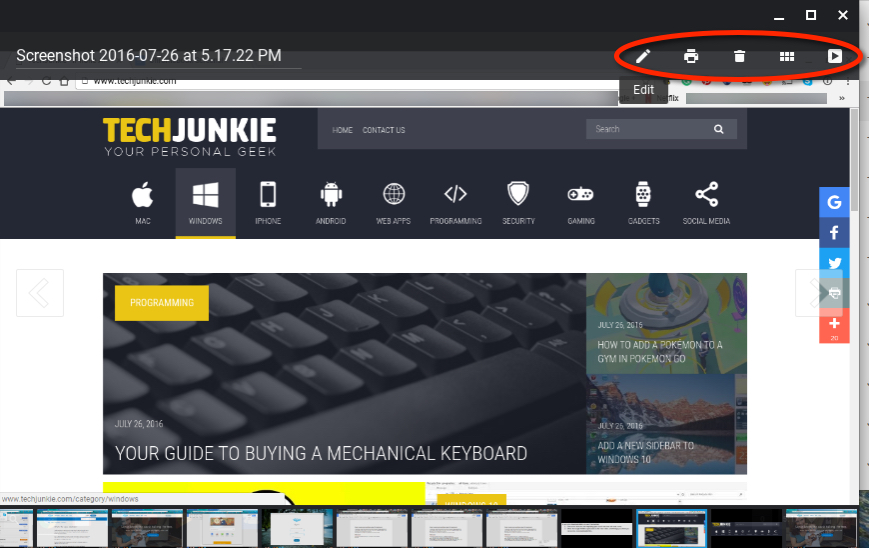
Click on the pencil icon if you wish to edit your screenshot further. From there, you can select “Auto-fix,” “Crop,” “Brightness,” and “Rotate” the image to the right or left. It’s not a whole slew of choices.
When you need something a little more complex to blur something out or to add annotations to your screenshot, or need even more options, the Chrome Web Store has some apps and extensions you can download to tweak them further. Under the recommendation of users, we’re currently testing out the free Pixlr Editor from the Chrome Web Store. It’s said to be the free version of Photoshop 2.0.
Let us know if you’ve heard of or know of any other awesome Chromebook photo editing or screenshot tools and applications.


One thought on “Chromebook Guide: How to Screenshot”