


How To Clear Disk Space in iMovie
Movies take up a lot of disk space and no matter how much you have, you will always use it up. If you’re a prolific creator then you’re going to see the ‘Not Enough Disk Space’ prompt at some point or another. If you see it, this tutorial will show you a couple of ways to clear disk space in iMovie ready for your next production.
The full message will reason something like ‘Not Enough Disk Space. There is not enough disk space available at the selected destination. Please choose another one or clear some space.’
The average movie folder can be anything from 1GB to 100GB in HD depending on the length and how many cuts or revisions you have made. The end movie is only likely to be between 4-5GB in 1080p while the rest is leftover cuts, code, and files that you won’t need once your production is complete. This is the ideal place to start when clearing disk space in iMovie.
Clear disk space in iMovie
There are a few ways you can clear disk space in iMovie. Most can be done from within the program itself. If you’re using iMovie 10.1.3 and higher, try this:
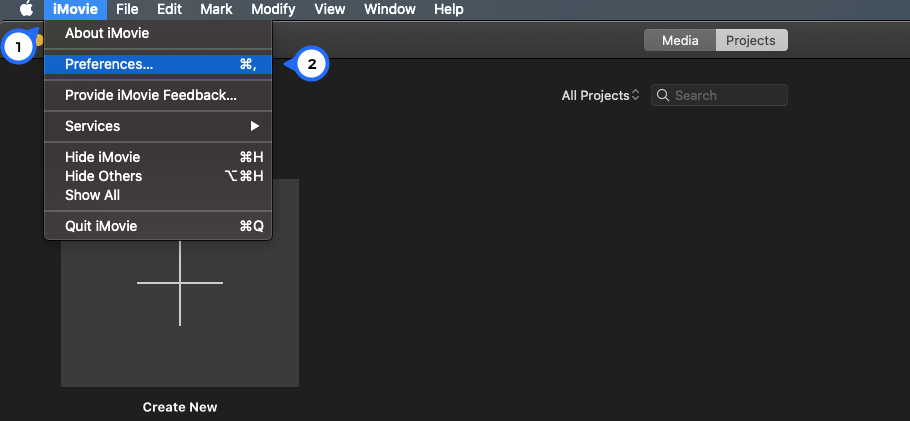
- Open iMovie and select Preferences.

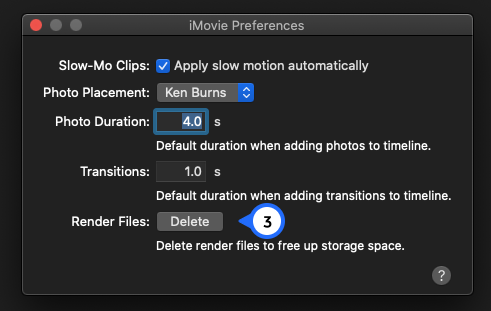
- Select Delete by Render Files.

- Confirm deletion
Depending on how much you use iMovie, this could clear dozens of gigabytes of disk space or more. It’s a very simple way of clearing out the trash from the program and making space for the next project.
You can manually delete files if you prefer to have more control.
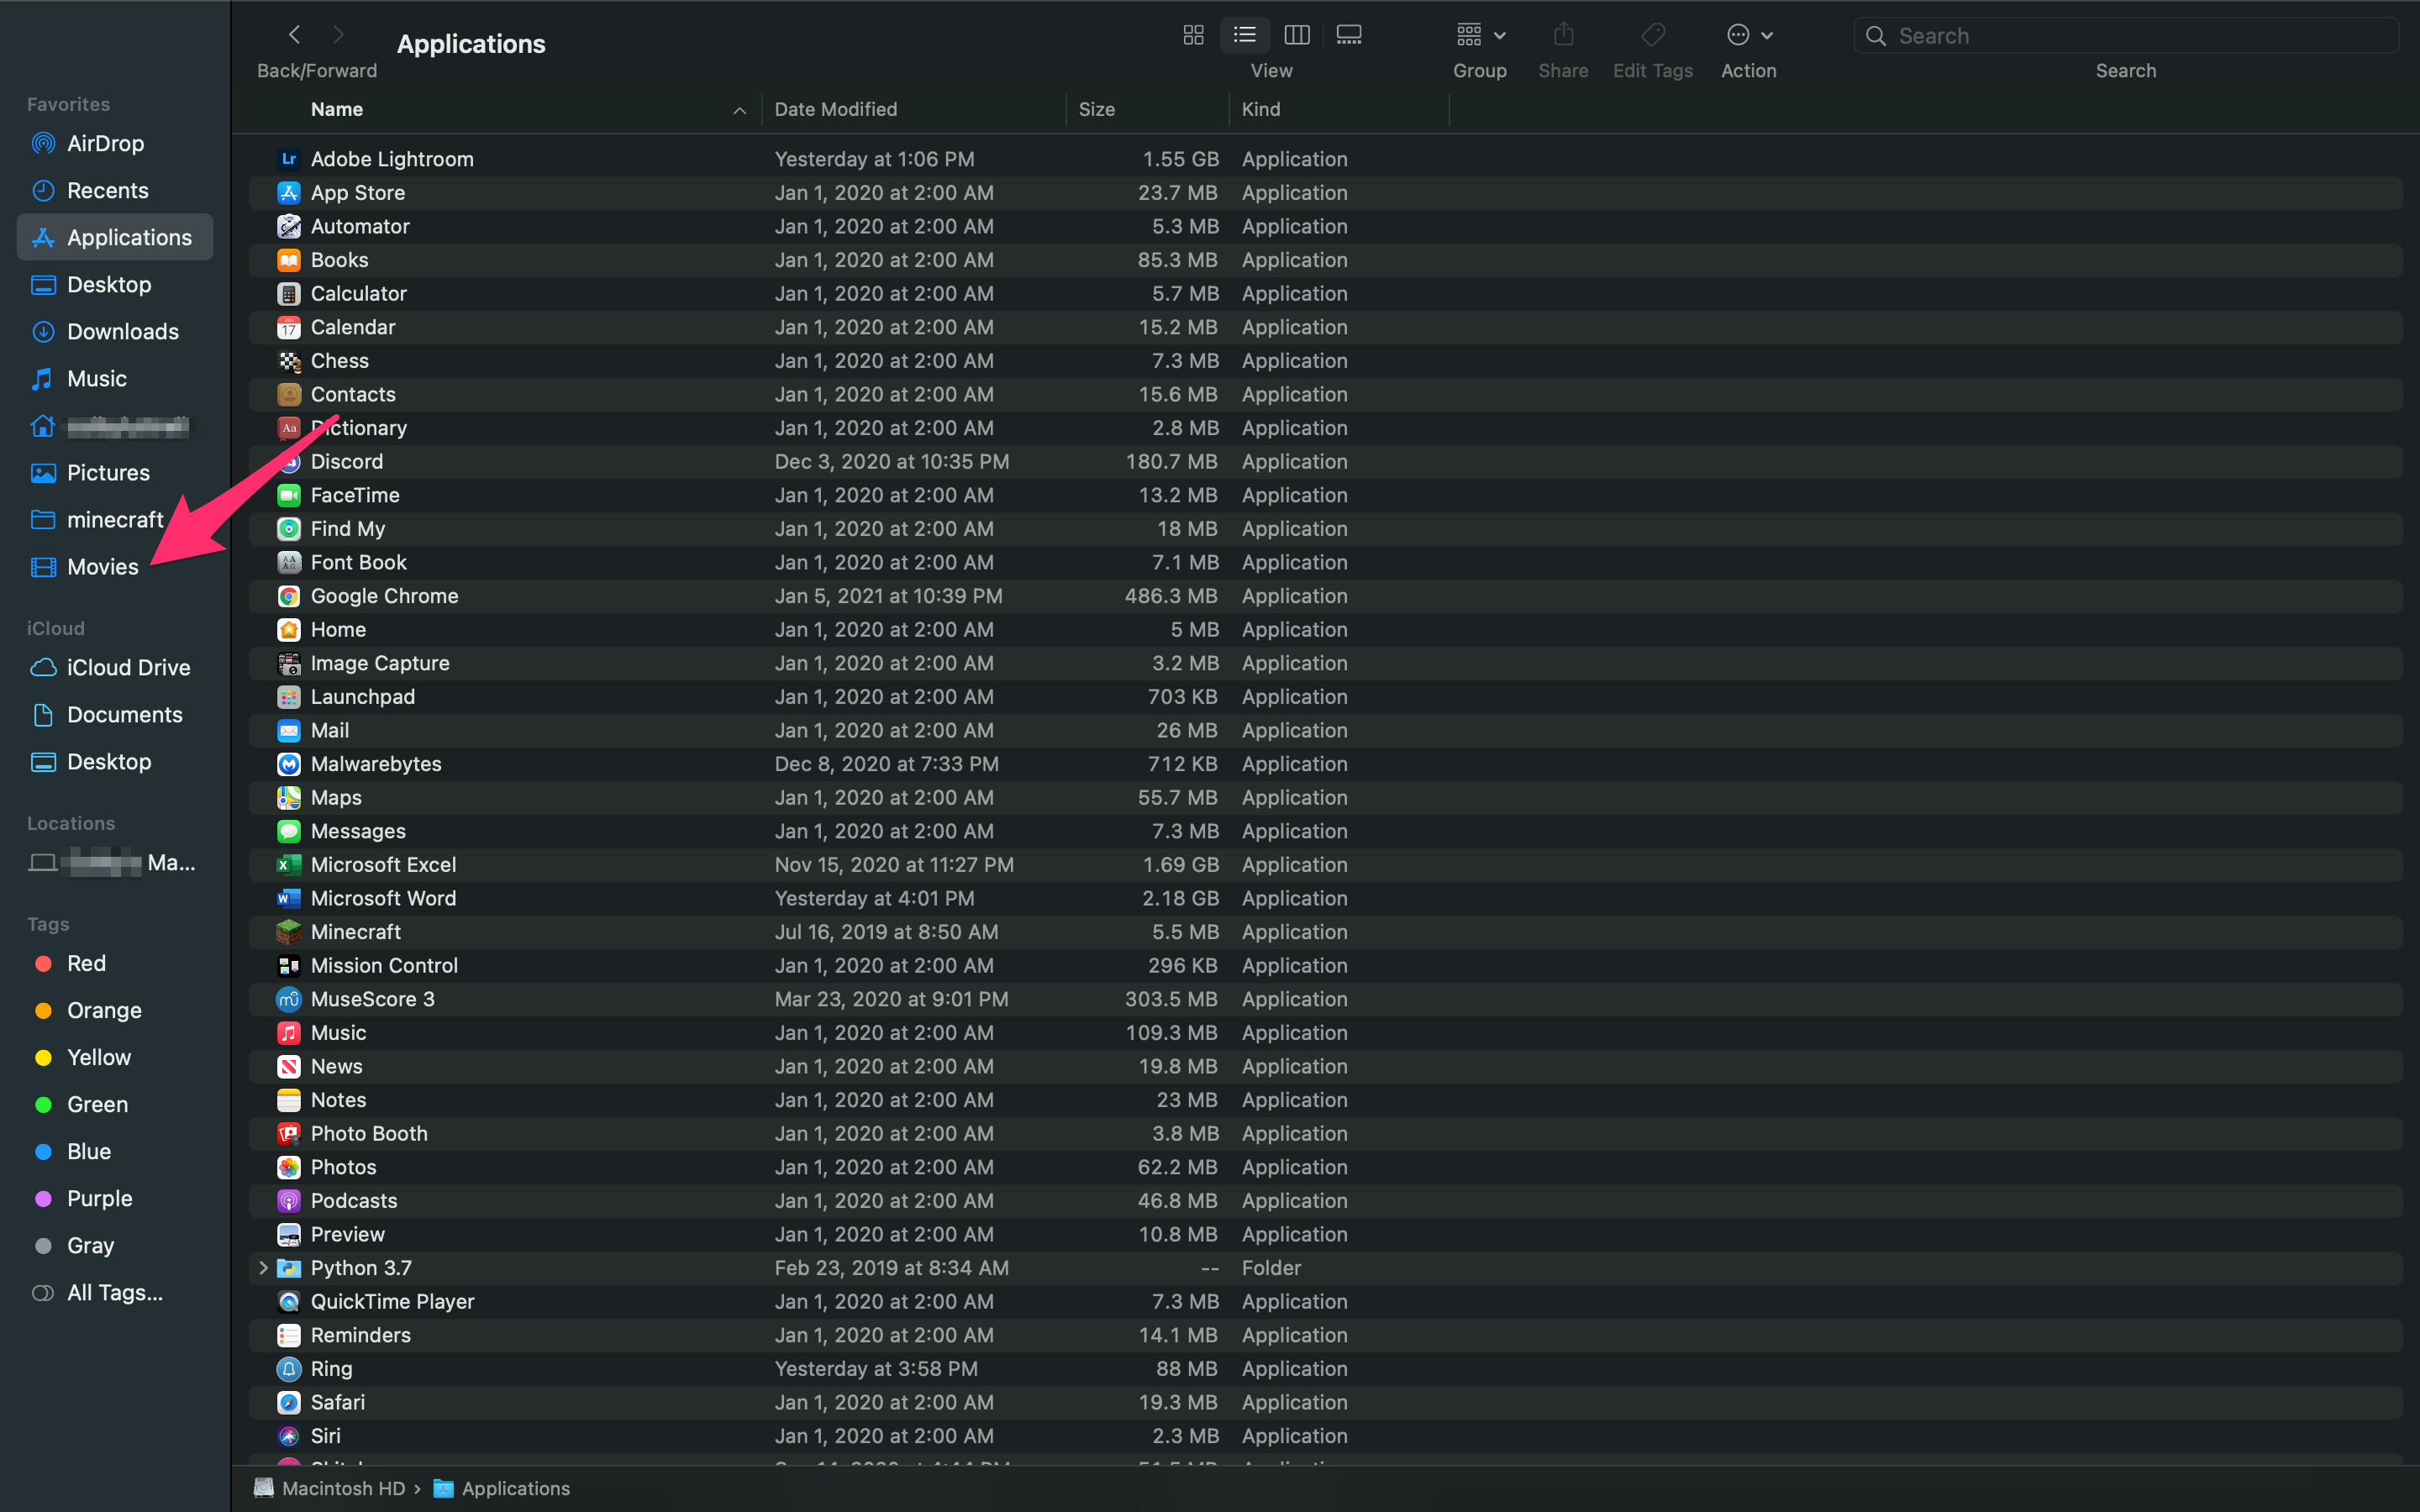
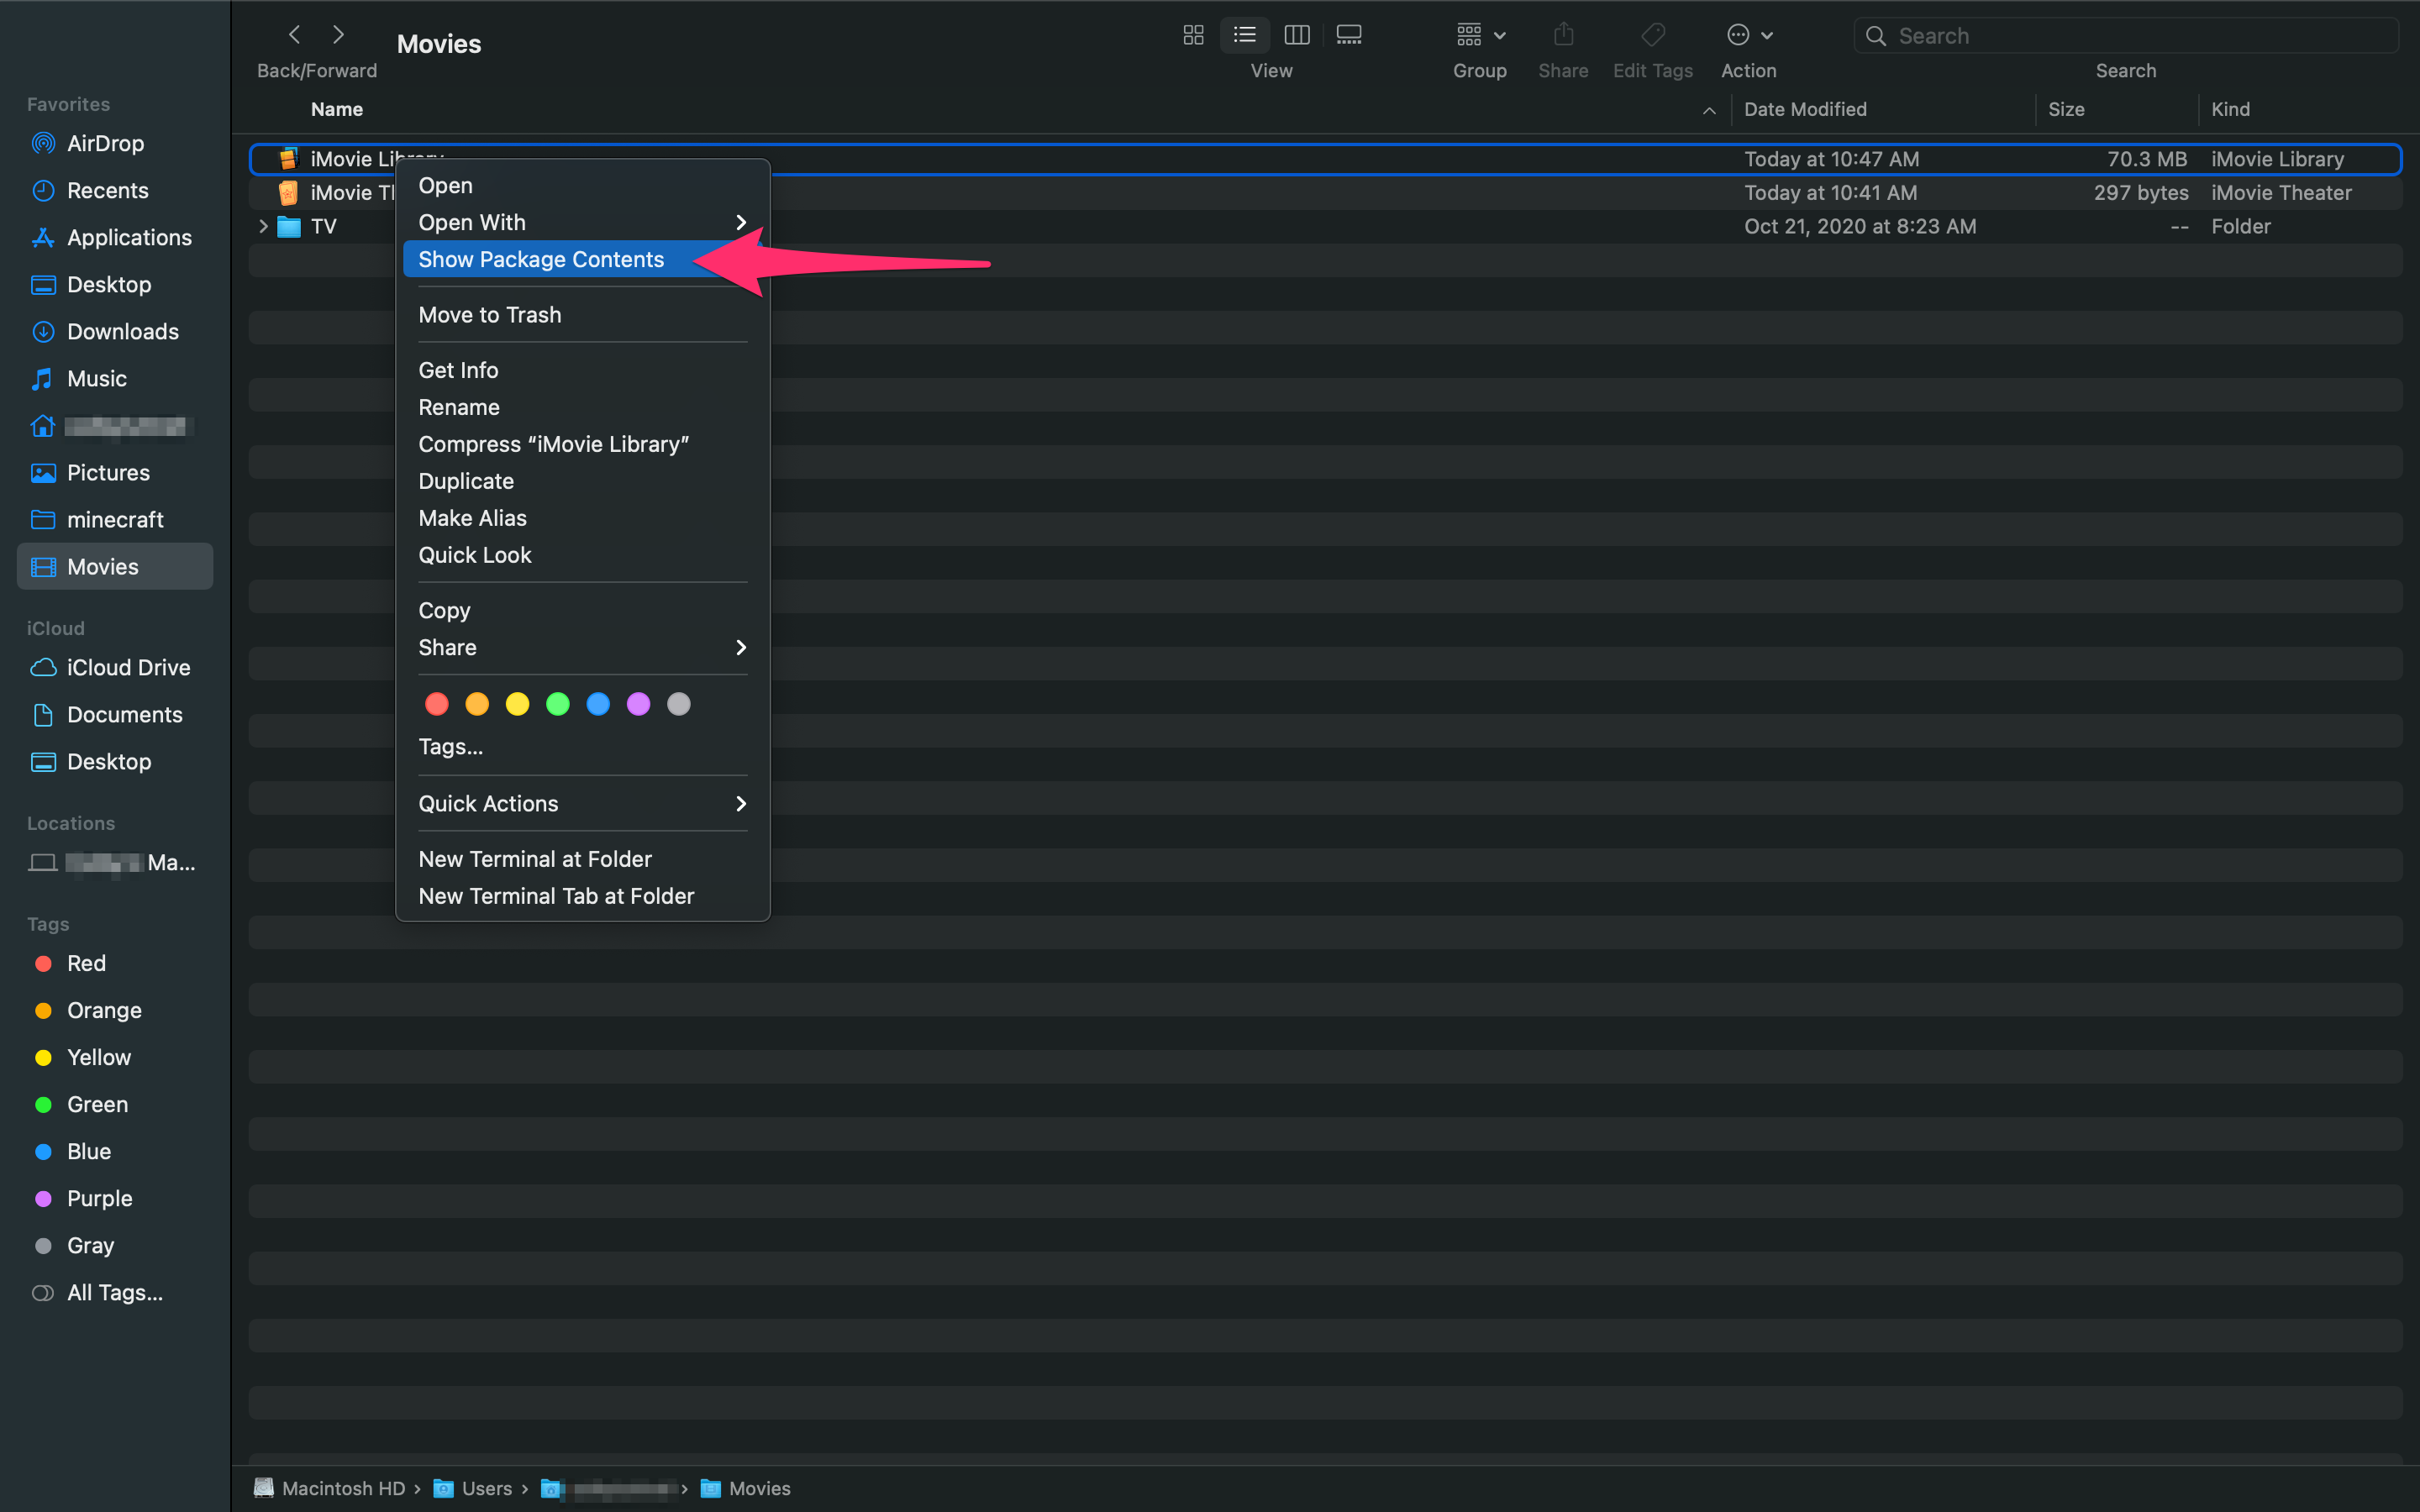
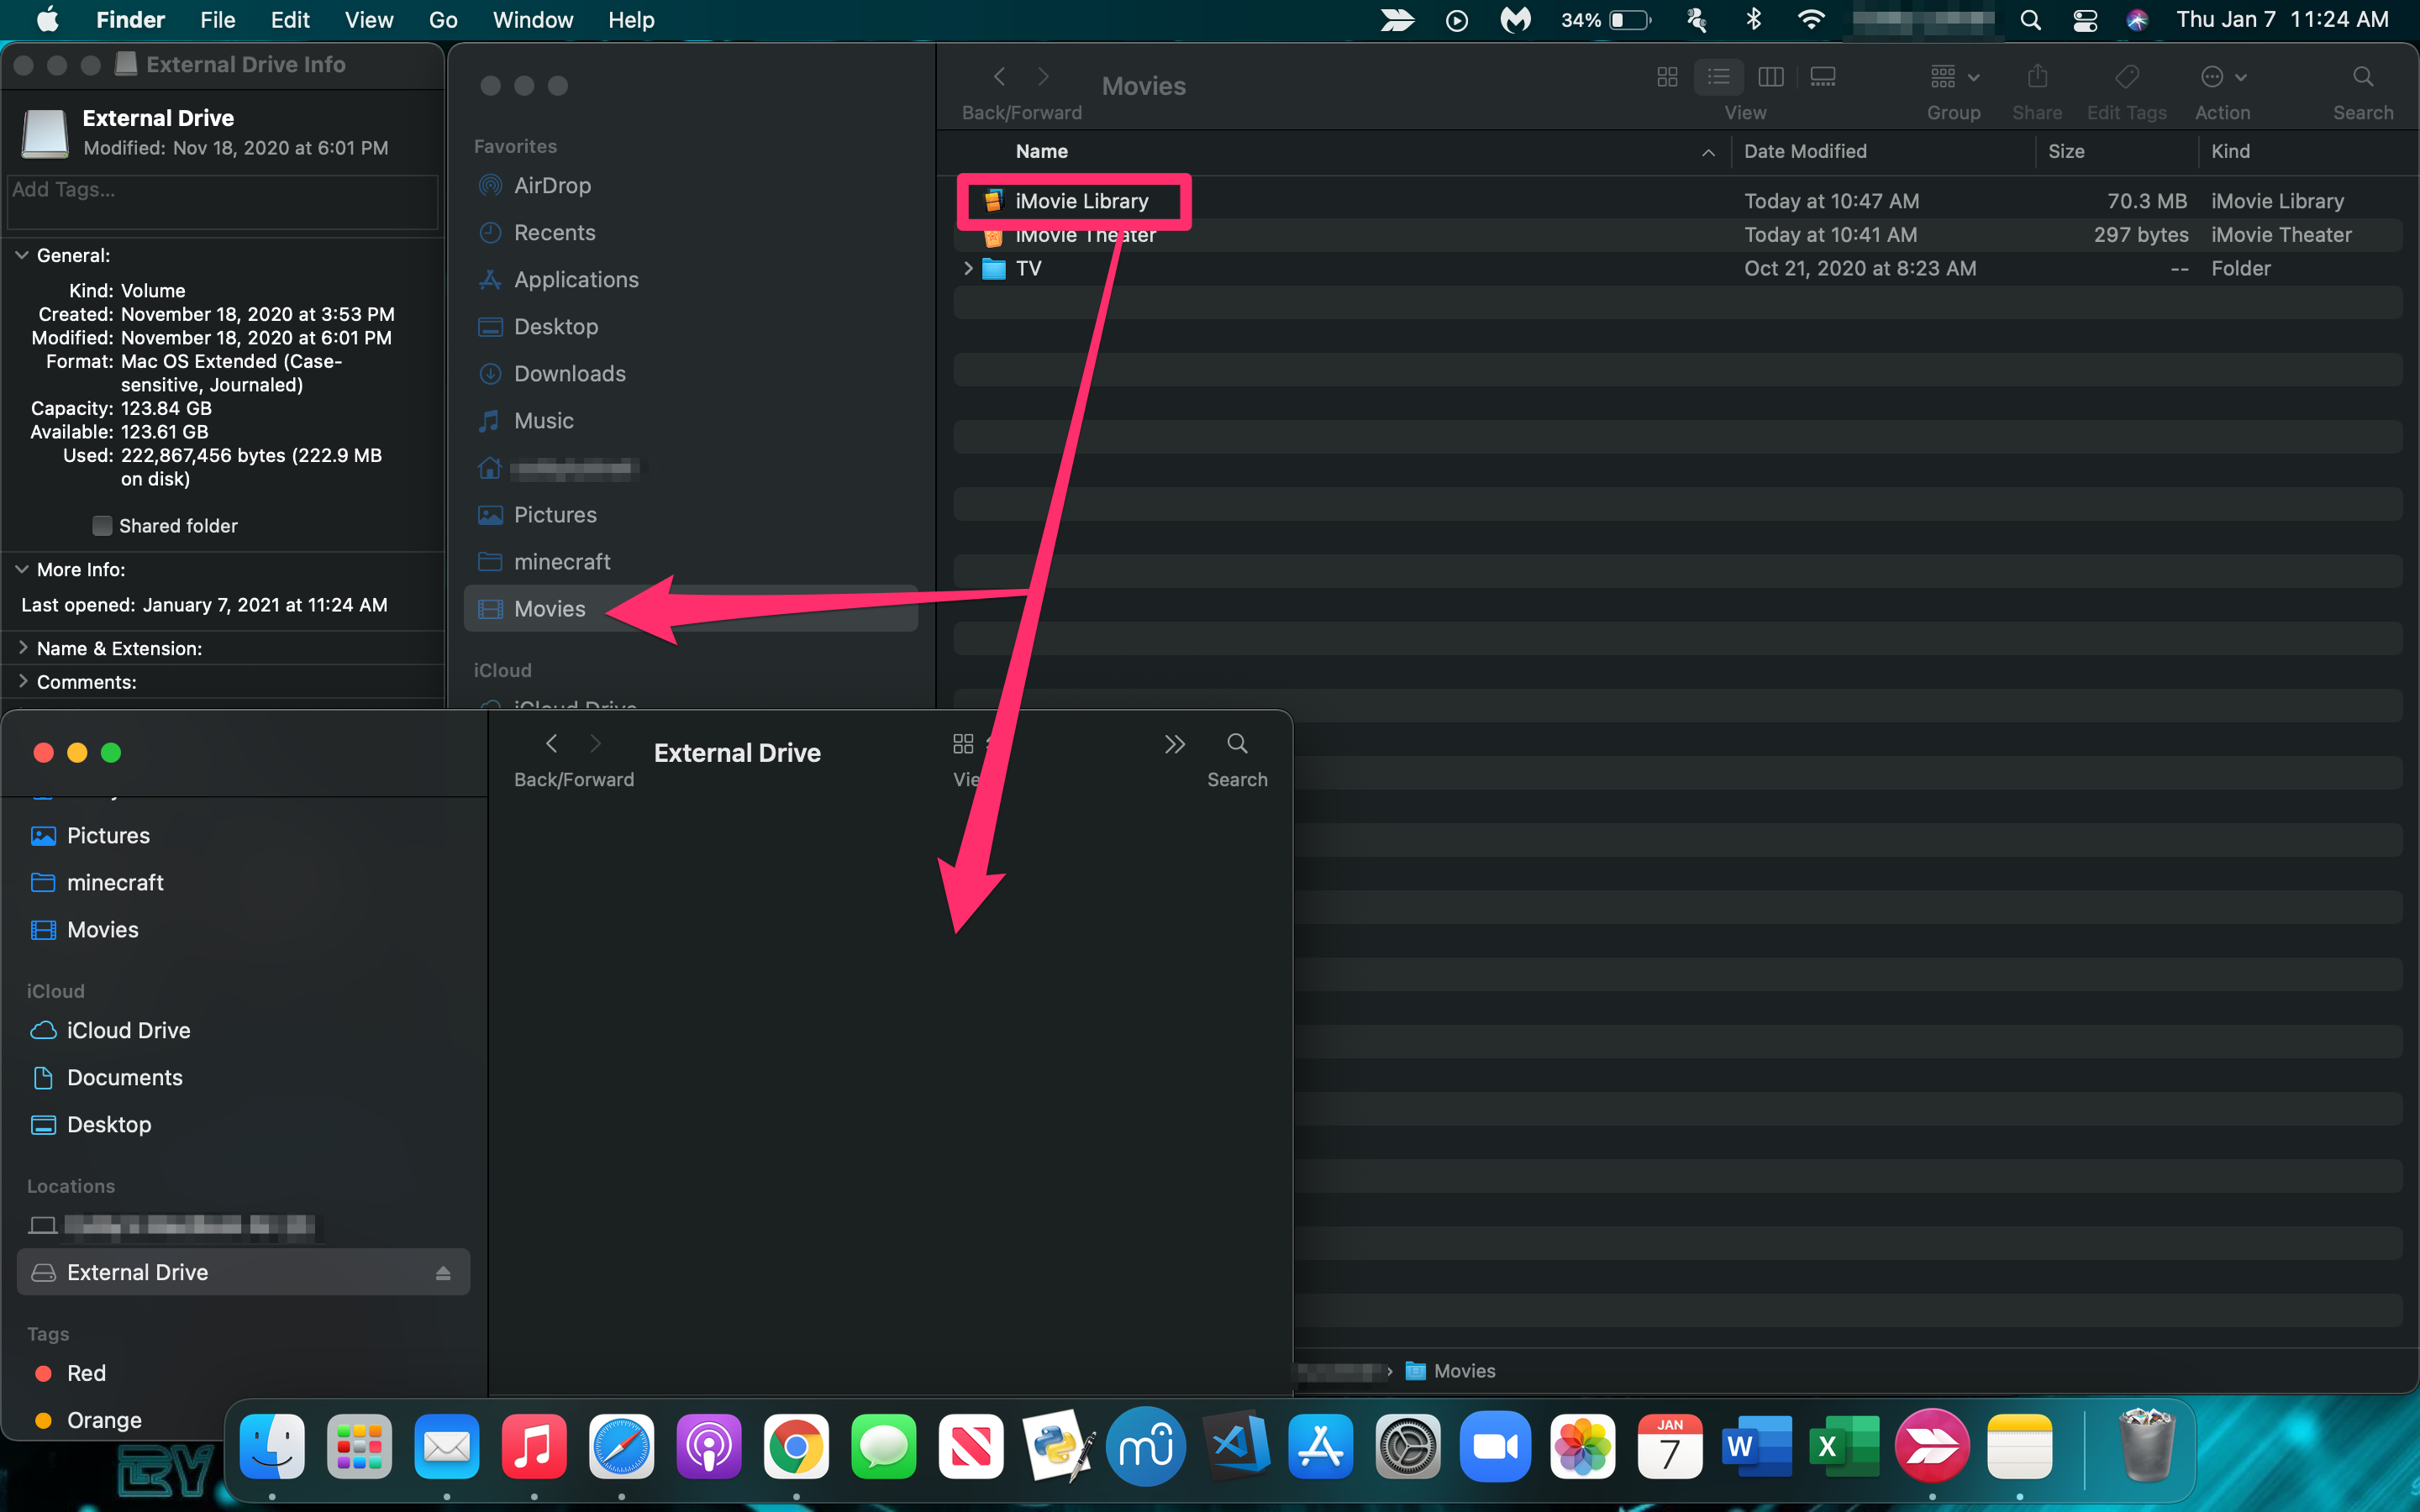
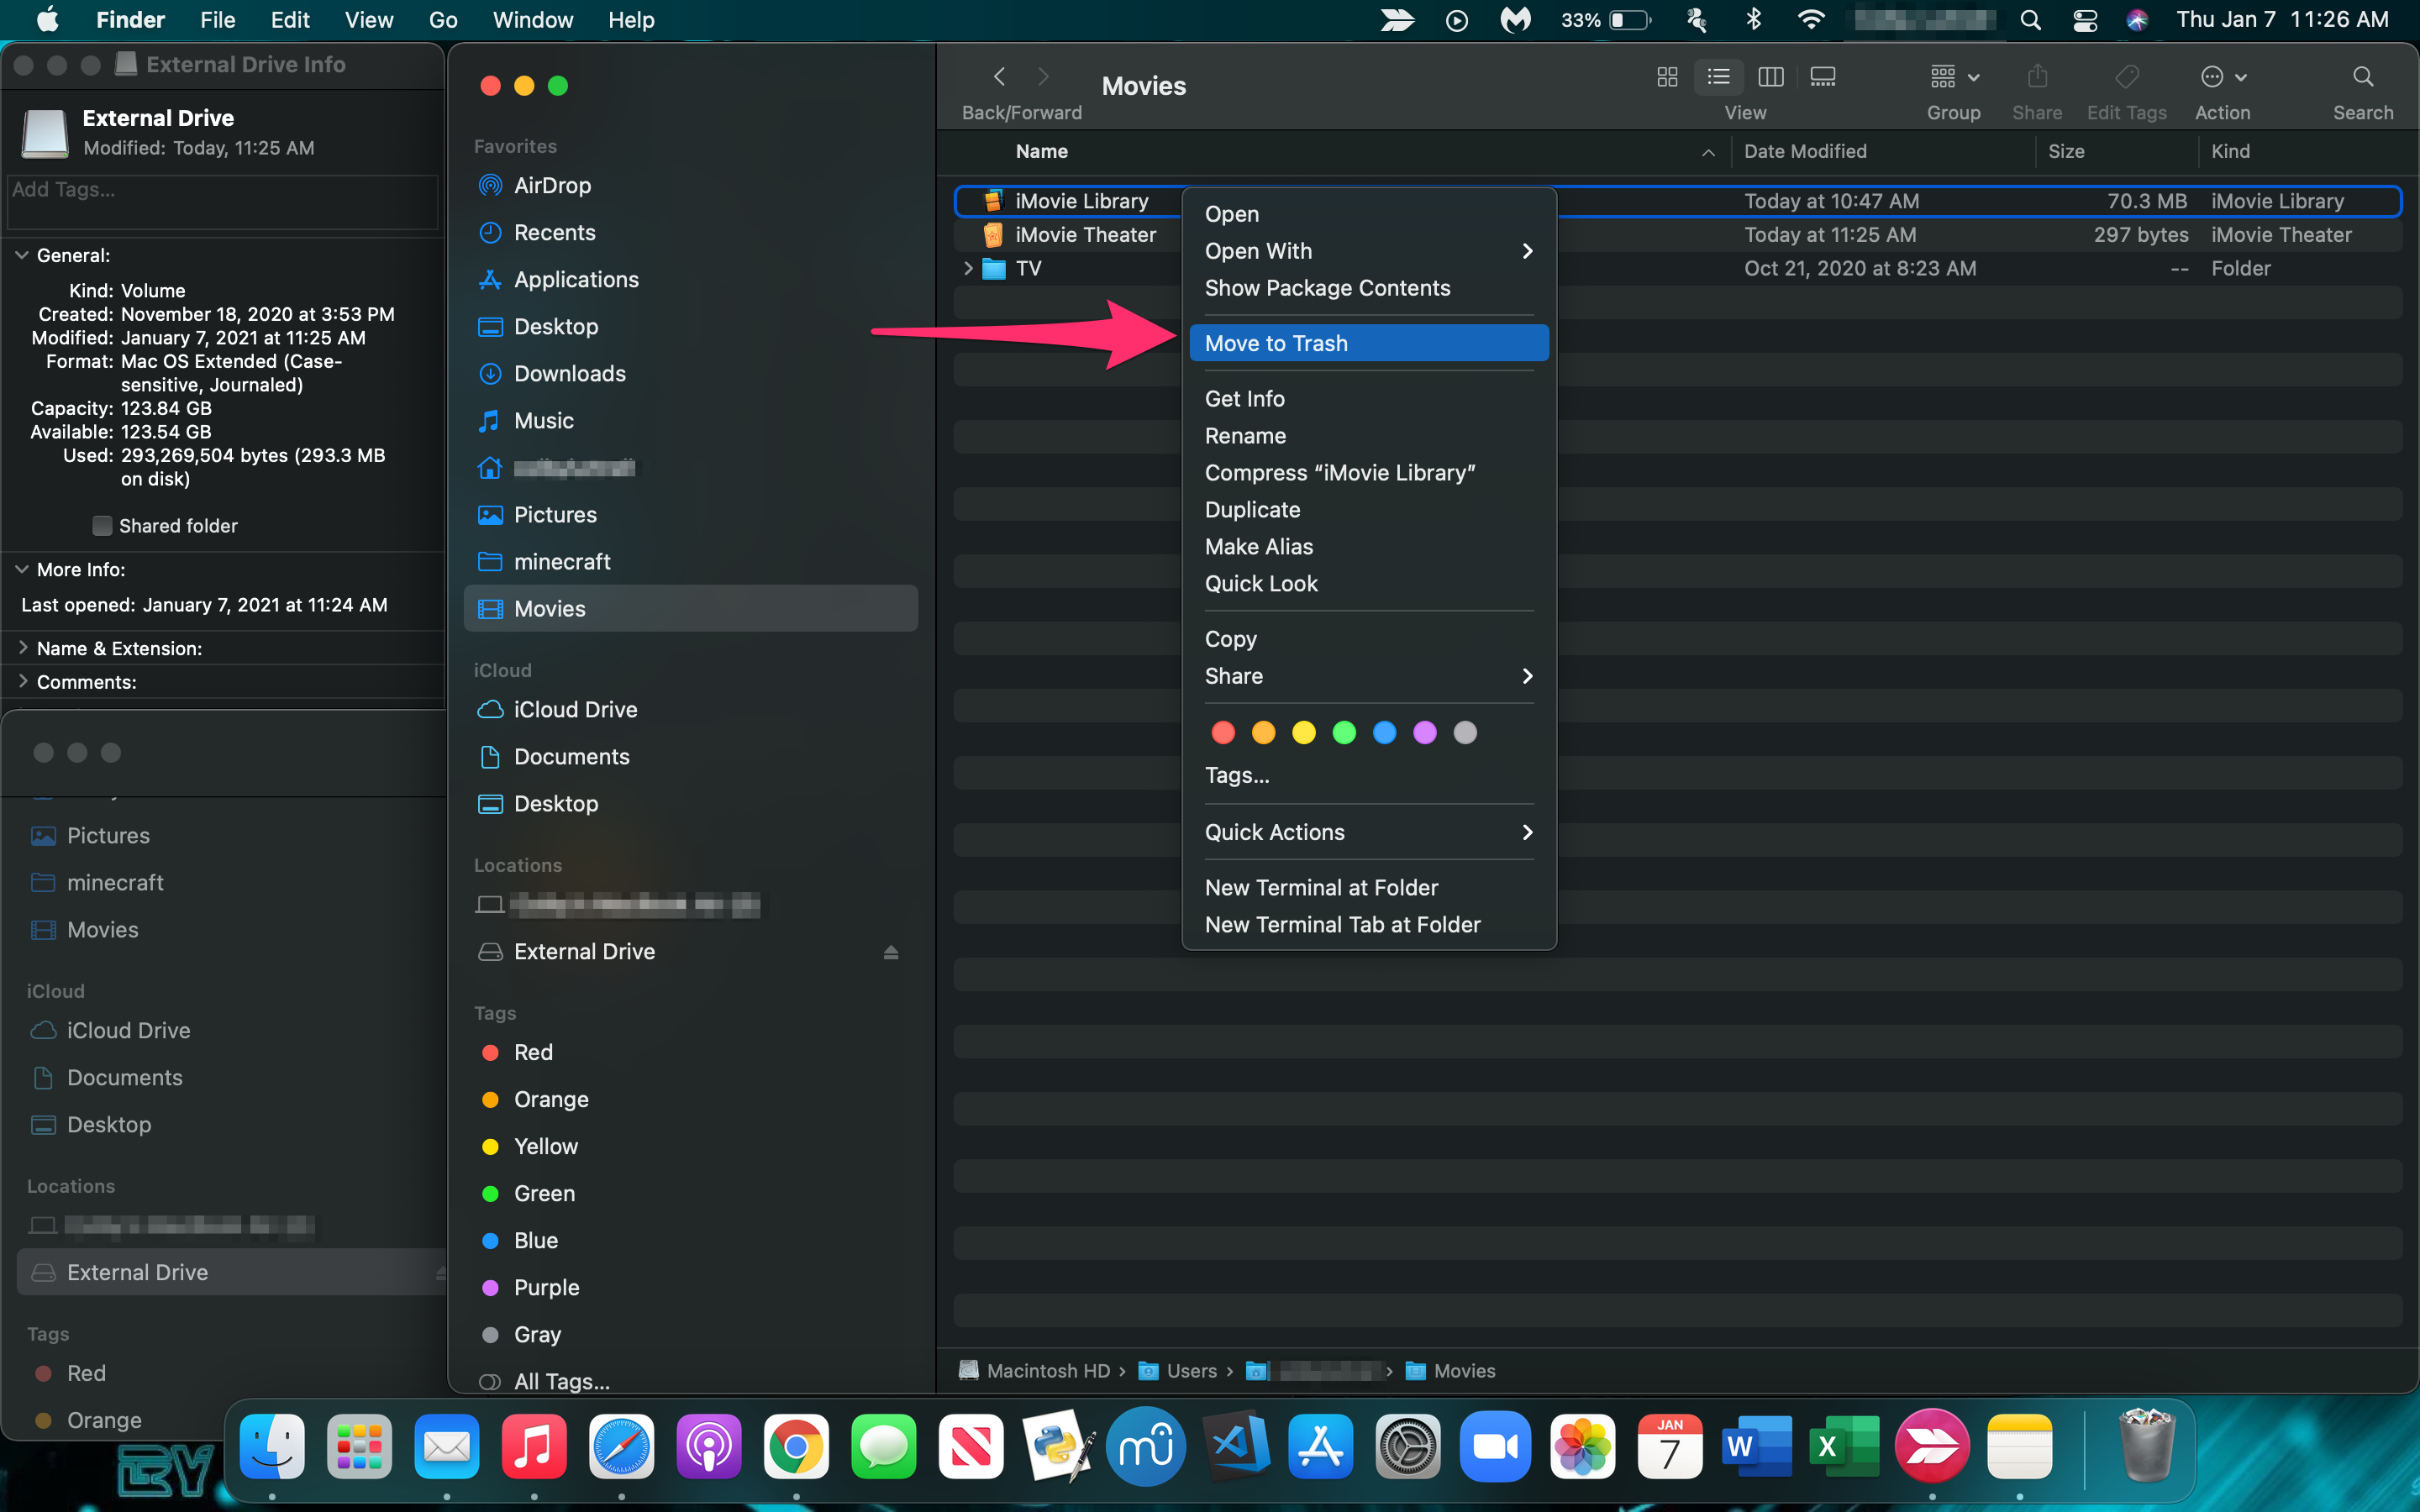
- Open Finder and click on Movies.

- Right-click iMovie Library and select Show Package Contents.
- Navigate to Render Files and delete anything you don’t need.
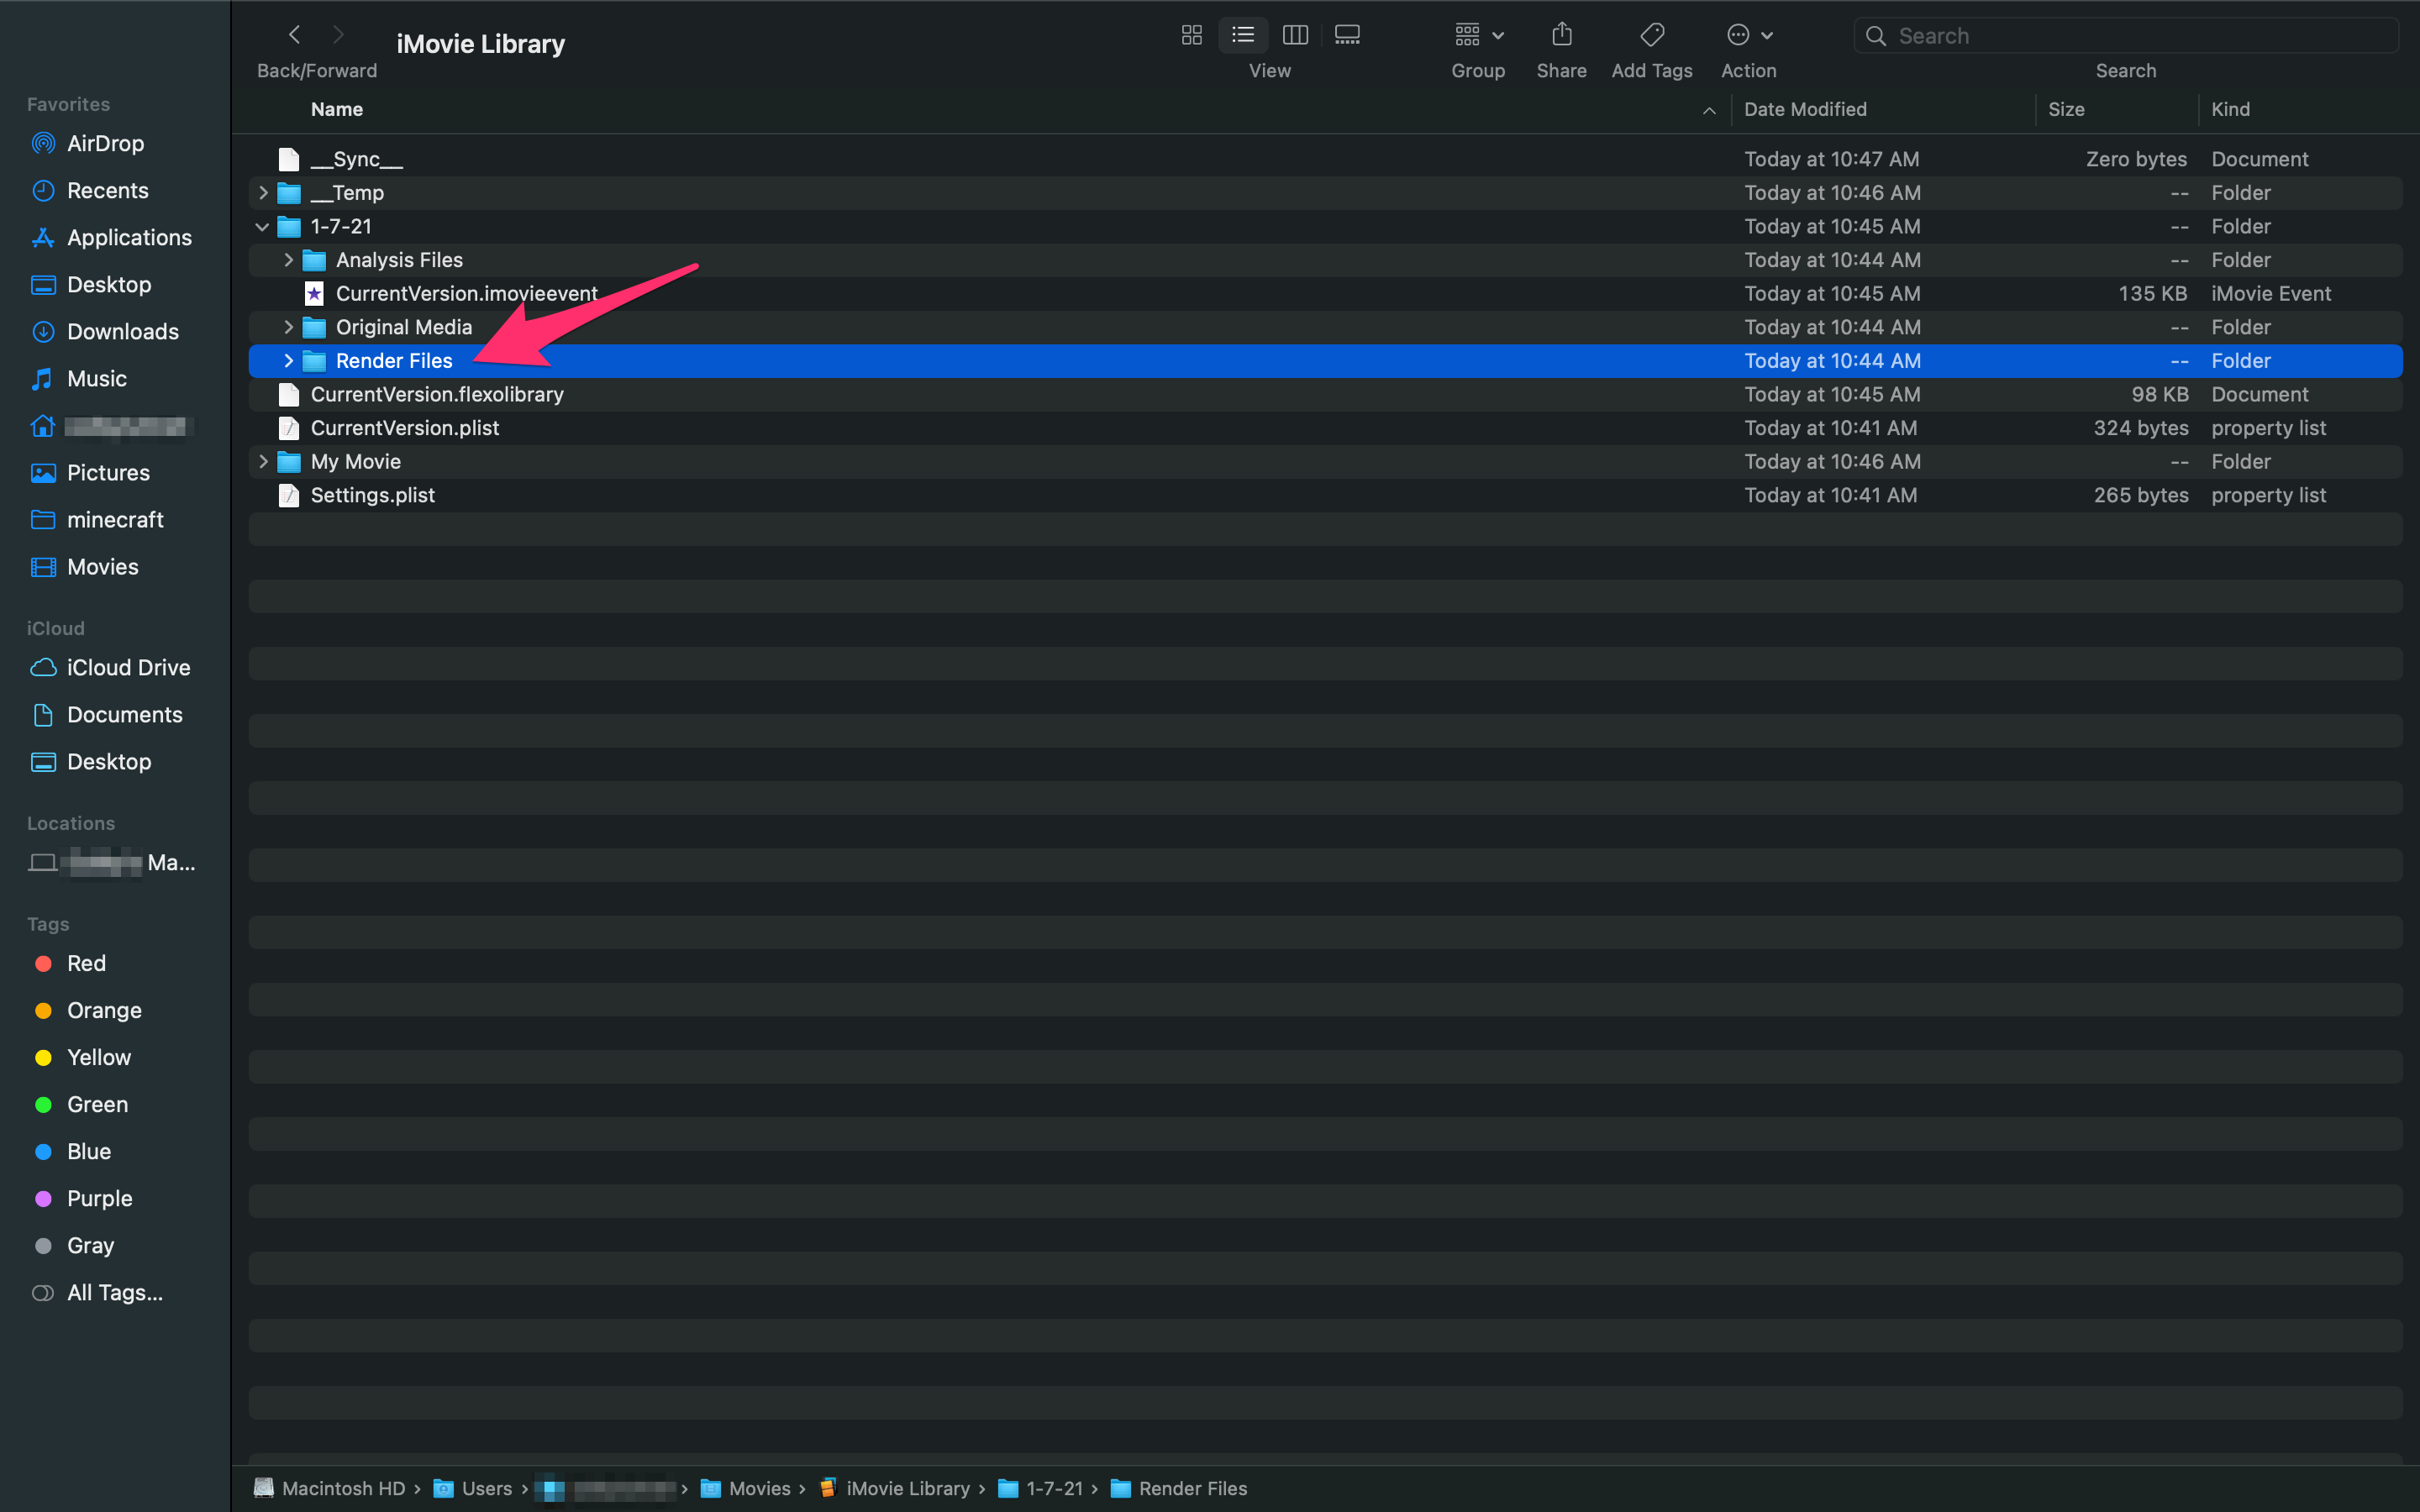
You can delete the entire Render Files folder if you prefer as iMovie will create a new one when you begin a new project. If you want to keep some of the files for future use, just open the folder and delete what you don’t want to keep. Either way, the result should be that you now have a lot more free disk space.
If you’re the Terminal type, use ‘find ~/Movies/iMovie\ Library.imovielibrary -path “*/Render Files” -type d -exec rm -r {} +’ and hit Enter to achieve the same thing.
Clear disk space on a Mac
The above methods will work fine if you’re a regular iMovie user and have lots of old files laying around. But what if you’re new to iMovie and just have lots of stuff on your Mac? You’re going to need to clean out general disk space to enable you to use iMovie properly.
First, let’s see what is using your disk space.
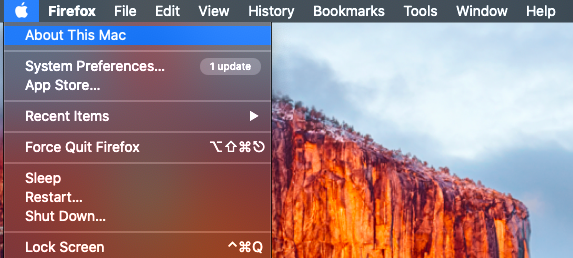
- Open the Apple menu and select About This Mac.

- Select Storage to see your disks.

- Select Manage for some options.

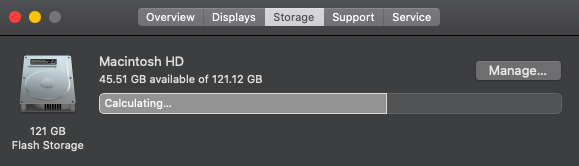
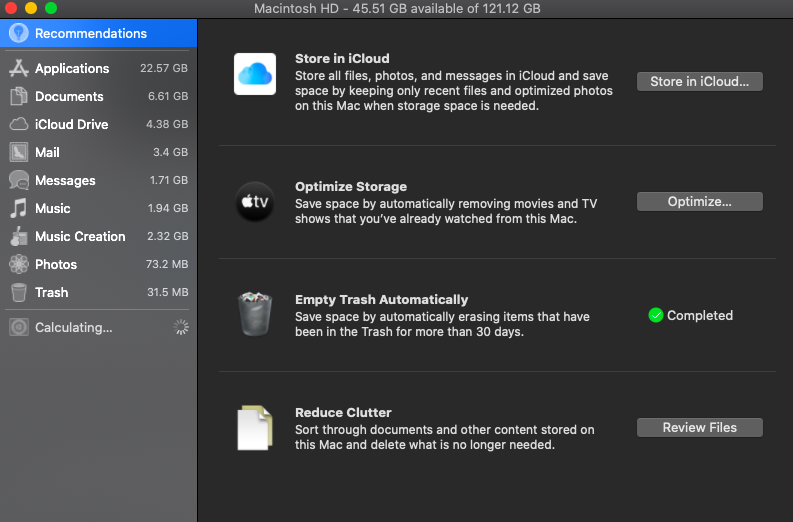
You should see a graphical representation of your disk usage where you can see how much storage you have used and how much you have free. Presumably, if you’re seeing low disk space messages, you won’t have much available space.
When you select Manage, you have some options. Optimize Storage is useful if you watch a lot of TV or movies using iTunes. Empty Trash Automatically is useful if you don’t often delete files by accident while Reduce clutter is okay if you don’t mind Apple deciding what documents are important or not.
Also:
- Check Downloads and delete anything you have downloaded that you no longer need.
- Check Mail and select Erase Deleted Items and In All Accounts and Mailbox.
- Select iPhoto and Empty iPhoto Trash.
- Select Applications and delete any you no longer need.
- Clear Safari’s cache by selecting Reset Safari from its menu.
- Clean your system cache in /Library/Caches and ~ /Library/Caches.
- Clear the Logs folder.
- Delete any iPhone backups you no longer need from iTunes.
- Delete duplicated files by using Finder and Show Duplicate Items.
By the time you have worked through this list, you should now have a decent amount of disk space free. It should be more than enough to use iMovie and anything else you need. If you’re still using up too much disk space, it’s time to think about buying a larger disk or using an external drive.
Move the iMovie library to an external drive
If you’re still struggling to find disk space, you may like to move the iMovie library onto an external drive. That way you can do what you like with the app without impacting your Mac storage.
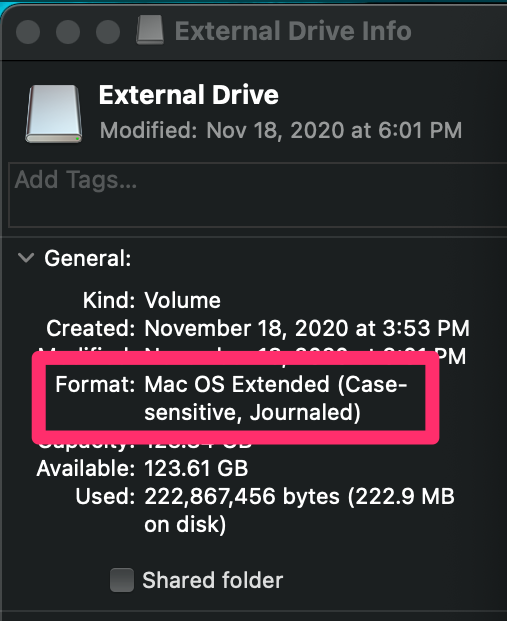
- Connect your external drive and format as macOS Extended (Journaled) if necessary.

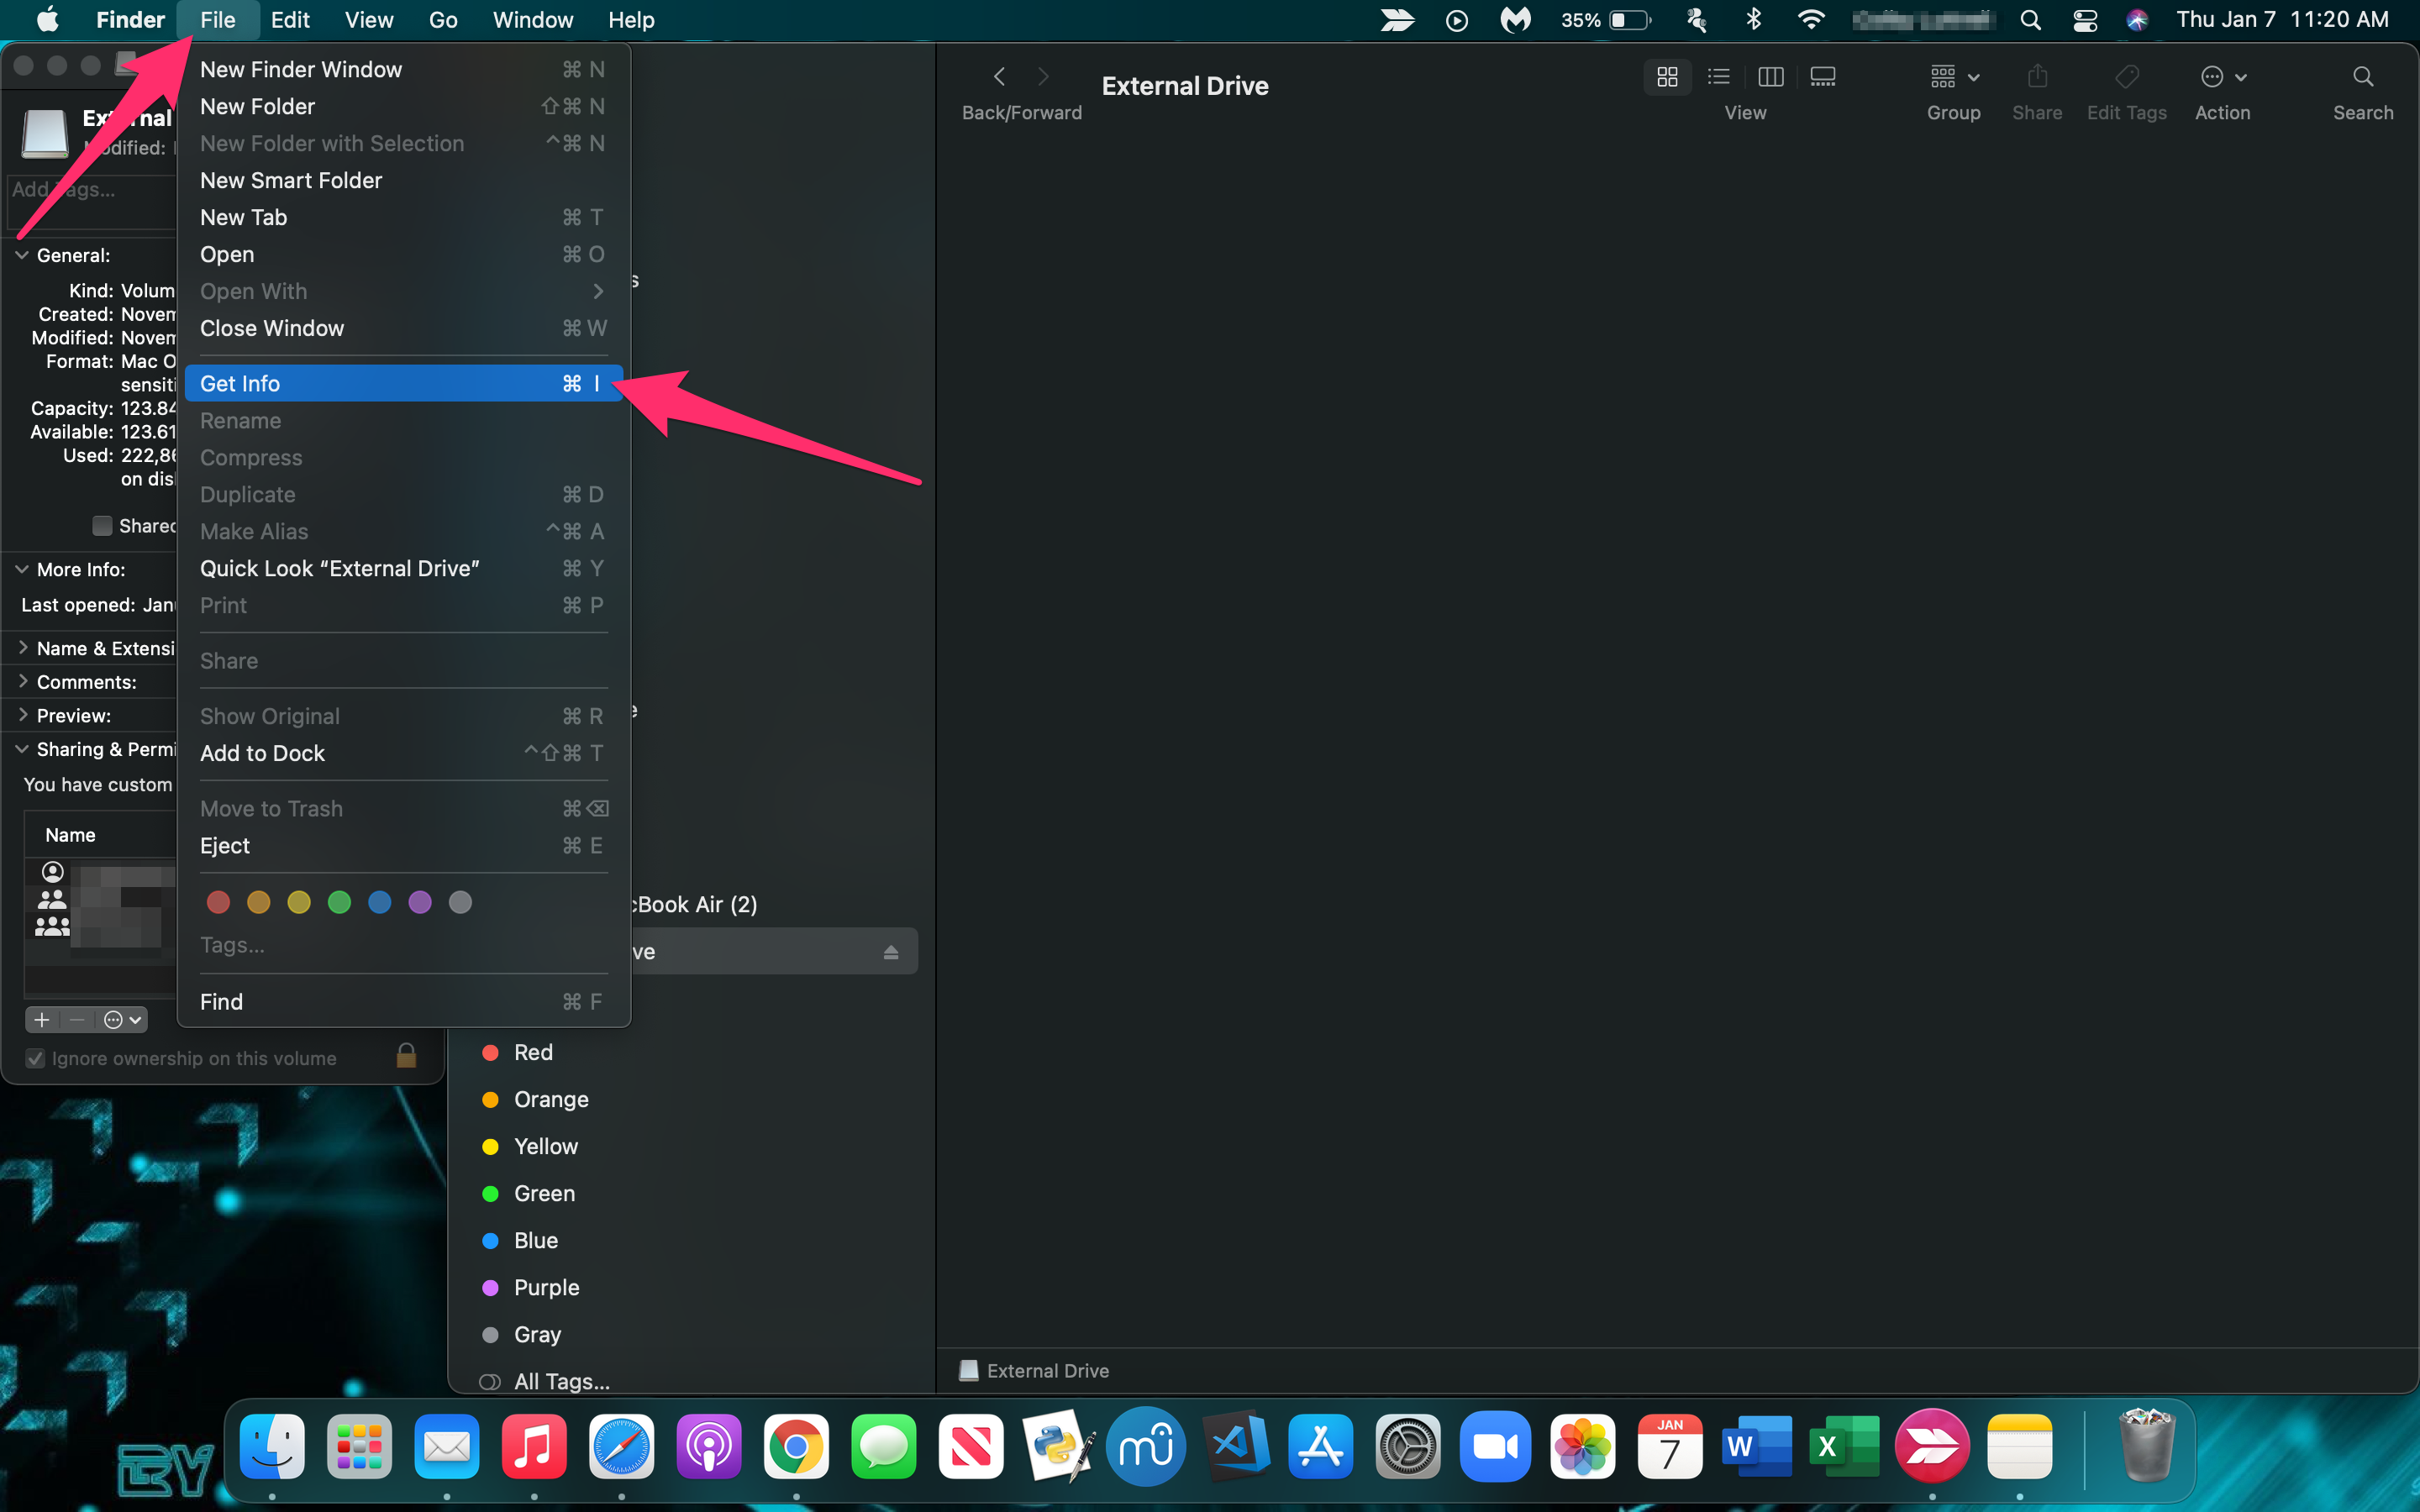
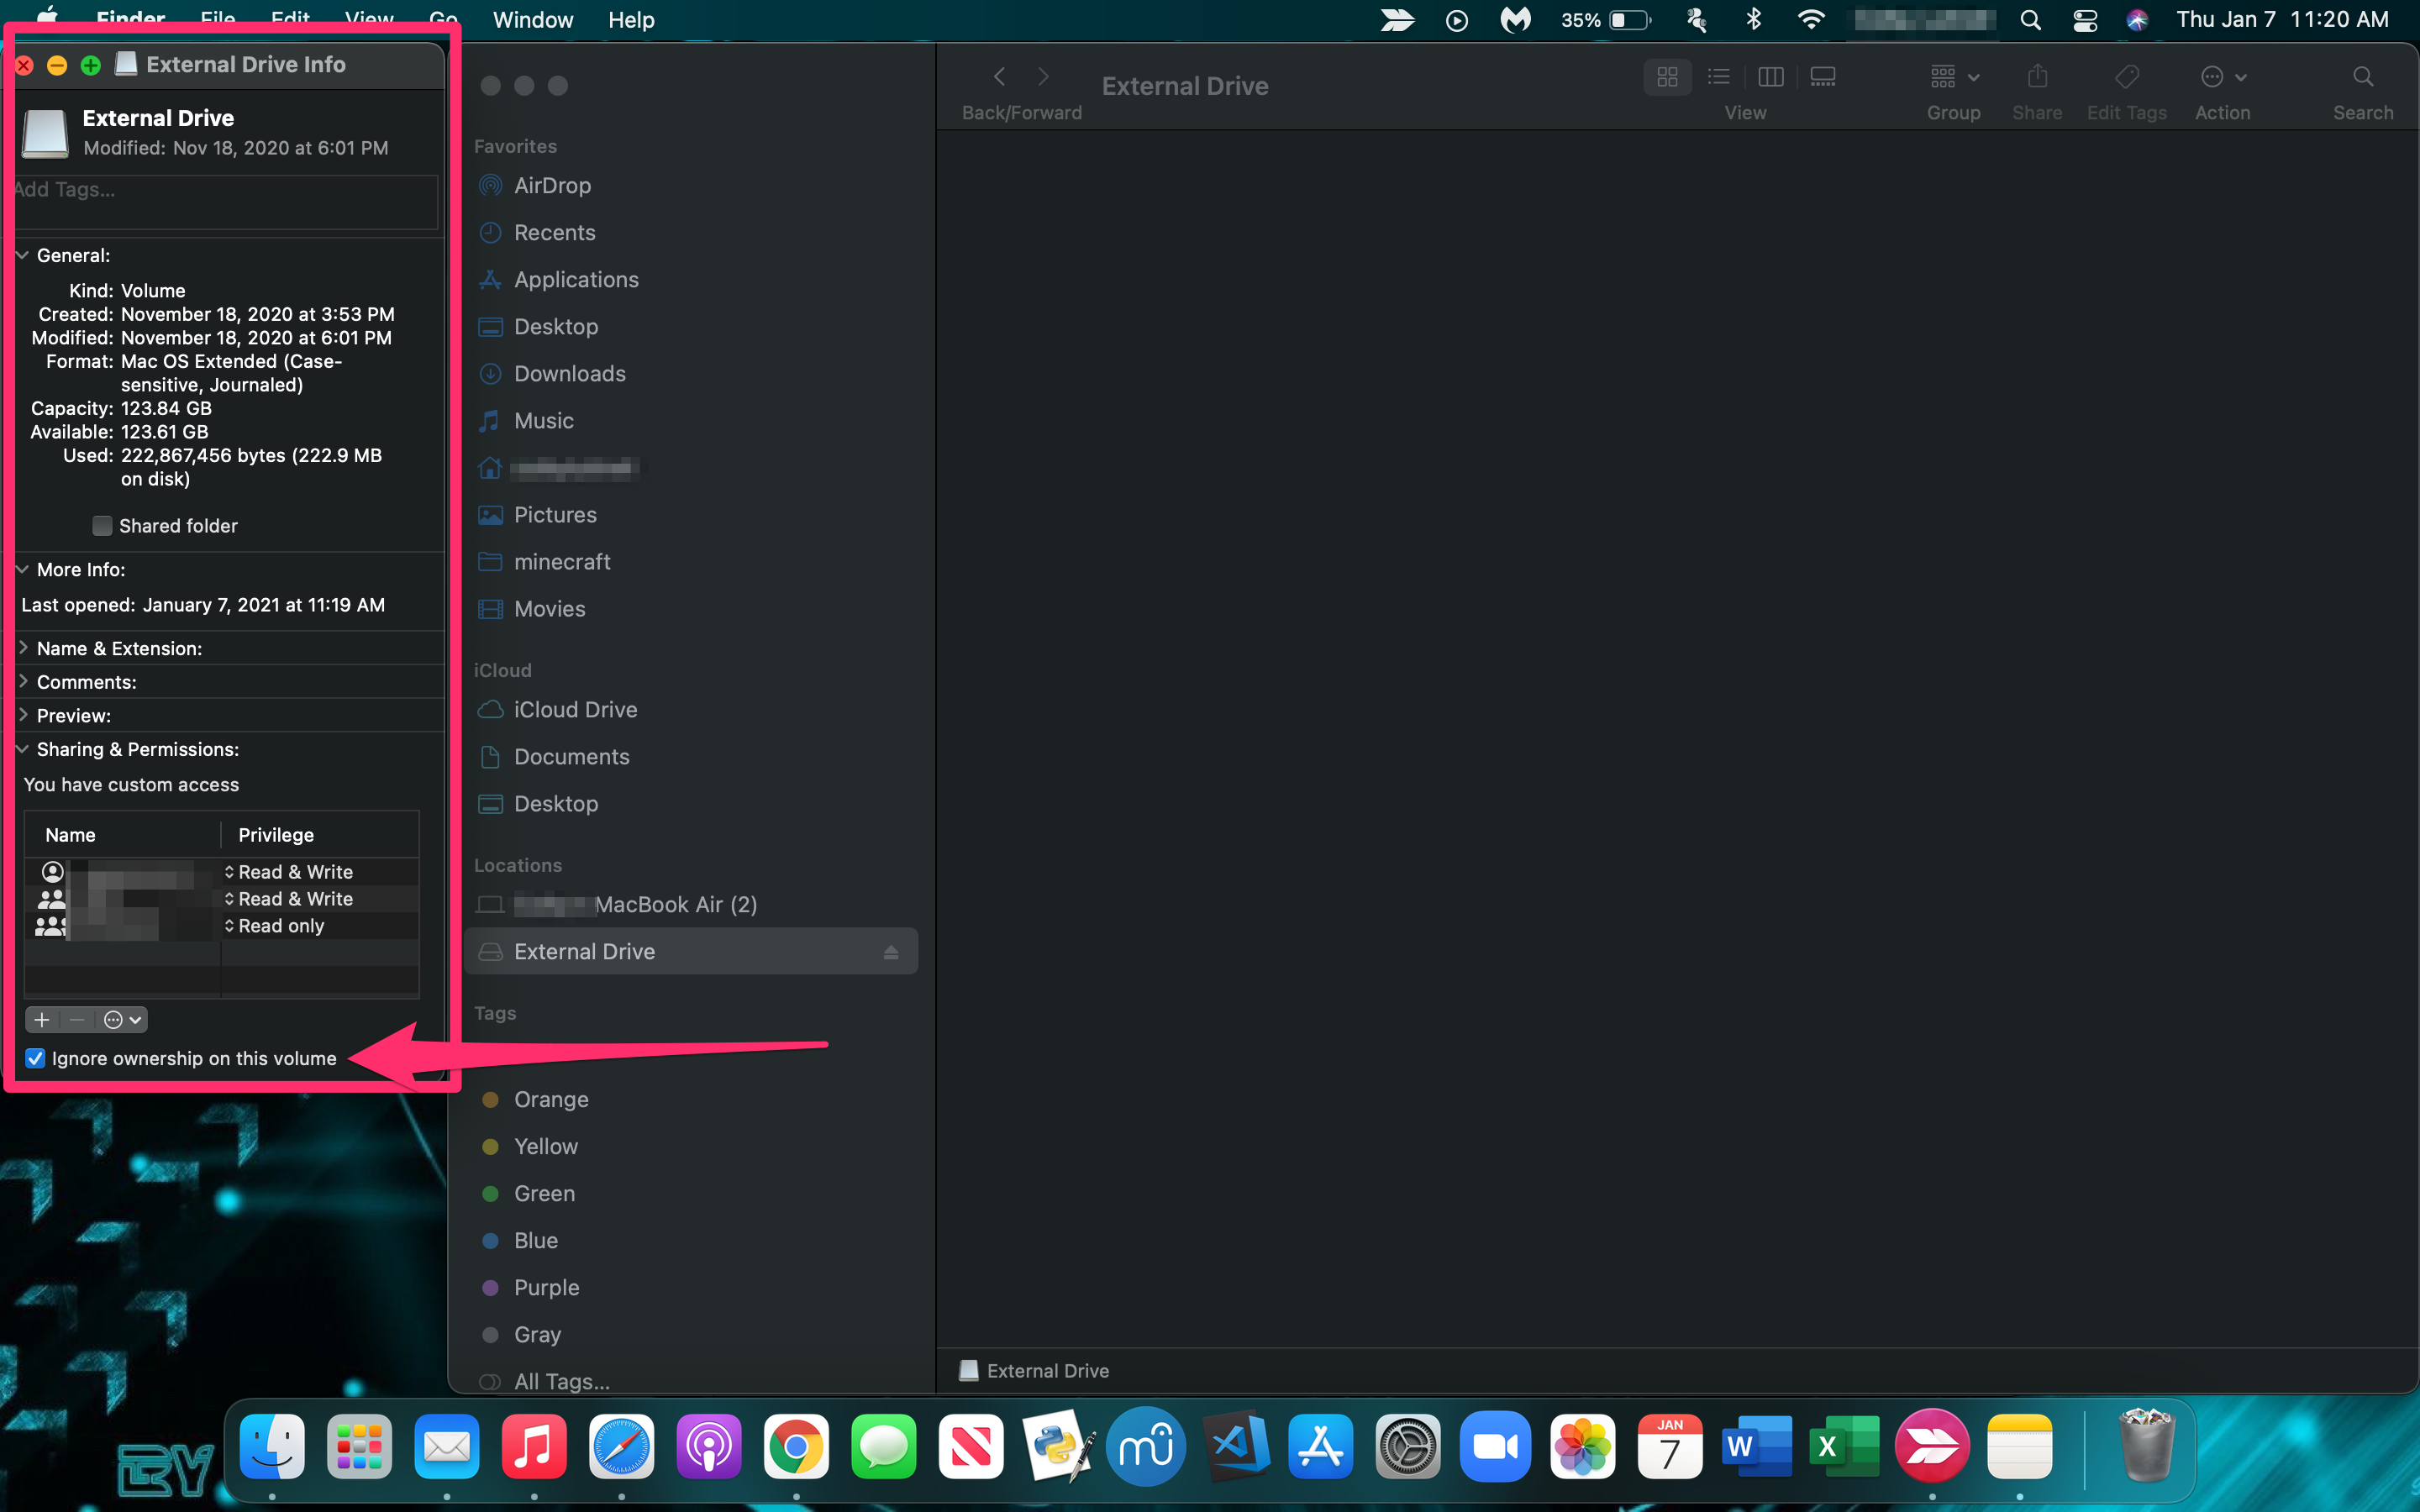
- Open Finder and select File and Get Info.
- Select the checkbox by Ignore ownership on this volume in Sharing & Permissions.
- Navigate back to Finder and open the Movies folder and move the iMovie Library folder to the external drive.
- Double click to open it in iMovie to make sure everything is present.
- Delete the original iMovie Library folder on your internal drive.
Clear Disk Space Error – Fix
There are several Mac users in forums all across the web talking about a Disk Space error in iMovie. Unfortunately, this is a really common error but it is easily fixed.
Many users experience it when first setting up their Mac (obviously that’s not right because you haven’t put anything on the disk yet), while some other users have performed the steps above and still receive the error.
All you need to do to fix this error is to visit the App drawer on your Mac and uninstall iMovie. You can do that by dragging it to the garbage can.
Now, you can go to the App Store on your Mac, search for iMovie, and click the cloud icon to reinstall it.
That’s all there is to it!


One thought on “How To Clear Disk Space in iMovie”