How to Create an Amazon Teacher Wish List

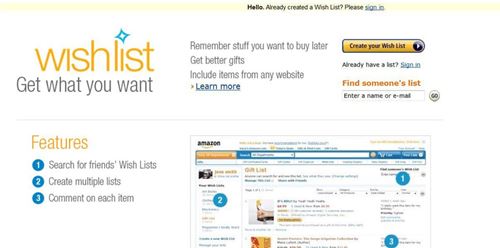
With Amazon Wishlist, it’s easier than ever to create a list of items you’d like to have. Most importantly, you can even share it with others, so when they buy you a gift, they’ll know exactly what to get.
For example, your birthday is coming up, and your coworkers want to buy you a present. They can consult your wish list and agree on which item to buy. They may even decide to pool their resources to get you that expensive piece of tech you’d never consider buying yourself. Either way, you’re getting something you really want for your birthday.
With the options wish lists provide, teachers found it a great way to guide parents who’d like to donate to their child’s class. This way, not a cent will go to waste and it’s guaranteed to be put to good use.
Setting Up Your Wish List
Creating a public wish list is a pretty straightforward process. First, you set up the list, then you fill it with things you’ll need, and finally, share it with the parents.
To set your wish list, follow these steps:
- Go to Amazon.
- Sign in to your personal account.
- Hover the mouse cursor over the “Accounts & Lists” option in the top right corner, just under your name.
- Click “Create a List” on the left side of the hover menu.
- From the “This list is for” drop-down menu, choose “You”.
- In the list type options, select “Wish List”.
- Next, type in the name of your list. As you’ll share this list with your class’ parents, make sure it’s intuitive enough for them as well. You can use something like “Mrs. Lane’s Class”.
- In the “Privacy” section, make sure you set the wish list to “Public”. This will allow other people to access it.
- The “Recipient Name” should include your name.
- Once you’ve set everything up, click the “Create List” button in the bottom right corner.
This will create a new entry in your Amazon lists. At first, the list will be empty, so you have to fill it with all the items you need.

Adding Items to the Wish List
With your wish list set, it’s time to add the items to it.
- Use the Amazon search to find products you’d like to add to the wish list.
- Once you find one, click on it to open the product page.
- On the right side of the page, you’ll see the “Add to List” drop-down menu.
- Click the arrow button of the menu.
- Click the name of the wish list you’ve created, as described in the previous section.
And that’s it! You’ve added your first item to the list. Now you can continue to add the rest of the supplies you need for your class.
Once you’re done, it’s time to see what your wish list looks like.
- Hover the mouse cursor over the “Accounts & Lists” option in the top right corner.
- In the “Your Lists” section of the hover menu, you should see the name of your class supplies wish list. Click it.
- The wish list page appears, showing all of the items you’ve just added.
If you want to order the items by relevance, price, priority, or any other criteria, you can do that by simply dragging the left edge of the item card up or down.
A useful thing to note is that you can also access your class wish list by using the “Your Lists” option in the “Your Account” section. It’s located on the right side of the hover menu. This option takes you to the screen where you can find all of your lists, including the one you’ve just created.
Additional Info for Parents
Below the “Move” and “Delete” options on the right side of the product entry, you’ll see the “Add comment, quantity & priority” link. Click this to add some more details for each item.
In this menu, you’ll see a comment field, where you can write anything you think parents might find useful when purchasing items. For example, you can note the purpose of the item, e.g. “For school play”.
Here you’ll also find the “Priority” drop-down menu. This allows you to choose one of the five available levels, going from Lowest to Highest. Next to the priority, there are two additional fields: “Quantity” and “Has”. Quantity shows how many items of that specific product you need, while Has shows how many of these items you already have.
Once you finish adding these details, click “Save” in the bottom left corner of the menu to return to the wish list. For convenience, Amazon will now display all details next to the item’s entry in your list.
Sharing the Wish List with Parents
Once your Amazon wish list is fully packed with all the things you need to improve your classes, it’s time to share it with the parents.
In the upper portion of the right side of your wish list’s page, there’s the “Send list to others” option. When you click it, a pop-up menu will appear. Here you can decide whether you want parents to only view the list, or if they can edit it as well.
When you click on either of the two options, two links will appear: “Copy Link” and “Invite by email”. If you copy the link, you can paste it wherever you want. For example, if you have a dedicated Viber group for the class’ parents, that would be a great way to share it. If you choose to invite parents by e-mail, you’ll be directed to your e-mail client to compose a new e-mail message.
Amazon to the Rescue
With Amazon wish lists it’s easier than ever for teachers to suggest which class supplies are essential. This also relieves parents of coming up with ideas for what to buy their child’s class. Even more, using a wish list, parents only need to purchase the items online and they’ll be dispatched directly to the school.
Do you as a teacher take advantage of this convenient system? Do parents find this idea interesting? Would you recommend it to your child’s teacher? Whatever the case, please share your thoughts in the comments section below.