


How to create an encrypted volume with VeraCrypt
It goes without saying that encryption is important, and that’s not only true for transmitting data. It’s true for storing it too. VeraCrypt is a powerful open source tool for encrypting folders, drives, and even your entire operating system install. It’s not just powerful, it’s fairly simple to use too.
Install VeraCrypt
VeraCrypt is available for a wide range of operating systems. This guide isn’t going into too much detail on the install process because it’s fairly simple no matter which OS you’re working with.
First off, if you’re on Linux, VeraCrypt might be in your distribution’s repositories. Since it’s easier to manage that way, check there first. If not, you can still grab it from VeraCrypt’s website.
VeraCrypt’s download page has a listing of the available stable releases. Download the right one for your system. We’re going to show you how to do it on Ubuntu Linux; however, VeraCrypt is available for Windows as well, and has a similar setup process as outlined below.
In any case, if you downloaded VeraCrypt from the website, you will be provided with a graphical installer that will walk you through the setup process.
Create A Volume
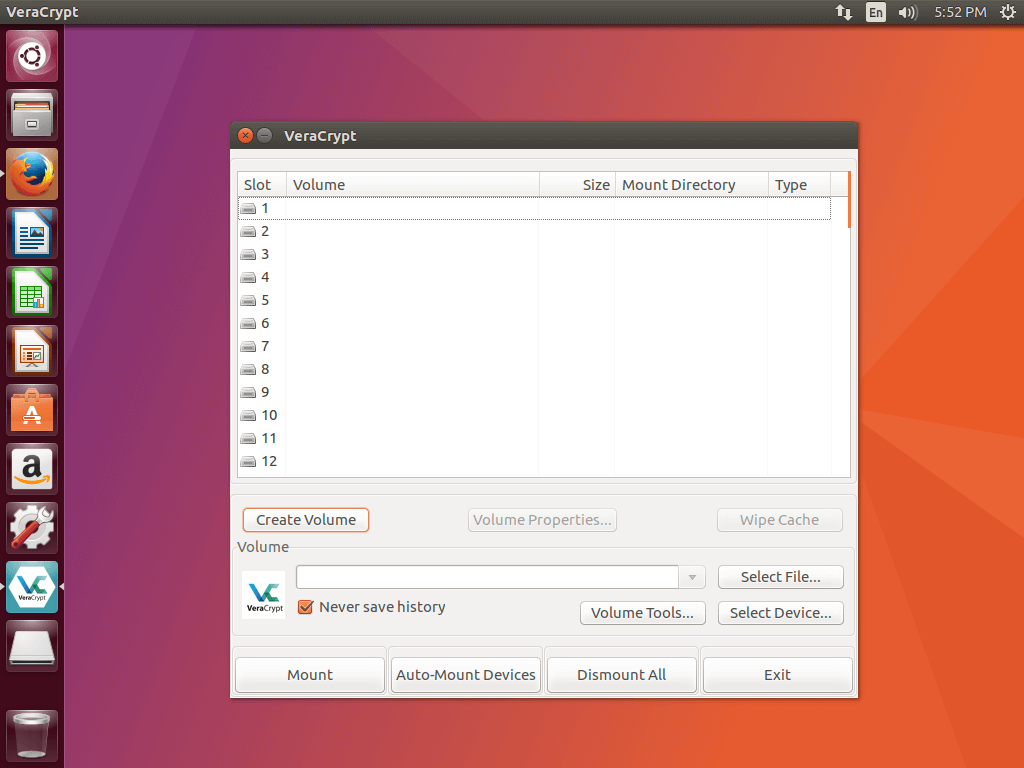
After the installer finishes, you can open up VeraCrypt like any other graphical application on your system. On Windows, it optionally creates a desktop shortcut too.
When you first open it, you’ll see a big listing of potential drives and a series of options for creating and mounting encrypted volumes.
Click on the Create Volume button to get started.
Choose A Volume Location
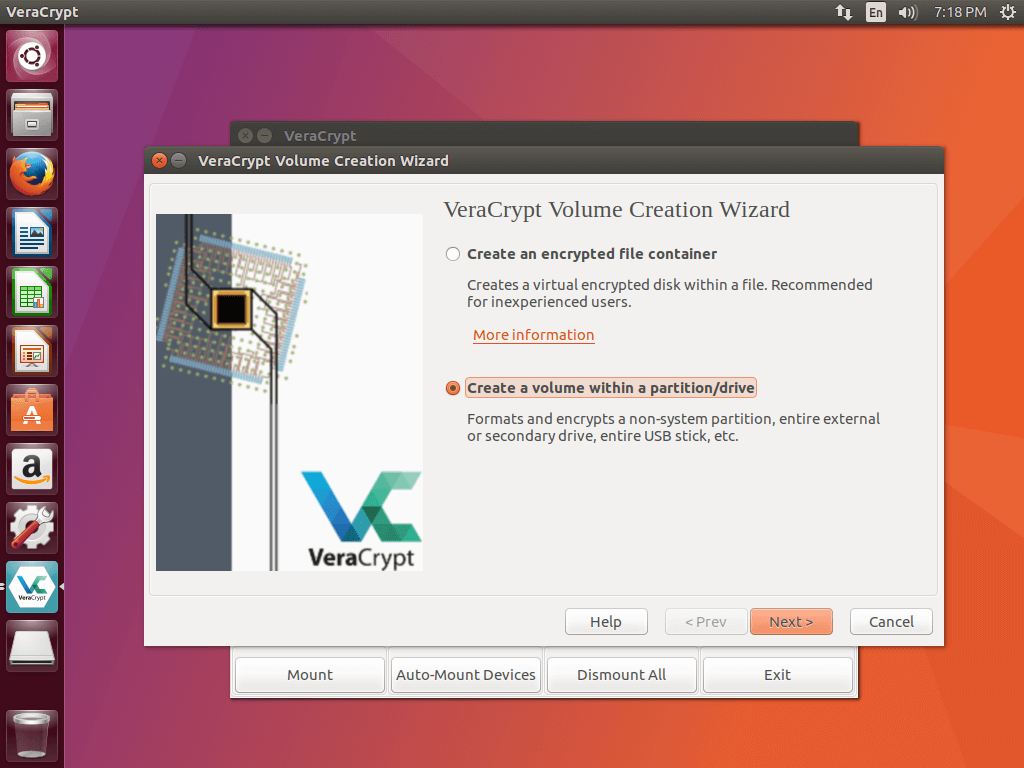
The first set of options that you’ll see will allow you to select which type of volume location you want to use. On Windows, there are three options. Everyone else gets two. The third Windows option is a little too advanced, and goes beyond the scope of this article.
The other two, are very similar and operate the same way. “Create an encrypted file container” creates a file that acts like a virtual hard drive partition. “Encrypt a non-system partition/drive” encrypts an existing hard drive or hard drive partition.
You can choose either one. It really depends on how you plan on using your encrypted volume. The file containers are usually better for smaller files or groups of files. They also have the drawback of behaving like a regular file, so they can be deleted.
Encrypting a drive might be a bit harder to manage, since the drive needs to be mounted in order to be used, but it can hold more data(theoretically) and is a lot less likely to be lost.
Pick A Volume Type
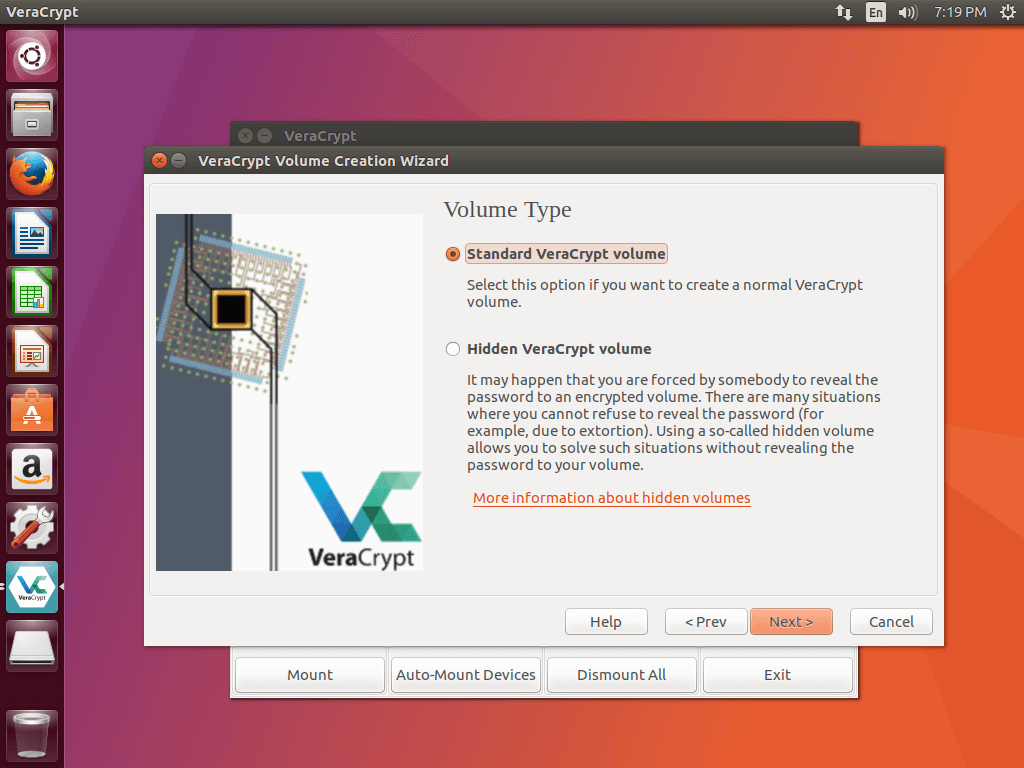
VeraCrypt offers both standard and hidden volumes. Standard volumes are like you’d probably expect. They’re a readily visible drive or file that you can’t access without a valid password.
Hidden volumes aren’t visible, or shouldn’t be without VeraCrypt. You can use VeraCrypt to detect and mount them, but no one but you will know that they’re there. Hidden hard drives or partitions look like free space, random, or corrupted data to disk management programs.
Once again, the choice is entirely yours.
Volume Location
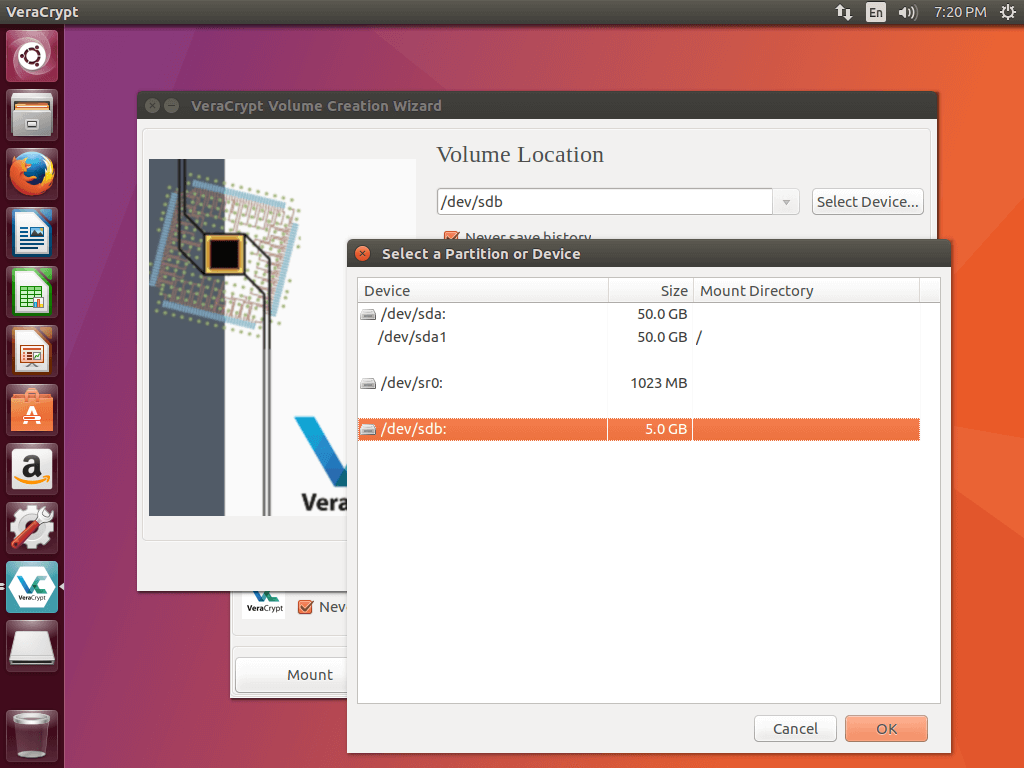
Choose where you want to place your encrypted volume. If you’re going with a partition, there’s not much of a choice. Containers can go anywhere that your computer has adequate space.
Do not choose an existing file or folder. VeraCrypt will erase and overwrite it. The same goes for hard drives and partitions.
Encryption
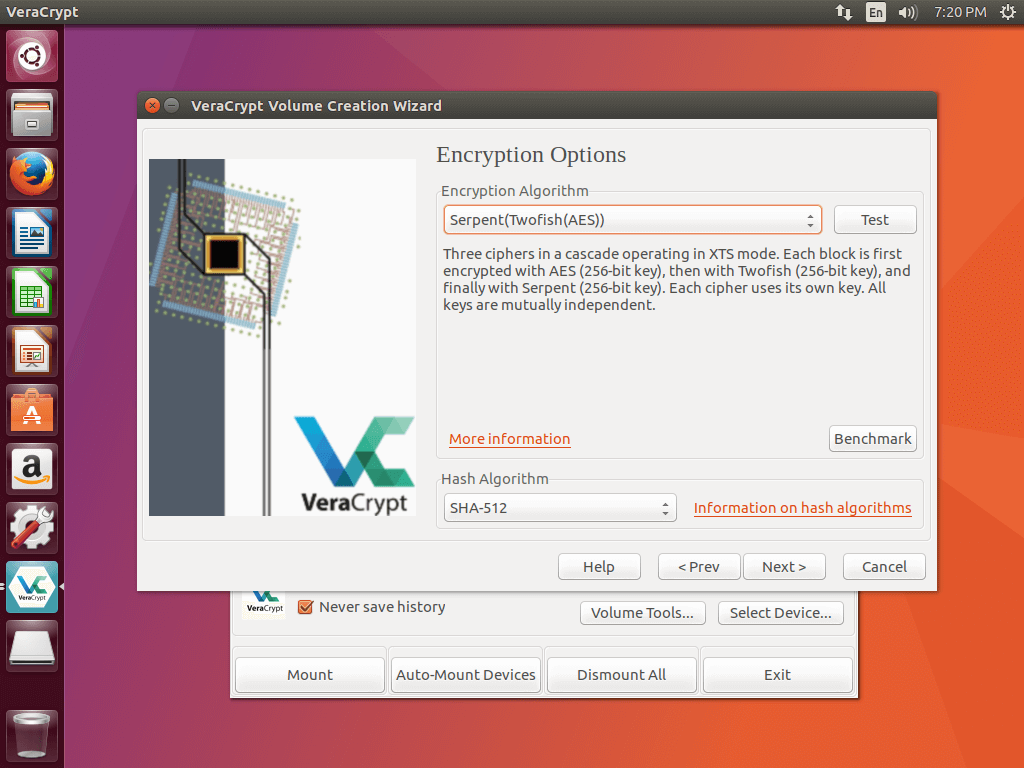
Since encryption is the entire point of using VeraCrypt, this section is pretty important. If you don’t know what you’re doing, select AES and SHA-512. They are both very strong. If you want to go for overkill, VeraCrypt offers two and three levels of encryption. Those will work too.
Volume Size
If you’re encrypting a hard drive or a partition, this window won’t pop up. VeraCrypt will just use the existing drive.
There isn’t much to say here. Pick the size of your volume. Make sure that it’s going to be enough for everything that you want to store going forward.
Set Your Password
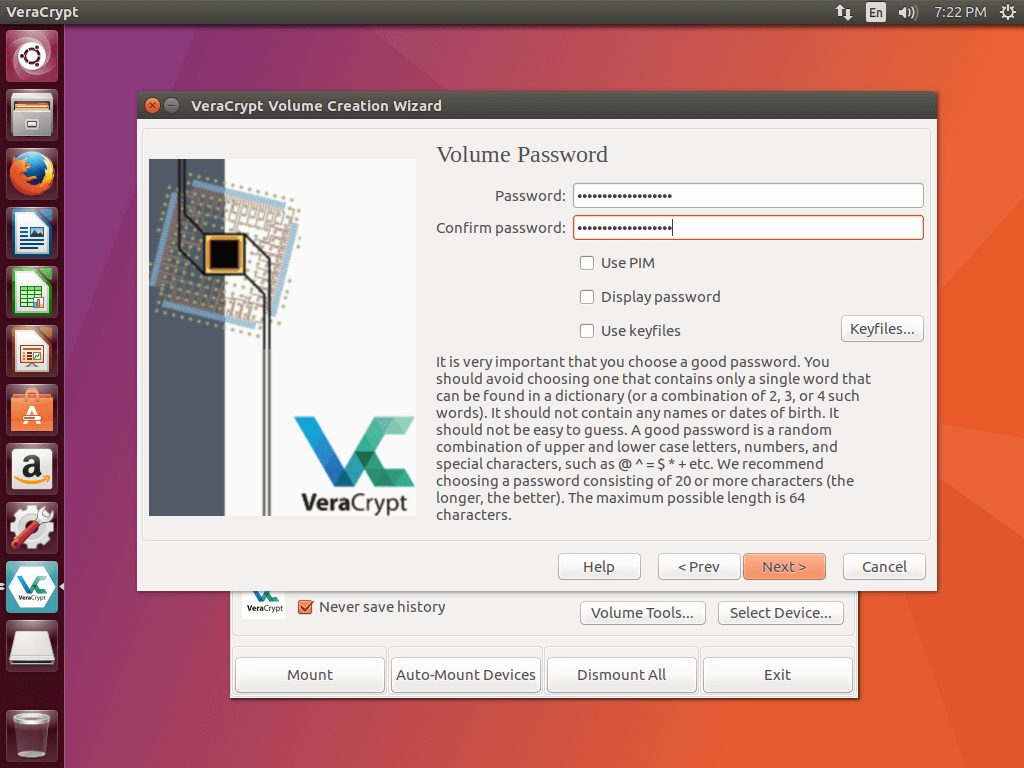
Now, you need to pick a password or phrase. As always, passphrases are better. VeraCrypt recommends choosing 20 or more characters. That’s a good goal.
You absolutely need to be sure that you can remember your password. If you lose or forget it, you are absolutely screwed. Your data is gone.
You can also opt to use a keyfile. A keyfile will act almost like a physical key and will be required to open you volume. You can but that keyfile on a flash drive, for example, and plug it in to your computer only when you need to access your volume. Again, make sure no to lose it for the same reason that losing your password is a bad thing.
Format
Next, you need to pick a format for either your virtual or actual hard drive/partition. VeraCrypt may ask if you need files larger than 4GB. This is because it’s go-to format is FAT. FAT is the file format that you’ll typically find on USB flash drives because it’s fairly universal. The main downside,though, is that it can’t handle files over 4GB. If you’re going to need larger files, tell VeraCrypt now, so you can see other options.
If you’re not going to use FAT, you should probably go with NTFS for Windows machines and EXT4 for Linux.
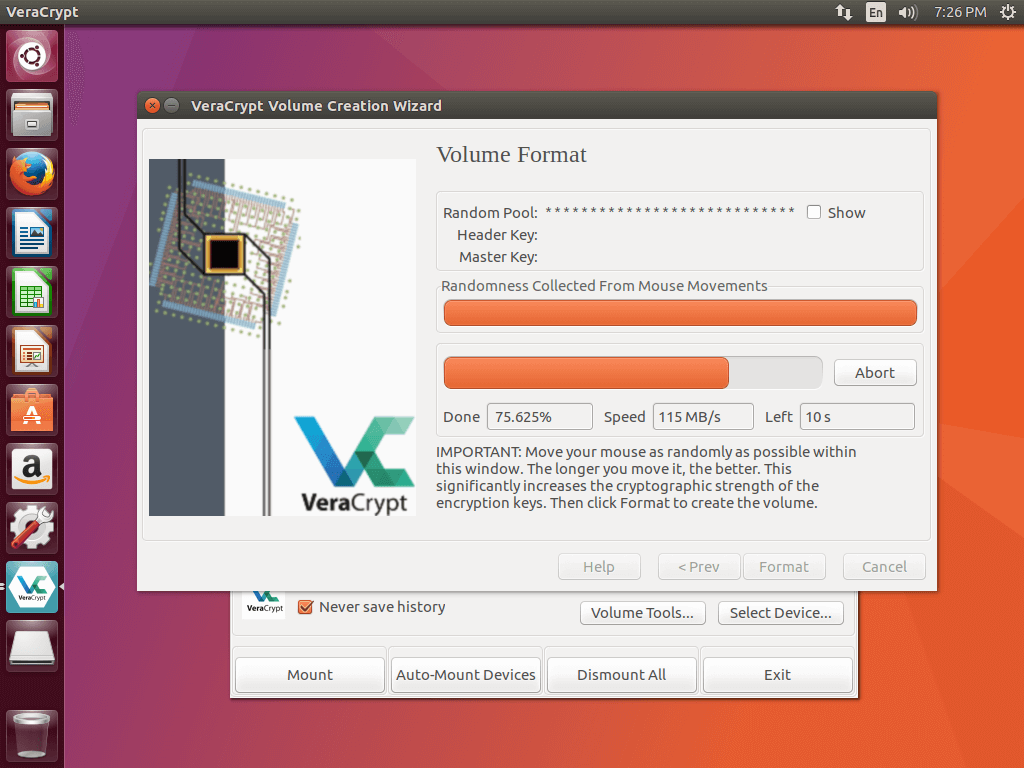
When you’re absolutely sure everything is set the way you’d like, click Format. This is the point of no return, so be absolutely certain.
The setup will run, format the volume, and give you a message at the end telling you that it’s done.
Mount Your Volume
Back at the main menu, select a drive where you want to mount your volume. This is fairly arbitrary, so don’t think too much about it.
On the bottom of the window, click on either Select File… or Select Device… depending on which you created. A window will open up that will allow you to browse to your file or select your drive. When you have it, click Open.
VeraCrypt will drop you back to the main menu and populate the address bar on the bottom with the path to your volume. Click Mount on the bottom to mount your volume.
VeraCrypt will prompt you for your password. Enter it and select the algorithm that you used. If you don’t remember, you can try to let VeraCrypt autodetect it. This would also be the screen to provide your keyfiles, if you made them.
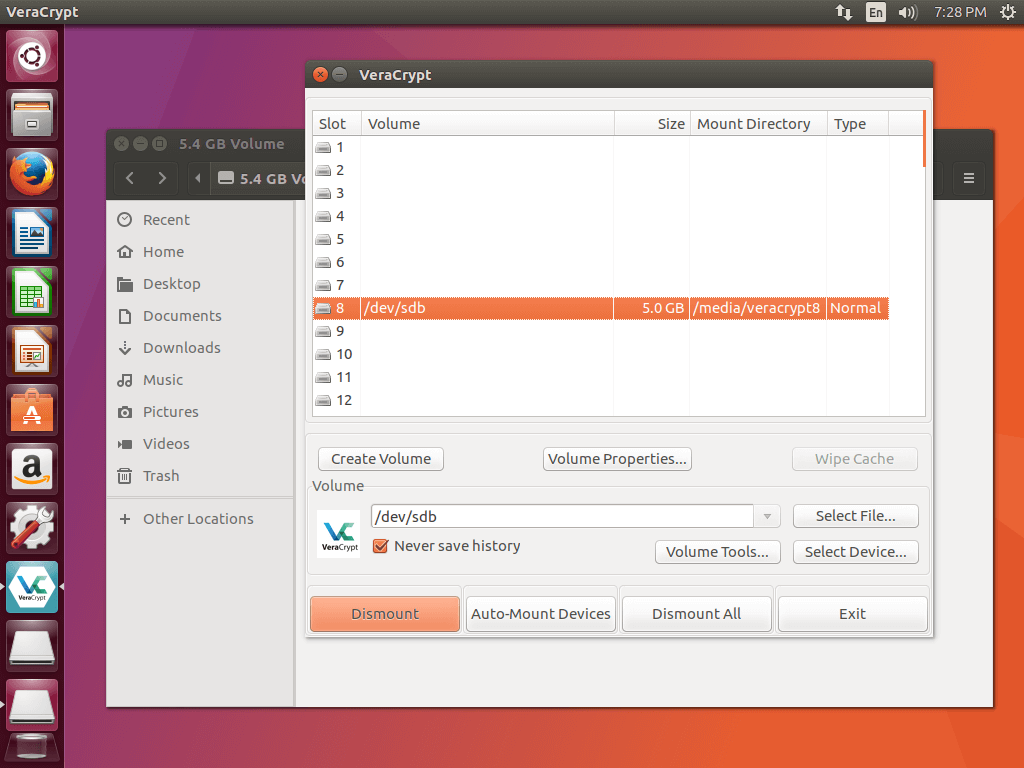
Your operating system and VeraCrypt will both mount your volume to the drive that you specified. You’ll be able to access it like a normal hard drive through your operating system as long as it’s mounted there. When you’re done working with it, go back to VeraCrypt, select the drive, and click Dismount.
Closing
You now have an encrypted volume on your computer. The files stored there should be fairly secure, though nothing is perfect, and there’s no accounting for user error.
There are plenty of options to explore with VeraCrypt. You can choose to go deeper, but you’re also covered for most basic use with what you learned here.


