How to Delete Background in Pixlr Editor

No matter if it’s just for fun or a professional design job, there are numerous reasons why we’d want to delete the background from some photos. It’s one of the basic skills of both professional and amateur graphic designers.
If you’re amongst the second category, you may think you need to purchase some expensive photo editing software. Luckily, that’s not the case. All you need to do is to visit the online Pixlr editor in your browser. It’s free to use and quite capable of doing the job. So, let’s start with background removal.
Wave That Magic Wand (or Throw That Lasso)
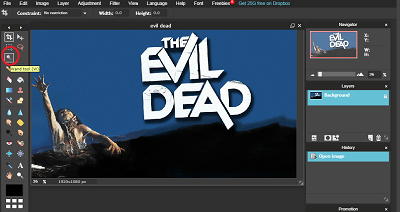
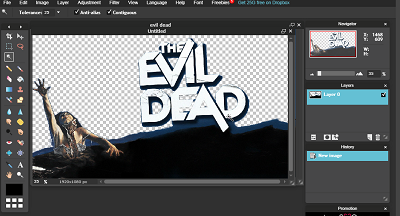
After you’ve opened your image, it’s time to grab the Magic Wand. As all the tools, it’s in the Toolbar on the left side of the screen. You’ll find it in the upper segment.
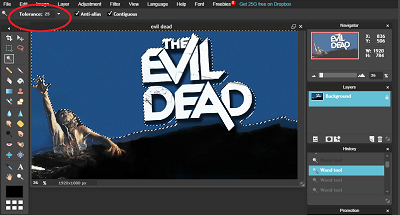
Before you start with this tool, you need to set Tolerance in the menu bar above. This setting enables you to change how detailed your “magic touch” will be. So the more details in front of the background, the bigger the Tolerance. For a simple object with sharp edges in front of the white background, the Tolerance of three is enough. The image below is a bit more complicated, so we went for 25.
After you use the Magic Wand tool, some smaller parts remain unselected. To add them to the selection, hold Shift, and click on them with the Magic Wand Tool.
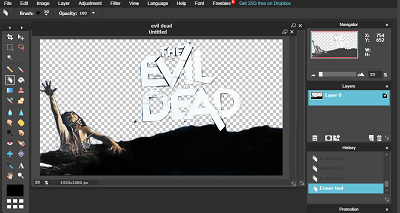
In case your image has far more details, this kind of magic might not work. Then it’s better to use the Lasso tool and make the selection by hand. If you have a very steady hand, you can use the Freehand Lasso, but we would recommend the Polygonal one since it allows you to make the selection gradually.
Invert the Magic
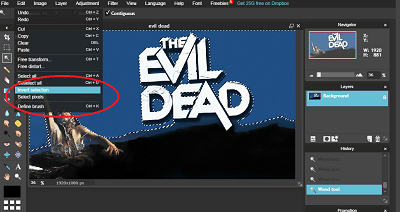
Now that you’ve made the selection using the Magic Wand tool (or the Lasso one), it’s time to invert it. The reason for this is that we don’t want the background, but the object in front of it. It is much easier to select a solid blue-colored field with the Magic Wand tool. That’s because we can quickly shift the selection to the lady.
To do this, choose “Edit” from the menu bar above, then click on “Invert Selection.” The change is pretty obvious: the dotted line is now around our lady (and the earth and letters). The task is almost complete.
Transportation to the Transparent Realm
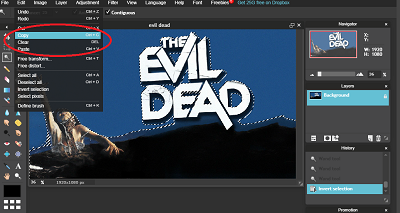
It’s time to get rid of that background for good. To do that, navigate to the Menu bar and choose “Edit” again. This time, click on “Copy.” This will copy the selected area. Since we don’t want the background, our goal is to transport it to a blank canvas.
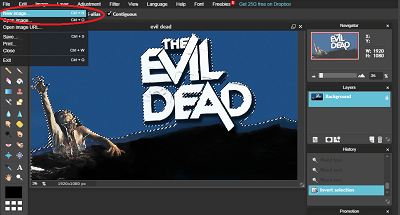
So, the next step is to prepare that blank canvas. Choose “File” from the menu bar, then click on “New Image.”
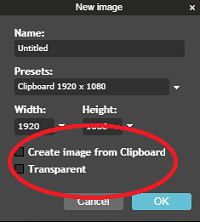
In the dialog box that pops up, you can choose the name of your new background-free image. The preset bellow should be there automatically. The width and height should be there, too, based on the original.
Make sure to check the two checkboxes below. We are creating our edited image from the image on the clipboard, and we do want it transparent since that means no background.
After you click the “OK” button, the new image will have a “checkered” background, meaning that it has none. Choose the “Edit” section again, but this time click on “Paste.” That will transport the image of our lady to our new canvas, without background.
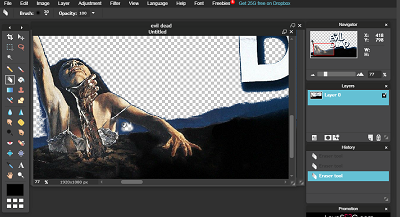
The Manual Labor
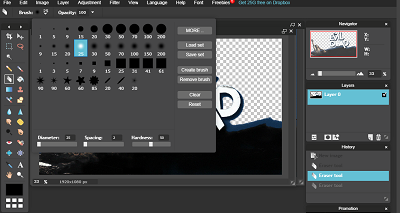
Here’s as far as the magic part goes. You will notice that the edges will need some cleaning up, and that’s manual labor. So, it’s time to choose the Eraser tool from the Toolbar.
After you click on the Eraser tool, you need to click on the Brush in the bar above. That will allow you to pick the size of the brush. You might have to switch sizes from time to time, depending on the project. When you reach a smaller area, you’ll need to pick a smaller brush, too.
With your cursor as the eraser, you’ll need to clean the edges carefully. It could take a while, but some useful shortcuts might make the job easier. If you accidentally go over the age, you can hit CTRL + Z to undo your last move. You will also probably need to zoom in and out during this cleanup process. Use shortcuts CTRL + and CTRL – for that.
Safekeeping
Now all that’s left is to save your new image. Choose “File” on the menu bar, then click “Save As.” You can save your effort as a JPEG file. It is the most user-friendly file extension, but it’s the least professional one at the same time.
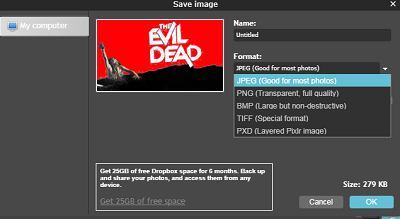
The problem is that JPEG files will always have a background. It can be white, but it’s still a background. On the other hand, PNG files can have a transparent background. So, if your goal is to keep the image as is, save it as a PNG file.
Magical Start, Precise Finish
Although the tools of Pixlr online editor genuinely allow you to create magic, that magic will not lead you straight to the finish. You’ll have to wrap it up by hand. Nevertheless, this last step is not complicated – it only requires precision and some patience.
If you know another magical shortcut, feel free to share it in the comments.