How To Delete Every Other Row in Excel
Excel is a powerful spreadsheet that many people use to organize and analyze information. There are a lot of common “power user” tasks that people need to learn how to accomplish in order to get the most out of the tool. We’ve written several articles showing you some of these power techniques, like this article on how to swap columns. In this article, I’m going to show you how to delete rows – specifically, how to delete every other row, in Excel.
There are three basic ways of accomplishing this task. The first way is to manually select and delete the rows you want to get rid of. While cumbersome and possibly time-consuming, this might be the right approach if your table is very small. The second way is to use Excel’s Filter tool, and the third way is to use an Excel add-on. In this article, I’ll show you how to use each one of these techniques. Then you can decide for yourself which technique is most suitable for your immediate need. Let’s get started!
Delete Every Other Row Without Filters
Manually selecting and deleting the rows you don’t need might take quite a while if your table has hundreds or thousands of rows. However, if your table is small enough, it might be the fastest approach.
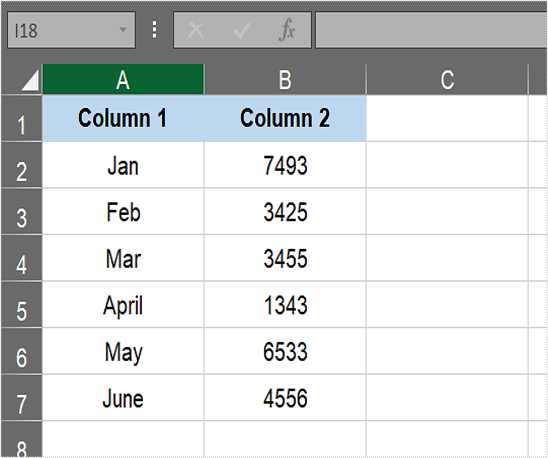
For an example, let’s set up a table in a blank Excel spreadsheet. Enter ‘Column 1’ and ‘Column 2’ in cells A1 and B1. Next, input ‘Jan’ in A2, ‘Feb’ in A3, ‘Mar’ in A4, ‘April’ in A5, ‘May’ in A6 and ‘June’ in cell A7. Add some random numbers to each cell in the range B2:B7. Your table will then have two columns consisting of six rows (not including the headers) as in the screenshot directly below.
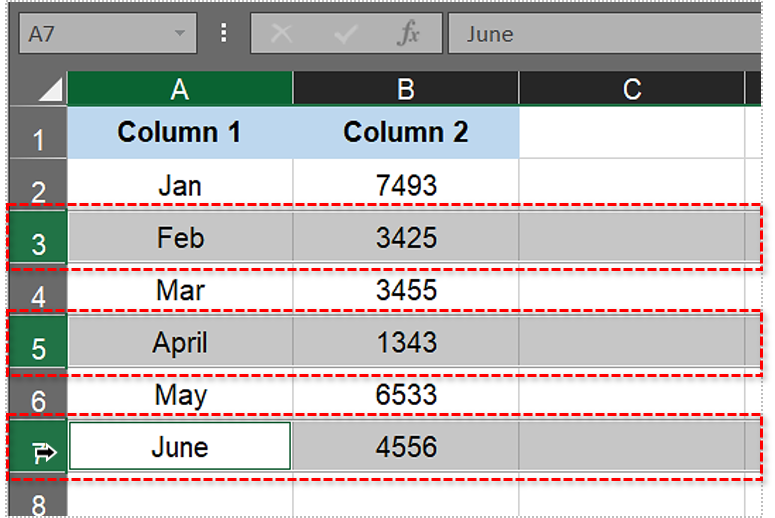
Rows 3, 5 and 7 are every other second row in the table above as it also includes a column header. Click the “3” on the far left of the spreadsheet to select the third row. Hold the Ctrl key and click the row 5 and row 7 to select the fifth and seventh rows.
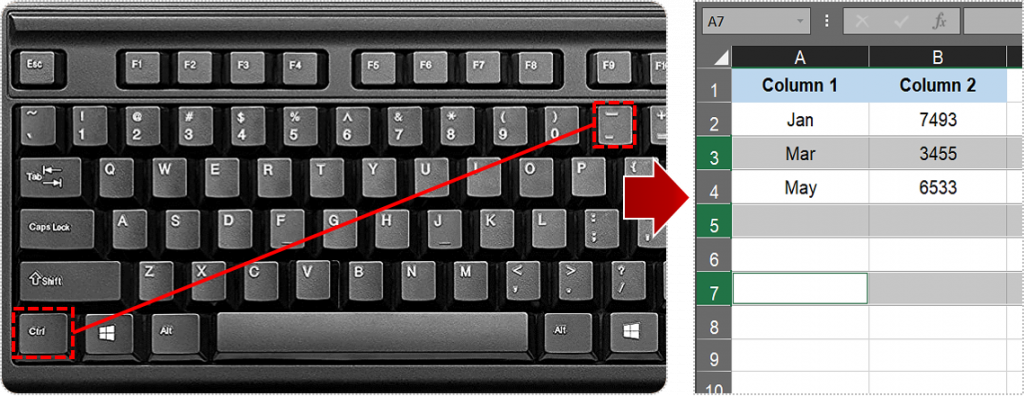
Hold down the Ctrl key and then press the – key. That will delete the selected third, fifth and seventh rows. You can also right-click the mouse and select “Delete” from the context menu that appears. Either way, your table will be left with three remaining rows.
Delete Every Other Row with Excel’s Filter Tool
The above technique works fine for small tables, but what if your table has 600 rows? Or 6000? Or 600,000? It would take forever and a day to get all those rows selected, and the first mis-click would force you to start the process all over!
For larger tables, there’s a powerful way to delete rows using the Filter tool. Excel’s filtering tool enables you to filter out columns from spreadsheet tables. When deleting rows, you can filter out those you need to keep and quickly select the ones to erase. To set up filters, you’ll need to add an extra table column. You’ll use this column to hold the numbers that will indicate whether the row is one that will be deleted or one that will be kept.
To add filters to the spreadsheet table, press the Ctrl + Z hotkey to undo the earlier erasing of the third, fifth and seventh rows. Enter ‘Filter Column’ in the cell C1. Select C2, enter ‘=MOD(ROW(),2)’ in the fx bar and press the Return key. Then click the bottom right corner of cell C2, hold the left mouse button and drag the cursor down to C7 to copy the MOD function into the rest of the column as shown below.
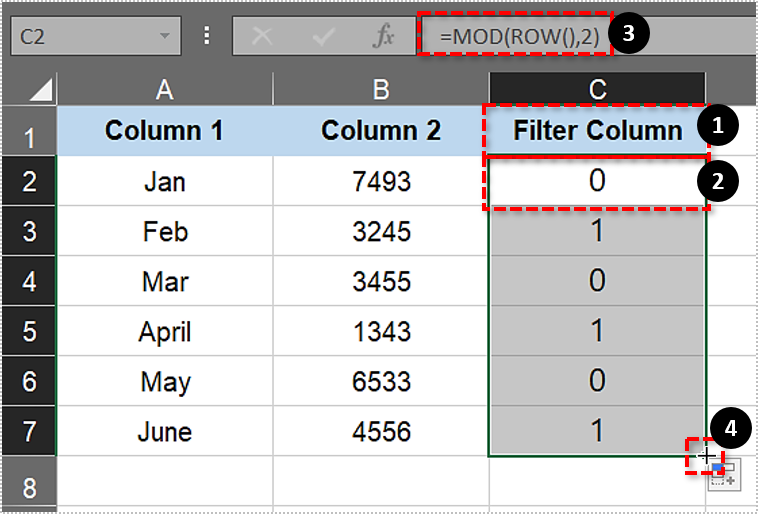
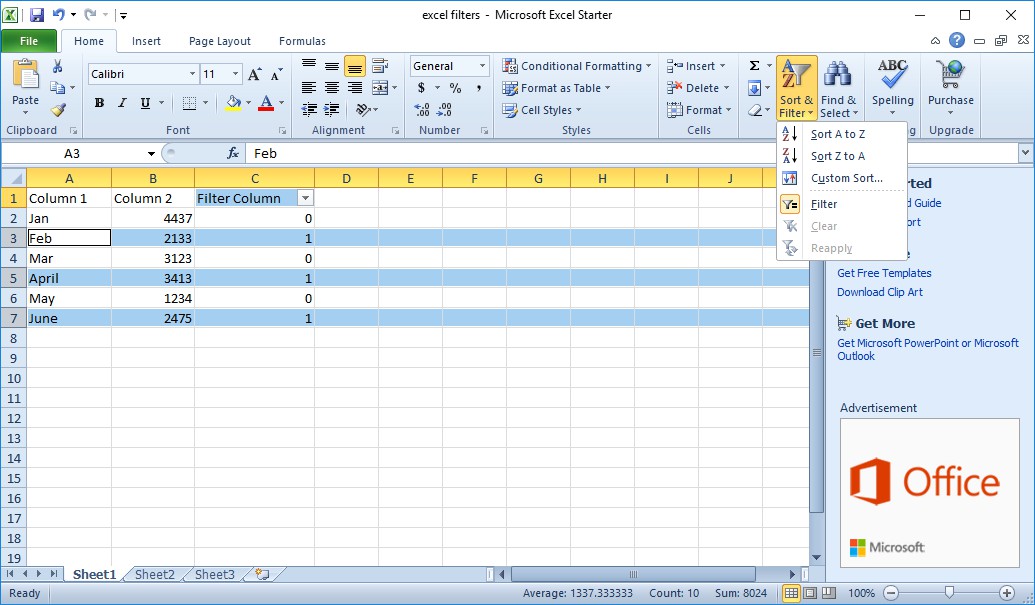
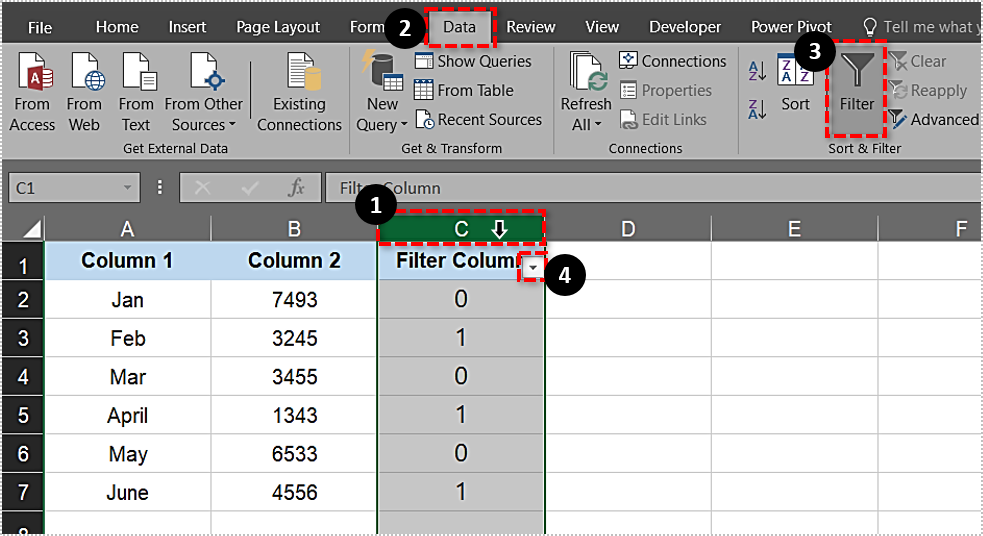
Now we have a 0 in every other row, and a 1 in the alternating rows. Perfect! To add the filters to table, click the C column header. Press the Filter button on Excel’s Data tab. The Filter Column cell will include a small arrow button on it as shown below.
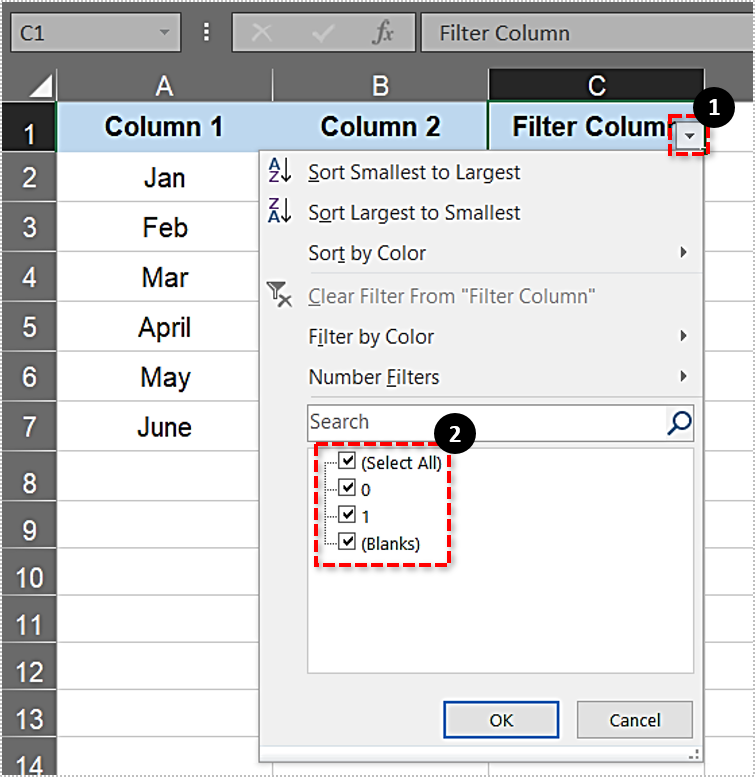
Click the small arrow to open the filtering options as below. There you can select 0 and 1 check boxes. Deselecting those check boxes filters table rows out from the table.
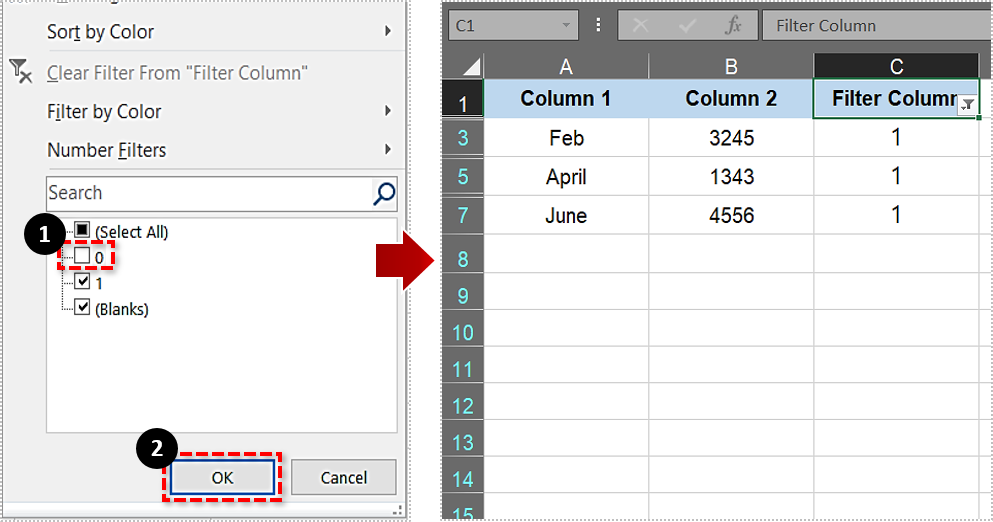
To erase every second row from the table, click the 0 check box. Then press the OK button. That will filter out every other first row as in the snapshot below.
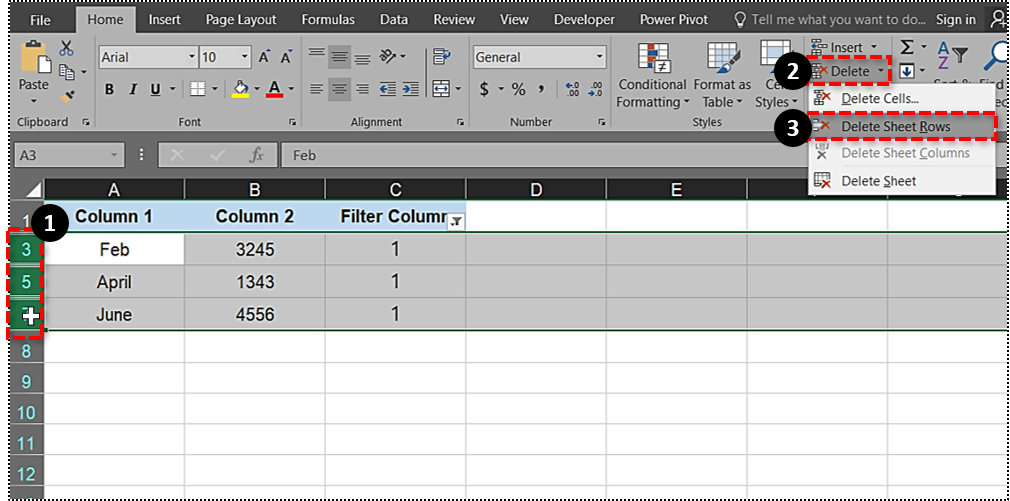
Now you can quickly erase every other second row from the table. Click the row 3 header and drag the cursor down to 7 to select the third, fifth and seventh rows. Press the Delete dropdown on the Home tab and select Delete Sheet Rows.
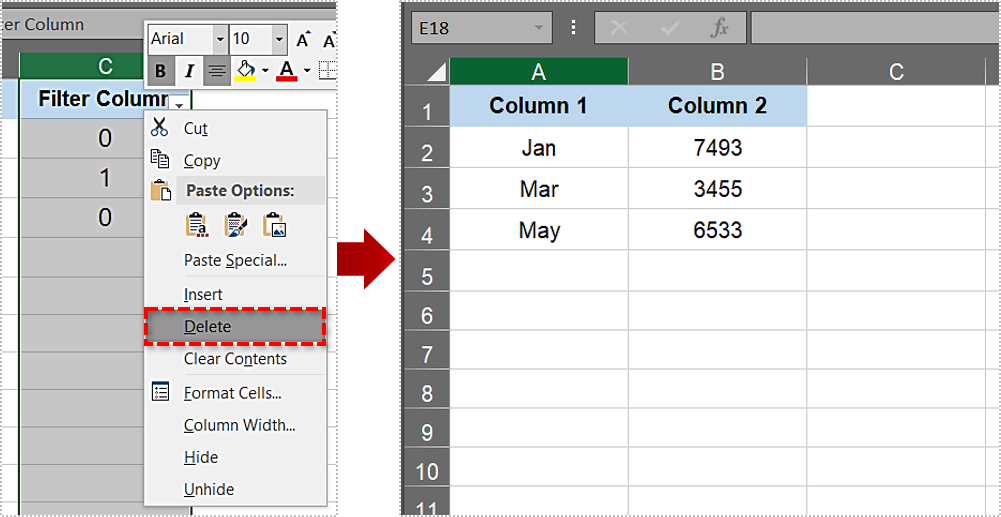
This will leave your table apparently empty – but the rows you want are still there, just hidden by the filter tool. To make them reappear, click the arrow button on the Filter Column cell, and reselect the 0 check box. Press the OK button to close the filtering options. That will restore the Jan, Mar and May rows as shown below.

Now you can remove the filtering column. Right-click the C column and select the Delete option. That will erase column C from the table.
In this example, you only added two filters to the table. You can modify the MOD function to add more filter values so that you can delete every 3rd row, every 4th row, or so forth. The =MOD(ROW(),2) function gives you two options. To filter out every third row, you would use the function =MOD(ROW(),3). Just edit the value in the function to configure how many filter values it adds to the column. Of course, Excel users can also manually enter the filter numbers in the column without MOD; but that might take some time for larger tables.
Delete Every Other Row with Kutools For Excel
Kutools For Excel is an add-on that expands the application’s toolkit. The add-on includes a Select Interval Rows & columns tool with which you can select rows and columns at specified intervals. Thus, that’s also a handy tool to select and then delete every other row with in Excel. Check out this website page for further Kutools details.
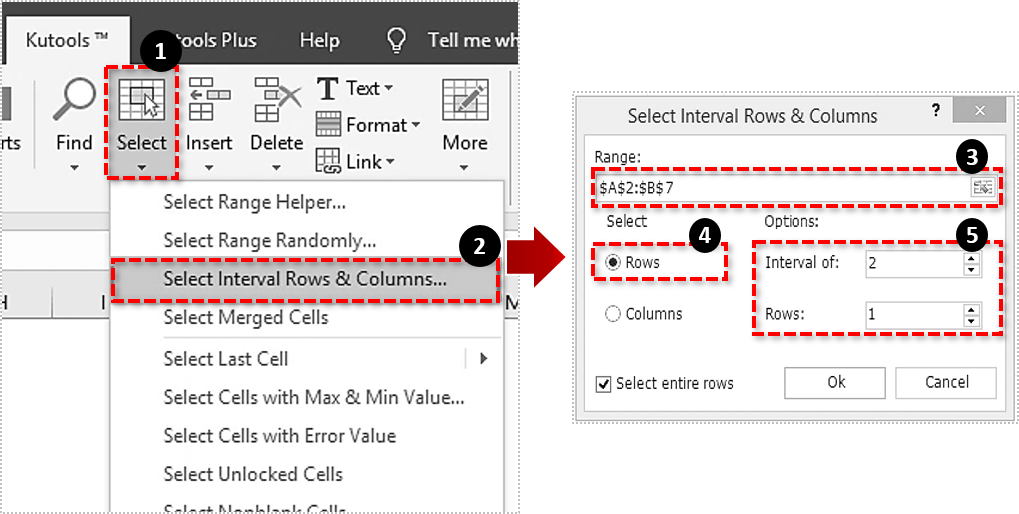
If you add Kutools For Excel to the application, you can open the tool by pressing the Select button on the Kutools tab. Click Select Interval Rows & columns… on the button’s menu. That will open a Select Interval Rows & Columns window from which you can configure the row selection by adjusting the Interval of and Row values. Thereafter, you can delete the highlighted row selection.
You can manually delete every other row in a small table, but Excel’s Filter tool is fairly essential for deleting every other row in larger spreadsheet tables. With that tool you can filter out all the rows you need to keep, and then quickly erase those that are no longer required. An add-on like Kutools for Excel can also accomplish this for you. This YouTube video further demonstrates how you can filter out and then delete rows.
Got any other cool ways to delete rows in Excel? Share them with us below!