How to Get Rid of Extra Rows in Google Sheets

Blank rows are often unavoidable when dealing with large amounts of data. Removing them can be inconvenient, especially if they’re littered randomly across the sheet. Fortunately, there are simple ways of dealing with this problem.
In this article, we’ll show you how to get rid of any extra rows in Google Sheets.
Simple Manual Deletion
If the number of rows that you have on your sheet is still manageable, the simplest solution for getting rid of any blank rows would be to just manually delete them. This is as easy as clicking on the leftmost section of the row, thereby selecting it entirely, right clicking, then selecting delete row.
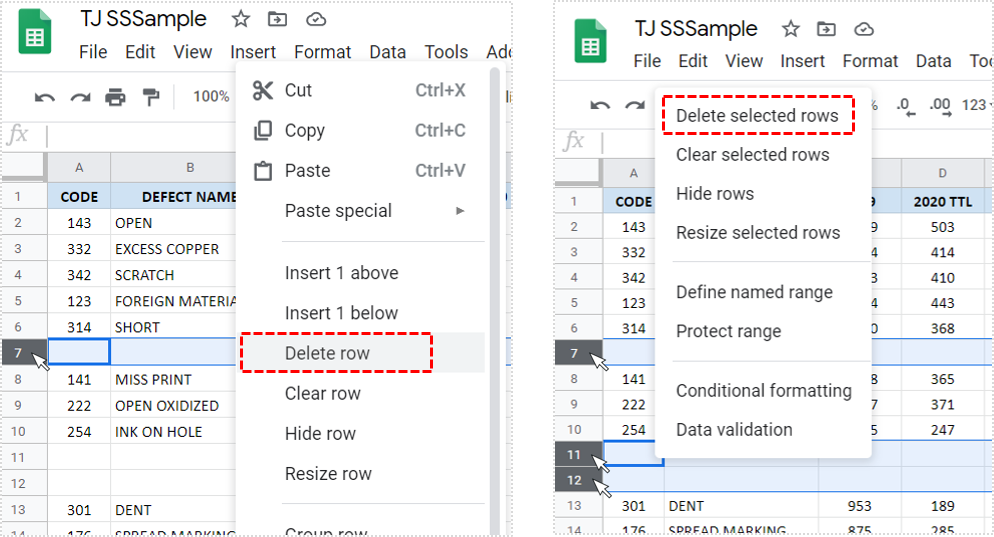
Multiple rows can be selected by simply clicking and dragging on the leftmost side, or by holding down CTRL while you click each row individually. Once you’re finished selecting which rows you want to delete, just right click as instructed above, then choose Delete Selected Rows.

Using Data Filters to Find Blank Rows
Manual deletion is all well and good, but if your data set consists of thousands of entries, then looking for blank rows one by one won’t be easy. Fortunately, there’s a much better solution – filtering the data that you have. By using data filters, you can automatically scour through an entire sheet, no matter how many entries there are, find all the blank rows, then delete them all at once.
To be able to use Data Filters, you’ll have to have at least one row at the top of the sheet that can be used as criteria to select from. For example, if you have a set of names, telephone numbers and addresses, the topmost row should be labeled as name, telephone number, and address respectively. This creates an anchor that allows you to choose which data to display.

Once you’ve created a category row, you can use data filtering by doing the following:
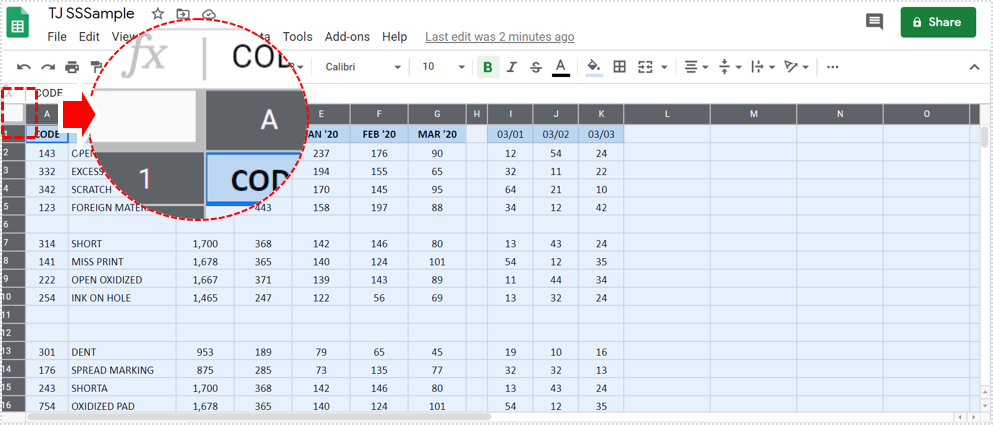
- Select the entire spreadsheet. You can either click and drag to select if you don’t have much data, or click on the top leftmost empty cell to the left of A and above 1.

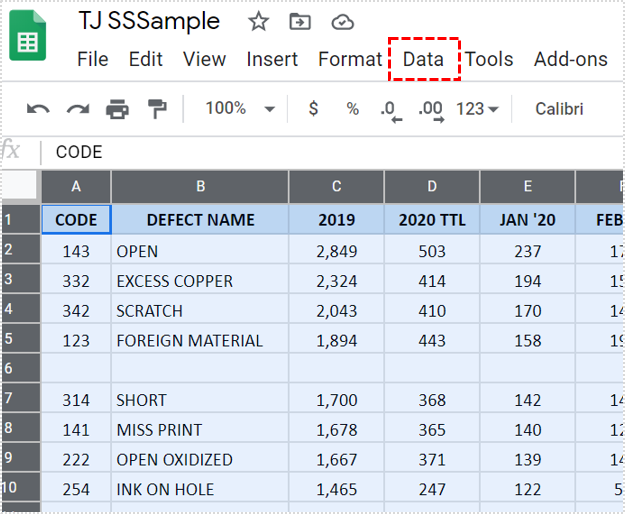
- Click on Data on the top menu.

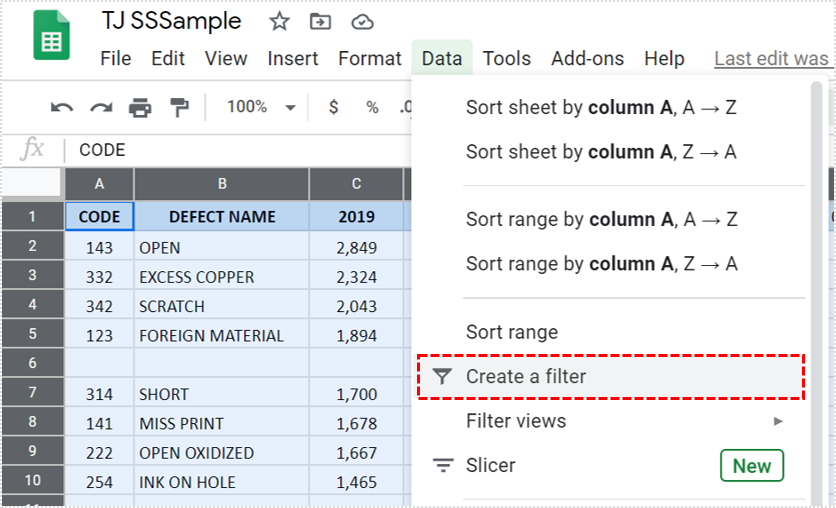
- Click on Create a Filter. This will then turn the topmost row of your sheet into a category selector

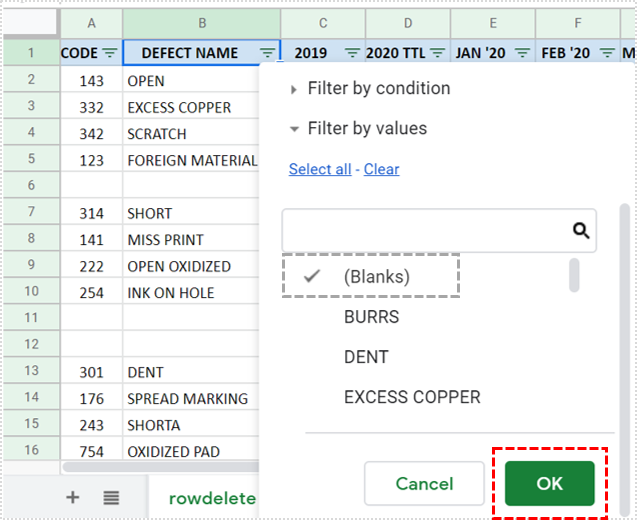
- Click one of the down arrows of any category. This will cause a filter menu to drop down. Click on Clear to deselect all of the filter parameters, then click on Blanks so that it’s the only one with a check.

- Click on OK. This will then display all of the rows that have blanks on that category.

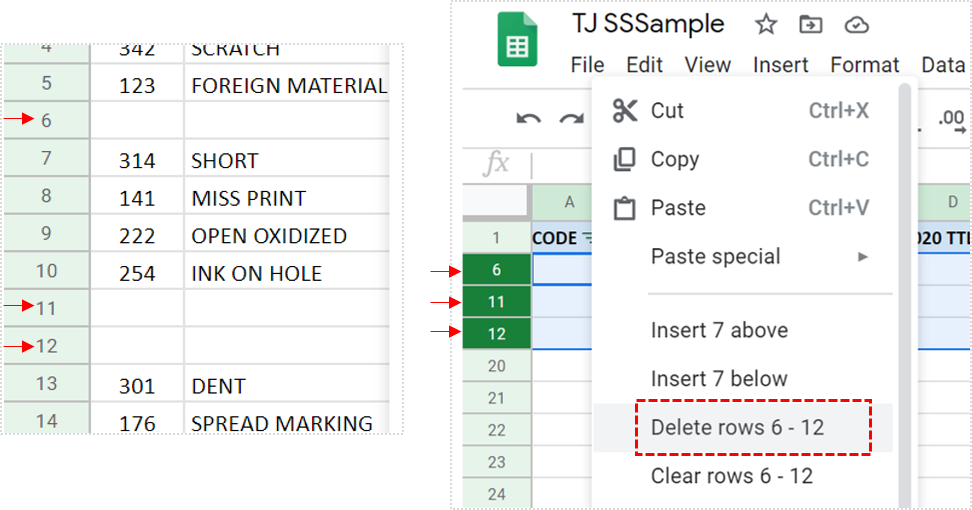
- If the number of results is manageable, you can delete the rows manually. If not, you can repeat steps four and five for the other categories until you whittle the results down.

- Once you’ve deleted all of the blank rows, select the entire sheet again.

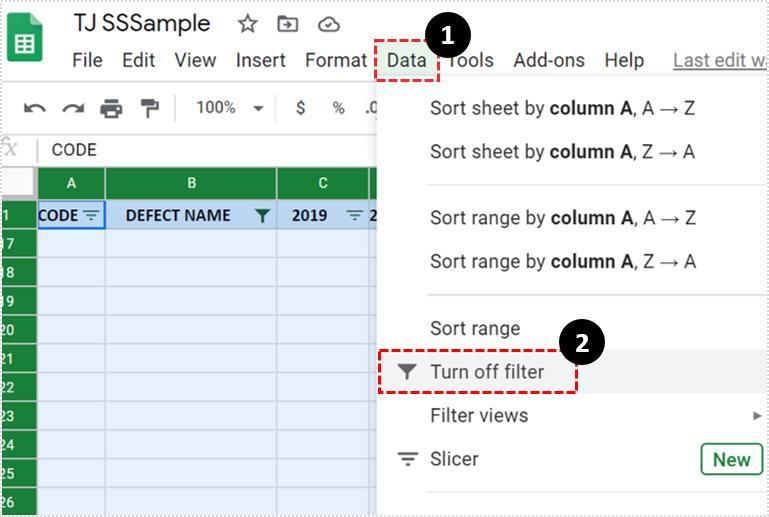
- Click on Data and select Turn Off Filter. This will return the shoot to its former state now with the blanks deleted.


Sorting Data to Find Blanks
If creating categories for your data set would prove inconvenient or impractical, the same process can be done through sorting. Sorting accomplishes the same as filtering does, only the rows aren’t being moved, rather the data in the cells. This means that more often than not, your new data won’t be in the same row as they were before sorting.
If this doesn’t pose a problem for you, then you can find blanks by following these steps:
- Select the entire sheet.
- Click on Data then select Sort Range.
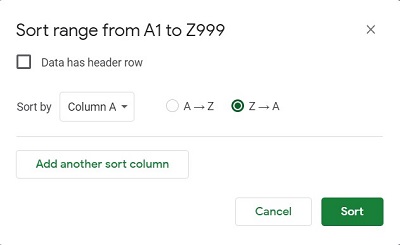
- Sorting out the blanks will be easier if you use more than one column for sorting. Click on Add another sort column to do so.
- Click on the Z to A radial to the right of the Sort By option, then click Sort.
- The sheet should now display blank rows together. You can now easily select and delete them manually.
As said, there’s no way to return the sheet to its former arrangement as you can do with filtering. Undoing the sort will restore the blank rows. If you were going to sort the sheet anyway, this would be fine. But if you wish to retain the former arrangement, stick to filtering.
Knowing the Right Steps
Removing empty rows in a sheet, even one with thousands of entries, is simple if you know the right steps. We’ve shown you a few of the simplest ways to accomplish this task without much hassle.
Do you have any other tips on how to get rid of extra rows in Google Sheets? Share your thoughts in the comments section below.