


What Does Archive Mean in Google Photos?

The sidebar of Google Photos has various useful tabs to help you navigate through the app and organize your files. One of these tabs is the ‘Archive’ folder.
This folder wasn’t available in the vanilla version of the app; it was added in 2017. The ‘Archive’ tab raised lots of questions – Is archiving the same as deleting items? Why do users require this feature?
Well, read on, because this addition to Google Photos has plenty of upsides. In this article, we’ll explain what Archive is, and how to use it to manage your photos and videos.
What Is Google Photos Archive?
The ‘Archive’ feature in Google Photos is purely organizational. Unlike some other tools that use the term ‘archive’ to store old or deleted files, in Google Photos you use it only to hide certain elements from your main photo tab.
For example, when you sync your Photos account with all your folders, plenty of images that get backed up to Google Photos aren’t those that you want to see when you first open your tab. Images like screenshots, receipts, some app images, selfies, and others that don’t look good on the photo stream.
Previously, you couldn’t remove these images from the main stream, and if you synced a particular folder, all the images inside appeared there. The only way to get rid of those thumbnails was to remove the image from the account completely – and sometimes you don’t want to do so.
This feature will remove images (or videos) that you don’t want to delete, but want to keep away from your main stream. In other words, it’s a way to declutter your main screen and organize it in any way you want.
These images will remain in their designated albums and the Archive folder, so you can access it whenever you want.
How to Move Images to Archive on Android or iOS
Moving images to ‘Archive’ from a smart device is a fairly straightforward task. First of all, you’ll need to get the Google Photos app from the Play Store or App Store and install it on your device. Then follow these steps:
- Launch the Google Photos app.
- Sign in to your Google account.
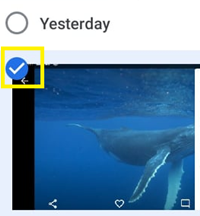
- Choose a photo from the photo tab that you want to archive.
- Select it by ticking the grey checkmark button at the top-left of the thumbnail. It should turn blue. You can also choose multiple images at once.

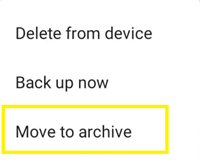
- Tap the ‘more’ icon (three vertical dots) on the top-right of the screen.
- Choose ‘Move to Archive’ from the drop-down menu.

When you move the image to the archive, you’ll notice that it disappeared from the main photo tab.
Moving Images to Archive on Your Computer
There isn’t too much difference between moving images to archive from your computer and moving them from the app. This is how you should do it:
- Go to the Google Photos official website.
- Sign in to your account.
- Select the image that you want to move to archive from the main stream. If you want to select more, hold ‘Shift’ key and select a different image to choose the range.
- Click the ‘more’ icon (three vertical dots) at the top right of the screen.
- Select ‘Archive.’

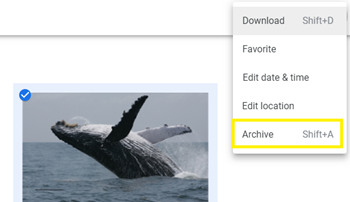
Alternatively, you can hold Shift + A instead of steps 4 and 5.
How to Access the Archive
All the archived images go to the same folder. If you want to check them, follow these instructions:
- Launch the Google Photos app.
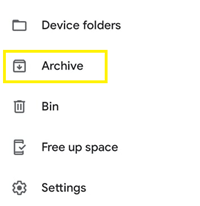
- Tap the navigation drawer (three horizontal dots) from the top-left of the screen. If you’re on your PC, the process is the same, just click it.

- Go to the ‘Archive’ tab.


The ‘Archive’ screen will display all images in the order the pictures were taken, and not by the order that they were moved to the folder. Therefore, nothing will change compared to the main photo feed, except that those images won’t be there anymore.
How to Unarchive Images
Unarchiving images means returning them to their place on the main photo screen. If you want to do that, follow the instructions:
- Launch the Google Photos app (or go to the official website from the computer).
- Sign in to your account.
- Click the navigation drawer to the top-left.
- Select ‘Archive.’
- Choose an image that you want to unarchive. You can select multiple images.
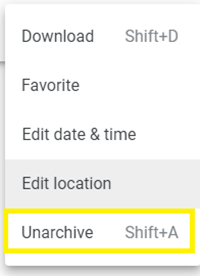
- Select the ‘more’ icon to the top-right of the screen.
- Choose ‘Unarchive.’

The image will disappear from the ‘Archive’ folder and reappear on the photo stream.
If you accidentally unarchive the wrong image, you can return it to the archive with the help of the instructions from the previous sections.
Archiving Is Not Deleting
Once you archive photos, they’ll just remain hidden from the home screen. These photos won’t be deleted unless you manually choose the ‘Delete from device’ option. They will remain in the albums that you’ve added them to, and they will still appear in search results and local storage.
However, when you create movies and animations with the help of Google Images features, these items will also not appear.
Do you like to keep things organized? Why do you archive certain images and videos? Share your experiences with the community in the comments section below.


One thought on “What Does Archive Mean in Google Photos?”