


How to fix ‘The specified module could not be found’ errors in Windows 10

If you’re seeing ‘The specified module could not be found’ errors in Windows 10, chances are that you have just downloaded something or are trying to install something onto your computer. The installer cannot find a specific file or dependency and throws up this error. While frustrating, this error is simple to fix.
The full error syntax should be ‘There was a problem starting C:Program.dll. The specified module could not be found’. Where you see ‘C:Program.dll’, you may see something completely different. It is that part that is important though as it tells you exactly what is causing the problem.
For example an error like this I saw the other day read ‘There was a problem starting C:WindowsSystem32LogiLDA.dll. The specified module could not be found’. This refers to the Logitech Download Assistant which downloads drivers for Logitech peripherals. The .dll file had been deleted for some reason and Windows couldn’t find it, hence the error.
Fixing it was just a matter of downloading a fresh copy of the Logitech Download Assistant and installing it. Normally I wouldn’t use such a program but the client insisted. That isn’t the whole story though so read on.
Fix ‘The specified module could not be found’ errors in Windows 10
In the example above, I could fix ‘The specified module could not be found’ error by reinstalling the application in question. Before that however, I had to look at potential reasons why the file was unavailable. One key reason for this is malware or a virus. It isn’t the only reason but is common enough to warrant a little action on our part.
As .dll files are shared resources that can be used by many programs, they are often prime targets for malware. So before you go replacing any files or downloading any new programs, it makes sense to perform a full antivirus scan. Then run a full malware scan. It takes time and will delay your using the computer but it is an essential step in keeping your computer safe.
Run the scans and then:
- Identify the file causing the errors by reading the error syntax. In the example it was LogiLDA.dll. Yours may differ.
- Perform a web search if you don’t recognize the program.
- Uninstall that program from your computer and reboot.
- Install a fresh copy of the program from the vendor.
- Retest.
If you don’t recognize the program causing the error and don’t think you need it, feel free to go to Step 3 and then jump to the retest. If you don’t need or want the program there is no need to reinstall it. Otherwise, make sure to download a fresh copy of the file from the vendor’s website.
If that doesn’t work, we need to perform a System File Check and then run the Deployment Image Servicing and Management tool (DISM).
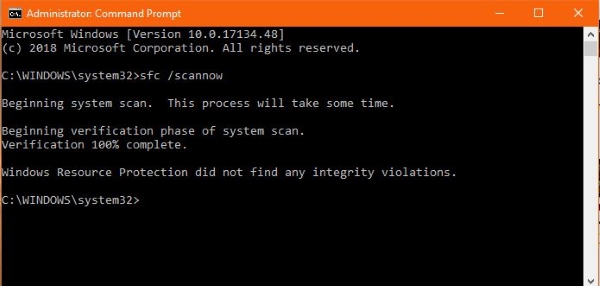
- Right click the Windows Start button and select Command Prompt (Admin).
- Type ‘sfc /scannow’ and hit Enter.
- Allow the process to complete.
- Type ‘DISM /Online /Cleanup-Image /RestoreHealth’ and hit Enter.
- Allow the process to complete.
The System File Checker analyzes system files including .dll files for corruption and will replace any it cannot find or cannot read. Running DISM afterwards will further check Windows core and Windows Store for the same. Both tools will automatically download and repair any files it cannot read or find.
Running these tools takes time but if reinstalling the program in question didn’t work or isn’t possible, this should get you back up and running again.
If that doesn’t work, we have one final option. System Restore.
Use System Restore to fix ‘The specified module could not be found’ errors in Windows 10
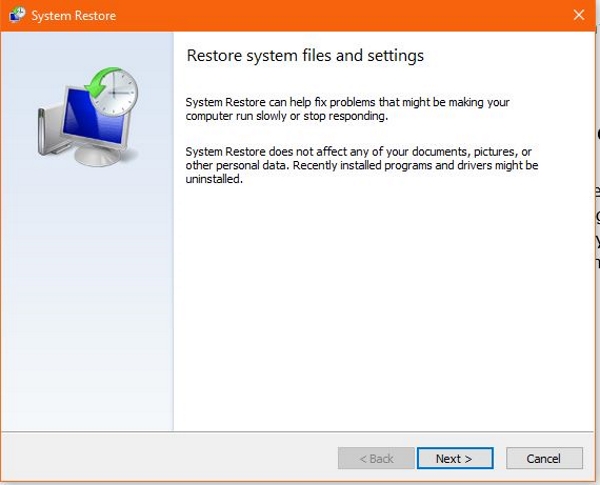
System Restore is the task of last resort but if reinstalling the program or running System File Checker and DISM didn’t work, this should. Think back to before this error began happening and pick a date. If it wasn’t caused by a virus or malware, chances are it was caused by a system change of some kind. A Windows Update, new program installation or other change you made.
- Type ‘control’ into the Windows Search box and select Control Panel.
- Select Recovery and then Open System Restore.
- Select Next in the popup window.
- Select an appropriate date in the next window and select Next.
- Check the selection and select Finish to perform the restore.
Once complete, your computer should return to normal and not throw that error. If you want to continue troubleshooting, you need look no further than whatever you did after that System Restore date and the time you first saw the error. Good luck with it!


One thought on “How to fix ‘The specified module could not be found’ errors in Windows 10”