


How to Remove or Hide Preference Panes in OS X System Preferences
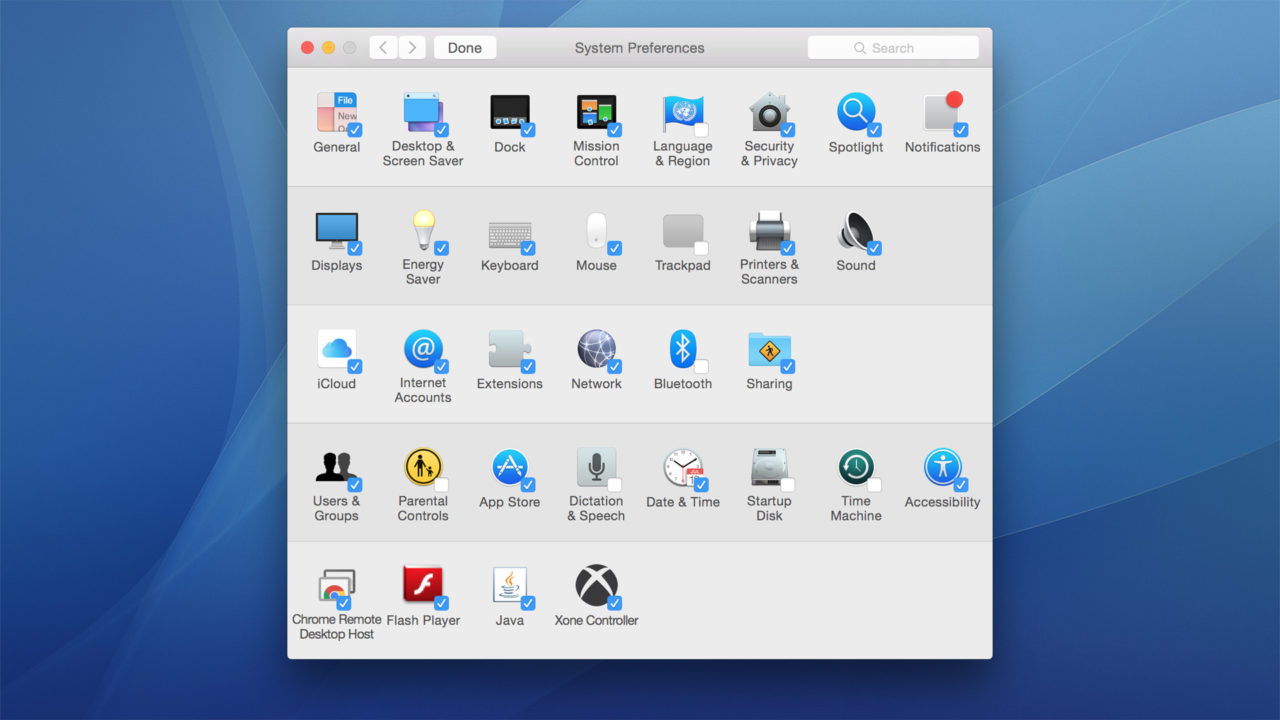
The System Preferences window in OS X contains most of the important settings and configuration options for your Mac, ranging from network interfaces, to user account setup, to desktop wallpaper options. Even third party apps and utilities like Java and Adobe Flash have preference panes in System Preferences. But not every user needs regular access to every preference pane. Here’s how you can remove or hide preference panes in OS X System Preferences.
Hide OS X Preference Panes in System Preferences
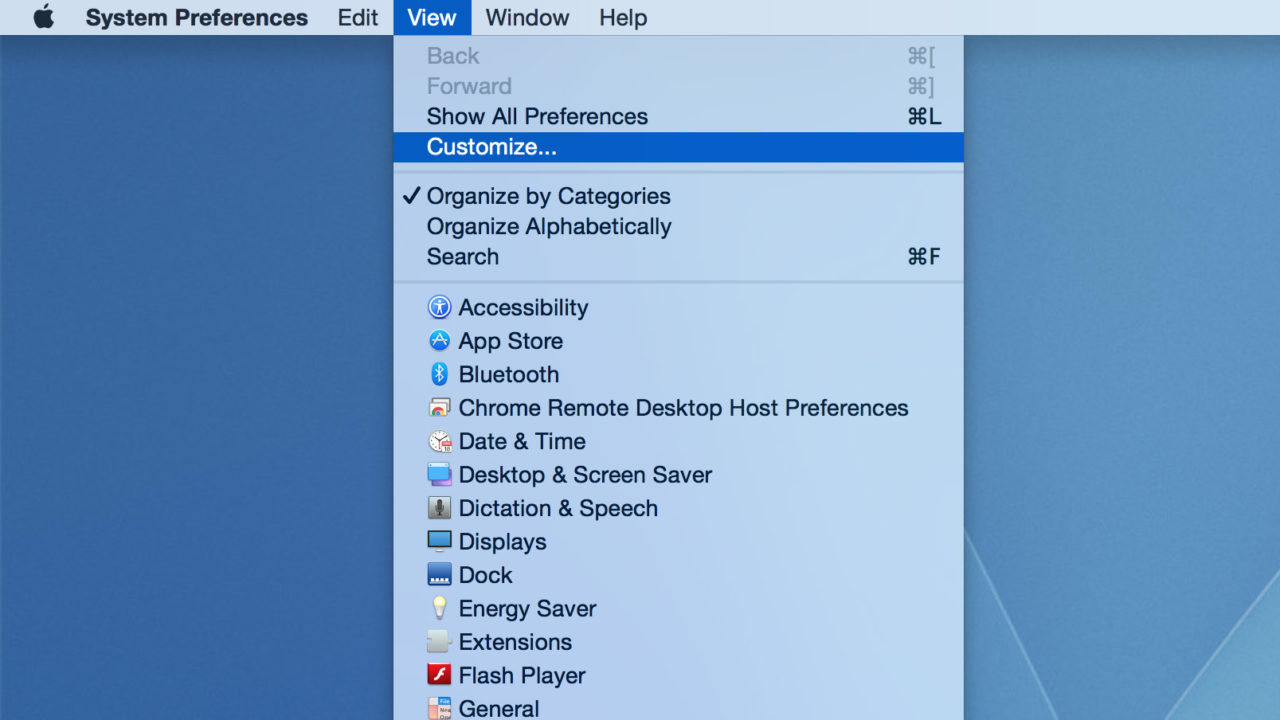
To hide preference panes in OS X System Preferences, first launch System Preferences from your Dock, or by searching for it with Spotlight. Once it’s open, go to View > Customize in the System Preferences menu bar.
A small checkbox will appear in the lower-right corner of every System Preference icon. Uncheck the box for any icon you want to hide in System Preferences, and then click Done at the top of the window.
After clicking Done, your new, simpler System Preferences window will be shown, displaying only the preference panes and icons you need to access regularly on your Mac.
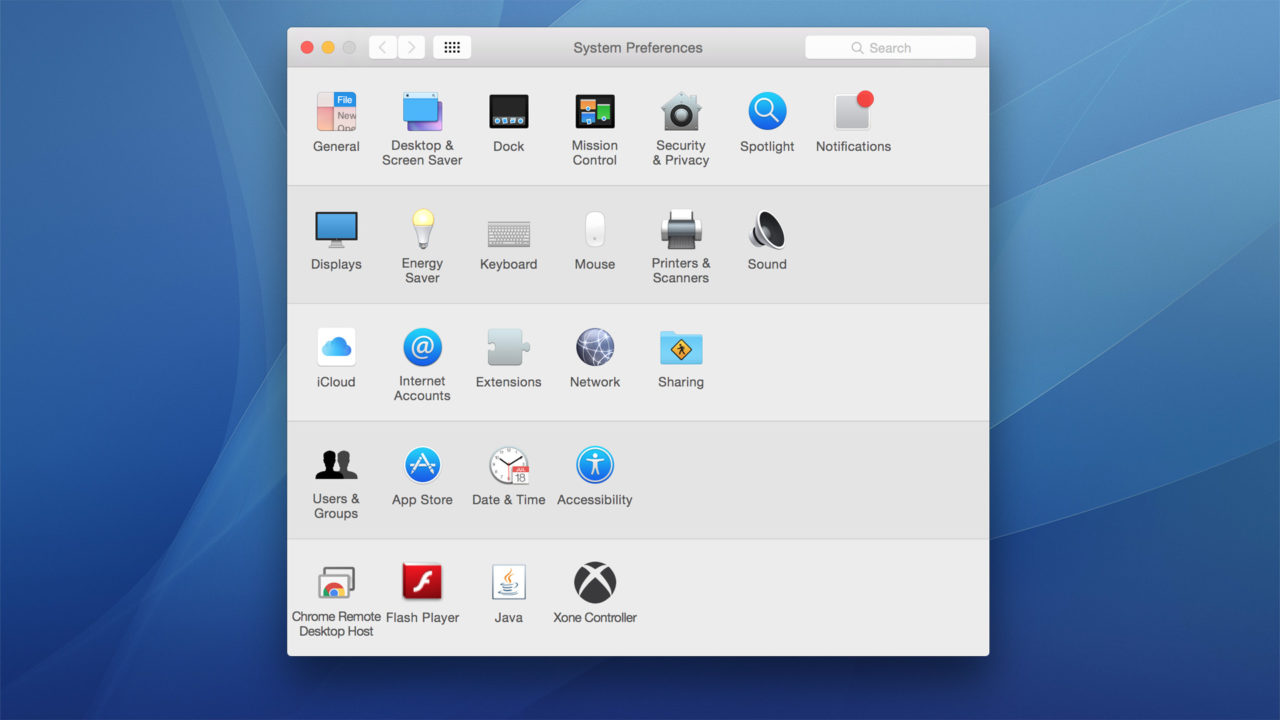
In our case, we don’t use a trackpad or Bluetooth with our Mac Pro, so we unchecked the corresponding preference icons. We also don’t need Language & Region settings, Parental Controls, Diction & Speech, Startup Disk, or Time Machine. By removing all of these unused preference panes, we’re left with a much cleaner layout that is limited only to the options and changes we regularly make.
But that doesn’t mean we never have access to these preference panes. If, for example, we get a Magic Trackpad in the future and want to access those preferences again, all we have to do is go back to System Preferences > View > Customize and check the box for the Trackpad preference pane.
While power users can take advantage of this trick to make things more efficient, it’s also a great option for those managing computers for less experienced users. If, for example, you want to let your kids change their wallpaper and sound settings, you could hide all but those two preference panes for their user account. Note, however, that hiding System Preference panes with the method described here is only effective as a matter of simplicity and convenience, and it’s not meant to be a substitute for proper account controls via OS X’s Parental Control features.
Remove Third Party Preference Panes in System Preferences
As we mentioned earlier, some third party software can add its own preference panes to the bottom row of System Preferences. While you can hide any of these preference icons via the same method described above, you can also remove them entirely, which is something you understandably can’t do with OS X’s default preference panes.
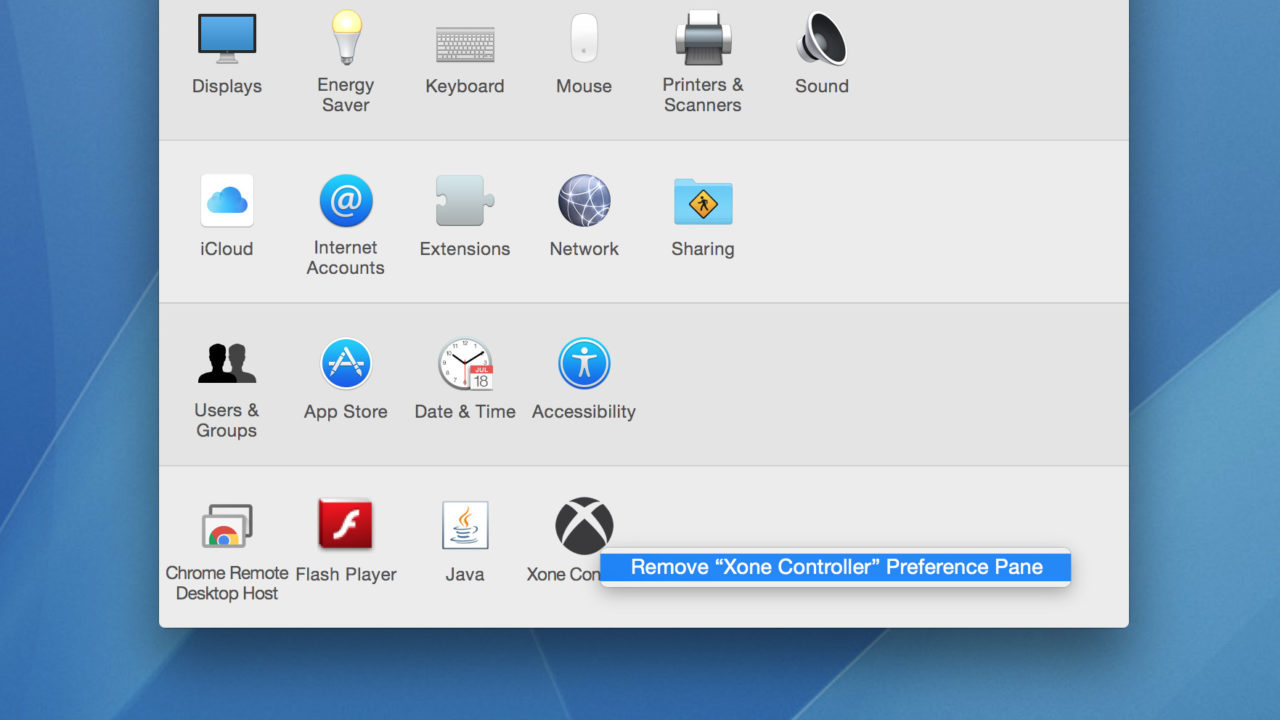
To remove a third party preference pane from System Preferences, simply right-click on its icon and select Remove Preference Pane. You don’t need to select View > Customize first; you can remove a third party preference pane at any time. Note, however, that you’ll need to enter your admin password and that this may break certain apps that rely on these custom preferences.
Also note that unlike the steps to “unhide” a hidden preference pane by checking its box in the “Customize” view, you’ll need to reinstall the app or utility again to restore a third party preference pane that you’ve removed. Therefore, when in doubt, try hiding a preference pane if you don’t want to see it, and only remove a third party preference pane if you’re absolutely sure you no longer need it.


