


How To Root Your Android Device – The Ultimate Guide
Since the early days of Android back in 2009, a small community of tech-savvy Android users have built an entire ecosystem around the idea of rooting your Android phone or tablet. By rooting your device, these users argues, you could gain access to applications that weren’t capable of running on standard builds of Android. With a rooted device, users would gain access to the ability to change information in the root files of Android. You could customize your device completely, removing applications that were preinstalled by your device manufacturer, block ads inside applications and web browsers, and even allowing for backup applications to save entire copies of your device to later restore should anything happen to your current phone.
Rooting became incredibly popular over the near-decade of Android’s existence; though it never quite rose above the niche community built on the web. Still, entire websites dedicated to the continued development of root access continued to exist, including the XDA Developers forum that keeps technology fans up to date with the latest on root methods, custom ROMs, and more. Manufacturers, in turn, responded to the rooting craze as well, first by voiding the warranties of any rooted device, followed by attempting to beef up security on how devices can be rooted, and failing all that, also began to disallow certain apps from running on rooted devices. Major updates to Android have, for many people, removed the need to root their devices, a process that often comes with its own flaws and problems comparable to the stock operating system on these devices. Still, a core group of Android fans haven’t given up hope, and continue to root their devices to gain access to tons of new features and functions not available on normal versions of Android.
But how do you do it? What exactly does rooting do, and can you even do it on your current device? The state of rooting in 2017 is something of a mixed bag, and not everyone can or even should root their Android phones. Still, if rooting is something you’re interested in, there’s a good chance that you can make it work on your device, even as carriers and manufacturers try to stop users from ever rooting their devices. If you’re unsure of where to start when it comes to rooting, you’ll need a full guide to show you the way—and luckily, that’s exactly what you’ve found. Let’s walk through rooting your Android device step-by-step, starting at the very basics.
What Does Rooting Mean?
To learn about how to root your device, you first must understand what exactly rooting means when it comes to Android. Unlike the term “jailbreak,” typically used to describe opening up the walled garden on iOS to allow for applications to be installed from outside sources, the term “rooting” actually has some semblance of meaning when it comes to performing the actual act of rooting your device. Rooting is the process of allowing users of Android devices to obtain complete control of their device through allowing root access over various Android filesystems. Basically, anything locked to the root filesystem of your device typically can’t be seen or edited by a normal Android user, but anyone with a rooted device can take their phone and add all sorts of new utility to your device, some of which we’ll discuss below.

There are four main words you’re going to see a lot when reading up on rooting your phone: root, bootloader, ADB, and recovery. Each of these terms play a key role in understanding how rooting works on your device, and they’re necessary to understand if you’re going to begin searching for root information about your phone online (more on that in an upcoming section below!). Here’s a quick summary for each piece of information.
- Root: At this point, we’ve well described what rooting means for your device, but on most forums, if you see a user talking about root, they’ll be discussing either the action of rooting their phone or tablet, or about the actual status of their device, ie “I have achieved root.” There’s also the possibility that a user may be talking about the root folder on your device, which keeps valuable system information and can be modified and viewed on a rooted device using an app like Root Explorer.
- Bootloader: The bootloader is the lowest level of your device’s software, scaling even lower than the root folder and recovery on your device. It’s the bootloader that loads your operating system (or ROM) every time you boot up your device. Most bootloaders in 2017 ship as locked bootloaders, which means they can only boot an operating system that’s been approved or signed, typically by the manufacturer or carrier. Unfortunately, most manufacturers have gotten pretty good at locking bootloaders, and the majority of devices that ship today are no longer able to unlock bootloaders. We’ll discuss this more below.
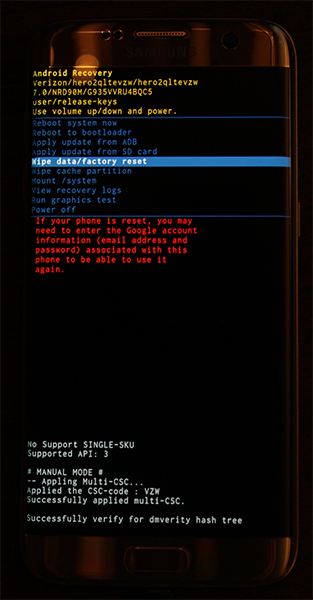
- Recovery: This is a separate runtime environment from your operating system that can be booted into on any device, rooted or otherwise. Recovery allows you several options; we’ve cited the recovery utility on devices within plenty of our troubleshooting guides on this very website because it allows you to wipe the cache partition of your device. Recovery will also allow you to wipe your device if you’ve been locked out. Custom recoveries, like TWRP, also exist today, though they typically require an unlocked bootloader to work properly. Those typically add advanced features like full device backups and even an improved, touch-based interface for your menu system.
- ADB: Finally, ADB (Android Debug Bridge) is a fairly common developer tool that uses a command-line interface to push commands to your device. ADB is free to download from Google, and though it can be difficult to learn how to use—especially if you’re new to pushing commands using text—there are typically a pretty solid amount of guides and walkthroughs that help you enter exactly the correct lines of code in order to not push a poor command to your device. Some root methods even have their ADB interface wrapped with a visual tool, making it easy to automate the root system through buttons and instant command pushes.
If you’re curious to read more into any of these terms, we suggest using the XDA Wiki that gives more in-depth looks at all of the information we wrote about above. XDA Developers, or XDA, is basically the place to go to read about Android rooting and device support. Both their general site and specifically their forums for each device are incredibly handy in learning about what can and can’t be done to your device. XDA has forums and subforums for nearly every single Android phone on the market, making it easy to read up on your device and find methods, information, and other key pieces of information you’ll need to know in order to do proper work on your device. Check out the XDA Developer forums here, and browse to your correct phone model. Some carrier-specific models even have their own key forums, so make sure you look up the developer information for your correct device.
What Does Rooting Allow Me to Do?
Plenty, actually. Even in 2017, when many users have moved past rooting, unlocking bootloaders (more on that below), and installing custom ROMs in order to keep the added security, stability, and even the warranty on their device, rooting still allows you to do a lot on your phone that you can’t otherwise accomplish. Not just small things, either, but impressive stuff. Rooting allows applications to directly control actions on your device, including the ability to hibernate battery-draining apps, remove advertisements from applications that have them built-in, remove system applications from your phone that are otherwise incapable of being uninstalled, and so much more. Though some of the reasons for rooting—phone backups, overclocking—have become a bit unnecessary in 2017 on most Android devices, there’s actually a pretty good lineup of reasons to root your device. Here are just some of the things you can do with a phone or tablet that has been rooted:
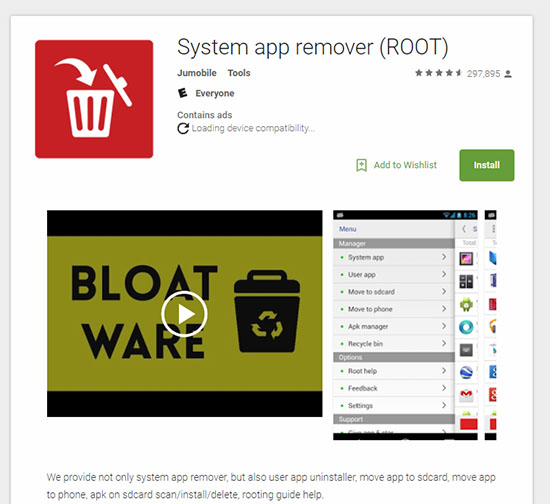
- Removing system apps from your phone: This is a big one. The ability to easily remove bloatware and other unwanted applications from your device is a major one here, since carriers and Android manufacturers alike still have a habit of installing unwanted software to your device that can’t be uninstalled—and in some cases, can’t even be disabled. If you’re sick of seeing your battery life ruined because of terrible applications running in the background that you can’t uninstall, rooting might be a great solution. That said, disabling most of these apps can have a similar effect, even if it doesn’t completely remove them from your device.
- Enabling settings originally disabled on your device: Carriers have a habit of locking down certain parts of devices that they don’t want consumers to have access to, especially when it comes to some manufacturer apps or settings. For example, Verizon has a habit of removing the themes store from LG devices, or hiding certain wireless network options inside your settings menu. Rooting allows you to bring those functions back, either through custom software or third-party apps available on the Play Store that are for root-devices only.
- Speeding up an older device: If your phone has slowed down in recent months, you might be able to boost up its speed by rooting the device and using one of a number of resources available to rooted devices. Since rooted phones can easily remove problem applications from their devices, it becomes much less of a problem when dealing with buggy apps installed by the carrier or manufacturer. You can even overclock your processor to deliver more performance, similar to a desktop computer, though obviously, you’ll have to put up with the downsides to that, typically at the cost of solid battery life.
- Additional customization: Apps like Xposed and Gravity Box have really killed the need for custom ROMs, since those applications allow you to edit and control the software already running on your device. You can control the look of your notification bar, the home keys on your display, and so much more. Now you can bring all the power of custom ROMs like expandable volume settings or customizable display areas to the software on your device that allows for powerful customization as is.
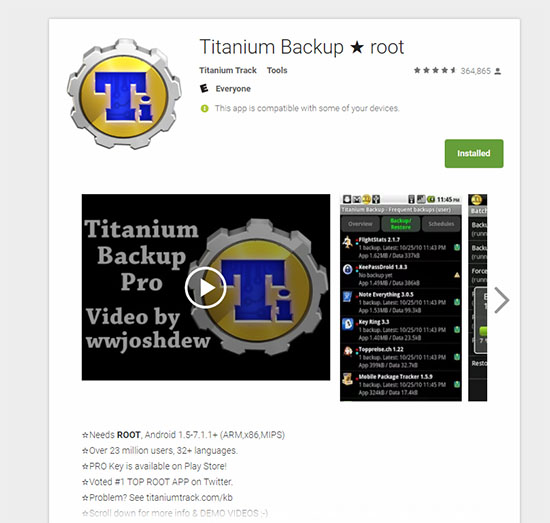
- Full backup support: Whether you’re using a backup tool included in your custom launcher, or you’re using a backup tool like Titanium Backup, a rooted Android device allows you to back up the entirety of your device, making it easy to carry onto a new phone or make sure that your device is fully backed-up down to the most base-level settings on your device. Google and Android have gotten better about app backups lately, specifically when it comes to Google Drive backup support, but Titanium is still the only way to completely back up your device settings like you could with a computer.
All of these reasons, plus the ones we didn’t mention, are great reasons to consider when deciding to root your device. That said, there are also plenty of reasons not to root your device, especially in 2017, when app developers are a bit more careful about what devices they do and don’t allow to use their apps. We’ll discuss why you should consider leaving your device without root access at the bottom of this article in further detail, but let’s just say there are inherent risks with rooting your device.
What’s the Difference Between Rooting and Unlocking My Bootloader?
When you’re looking up various methods and articles about rooting your device, you’ll often see discussion about locked bootloaders versus unlocked bootloaders, without much explanation of what a locked bootloader means. If you’re new to the rooting scene, it can often be a fairly unwelcoming place for folks who have no experience rooting their devices. The root community has become so entwined with themselves over the past decade that they often can be cold to outsiders who aren’t willing to put in the work to figuring out terms and problems themselves. While forum sites like XDA do provide plenty of people willing to help newcomers, there is an expectation held that if you’re going to root your device, you have to be willing to read forum posts or guides in order to understand terms like “bootloader.” We provided a quick-reference guide above for the four key terms above, so if you need a refresher, make sure to check out that section.
You don’t need an unlocked bootloader to enjoy a majority of the benefits that come with rooting your device. Apps that require root will still operate on any device that has a locked or unlocked bootloader. Back in the early days of Android, rooting and unlocking your bootloader typically went hand-in-hand, allowing you root access to the device while also replacing your recovery with a custom recovery like TWRP or ClockworkMod Recovery that made it easy to use touch controls or add backup functions inside of recovery. Still, if you don’t plan on using a custom ROM or recovery, not having an unlocked bootloader isn’t the end of the world.
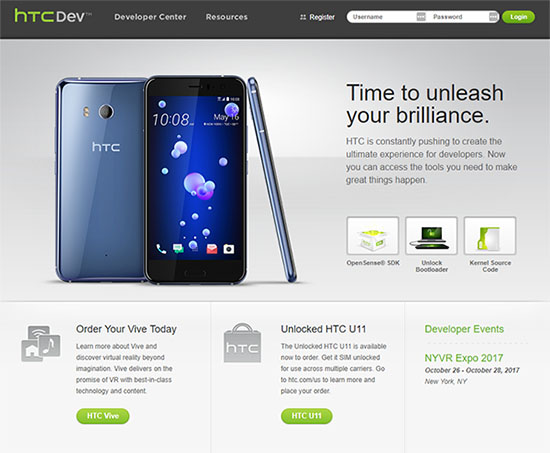
In 2017, it’s safe to assume your device ships with a locked bootloader, especially if you purchased your phone through a carrier store like your local Verizon or AT&T. These carriers typically demand locked bootloaders from manufacturers like Samsung or HTC, making it impossible to expect your device to have an unlocked bootloader. If loading custom ROMs onto a device are important, you’ll want to make sure you purchase unlocked devices from your manufacturer. Some devices come with specific unlocked and unlocked models; the Pixel line of devices from Google, for instance, ship directly from Google with unlocked bootloaders, but the devices sold by Verizon or with Verizon-specific branding (say, from Best Buy) include locked bootloaders. Some manufacturers support unlocked bootloaders more than others; HTC, for instance, supports their own HTCDev tool that allows users of unlocked HTC devices to unlock the bootloader on their devices. Overall, your best bet is to do your research first to understand whether your device ships with a locked or unlocked bootloader; typically, this information can be found on both forum postings and within the actual manufacturer’s documentation. If you’re just looking to root your phone, not having an unlocked bootloader isn’t the worst thing that can happen.
What are the Risks of Rooting My Device?
A lot can go wrong during the rooting process if you aren’t careful. You’re typically pushing code, either manually or through the use of specially-developed rooting software, to your device, modifying the underlying software, and unlocking abilities on your phone you didn’t originally have. That, of course, means a ton of things can go wrong if you aren’t careful. The biggest thing to watch out for, of course, is a bricked phone. Bricking is what happens when your device can no longer boot to the operating system; basically, it’s as good as a brick. This typically occurs when a bad command was pushed over to your device, either through a rogue rooting application or through ADB itself. The only way to avoid bricking your device is to make sure every step you take during the rooting seriously and slowly, and to ensure that every line of code entered and pushed through ADB is approved and good to go.
Most people think of bricking your device as the ultimate challenge to face when it comes to rooting, and for the most part, they’re right. Most other risks that come with rooting can be reversed with some technical know-how on your end, as well as unrooting the device. That said, it’s important to note what comes along with using a rooted device, so here’s what you’re risking and facing when you’ve successfully rooted your device:
- Instability: This one might seem a bit obvious, but some serious risk of instability comes when you’re rooting your device and messing around with key settings on your phone. Any root-friendly app can cause troubles with your device, since they typically have so much power. Lag, poor battery life, and crashes should be expected on any rooted device that’s running a large amount of rooted applications.
- Voided Warranty: There’s no way around it: rooting your device voids your warranty, no matter where you picked the phone up from. Carriers and manufacturers alike don’t goof around on this, so it’s something you’ll want to keep in mind when deciding to root your phone. If you root, your warranty is as good as gone for as long as your phone is rooted. Of course, you can always unroot your device—more on that at the bottom of this guide—but remember that, when it comes time to send your phone in for repair, you may not be able to follow the steps to unroot your device, either because of a dead component or because you can no longer adjust the system software on your phone.
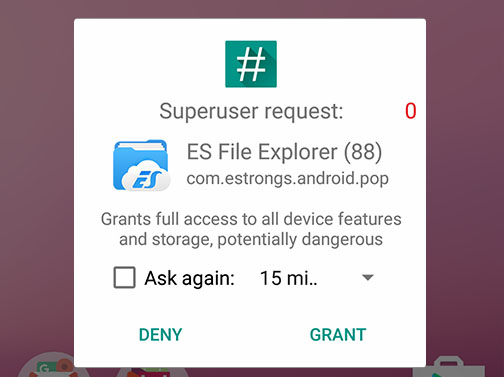
- Security risks: A rooted device can use the Superuser prompt to change basic core settings on Android, customizing your device in ways a non-rooted device could only dream of, but that Superuser ability can also be a total headache. In the wrong hands, a rooted device
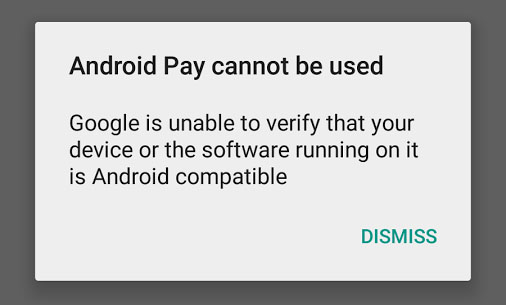
- App troubles: This one might seem small, but for some users, it’ll be a massive pain in the neck. Newer versions of Android use an API utility called Safetynet to check your device for root access. If root access is detected as enabled, you may not be able to use certain apps on your device. Android Pay is the big example of this, as the mobile payment app doesn’t work if your device is rooted. Netflix is another great example, as the company began blocking rooted devices in May of this year (though it does seem as though the company is loosening its grip on this), and some cable TV providers like Spectrum won’t allow you to stream their feeds on a rooted device. Overall, most of your apps will still work on rooted devices, and there are some workarounds to getting by undetected by Safetynet, but overall, rooting your phone may create more problems with your device than you were hoping for when it comes to app support.
- Updates: Finally, rooted devices will have to forego without using official software updates from your manufacturer or carrier. While you can update to these patches, you’ll lose your root access while doing so—and can even risk bricking your device if something goes wrong during the update. And since you won’t be covered by a warranty, you’ll be on your own when it comes to fixing your phone.
If you can accept the risk that comes with rooting your device, you’ll be welcome to the rewards that come to unlocking more potential out of your phone or tablet. Just remember that you’re modifying your device at your own risk, and if anything goes wrong, you’ll be liable for the device—not the manufacturer, your carrier, the creator of the guide used to root your phone, or even us here at TechJunkie.
How Do I Root My Android Device?
Rooting is a difficult process to explain in a “how-to” guide, because every phone functions differently. Not every phone can be rooted, especially when you’re dealing with carrier models and the like. Figuring out how to root your device is, in a strange way, part of the fun of rooting in general. The best place to start when looking for a guide to rooting your phone is to check the XDA forums linked above, or look up your phone with a quick Google search to find guides and links. Typically, smaller Android blogs will report when specific devices have been properly rooted, making it easy to find out exactly when your device is capable of being rooted. You might even find full video guides on YouTube that show you how to accomplish rooting your device with step-by-step instructions attached. It’s worth noting that rooting in 2017 is far harder than it used to be, with improved security inside of Android as a whole to blame. Developers need to work harder than ever to find root exploits, and considering that much of Android’s rooting community has, effectively, retired, you may be waiting weeks or even months after a phone’s release before an exploit is found.
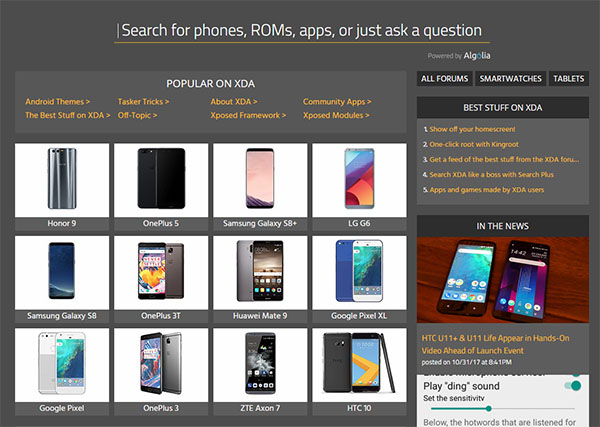
So, to begin rooting your Android device, you’ll need to familiarize yourself with the method for your specific device. This couldn’t be possible without the help of utilities like XDA-Developers, and we’ve linked to them several times on this page. Begin by heading over to their forum home page and selecting the search icon in the top-right corner of their device. Once you’re searching through XDA, you’ll want to find your device; for example, search for “Galaxy S8” or “Moto Z2 Play” using their search function, and click the entry to load the forums for that specific device. Once you’re viewing the forum for your specific device, you’ll notice that each forum is divided into subcategories for easy browsing. For example, the S8 forums have entries for “Real Life Reviews,” “Q&A,” “Guides, News, and Discussion,” “Roms, Kernels, Recovery, and Other Development,” “Themes, Apps, and Mods,” and finally, individual listings for forums for specific versions of the S8, like the Verizon and AT&T versions. Typically, if you purchased your device through a carrier, you’ll want to head directly to these guides; otherwise, you’ll find information in either “Guides” or “Development” sections of the forum. Once you find a guide, you’ll want to make sure your phone’s software version is supported. Use as up-to-date a guide as you can, and make sure to read through recent replies on each guide to make sure that your phone’s current software still supports that method. If the methods outlined in the guide for your brand of device don’t seem to support your current software build, don’t install them—you might just brick your phone.
Here are some quick-start guides for rooting your device, based on what the most popular devices are on the market as of writing. You’ll want to double-check that your specific model works with the listed method, because certain devices have different models and build numbers that may not correspond with the linked guide.
All of the guides linked above use XDA forum posts to guide you through rooting the device and, if possible, installing custom recoveries and unlocking your bootloader, with the exception of the link for the HTC U11. HTC uses their own HTC Dev tool to unlock your device’s bootloader, making it easy to flash custom software on any unlocked HTC device from 2011 onwards. We’ve linked the HTC Dev tool above so you can learn all about their policies.
You’ll want to double-check each guide linked above before using it on your device.In addition to following the guides for these devices, it’s worth looking at certain root programs that promise to work on multiple devices, including root applications like Magisk, Framaroot, KingRoot, and Towelroot. All four of these platforms have their advantages, along with a list of compatible devices, and you’ll want to head to their respective XDA listings to learn more about them and what they can and can’t do.
One last piece of advice: stay away from sites advertise being able to root every device under the sun, especially when your phone or tablet is a newer model or running a fairly-new version of its software. Sites like OneClickRoot.com advertise being able to root any device with a single click, but these sites are often complete scams, designed to take your cash or even spread viruses on your computer. OneClickRoot, for example, charges $39 for a product that doesn’t root every device, but instead, “remotely” roots your device with another individual on the other end of your internet connection taking over your phone for you. Obviously this isn’t just a poor way to spend your cash—it’s also possibly incredibly dangerous, with the individual able to see all of the personal information on your device at once. There are one-click root programs available on the web today that work for a wide variety of phones, such as Kingo Root, but with most phones on their list having first arrived on the market in 2011 or 2012, you’re likely not going to find your device on the list. Overall, it’s safer to use XDA to find a method for your device, since the users on their forums almost always own the same phone variant as you. It’s typically a bit more work, but text or video guides can often walk you through the root methods without too much of a problem.
Can I Unroot My Device?
Since rooting your device basically guarantees that it won’t be possible to perform any sort of action that involves your warranty, there is a strong chance you may need to unroot your device at some point, giving up your root access in exchange to send your device back to the manufacturer or carrier. The methods for unrooting your device can often vary based on what your phone model is, and you’ll want to search XDA or Google for whether or not your device can be unrooted. It’s good to know the answer to this question before you dive into rooting your phone, since warranty replacements are far easier when you don’t have to worry about your phone bricking and being unrepairable.
Typically, the guide you’re using to root your device will have information listed about whether or not your device can or cannot be unrooted. If you’re using XDA to browse the forums for guides, each forum post has a search functionality that lets you browse through the content of each page without having to read the entire thread. It’s generally a good idea to browse through the results for the term “unroot” to find if there is a method and if someone has already asked the root creator if their devices can be unrooted. Typically, unrooting a device is a fairly simple procedure, and will allow you to send your phone or tablet into your carrier for service or replacement.
Finally, it’s also worth noting that users of SuperSU, an app that allows root users to grant Superuser access to root applications and one of the most popular root applications in the Play Store, have built-in options inside the settings menu to allow users to both temporarily and completely unroot their devices right from within the app. This might not work for all devices, but it’s typically worth a shot when trying to reset your device.
***
We know it may seem a bit disappointing that this guide can’t explain how to root every single device on the market today, but unfortunately, rooting is as far from “one size fits all” as you can get. Devices have different software builds, version numbers, and even customized hardware between carriers, making it incredibly difficult to recommend how to root even a single device model. For example, if you wanted to root a Galaxy S8, you’ll have to determine which model you have, followed by which built of software. Though the S8 is identical on the outside of the hardware, the S8 actually has eleven different device models, with the majority of the devices making up the carrier-controlled models. This doesn’t even include the Galaxy S8+, which adds its own version of software and hardware builds, making it near-impossible to cover just that one device in a single guide. Now imagine having to cover every Android device ever made—it’s impossible, so say the least.
But we hope this guide has, at the very least, helped shine some light on how rooting works on Android, and made it possible for anyone and everyone to learn how to root their device. For all the hype, it can be a fairly simple process if you’re willing to put in the effort in learning key terms and phrases used within the rooting community, making it easy for anyone with a few hours of spare time to follow through with. This guide really functions as a start guide to understanding the larger world of rooting with Android, and diving into the root community certainly takes some amount of commitment, but you shouldn’t let the barrier of entry put you off. Rooting your device can have a great impact on how you use the device day to day, and while there certainly are more drawbacks to rooting than ever before, it’s still a fun modding project to perform on your device. So what are you waiting for? Head on over to XDA, find the guide for your phone, backup your important files and information, and get to rooting!


2 thoughts on “How To Root Your Android Device – The Ultimate Guide”