


How to Set Up a VPN in Windows 10 [November 2020]
![How to Set Up a VPN in Windows 10 [November 2020]](https://www.techjunkie.com/wp-content/uploads/2016/12/hand-1231897_1280-1280x720.jpg)
When it comes to picking up a computer, Windows 10 is the default for millions of people. Unlike MacOS, Windows exists on hundreds of quality laptops available for under $600, while also being great for gaming, self-built desktop PCs, and so much more. It’s easier to use than Linux, and can do way more than Chrome OS. It’s been the most popular desktop operating system around the world for decades, and with how good Windows 10 is, it’s easy to see why.
However, as big as Windows is, that doesn’t mean everyone knows how to use it to its full potential. If you’re looking to boost your security, using a VPN on Windows is an absolute must. No matter who or where you are, it’s a great idea to use a VPN to help protect your outgoing traffic. Microsoft has done a lot to boost the security of their operating system since Windows 10 launched in 2015, but you still need to keep your actual browsing data secure. Using a VPN makes your internet connection anonymous, and can even give you the benefit of making Windows 10 faster than before.
If you don’t already have a VPN selected for use with your Windows PC, take a look at our selection of the best VPNs on the market today, then return here to set up your VPN with Windows.
Installing Your VPN with Windows
When it comes to installing a VPN on Windows, the easiest way to do it is to turn to the app itself. Most VPNs in 2020 use their own software that automatically enable VPN connections on Windows. Here’s how to do it.
Download the Installer
For this how-to, we’re using Private Internet Access for our VPN service., but these steps basically apply to any VPN you want to use today. After choosing the monthly, quarterly, or annual subscription option, choose your payment method and make the purchase. Once you’ve paid, you’ll receive an email instructing you to download the installer for the VPN software.
After you’ve received and opened the email, download the Private Internet Access installer from the link provided in the email, then proceed to put the VPN software package on your PC.
Head to the Private Internet Access’ website, where you purchased the VPN software, will open. It will begin downloading the installer through your web browser. Choose to Save As, if given the option, and save the installer to your desktop. This way, it’s easier to locate and start the installation of the Private Internet Access VPN software installer.
Install VPN Software
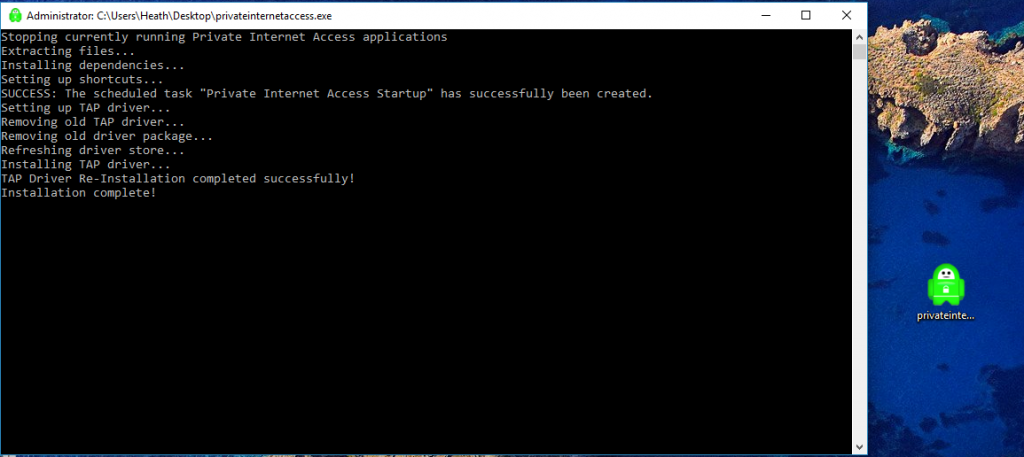
- After the download completes for Private Internet Access, right-click on it with your mouse and select Run as administrator.
- You’ll see a command prompt box pop open on your Windows display. It will extract and install the needed items for the VPN software to work on your Windows 10 machine. An install box will ask for your permission to install the Private Internet Access VPN on your Windows 10 computer. Just click the Install button.
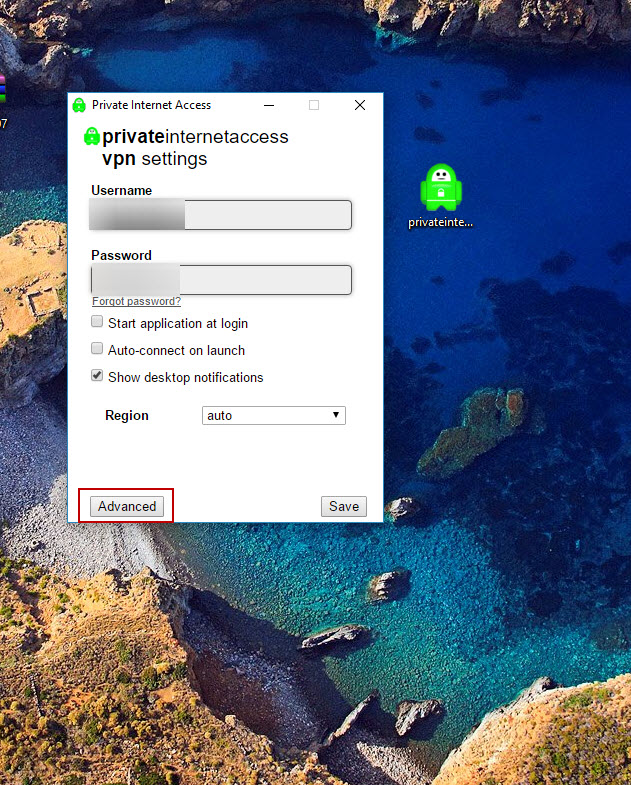
- Next you’ll want to change the connection type to TCP. Right-click on the Private Internet Access icon in the system tray, at the bottom right in your Windows 10 taskbar.
- Go to and select Settings with your mouse.Next, click the Advanced button.

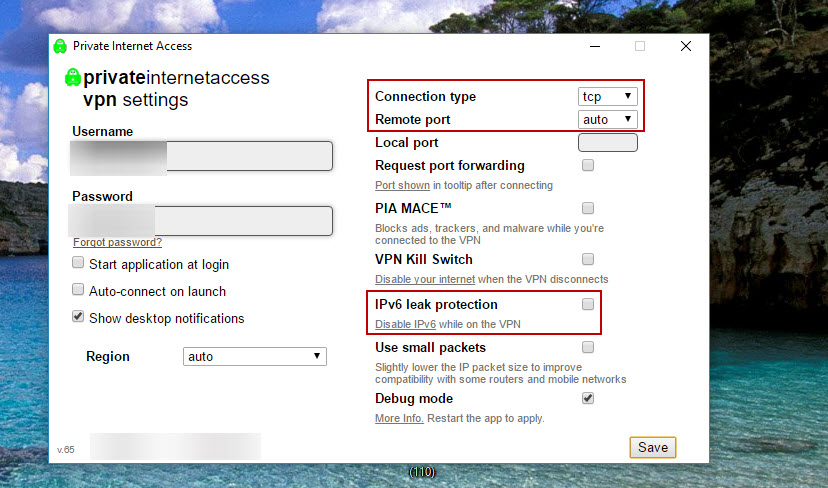
- Select TCP in the top drop-down where UDP shows as the default.
- Then, either pick your connection location or use Auto.
- If you’d like to use IPV6, you may also want to uncheck IPV6 leak protections. Whether you uncheck the IPV6 leak protection or not is up to you. Leak protection protects your personal information from “leaking” onto the internet, affecting your privacy and security.

- After you’ve selected the proper settings, click the Save button.
- Finally, right-click on the Private Internet Access icon in the system tray, in the bottom right of the Windows 10 taskbar.
- Then, go up to Connect and click on it to connect via a VPN.
Boom—that’s it. You’re now anonymously connected to the Internet!
Use Windows’ Built-In VPN
If you’re looking for ultimate privacy, you’re going to have to turn to an external VPN. However, if you’re just looking a simple VPN to have running in the background, you’ll be excited to know Windows 10 offers one for absolutely free. It’s a bit of a pain to configure on your end, but once you have it up and running you’ll be ready to protect your data, using PPTP rerouting to do it.
Follow these instructions to configure the built-in VPN that comes packaged with Windows 10.
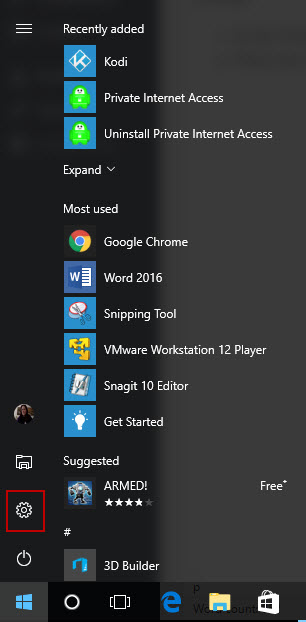
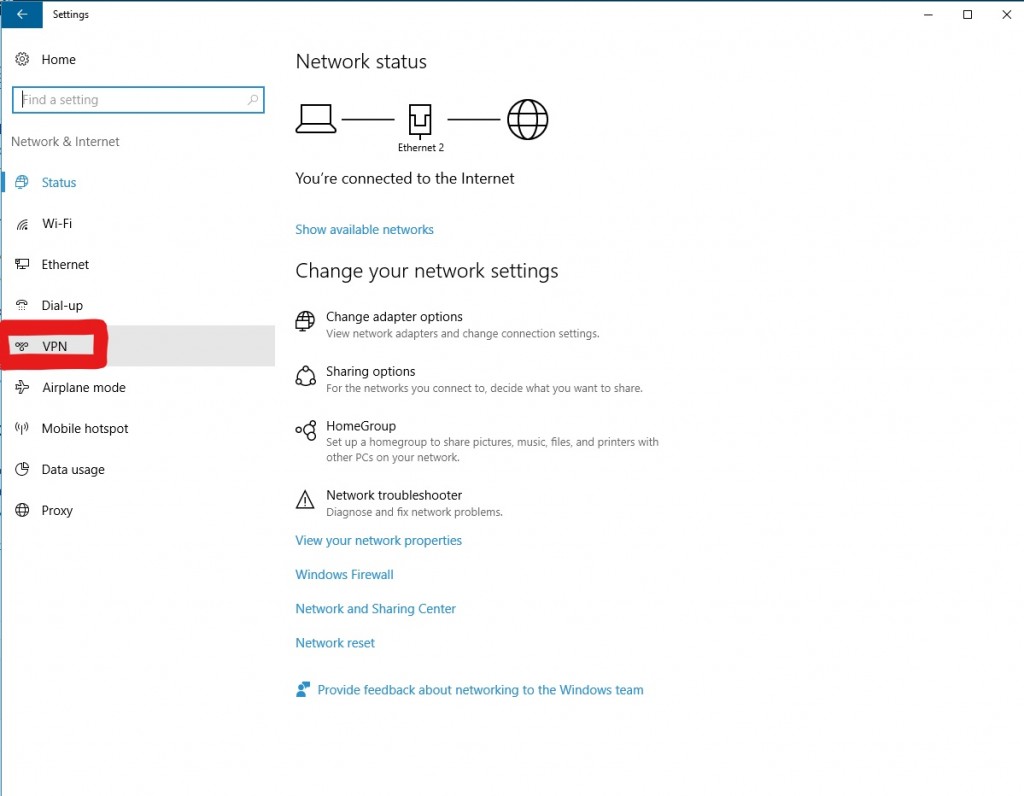
- In the Windows 10 taskbar, click on the Windows icon. Then, click on Settings (the little gear icon).

- When the Windows Settings box appears on your desktop screen, click on Network & Internet.

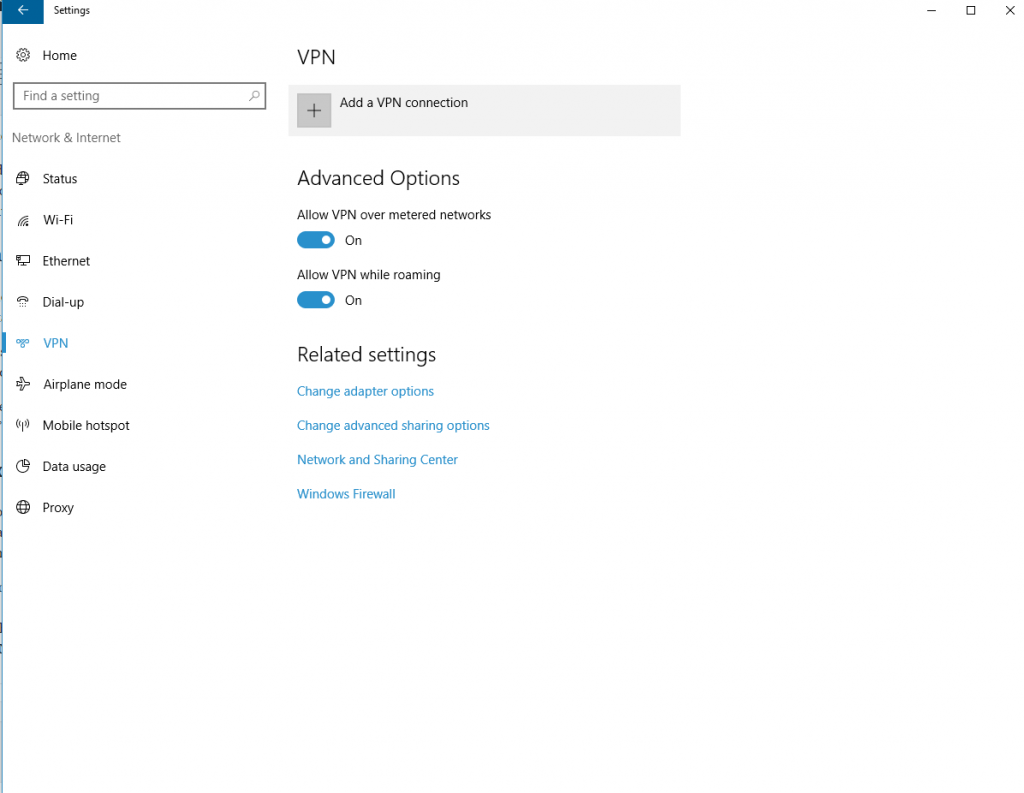
- Then, in the left side panel, click on VPN.

- In the VPN window, click Add a VPN connection.

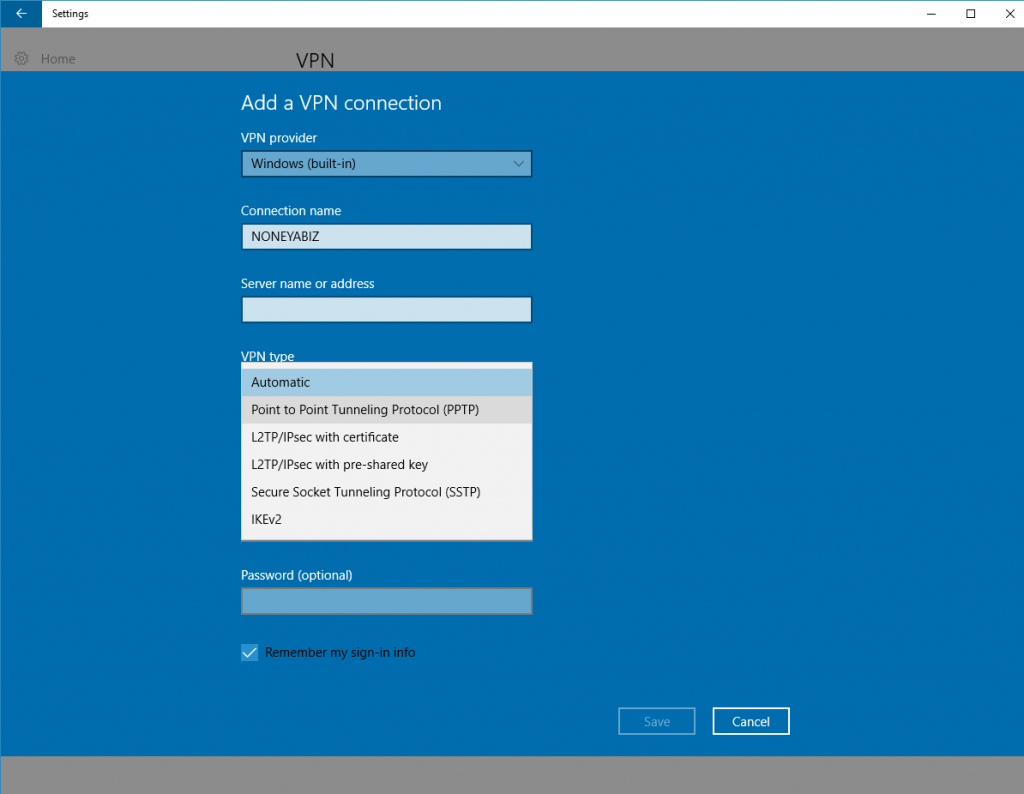
- Select Windows (built-in) as your VPN provider in the drop-down box.
- For your connection name, enter whatever you’d like to call the connection.
- The server name or address gets entered next. You’ll need to know this information, as it pertains to your private server or the VPN server which you’ll connect to. You’ll need to do some research on your own to find a reliable VPN server that will let you connect to it.
- Next, choose PPTP (point to point tunneling protocol).
- Choose your username and password as your sign-in info. Then, enter your username and password in the text boxes. Make sure the box is checked to Remember my sign-in info, unless you’re on a public PC.
- Last, click the Save button at the bottom of the VPN setup. Now you’re ready to start using it.

Your newly set-up VPN now appears in the VPN list. Just click on it and select the “Connect” button and you’re up and running.
***
There are so many VPN service providers available, paid and free, and it may be hard to choose one. It could take some time and research to conclude your search. When you’ve found the one that suits your needs, you can either use their installation software or use the built-in VPN that comes with Windows 10.
If you’re looking for a shortcut to finding your new VPN, however, make sure to check out our list of the best VPN services in 2020, with some of our favorite picks for VPNs on Windows and other platforms.
Do you have a favorite VPN service or do you use Windows’ built-in VPN service? Do you have any advice for someone setting up a VPN on Windows 10? Please leave us a comment below!


2 thoughts on “How to Set Up a VPN in Windows 10 [November 2020]”
VPN protocols that should be used are the following in order of most secure to least.
OpenVPN
LT2P/IPsec
IPsec (IKEv2)