


How to Turn on Desktop and Documents Syncing in macOS Sierra

When you installed macOS Sierra, you may have noticed that it asked you whether you’d like to sync some of your Mac’s folders up to iCloud. This is a new feature that will take all of the items from your Documents folder and your Desktop and store copies of them (securely) with Apple, so if you need to see a file on your iPhone, for example, you’ll be able to.
If you dismissed that message during the installation, though, how do you set it up? Let’s talk about how to turn on Desktop and Documents syncing in Sierra!
Enable Desktop & Documents Syncing
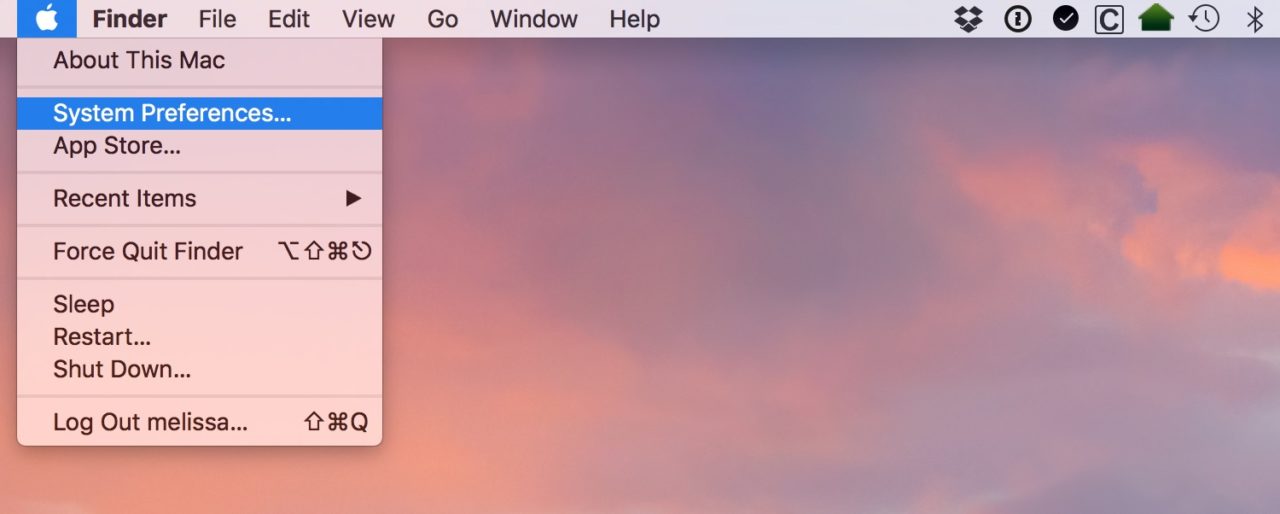
The first thing to do is to open System Preferences on your Mac. You can do this under the Apple logo at the upper-left of your screen.
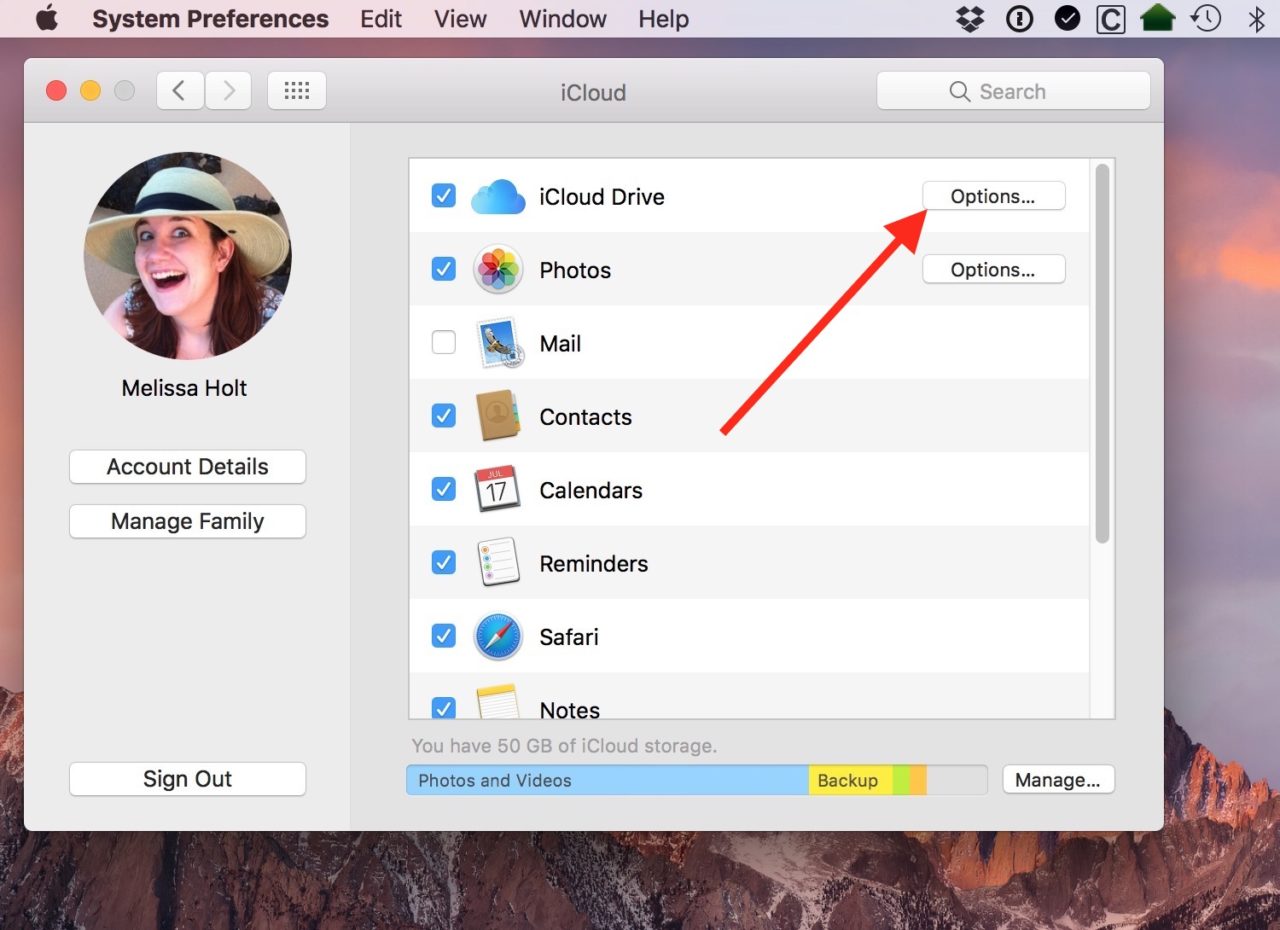
When System Preferences opens, select iCloud. From the iCloud Preferences window, make sure the box for iCloud Drive is checked and then click Options.
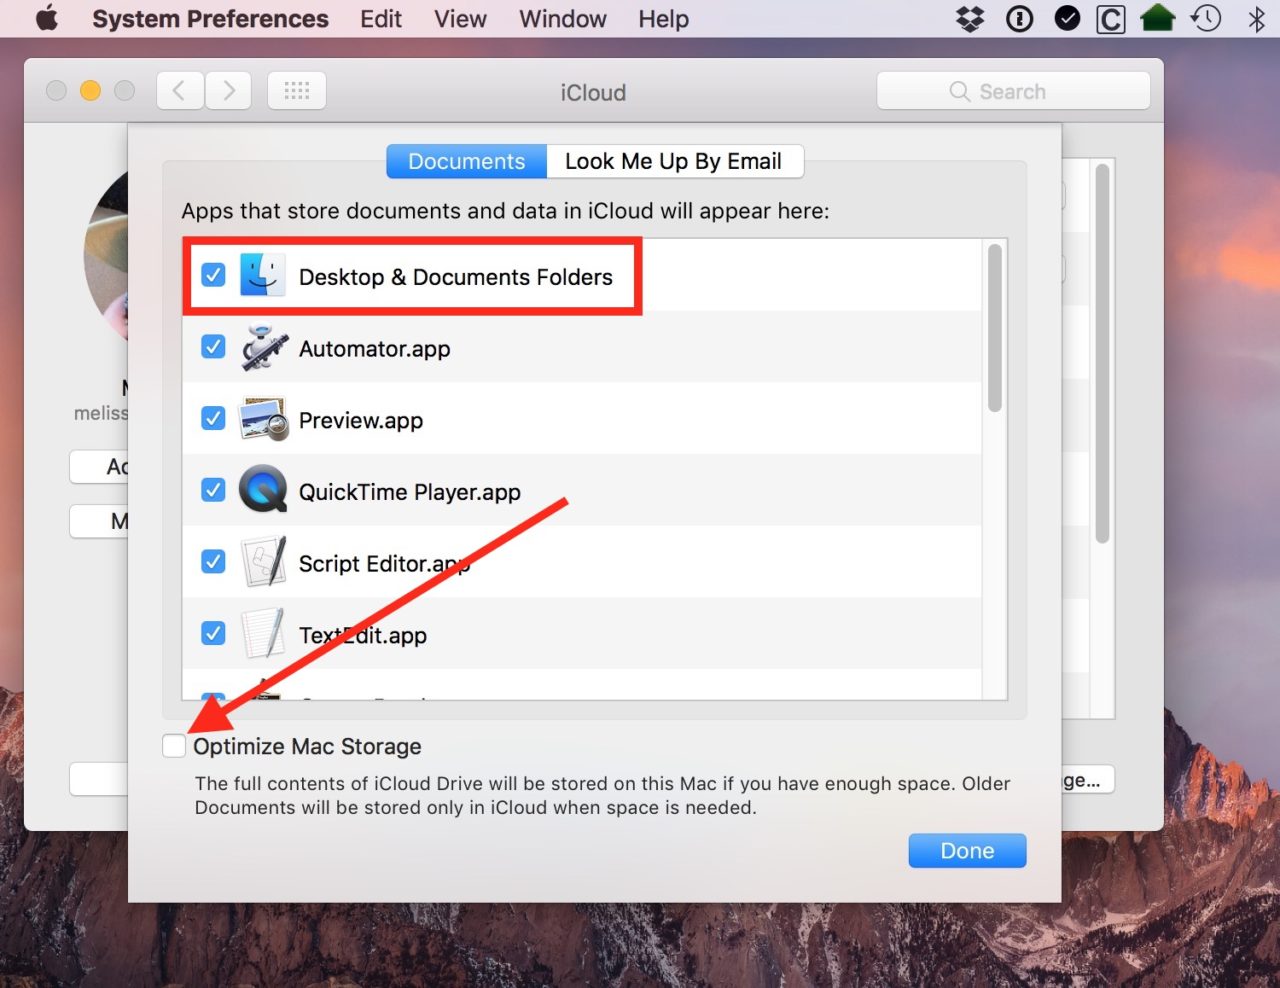
The iCloud Drive options window will appear. Make sure you’re on the Documents tab and then check the box labeled Desktop & Documents Folders. This will enable the secure syncing of your desktop and document files and folders to iCloud, allowing you to access them from your authorized devices when needed.
What About Optimized Storage?
You may have also noticed another new feature in macOS Sierra called Optimize Mac Storage. As opposed to merely syncing your files to iCloud, this feature actually moves some of your data off your Mac and stores it with iCloud. The way it works is that you’ll still see references to your data (Photos, iTunes media, etc.) on your Mac, but those files will actually be stored remotely and will be downloaded on demand when you need them.
Optimized Storage is a clever solution that aims to address the conflict between the typically smaller SSDs on modern Macs and the increasing size of our digital files as HD movies and higher resolution photos take up ever more space. So if you have an entry-level MacBook with a 256GB SSD, for example, you could still have on-demand access to hundreds of gigabytes of media that wouldn’t normally fit on the drive itself by syncing that data to iCloud and downloading what you need when you need it.
However, I still recommend that most users keep this option off unless you’re truly in dire need of having access to large amounts of data as described above. Despite Apple’s major investments in data centers and online infrastructure, I’m still a big believer in always keeping on-site copies of your files so that they can be properly backed up. If you need local access to more files than you can fit on your Mac’s built-in drive, consider picking up a portable external drive, which are now quite cheap.
Back to Desktop & Documents Syncing
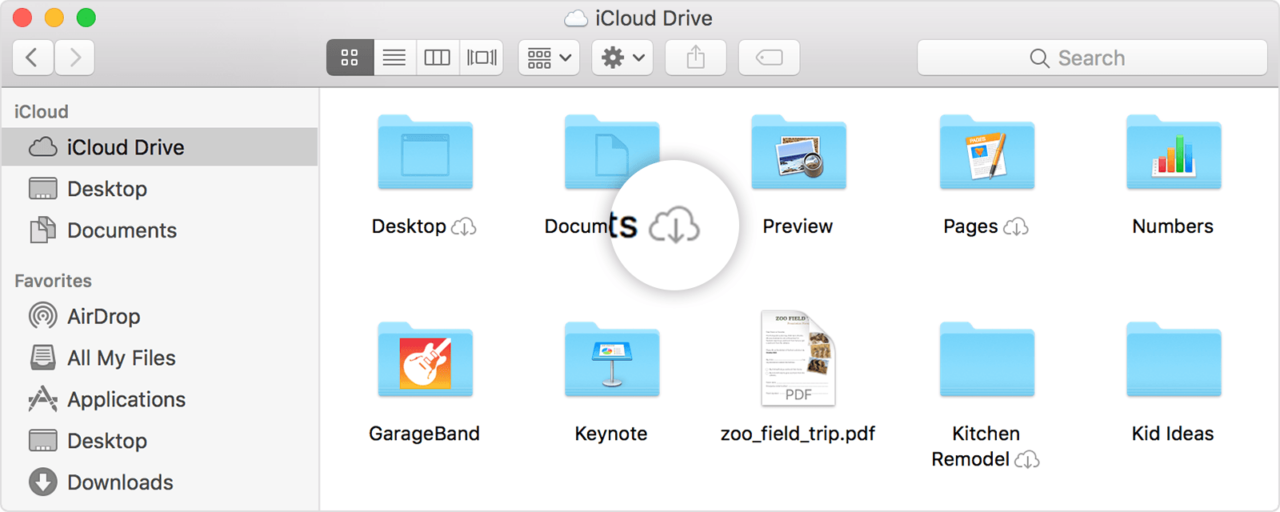
Anyway, once you’ve checked the Desktop and Documents Folders box in System Preferences, click Done and, as long as your Mac has an active Internet connection, the syncing of your files should start! If you open a new Finder window, you’ll see that your Desktop and Documents user folders will be nested in the iCloud section of the sidebar, and the status of your syncing will be displayed in the Finder status bar if it’s enabled (go to View > Show Status Bar from Finder’s menu bar to see it).

If you don’t have the Finder’s status bar enabled, you can also get a rough estimate of the syncing progress via the progress circle in the sidebar.
Final Notes & Considerations
- I think it’s very important to back up your files and folders before you make any big changes like this, especially since Sierra’s so new. So, yeah. Go do that first, all right?
- Make certain that you have enough iCloud space to accommodate all of your Desktop and Documents files. If not, you’re going to have to pay Apple for a more expensive storage tier. Check how much space you’ve got remaining within System Preferences > iCloud (it’s the colorful bar shown at the bottom of my second screenshot above). If you do want to buy more space to use this feature, you can do so on any of your devices within iCloud’s settings.
- On your other Macs running Sierra, your Desktop and Documents folders will be merged if the other computers have these same settings turned on and are logged in under the same iCloud account. If you have a Mac that’s running an earlier version of the operating system, you can access these files under the Finder sidebar, within the “iCloud Drive” section.
- To see your files on your iPhone or iPad, you must use the iCloud Drive app, which you can download from iTunes.
Finally, if you have questions, be sure to check out Apple’s various support articles on this! They’ve got an FAQ page, one for troubleshooting issues, and one with general information.


