


How to Create a macOS Sierra USB Installer
Apple makes upgrading to its latest operating systems easy thanks to the Mac App Store, but some users prefer to have a physical copy of a full macOS installation to aid in upgrading multiple Macs, installing from scratch on a new drive, or for troubleshooting purposes.
Apple no longer distributes macOS in a boxed physical form, so it’s up to users to create their own USB-based installers. Thankfully, this process can be accomplished with just a single Terminal command. Here’s how to create a USB installer for macOS Sierra.
Step 1: Download macOS Sierra from the Mac App Store
To create a USB installer for macOS Sierra, you first need to download the installation application from the Mac App Store. Using a compatible Mac, simply launch the App Store, find Sierra from the homepage sidebar, and download the installer.
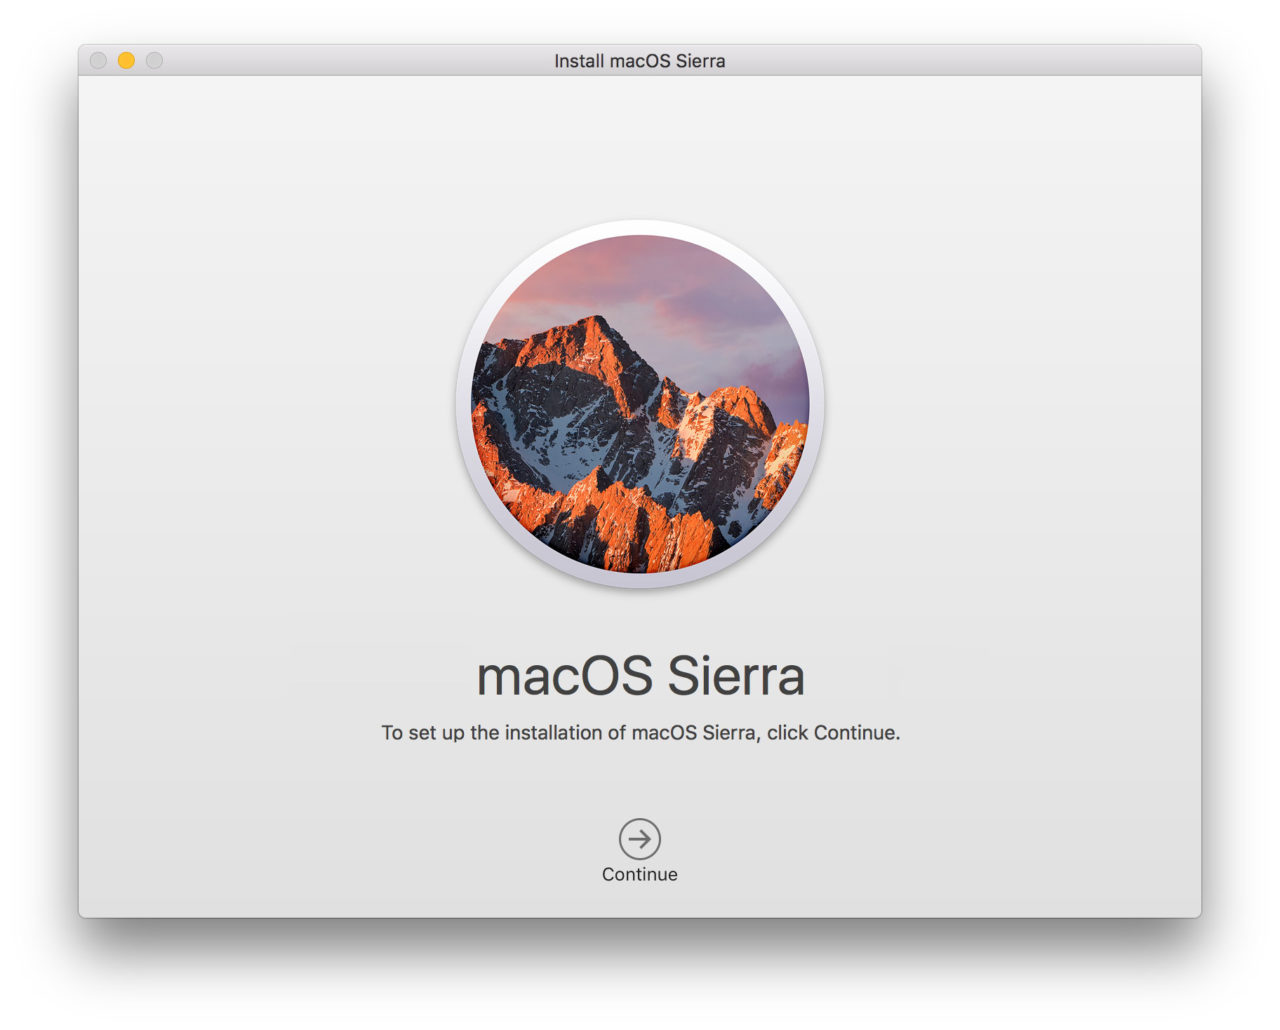
Once it has completed the download, the Sierra installer will automatically launch. Quit the install application, as this is meant for users who wish to upgrade their Macs to Sierra, not create a USB installer. You can quit the installer application by using the keyboard shortcut Command-Q.
Step 2: Prepare the USB Drive
To create a macOS Sierra USB installer, you’ll need a USB 2.0 or USB 3.0 drive with a capacity of at least 8GB. The process of creating the USB installer deletes all data on the USB drive, so make sure it doesn’t contain any important files.
With your USB drive connected to your Mac, launch the Disk Utility app. You can find Disk Utility by searching for it in Spotlight or in Applications > Utilities.
In Disk Utility, select your USB drive from the list on the left. Next, click Erase from the toolbar. We need to give the USB installer a temporary name in order for the Terminal command below to work. If you plan to just copy and paste the Terminal command, name your USB drive “Sierra.” You’re free to change it, but you’ll need to modify the command to reference the new name.

Make sure that Format is set to OS X Extended (Journaled) and Scheme is set to GUID Partition Map. Finally, click Erase to complete the process.
Step 3: Create the macOS Sierra USB Installer
With your USB drive ready, launch Terminal. As with Disk Utility, you can find Terminal via Spotlight or in Applications > Utilities. Copy and paste the following command into the Terminal window:
sudo /Applications/Install macOS Sierra.app/Contents/Resources/createinstallmedia --volume /Volumes/Sierra --applicationpath /Applications/Install macOS Sierra.app --nointeraction
This is a sudo command, so you’ll need to enter your admin password when prompted. Terminal will then access the createinstallmedia tool built in to the Sierra installation bundle. You can monitor the progress of the process via the Terminal window.
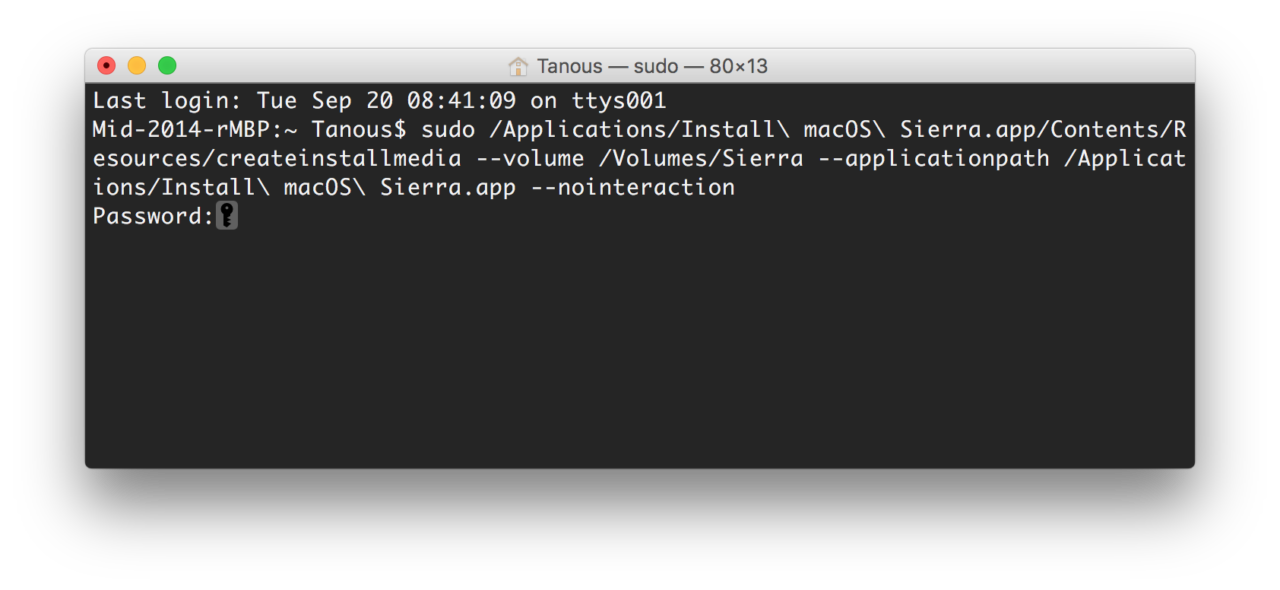
The time it takes to complete will vary depending on the speed and type of your USB drive, but shouldn’t be more than 5 minutes or so. Just be sure to let the command run uninterrupted until you see it report “Done,” at which point you can quit Terminal.
At the end of the process, your new macOS Sierra USB installer will mount to your Mac’s desktop and will be ready for use.
Step 4: Install macOS Sierra via USB
Once you have your macOS Sierra USB installer, you can use it to install Sierra on compatible Macs in one of two ways. First, you can connect it to a running Mac and launch the upgrade installer. This will produce the same result as upgrading via the Mac App Store, but it saves you from having to download the Sierra installer application first.
Second, you can use your USB drive to perform a clean install of Sierra. To do so, first power off the Mac you wish to upgrade and plug in your USB drive. Next, hit the Mac’s power button to turn it on and then press and hold the Alt/Option key on your keyboard as soon as you hear the Mac’s startup chime.
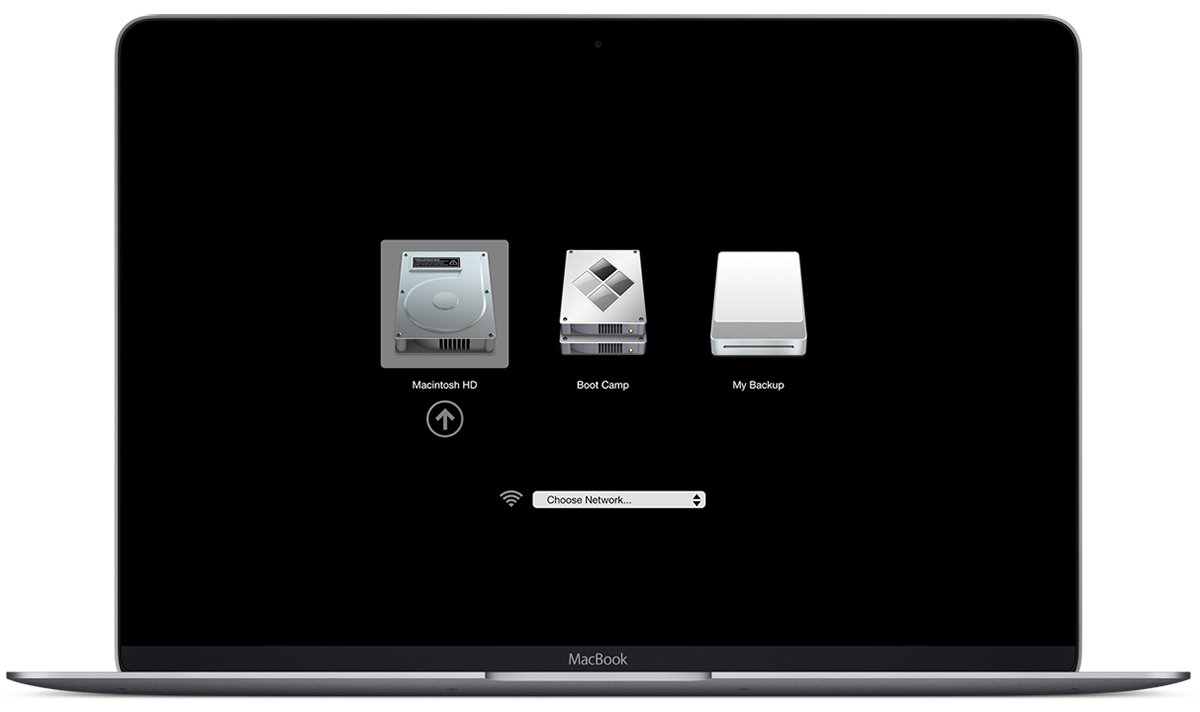
Keep holding Alt/Option until you see the boot menu appear. Use the cursor or the arrow keys on your keyboard to select your Sierra USB installer. The Mac will now boot to the Sierra installer and, because it is running off of the USB drive, it can access and erase your Mac’s internal drive. Once erased, the installer will perform a clean install of Sierra on your drive (just make sure to back up before performing a clean install!).


6 thoughts on “How to Create a macOS Sierra USB Installer”