


How to Make a Booklet in Word

Word is a powerful publishing tool which allows you to create a booklet or an entire book. The best thing about Word booklets is that you don’t need any advanced formatting knowledge to make them.
This article presents you with a simple step-by-step guide to create a booklet/book in Word. If you don’t have a lot of experience with the app, you only need to follow the instruction to a T and you’ll have no problem making your own booklet.
For completeness, we have also included a section on how to prepare the document for print. There is also a quick overview of how to print on both sides, even if your printer doesn’t support the auto option.
Making a Booklet in Word
Step 1
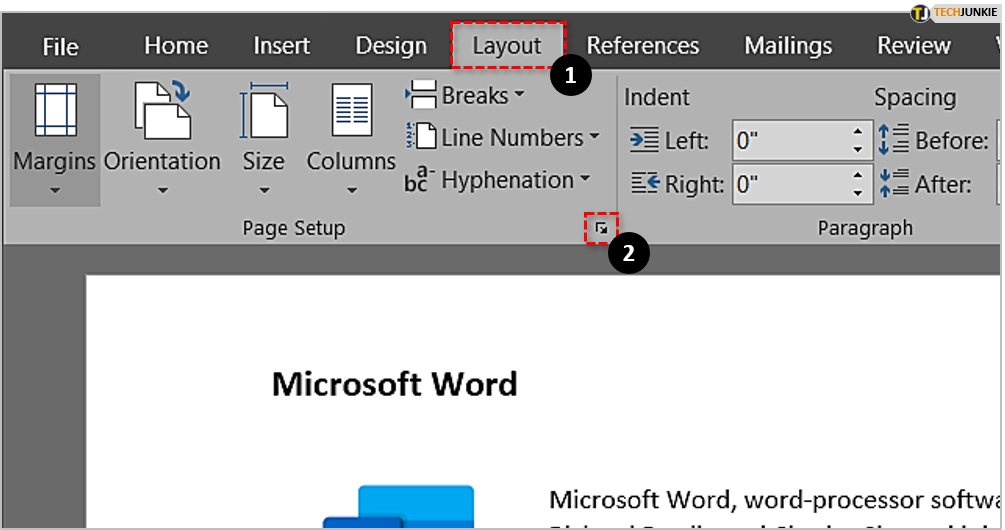
Open a Word document and select the Page Layout tab (in some versions of Word, it’s named only Layout). Within this tab, you need to click on the small icon on the bottom-left to access the Page Setup window.
Step 2
There are a few settings you need to change within the Page Setup window. Click on the Margins tab first, select the drop-down window next to “Multiple pages,” and then choose “Book fold.”
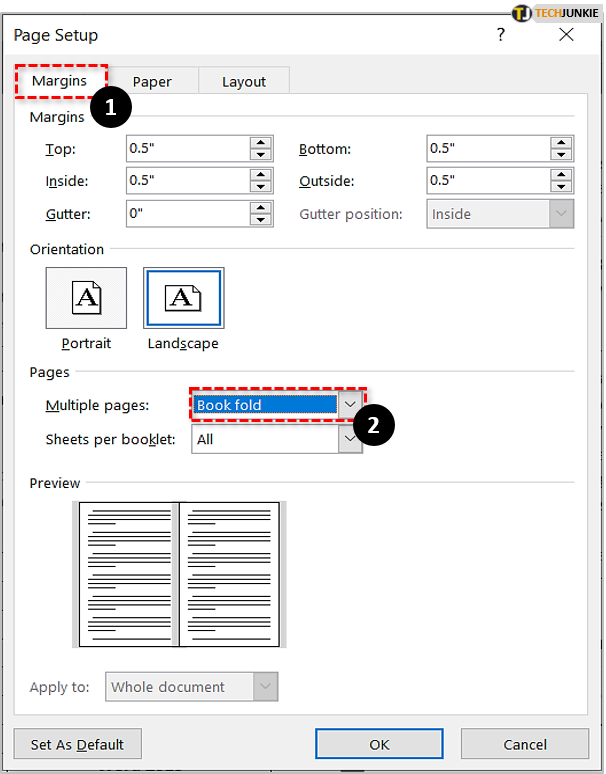
As soon as you select “Book fold,” the page orientation changes to Landscape. When creating a booklet, you need to keep it at Landscape.
Important Note
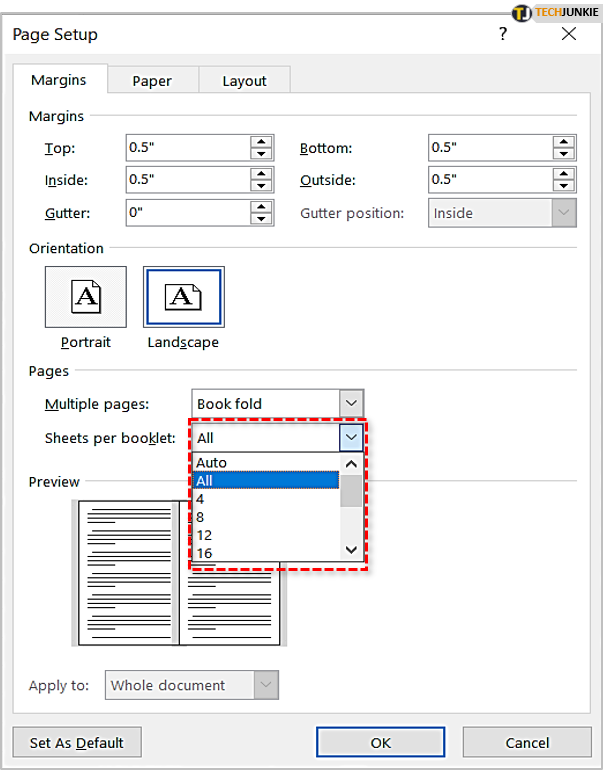
If you are dealing with a Word document that’s quite long, it’s advisable to divide it into two or three booklets. Then it’s much easier to bind them into one book and there won’t be any problems with printing and binding. To do this, navigate to “Sheets per booklet” and select the number of pages you want each booklet to have.
Step 3
Now, you need to make Gutter adjustments. The Gutter is how Word dubs margins that appear in the middle of the page. By default, these settings are at zero and you should increase them to 1.
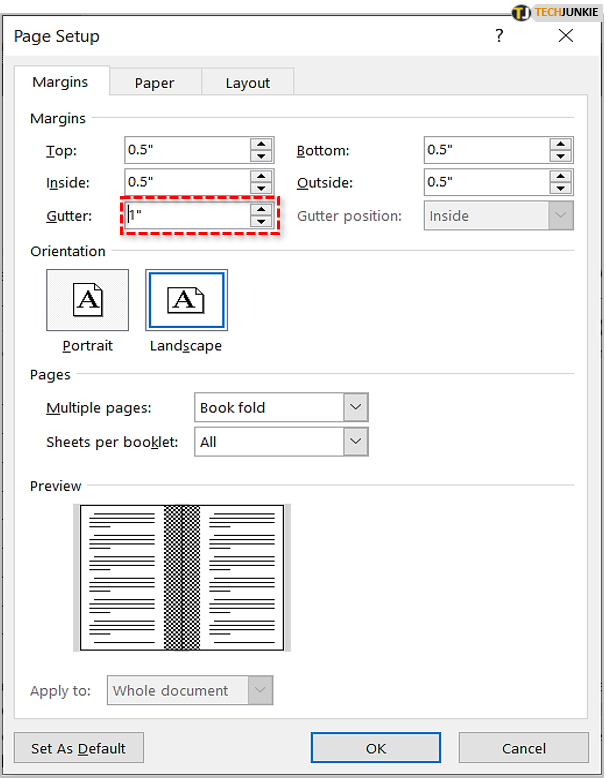
This prevents problems with jumbled words when your booklet gets bound after printing. When you make the adjustments, click OK to preview the changes.
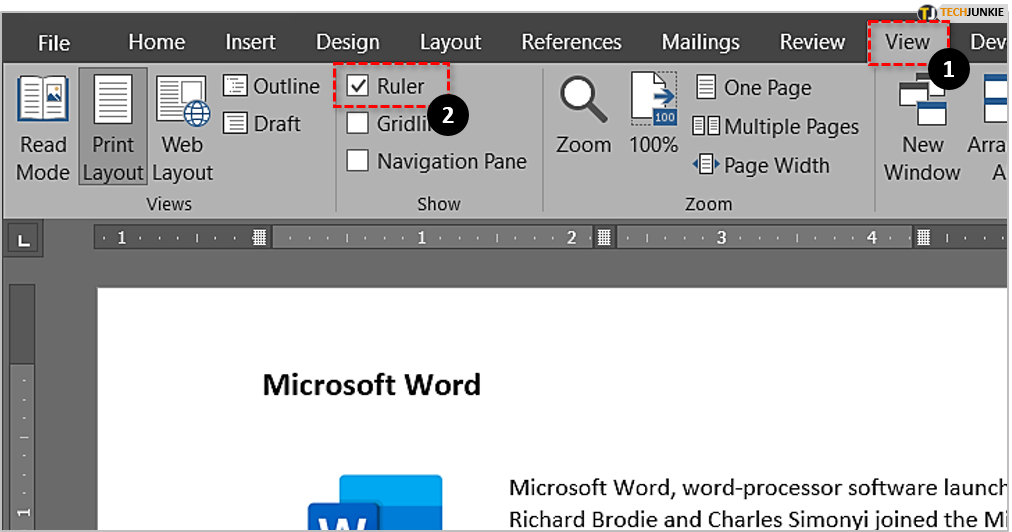
Tip: Enabling the ruler allows you to make manual adjustments to the margins/gutters. To do this, select the View tab and click Ruler under “Show Group.” Setting up the pages this way can make it much easier to insert images, graphs, and other media you might want in the booklet.
Step 4
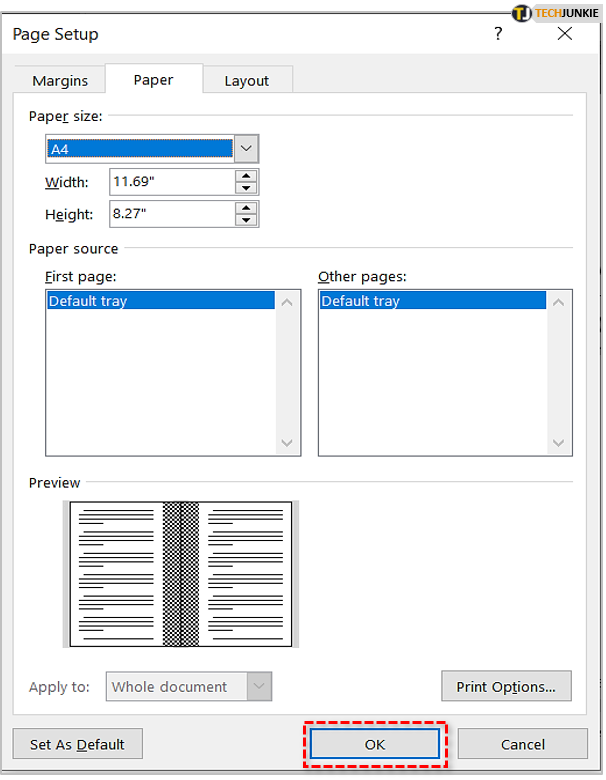
Next, click on the Paper tab in the Page Setup window. Depending on your printing preferences, you can choose different sizes from the “Paper Size” dropdown menu.
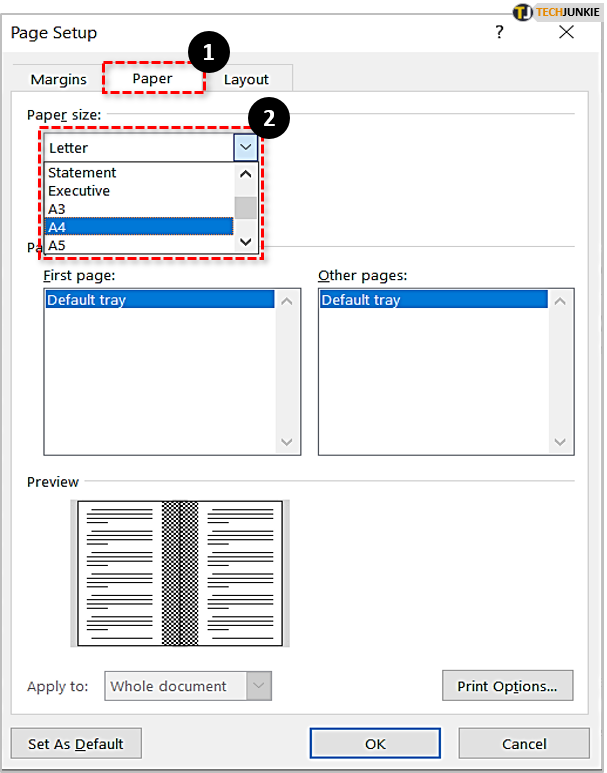
The important thing here is to understand that the booklet will be half the size of the paper. And don’t forget to put the right type of paper in your printer.
Step 5
Finally, you can click OK at the bottom of the Page Setup window and your document will automatically be formatted the right way. You should know that tables and images might need manual adjustments.
Booklet Design Embellishments and Tricks
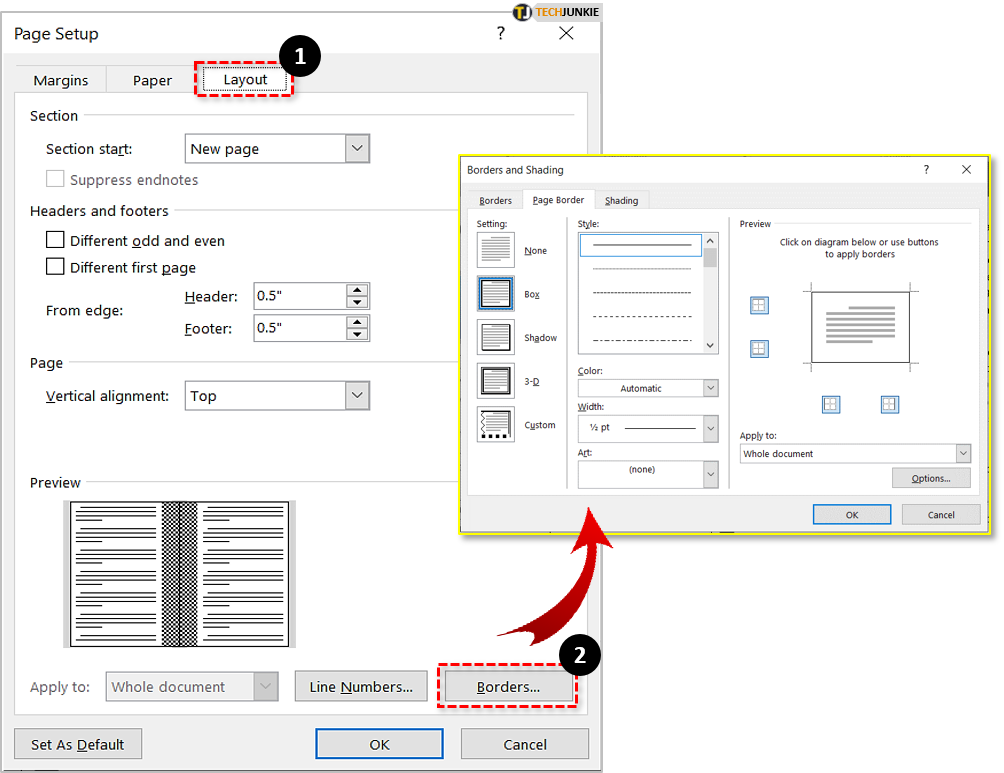
Adding borders to your booklet can make it look prettier and more professional. To set the borders, go back to Page Setup, select the Layout tab, and choose Borders.
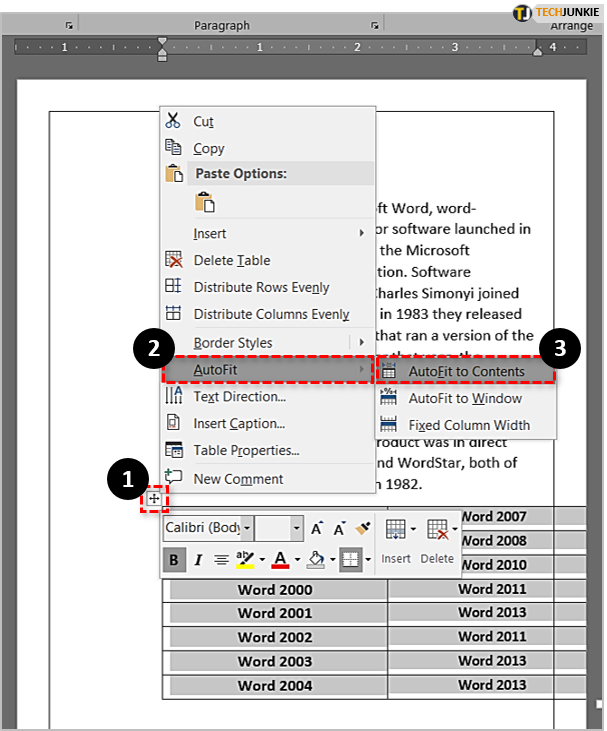
Tables and table formatting are often a problem when you are designing a booklet. However, there is no need to get heartburn over misaligned tables. Select your table, click on the small handle on the top left, and then choose AutoFit. From the AutoFit menu, select “AutoFit to Contents” and you are good to go.
While you are at it, why not utilize other Word editing tools to improve the booklet even more? Click the Insert tab and add a header and a footer to the document. From the same tab, you can also add page numbers to have a complete, professional-looking booklet.

Booklet Printing
At this point, you should have the entire document ready to print. Similar to booklet setup, there is no science to printing preference, though there are certain things you need to check.
For starters, the printer needs to be set to print both pages. And if it doesn’t automatically print both pages, make sure to flip them correctly. Here is a quick rundown of how to print:
Step 1
Select File, then Print to access the print settings window. There might also be a print icon in the toolbar, and you can also use the shortcut Ctrl + P (on PCs) and Cmd + P (on a Mac).
Step 2
Click Settings and choose printing options. For printers that support auto-printing on both sides, choose this option (it should be in the dropdown menu under Pages). It’s also important to select “Flip pages on short edge” or the second page will be printed upside down.
For printers that don’t support this feature, select “Manually Print on Both Sides.” This requires a bit more work on your side since you need to flip the pages when prompted. Check the flipping instructions carefully to avoid printing upside down or on top of already printed text.

Become Your Own Publisher
When all is said and done, Word makes it really easy to make a booklet or even a full book. You are only limited by your imagination when it comes to making the booklet look presentable.
What kind of booklet are you looking to make with these instructions? Do you need a booklet for business or school? Tell us more in the comments section below.


One thought on “How to Make a Booklet in Word”