How To Make a Brochure or Flyer with Google Docs
Creating an event flyer or brochure in Google Docs is possible either by using a pre-existing template or through custom formatting. Google even provides a free template gallery with a number of flyer options that you can choose and customize. Adding a lot of images will require that you use an outside program with a larger toolset but for a more basic product, Google Docs will do just fine. Google Docs, though flexible, is intended for text document creation and not so many graphical capabilities as they are quite limited on the platform.
How to Create an Event Flyer or Brochure With Google Docs
The Google Docs flyer and brochure template options are an excellent choice for what most people need, and they will save you a ton of time. So, if you’re interested in creating an event flyer or brochure using a free platform like Google Docs, we can start there.
Using The Template Gallery
To save yourself some time, Google Docs offers pre-existing templates that you can use in the creation of your flyers or brochures.
To open the templates:
- First, sign in to your Google Drive account and access Docs.
- You could also just head directly to the Google Docs page. So long as you’re logged in, clicking on the link will open the Google Docs webpage.
- If you aren’t logged in, enter your email address and password when prompted.
- Click on the NEW button at the top of the left side menu, scroll to Google Docs and click on the ‘>’ to the right of it.
- Choose From a template.
- This will generate a menu of templates for use with varying types of documents.
- If currently in Google Docs (instead of Google Drive), you’ll need to hover your cursor over the ‘+’ icon in the lower-right of the screen and then click the Choose template icon when it appears.
- For Flyers:
- Browse the flyer options and select a template to use as the basis for a new document.
- After it opens, assign a new title to save the document.
- Once the Doc has been titled, you can change the text and graphics while using the existing formatting.
- For Brochures:
- The brochure templates for Google Docs are all in vertical format. If you’re looking to create a more traditional bi- or tri-fold brochure, you can skip further down to the Manual Setup section.
- Scroll down to the middle of the Template Gallery to find the “Work” section.
- Search for one of the templates that look good to you. Make sure that it has “Brochure” written below its icon before selecting it.
- Highlight the placeholder text and type in the text that you would like on the brochure.
- Replace the pre-inserted image on the brochure by clicking on the image to highlight it, right-clicking it, and selecting Replace image from the drop-down menu that pops up.
- Click Upload from computer and locate the image you want to replace it with.
- Click the Open button.
- You can now alter the format the text that you want to use in the brochure by highlighting the text that you want to change and choosing one of the options located in the menu bar at the top of the page.
- Save your document once it’s complete.
- To print your brochure, later on, you can open it and press Ctrl+P (Windows) or Command+P (Mac).
- You can also click the “File” tab and then click Print from the menu.
- Once the print menu opens, set the print settings to your liking and then click Print.
Importing Templates
There are plenty of other templates out there that you may like more than the samples offered by Google Docs. Some of them can even be created in Microsoft Word and imported to Google Docs, converting them to the Google Doc format.
To import a template:
- Just locate a template that you’d like to use from a different platform (like Microsoft Word)
- Log in to Google Drive or Google Docs.
- Open the template in a preview format if possible.
- Click on the drop-down menu labeled “Open With” and choose Google Docs to open in the correct format.
- If you are forced to open as a Word document, click Save As and then select Google Docs from the format options.
It’s a super quick process that is relatively painless and you should now have the template you want to use.
Manual Setup
For the tryhards out there, you can create flyers and brochures from scratch if you so choose. It’s definitely best if you have an artistic vision of how you’d like the finished product to look before embarking on the task. Look into a few sample flyers or brochures for inspiration, just understand that Google Docs has its limits when it comes to graphics.
For custom-made flyers:
- Scroll through the font options and use different sizes for headlines.
- You can change the font color or highlight text on the main shortcut menu.
- Choose “Insert” from the menu options to add photos and graphics from your Google Drive, hard drive or directly from a camera.
- The Format menu also makes it easy to manipulate text, add spacing, columns, bullets and lists and other custom formatting options.
- To begin completely fresh, you can highlight the text where you want custom formatting removed and choose “Clear Formatting.”
The end result will require the use of the tools Google Docs offers at your disposal. Just don’t expect miracles as I’ve already stated that the platform is not meant for graphically intense tasks.
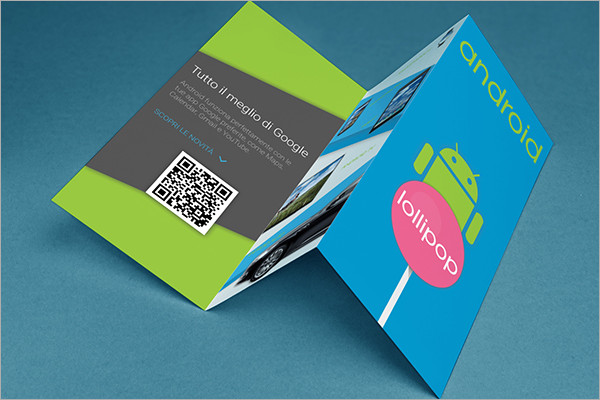
Brochures are a bit more in-depth when creating one from scratch. This is especially true if you plan on creating a more traditional bi- or tri-fold brochure. So I’ve created an entire section for customized brochure creation.
Custom Brochures
First, you’ll need to decide what you want your brochure to look like. Brochures come in many different shapes and sizes, small and large print, multiple or few images, and other varying options. Do you want yours to be a letter-sized multi-page brochure or a number 10-envelope-sized tri-fold brochure?
It’s often a good idea to sketch and fold a mock-up on blank sheets before you get started. This may seem like unnecessary additional work, but knowing what you want your brochure to look like before attempting to create it will minimize later frustrations.
Let’s begin by:
- Opening up Google Docs and logging in with your credentials.
- Your brochure will be saved to the Google Drive belonging to the currently logged-in Google account so make sure it’s the one you want to use.
- Pull up a new document.
- In Google Docs, click the ‘+’ at the lower right portion of the screen.
- Using Google Drive? Click the NEW button from the left side menu and then click on Google Docs.
- Add a title for your brochure by clicking in the box labeled “Untitled document” at the top-left of the screen and typing in what you want it to be called.
- Next, click the “File” tab and select Page Setup…. At the bottom of the drop-down menu.
- This will open up a dialog box that allows you to set the paper size, page orientation, and margins.
- Place a check in the Landscape box, then change all of the margins from “1” to “0.25” on the right side of the window.
- Click OK at the bottom of the window to apply the changes you’ve made to the document.
- Now, click the “Insert” tab in the top side menu and select Table from the drop-down menu.
- Doing so will prompt a pop-out menu.
- In the top row of boxes in the table pop-out menu, click the number of boxes that represents the number of columns that you want to use.
- You should see a thin, page-wide set of boxes appear in your document.
- For example, if you intend on creating a three-page brochure, you’d highlight the third box from the left in the top row of the table pop-out menu.
- You should see a thin, page-wide set of boxes appear in your document.
- To resize the table, click and drag the bottom line of the table down to the bottom of the page, then release it.
- Now, we’ll add a second page to the brochure. Just highlight the entire table by pressing Ctrl+A (Windows) or Command+A (Mac) and then press Ctrl+C (Windows) or Command+C (Mac) to copy it.
- Click just below the table and press Enter to form a second page.
- Then, click the second page, and paste the copied table into it by pressing Ctrl+V (Windows) or Command+V (Mac).
- This will ensure that the table is the same size on both pages for consistency sake.
- The first page will serve as the brochure’s covers (front and back), while the second page will contain all of the brochure’s text and images.
- To get rid of the table’s pesky black lines, right-click one of the lines and select Table properties… from the menu.
- Then, click the black box below the “Table border” heading.
- Follow this up by clicking the white box in the upper-right corner of the drop-down menu.
- Finalize the process by clicking the OK button.
- You could opt to wait until after you’ve finished your brochure if you want to keep the lines in as guides. This may be an easier option to ensure that the brochure appears professionally done.
Creating the Covers
- Click near the top of the front cover panel to place the text cursor there.
- Type a headline or title for your brochure.
- The cover headline is usually the biggest and boldest in the brochure so make sure that it stands.
- You can use the toolbar tools to adjust the style (bold, italic, underlined), color, size, and alignment—headlines are often centered—of the headline.
- Next, we’ll add a cover image to illustrate the purpose of the brochure, as well as draw in your prospective audience. To add an image, click Insert in the toolbar, select Image, click Upload from your computer, and double-click a picture that you want to use.
- Make sure that the text for your brochure wraps around the images. Choose the Wrap option from the right-click menu on the image.
- Break text means the text will stop above and continue below the image. This is also a viable option, particularly with the small panels of a tri-fold brochure.
- Inline means the image will basically be paste amidst the text, which can cause formatting issues in the case of a brochure.
- Locate and click on the back cover panel.
- The back cover of a tri-fold will be the middle column on the first page.
- Add any and all contact or follow-up information you feel is necessary for your brochure.
- The back panel of a brochure often includes information about the next steps or how to contact the organization that published the brochure.
- Sometimes, it’s designed to be a mailing panel so that the brochure can be mailed without using an envelope.
- You can add an image or two to the back cover to ensure that your brochure is attractive and makes people want to pick it up.
- Follow the same steps as you did for the front cover in this regard.
Creating the Internal Panels
Now, for the meat of the brochure sandwich. It’s time to add all of the primary information you want in the brochure creating the reason for a reader to pick it up in the first place.
Here’s what you need to do:
- Scroll down to the second page of the brochure which is where all of the internal text and images will go.
- Click on the first internal panel and start adding the text and images that are the heart of the information you’re trying to convey with the brochure.
- For tri-folds, this can be either the left-most panel on the second page or the left-most panel on the first page, as these are the two panels readers will see first when they open the brochure.
- You could also copy and paste the information from another document to your brochure text boxes using the Ctrl+C and Ctrl+V functions.
- These functions are Windows OS users.
- Mac users will need to press Command instead of Ctrl to perform the same functions.
- Highlight and adjust the text with the cursor and use the tools available at the top of the window.
- Headlines above articles are often bold or italics and sometimes use a different font from the main text of a brochure section.
- Body text is usually 10 to 12-point type. Headlines are typically larger.
- Use the alignment buttons to align the text.
- Body text in columns is usually aligned left or justified.
- Headlines are typically aligned left, centered, or justified.
- After entering the text and lining things up, you can add a few images to help emphasize what’s being said and to keep readers’ attention planted in your brochure.
- To add an image, click “Insert” in the toolbar, select Image, click Upload from your computer, and double-click a picture that you want to use.
- Just like on the covers, you’ll need to make sure that text is set to Wrap around the images. This is especially useful for tri-fold brochures. Click Wrap text at the bottom of any image you insert.
Once the brochure has been created, Google Docs (or Drive) will save it automatically. You’ll be able to come back to it at any time you’d like to make a few edits or print it out.
To print your brochure:
- Click “File” in the toolbar, then select Print in the resulting drop-down menu.
- From the “File” menu, you can also download the document in a different format or email it to a commercial printer or coworkers.