How To Make Google Docs Landscape

The orientation of a Google Doc is set to portrait by default, and for good reason. It just makes the most sense. The portrait orientation is generally used for the vast majority of documents you’ll find on the web. Pages full of lengthy text is best viewed in this way. If you don’t agree, maybe you should think about what page orientation you’re reading this article in.
However, there are a few fringe cases where formatting your document to be wider than it is tall is more beneficial. Occasionally your documents can contain large tables that require additional horizontal space. Things like presentation slides and posters also fall into this scenario. In this situation, it’s definitely better to apply the landscape orientation to the page.
“How does one go about altering the orientation of a Google Doc?”
In this, TechJunkie has you covered.
Changing The Orientation of A Google Doc
No matter the reason you have for changing the orientation of a Google Doc, setting it up is a matter of just a few clicks. Just know that Google Docs only lets you change the page orientation of an entire document and not just specific parts of it. So, if you were expecting to drop a table in the middle of a lengthy essay, you’re going to be disappointed. Instead, you’ll have to create a new document specifically for the table and upon printing it out, add it to the rest of the pages.
Microsoft Word is better in this way, allowing you to orient different sections of a document in different ways. Google Docs is a bit limited in this way so you’ll have to get used to it if you plan to use it as your preferred suite. Though not as useful, Google Drive is still a free program and has its perks in comparison.
Even still, being able to swap the entire document into a landscape orientation is still very useful for slideshow presentations and single page projects creating flyers and posters.
If you’d like to learn how to set your Google Docs to landscape from portrait:
- Head to either Google Drive or Google Docs, and open the file for which you need the orientation changed.
- You can also create an entirely new Doc if that suits your needs better.

- You can also create an entirely new Doc if that suits your needs better.
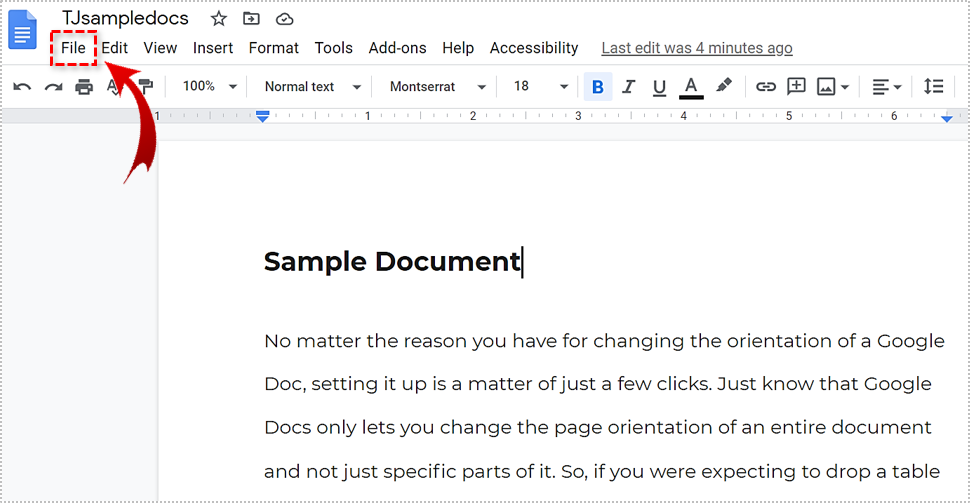
- Click on the “File” tab at the top of the window.

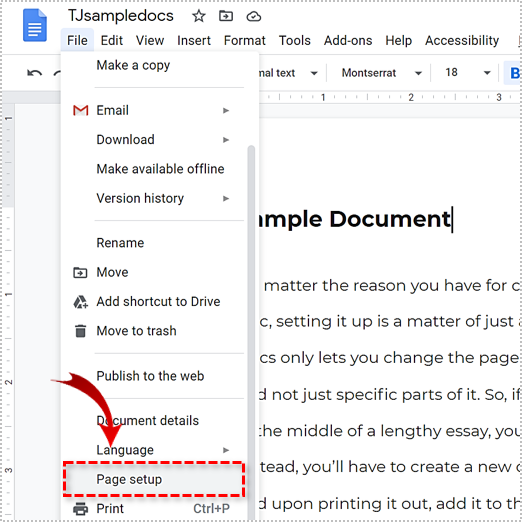
- From the drop-down menu, select Page setup…
- This will pull up the “Page setup” window.
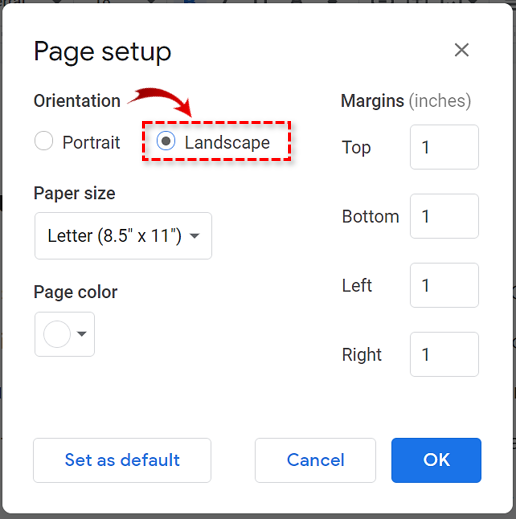
- You’ll notice the different options available to you in this pop-up window:

- In the first section marked “Orientation” there are two radial options: Portrait or Landscape.
- Portrait is toggled by default.
- To change the orientation to Landscape, simply click the corresponding radial. It will fill up with a black dot when selected.

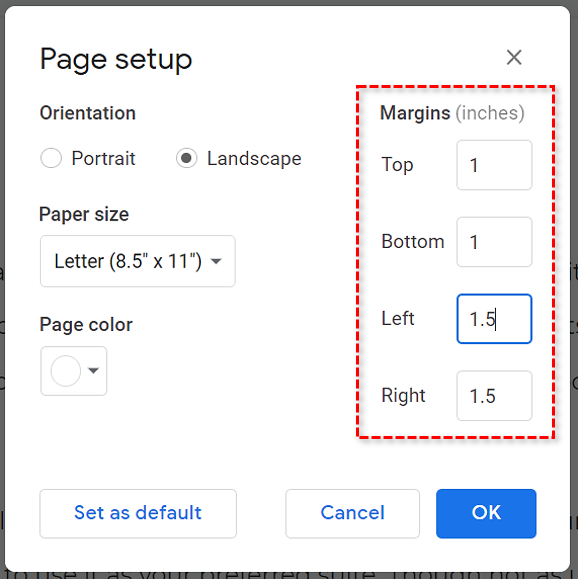
- There are a few other options that you can adjust including Margins (in inches), Paper size, and Page color.
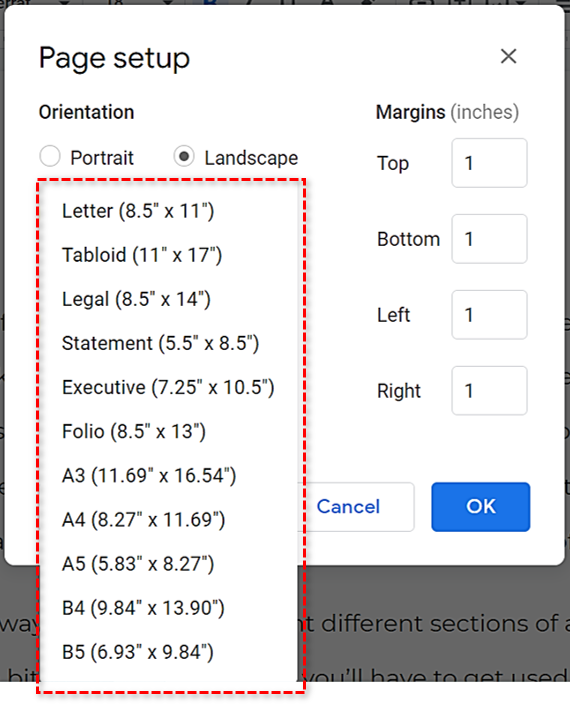
- Google Docs supports the following sizes for the paper size of the document:
- Letter (8.5″ × 11″)
- Tabloid (11″ × 17″)
- Legal (8.5″ × 14″)
- Statement (5.5″ × 8.5″)
- Executive (7.25″ × 10.5″)
- Folio (8.5″ × 13″)
- A3 (11.69″ × 16.54″)
- A4 (8.27″ × 11.69″)
- A5 (5.83″ × 8.27″)
- B4 (9.84″ × 13.90″)
- B5 (6.93″ × 9.84″)

- Choose the margin adjustments by entering the size in inches desired into the Top, Bottom, Left, or Right boxes provided.

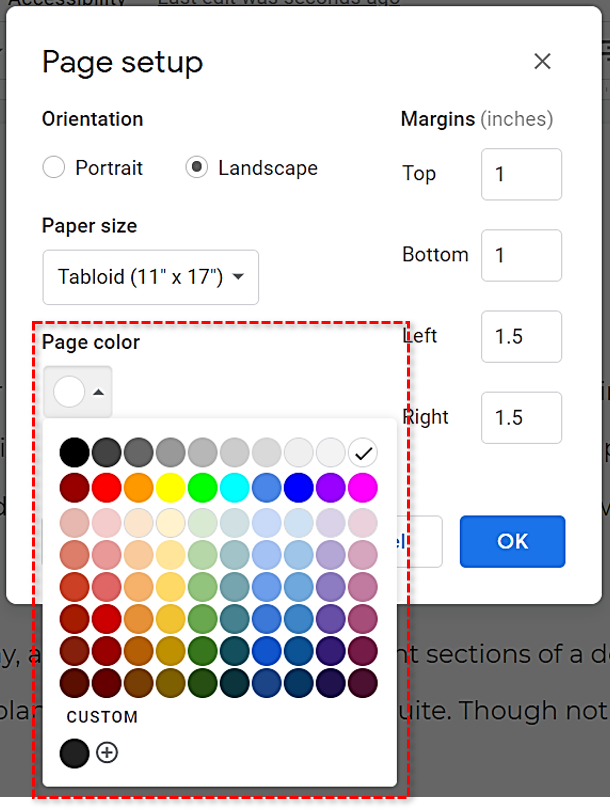
- Changing the “Page color” will alter the background of every page in the document to the color selected. So if you want the background to become black so that you can change the color of the text to white, you can do so from this option. Customized colors are also available.

- Google Docs supports the following sizes for the paper size of the document:
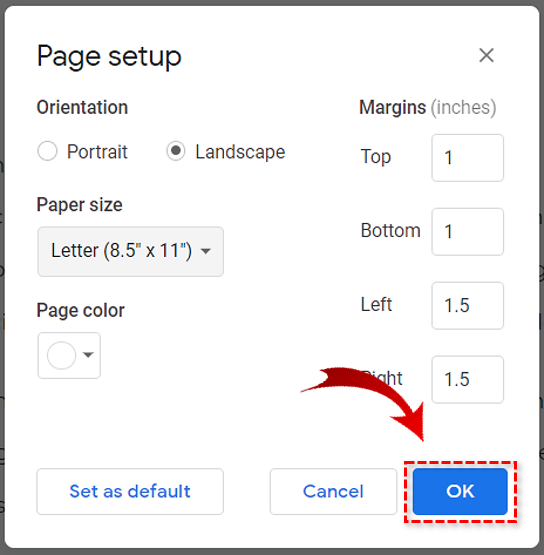
- Once finished with your additions, alterations, and edits, just click the OK button at the bottom right corner of the window.


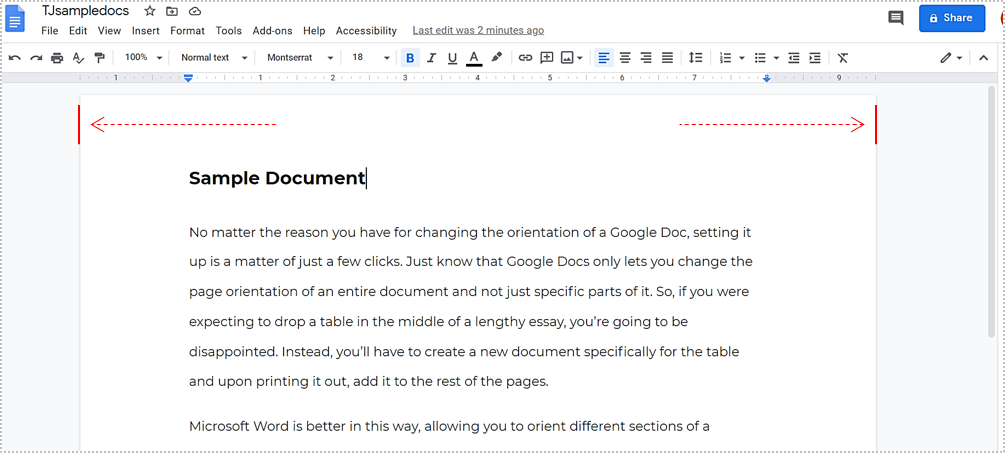
As soon as the window closes, you’ll notice that the pages are much wider and would be able to fit extended elements. The document is immediately turned on its side into the landscape page layout, stretching any of your added tables, text, and images across the page. At this point, you can add additional wide images and tables and have them appear better than they would otherwise in the default portrait orientation.
If you think that the landscape orientation will be used more often than the portrait option, and would prefer not to have to go through these steps every time, you can set landscape as the default orientation. All that needs to be done is to click the bottom Set as default found at the bottom of the “Page setup” window prior to hitting OK.

The next time that you open a new document, it’ll be in whatever default orientation you set. This is a great idea if you plan to be working on a multi-document project for a lengthy period of time.
In addition to the setback mentioned earlier (unable to target specific portions of the document for landscape orientation), a second drawback is that the media included in your document can be rearranged and reordered in unintended ways after making the swap. This means that when images or videos are added to the document while it’s set in portrait orientation, and then you switch it to landscape orientation, it will likely appear altered in some way. You’ll need to give the Doc a manual cleanup after the changes are applied before printing or sending it off to anyone for approval.
That’s all there is to it. Other than the two mentioned complications, switching your document from portrait to landscape orientation is simple, quick, and effective. Just remember to fix any added media after the change and you’re Google Docs will come out looking amazing.