


Never Forget Your Files Again With Windows Timeline
If you haven’t heard of Microsoft’s new Timeline feature coming as part of the Spring Creators Update, you’re in for a treat. Originally supposed to hit Windows 10 PCs during the fall, the feature experienced some delays, but is now rolling out to everyone over the next few weeks.
Timeline is designed to bring some awesome inter-connectivity to your PC. In its most basic form, it shows you a history of of programs and files you’ve used which synchronize across all of your PCs. If you sign into a lot of mobile apps with your Microsoft account, Timeline will synchronize with those activities as well.
Timeline makes life a whole lot easier. Have you ever been working on something on your iPhone or Android device and waned to look at it or continue working on it on another device, such as your PC? Well, now you can do so very easily. With Timeline, you can just click on your last activity — there’s no longer a need to send a file to yourself via email or upload the file to the Cloud so you can access it on your PC — Timeline simplifies this process entirely.
Be sure to follow along below — we’re going to show you how to enable and start using Timeline on a daily basis!
Timeline Setup
Once you have the Spring Creators Update downloaded and installed, accessing Timeline is as easy clicking on the Task View button to the right of the Search box on the taskbar.
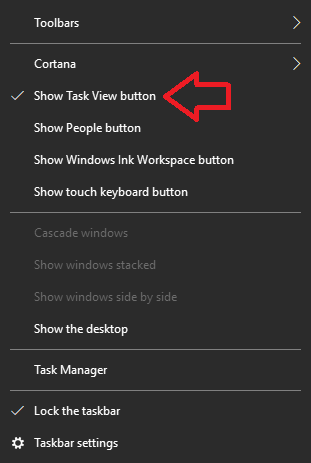
If you don’t see Task View on your task bar, chances are you hid it from view. To make it show up, it’s as simple as right-clicking on the task bar and clicking “Show Task View.”
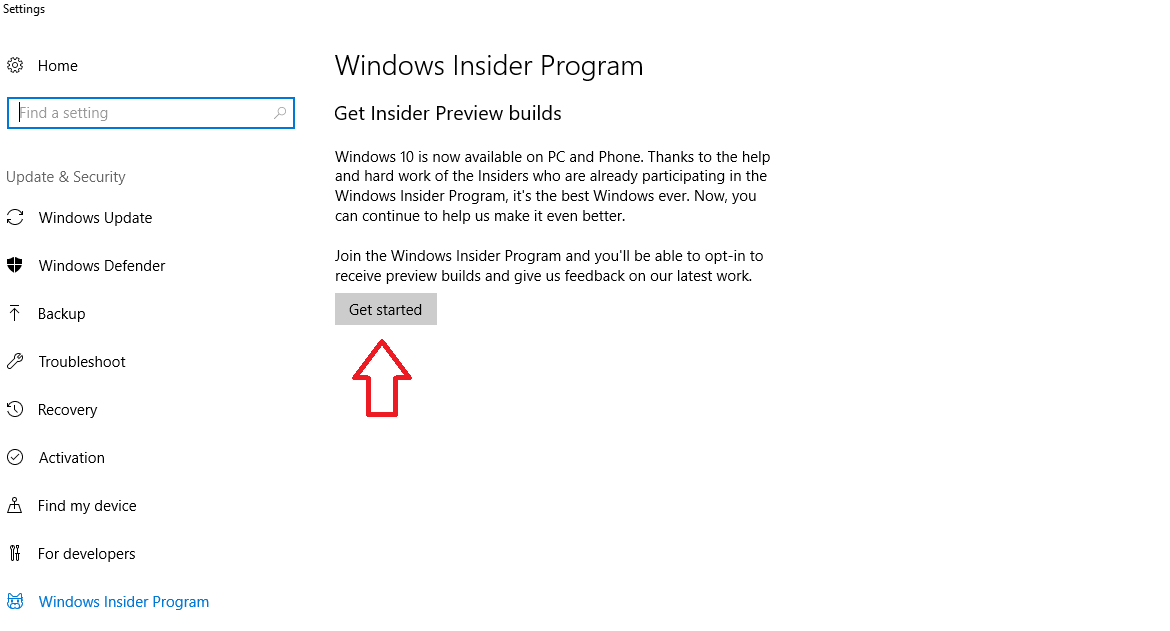
If you don’t have the Spring Creators Update, you can get it instantly by opening the Windows 10 Settings window. This can be accessed within the Start menu. Next, head to Update & Security, click the Windows Insider Program link and then select the “Get Started” button. Once prompted, tell it you want “Fixes, apps, and drivers,” and set your pace to “Slow” so that you don’t get any early updates that might mess with your PC. This should get you the Spring Creators Update downloading on your PC before anyone else.
Next, we can start using Timeline. Once the update is installed on your PC, you should be able to click that button next to the Search bar that brings up Task View (also your Timeline now).
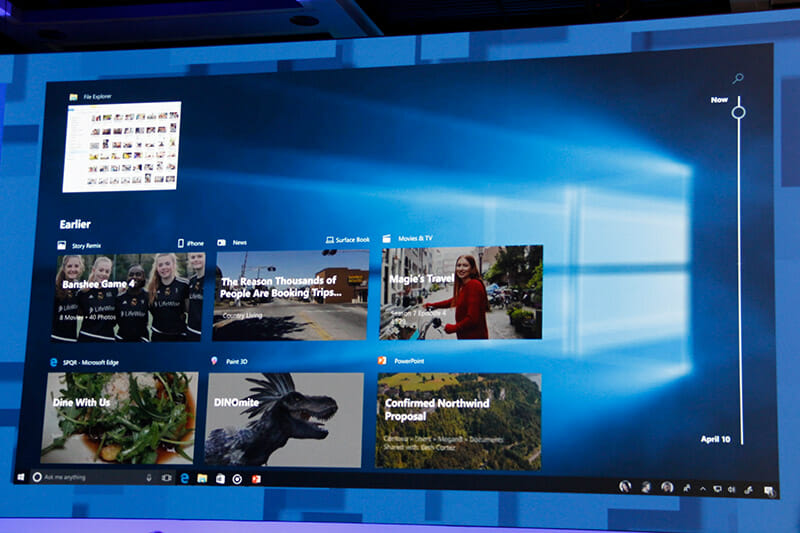
Once you open Task View, you’ll see all of your currently open programs in Task View. Below that interface is your Timeline. Depending on how many Task View programs you have open, you may need to scroll down a bit to see your Timeline.
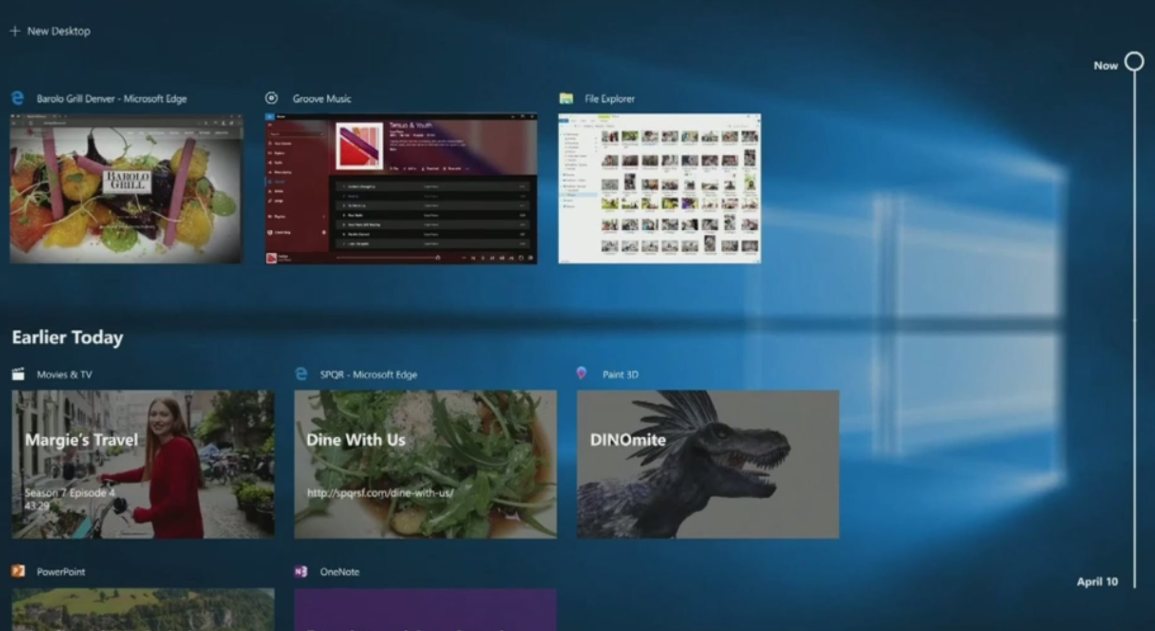
After your scroll down, you should start seeing all of your activities — files you’ve opened, programs you’ve used and etc. One neat thing is that Timeline supports Universal Windows Platform (UWP) apps from the Windows Store — with this support, you’ll be able to see specific articles you’ve viewed in your Timeline with the News app, or even specific websites you’ve visited in Microsoft Edge.
Here’s the powerful part of Timeline: open Timeline right now and look at your activities. Click on any one of them — it could be a file or a web page. Once you click it, Windows will open the file straight away, or navigate you back to the web page you were on, or even take you back to the article you were reading in the News app!
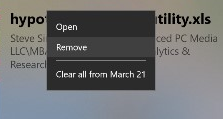
If you want to remove an activity or clear a group of activities, it’s as easy as right-clicking on the activity (or long-pressing if you’re on a tablet or touch screen) and selecting the “Remove” button. There a “Clear All” button as well that can clear all of your activity for a certain date.
Next, we need to activate the powerful portion of Timeline — syncing with the Cloud. It doesn’t sync with the Cloud by default, so that’s something we’ll need to manually enable. By enabling it, you ask Microsoft to sync your PC data to the Cloud. This enables you to see all of your Timeline “activities” on other devices that sign into with the same Microsoft account. Say we open an excel file of last month’s budget on our PC. If we’re logged into the same Microsoft account our PC is on another phone, tablet or PC, we can go into our Timeline and access that same file, even if the file didn’t originate from one of those devices — it just pulls it from the Cloud. It’s seamless. You don’t have to send yourself a file in an email, upload it to the Cloud, or try and transfer it by way of a flash drive to access it on another computer. With Timeline, you can access it on another device in seconds.
Another neat tidbit — you don’t have to enable syncing on all of your devices. If you only want to see the activities or data from your PC, just enable syncing on your PC. You’ll be able to see all of your activities from your PC on any device logged in with the same Microsoft account; however, if you’re on your PC, you won’t be able to see the activities from your phone, tablet or another PC. We recommend enabling it on all of your devices if you want to get the most out of Timeline — this gives you seamless access of your files and activities across all of your devices.
To enable syncing, scroll all the way to the bottom of your Timeline. You’ll see a button that says “Turn On.” Click it, and it will open it up in the Settings module.
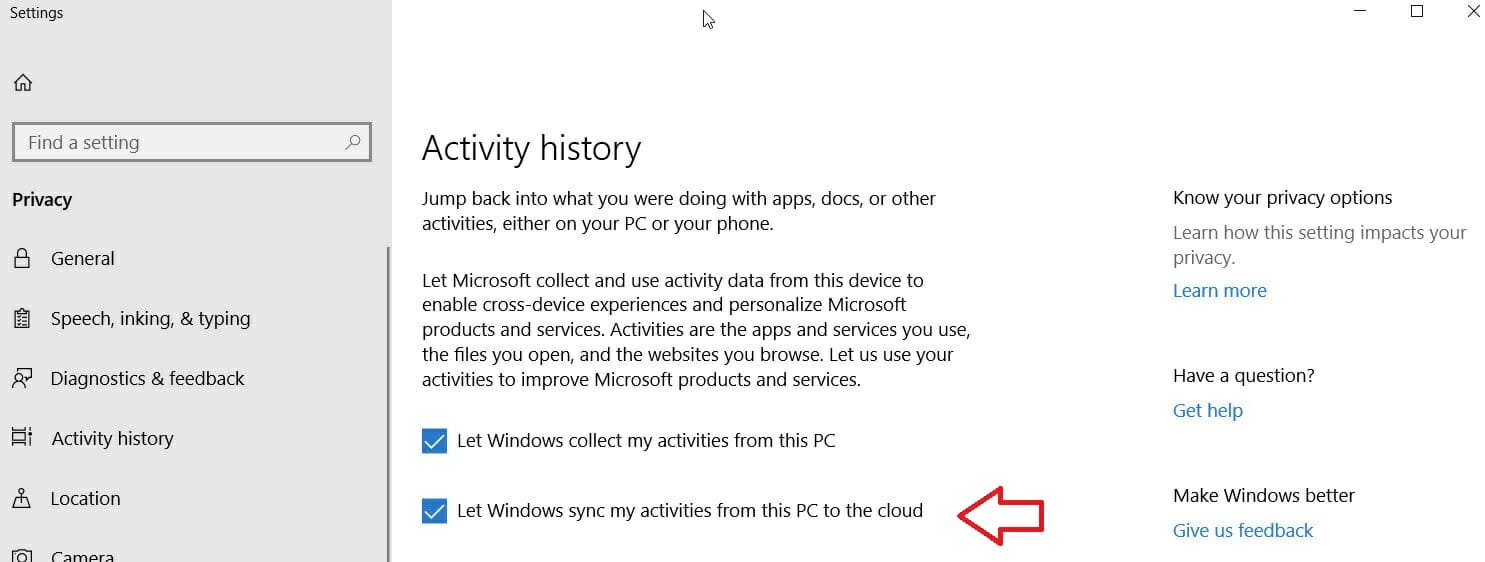
You can also access it by opening the Start menu, clicking on the Settings gear icon and going into Privacy > Activity History. To enable syncing, check the box that says Let Windows sync my activities from this PC to the Cloud. And now you’ve started syncing your activities on that PC with all of your devices that can be accessed with a Microsoft account.
How To Disable Timeline
You may want to disable Timeline for a number of reasons — you don’t like all of the data it’s collecting, or maybe you’re not a fan of having all of that personal data traveling through the Cloud. Either way, it’s super easy to disable the Timeline feature entirely.
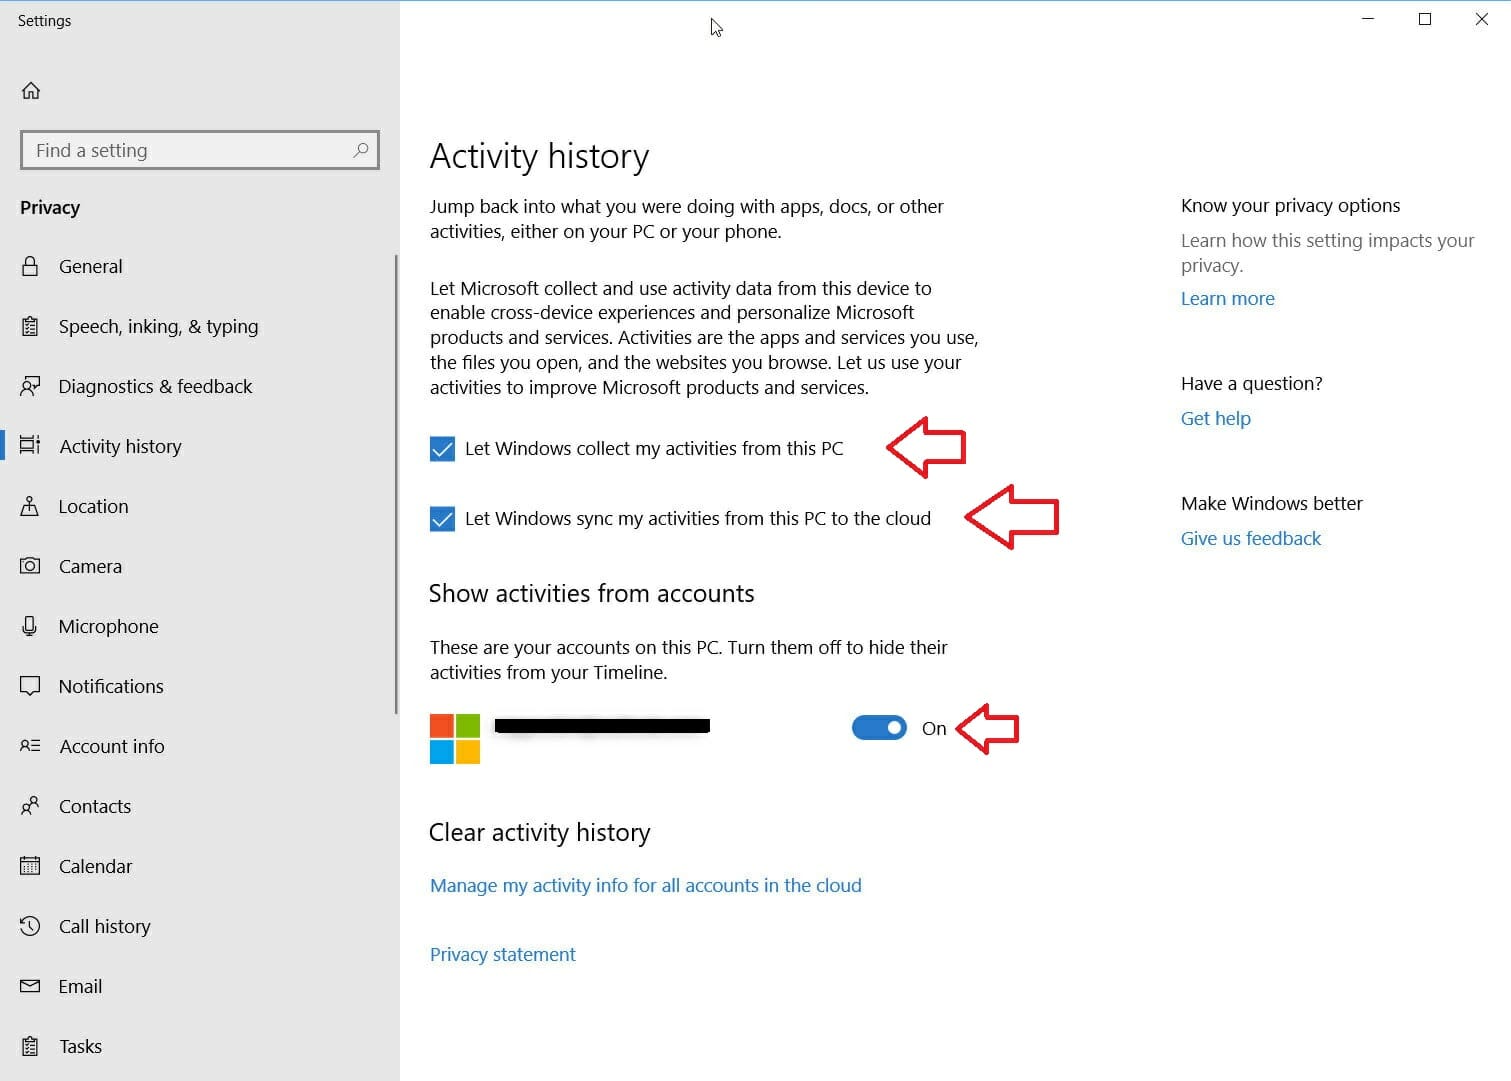
Head back into the menu we were just in. You can do this by going to Settings > Privacy > Activity History. If you just want to stop uploading your data to the Cloud, simply uncheck the box that says Let Windows sync my activities from this PC to the Cloud. If you want to stop Timeline altogether, also uncheck the box that says Let Windows collect my activities from this PC.
![]()
Next, under the Show Activities from accounts heading, you’ll want to turn any accounts listed to the “Off” position. And to clear everything that Microsoft had already collected, simple click the “Clear activity history” button.
Congratulations, you should have successfully stopped the Timeline feature from running on your PC. Microsoft will no longer collect data for that purpose.
How You Can Use Timeline In Your Daily Life
We’ve already mentioned quite a bit just how useful Timeline is. Timeline saves you a ton of time. If you’ve ever tried to figure out how you can get a file from your tablet or phone to your PC in a seamless way, you’ve probably realized there isn’t one, and it’s just going to be a tedious process. Timeline clears that up, saving you a ton of time by making your important files accessible on any device.
You can imagine that it’d be especially useful at meetings. Say you forgot to move a file from your at-home workstation to your phone or tablet. If you’re logged into Cortana on any Android or iOS device (logged in with the same Microsoft account as your workstation), Timeline will let you grab that file in seconds once you find it in your activities and click on it.
Aside from that, it can be really helpful if there was an article or web page you wanted to read or visit, but accidentally closed it and lost your place. Timeline can register articles you read and web pages you visit as an activity so you can easily find your place if you lose it.
Closing
And that’s all there is to it! By setting up and using Timeline, you’ll save yourself a ton of time (and potential embarrassment in a meeting) by being able to quickly, easily, and seamlessly grab files from your computer by way of the Cloud.


