


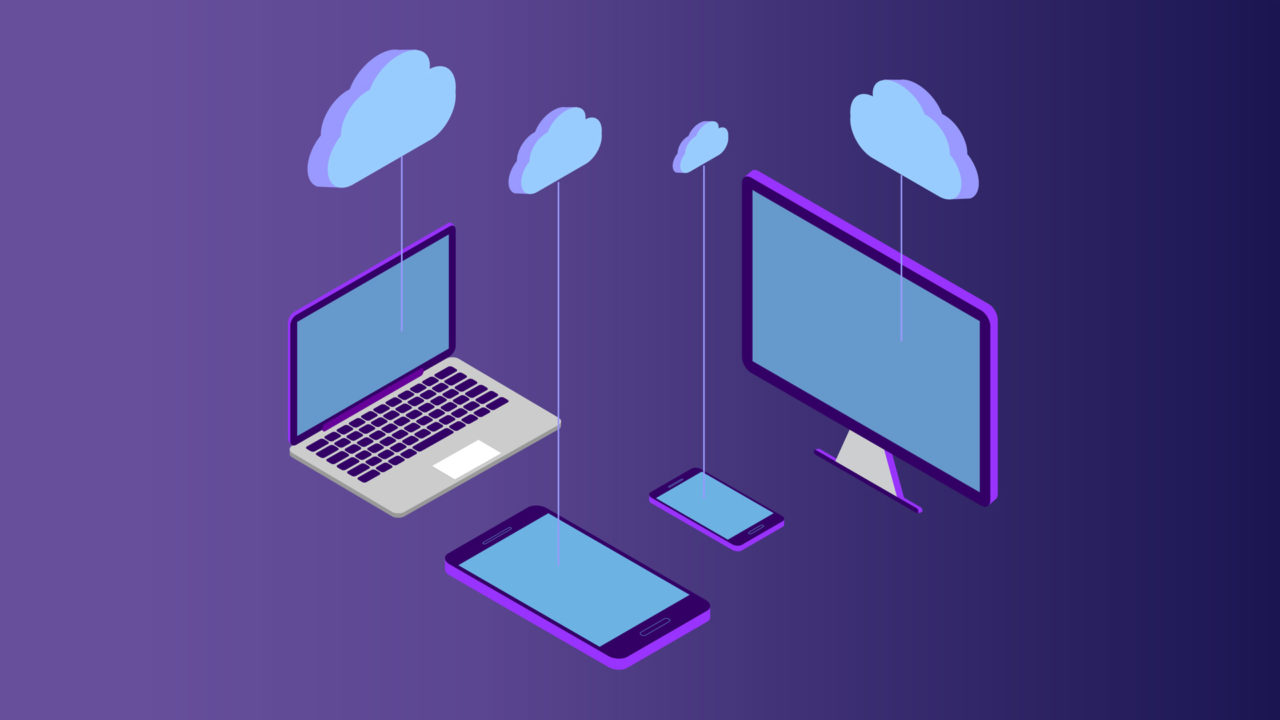
How and Why to Set Up an Offsite Backup for Your Mac
It’s hard enough convincing people to back up their data locally. Even with tools that make it easy, like Apple’s Time Machine, many people still don’t take the time to properly back up their most important files. Imagine then the frustration of trying to convince people to not only back up locally, but to create an offsite backup as well!
In my line of work with Apple-focused tech support, I’ve seen all of the worst-cases scenarios: people losing the only copies of their baby photos, crucial tax and business documents, and even the “less important” stuff like music and movie libraries. Once you’ve tried to console a crying customer when you tell them that their lack of a backup means that their data is gone forever, you never want to let this happen to anyone else. It’s horrible! That’s why offsite backups are so important.
What is an Offsite Backup?
While local backups — e.g., Time Machine, a cloned hard drive you keep on your desk, or even just a USB drive of your most important documents — are important, they’re vulnerable to the same risks as your original data on your Mac. If your house burns down, floods, gets fried by a lightning strike, or is burglarized, your local backup that’s sitting there right next to your Mac is going to bite the bullet, too.
The solution then is an offsite backup, which is exactly what it’s name describes: an additional copy of your data that’s not stored in the same location as your Mac and local backup. For most consumers, there are two main choices for your offsite backup:
- Backing up to a physical device, like this hard drive (which is about $50 for 1TB of storage) or this SSD (which is much faster but significantly more expensive) and then physically moving the drive to a different location outside of your home or office.
- An online subscription backup service, like CrashPlan ($10/month per computer), Backblaze ($5/month per computer), or Carbonite ($6/month per computer), which uploads your data to the company’s servers, which are located in various places around the world.
The point is, with either option, you’re getting at least one copy of your data outside of your home or office, so that it’s not at risk of suffering the same potential fate as your original data and local backup.
Of the two options, the subscription model is more expensive in the long run, but it has the advantage of never requiring you to physically update it; after all, how likely are you to run to a safety deposit box or to your pal’s house to get a drive to update and then bring back? If you’re like most of the people I know, the answer is “almost never,” so that’s just about as bad as not having an offsite backup. After all, if your house burns down, it’d be a double whammy to then realize that the only surviving copy of your photos is more than a year old.
Online Backup Service
The offsite backup service I use and recommend is CrashPlan, even though it’s the most expensive of the ones I listed above (this is not sponsored — I’m an actual paying customer!). I’ve been able to thoroughly test the program and Code42’s (CrashPlan’s maker) support since I first started with it over five years ago, and I’ve been very pleased with both. In fact, CrashPlan has saved my bacon more than once!
But most of the online backup services work the same. You’ll sign up at the service’s website and then download the client software to your Mac, which is typically accessible from the menu bar. Here’s what CrashPlan looks like:
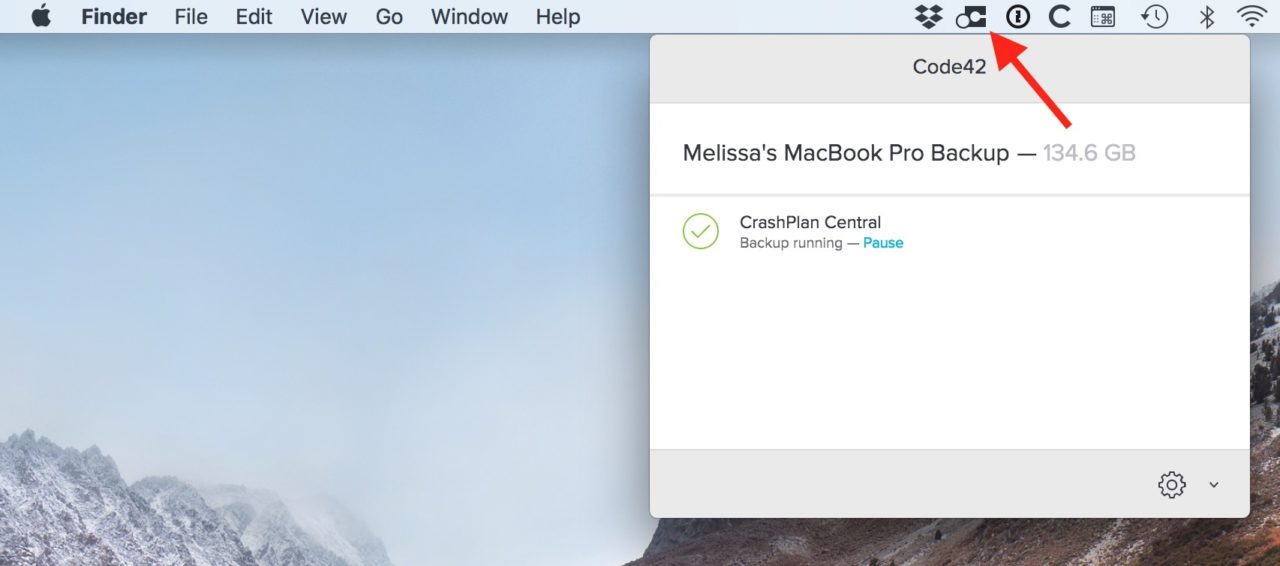
If you opt for CrashPlan, you can try it out for free and use their handy getting started guide to configure the program on your own Mac. In general, though, once the client is installed, you can choose to backup your entire Mac’s drive (including, for some services, external drives too) or just certain folders. Once you’ve made your selection, the client will start uploading your data to the company’s servers, a process that can take days or even weeks depending on the speed of your Internet connection’s upload bandwidth and the amount of data you’re trying to back up. Once that initial upload is finally complete, however, future uploads will go much faster as you’ll just be backing up new files and the changes to any existing files.
Manually Moved Physical Drive
If you decide to go the physical-drive route instead, be sure that the place you’re planning on storing it is both secure and in a different location than your Mac usually is. For example, a safe in your friend’s house is a great location; an unlocked shed in your back yard is not. However you store it, be sure to encrypt the drive for safety’s sake, too! This will ensure that if someone nefarious takes the thing, they won’t be able to read the data on the drive without your encryption password. (And see the general steps to encryption below in my sections on software.)
Finally, the last thing to consider for your physical offsite backup is what software to use. I’d recommend using a different program than the one for your onsite backups, so if you have a Time Machine drive at home, for example, then you’d want to use a different application for your offsite drive. Yes, I know this is more complicated to do; the reason I suggest it is that if something goes wrong within the software itself (e.g., if Apple’s Time Machine program develops a bug that corrupts your backups), you have a fail-safe option that’s completely different.
So if you’re already using the free, built-in Time Machine software at home, my favorite alternative backup software is Mike Bombich’s Carbon Copy Cloner ($39.99 after a 30-day free trial). This program will let you create a bootable clone of your Mac, meaning that you could theoretically start up from your backup if your computer’s internal drive dies. This is another case in which I’ve had extensive good experiences with a program; not only have I used it for years and years myself, but any time I’ve asked questions, the developer has been incredibly responsive, kind, and helpful.
Configuring Your Backup Drives
Here are some general steps on how to configure a physical drive for backup, depending on which software you’re using.
Time Machine: Plug the drive you’d like to use as a backup into your Mac. Sometimes, your computer will ask you right off the bat if you’d like to back up to the connected device:
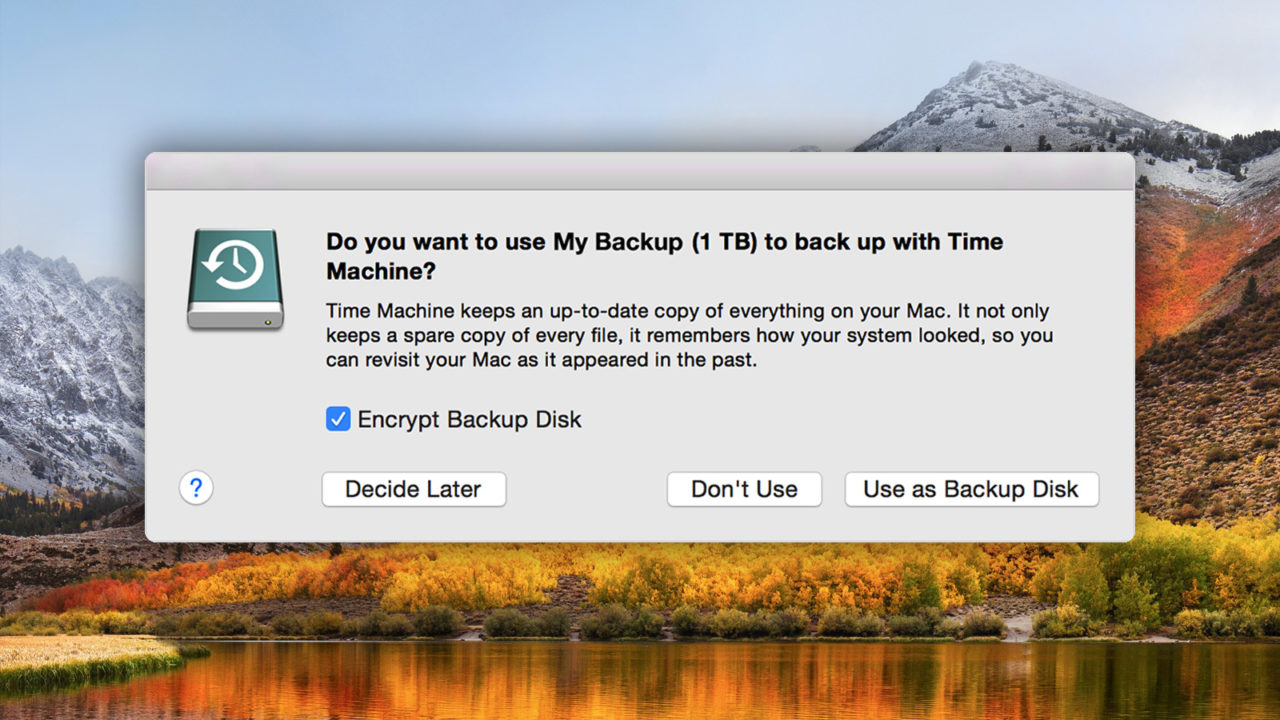
Time Machine interface image via Apple.
But if it doesn’t, follow the instructions Apple has laid out in their support article on how to set up a Time Machine backup. And in either case, be sure to check the box for encrypting the drive, as this’ll help keep your backups safe from prying eyes.
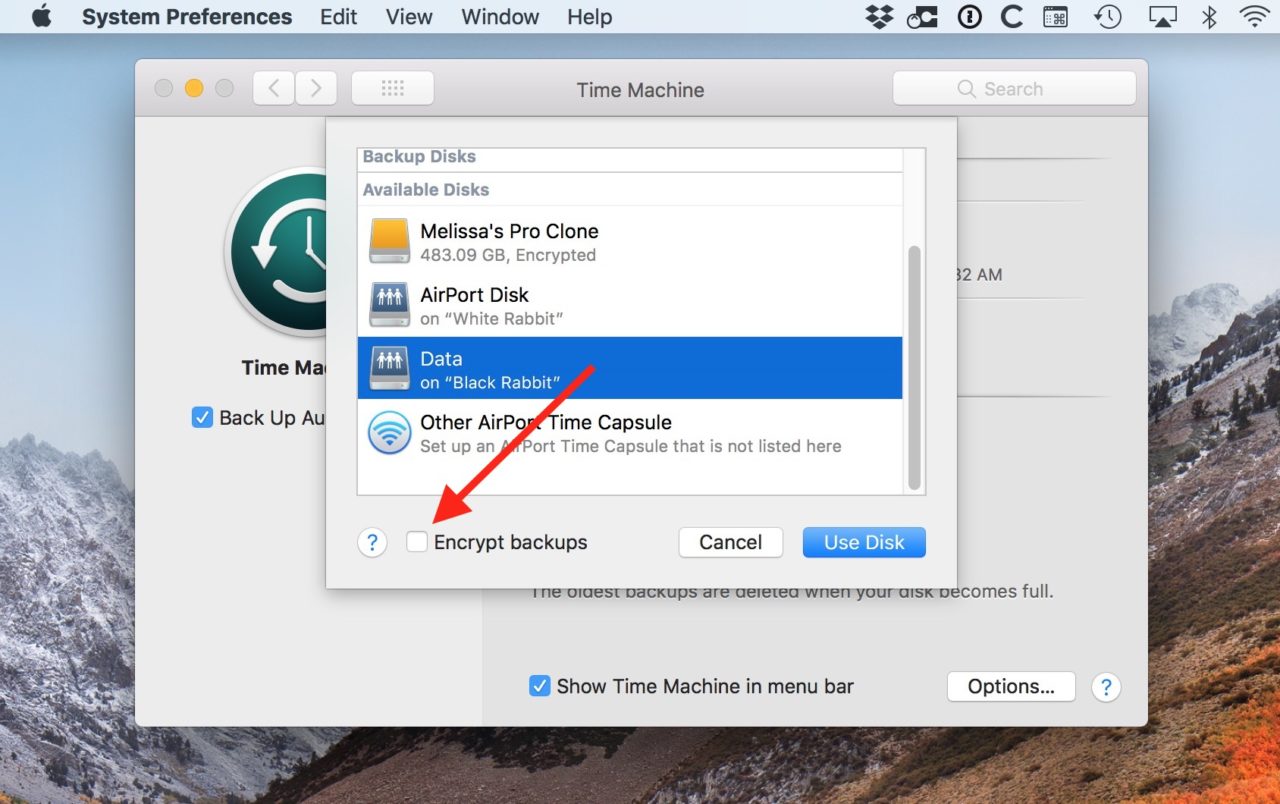
Don’t lose the password, though!
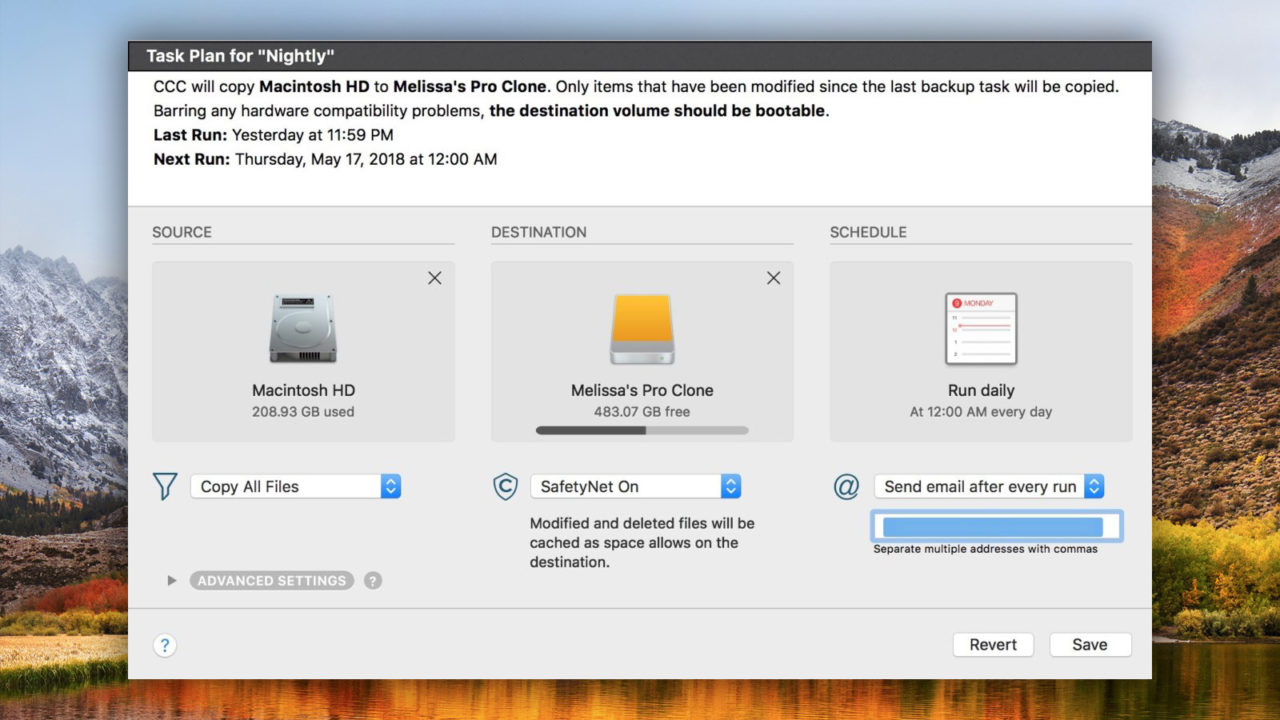
Carbon Copy Cloner: Detailed instructions for downloading and installing the program, preparing your drive for Carbon Copy Cloner, and encrypting the drive are available on Bombich Software’s incredible knowledge base site. CCC is also highly configurable; you can set it to do all sorts of neat stuff, like running when you connect the destination drive, running on a schedule, or even sending you an email whenever a backup is run. This is what one of my configured tasks looks like, for example:
As I mentioned, using a different program for backing up your offsite drive makes things a bit more complex, but I think it’s worth it. If you disagree, though (or you just don’t want the hassle), having two Time Machine drives is absolutely fine, even if it’s not as bulletproof of a scheme. Trust me when I say that having even one backup is way ahead of a lot of people I meet. Sure, Macs are supposed to “just work,” but no device is immune to crashes. Or fires and floods, for that matter. I’m definitely going to invest in the first computer company to invent a truly disaster-proof device.
My Personal Backup Process
Finally, in case you’re curious about how paranoid I really am, here is my current backup scheme:
- Two onsite network backups (for which I use two Time Capsules);
- One onsite USB backup (for which I use Carbon Copy Cloner);
- One full offsite backup (for which I use CrashPlan);
- Additional offsite syncing of photos, critical business folders, and other documents through various services, such as iCloud’s Desktop and Documents syncing.
So, um…yeah. Paranoid. But honestly, it generally takes no longer than 5 minutes per week to check and maintain these backups. After the initial setup, it’s been smooth sailing, and I don’t really have to worry about my data unless there’s a zombie apocalypse or something. In which case I’d probably have different things to worry about than whether I had a copy of my birthday pictures, you know? Funny how birthdays fade into the background when zombies are involved.


