


How to Organize Google Sheets into Folders

Google Sheets has such an intuitive interface that many first-time users forget to keep track of their files. But after a while, you might end up with a large and messy digital archive. If you haven’t already, now would be the right moment to organize those files into folders.
While you can’t create folders in Google Sheets directly, you can make them in Google Drive. In this article, we’ll show you everything you need to know about organizing Google Sheets into folders.
Organizing Your Google Sheets with Google Drive
Now that you have some sheets on Google Drive, start using folders to organize them. Google Drive folders are similar to the folders on your computer.
Here’s how to create a folder, step by step:
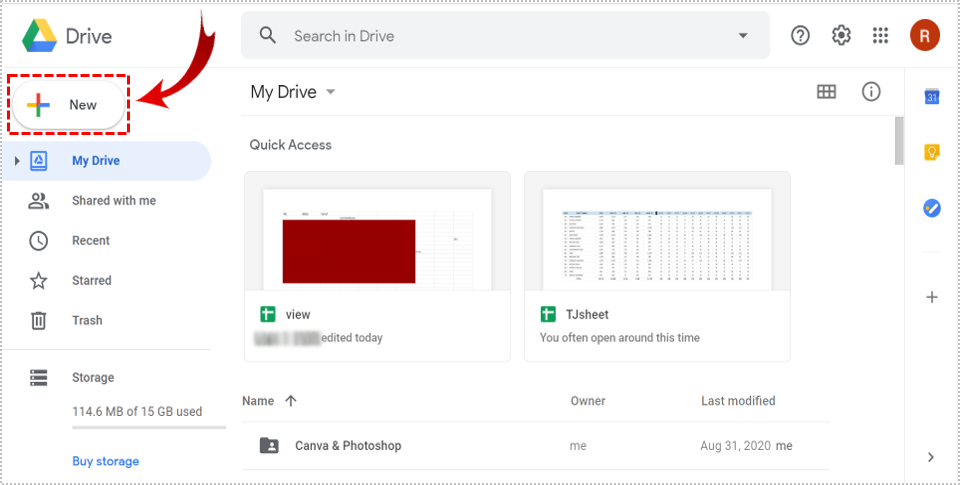
- Go to Google Drive, find the “New” button in the upper left corner.

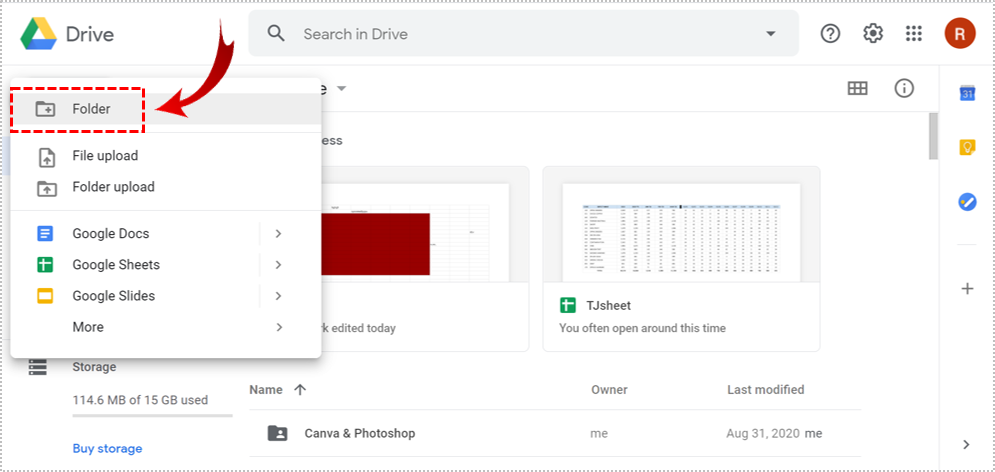
- On the drop-down menu, select “Folder” from the drop-down menu.

- Enter the name of your folder in the dialog box, and you ready to click “Create”.


Working with Google Sheets and Google Drive
Organizing so many sheets and documents is easier than you might think. Google Drive has a number of helpful features to make this task easier for you.
- The search feature lets you locate the files you need using not only the words contained in the file name, but also the words within the file. As soon as you start typing, a list of suggested words and phrases will appear.
- All your Google Sheets files are initially sorted from most recent to oldest. Other sorting options include sort by “Name” and “Last modified”.
- Use filtering to differentiate Google Sheets from other files in your Google Drive.

Moving and Deleting Sheets
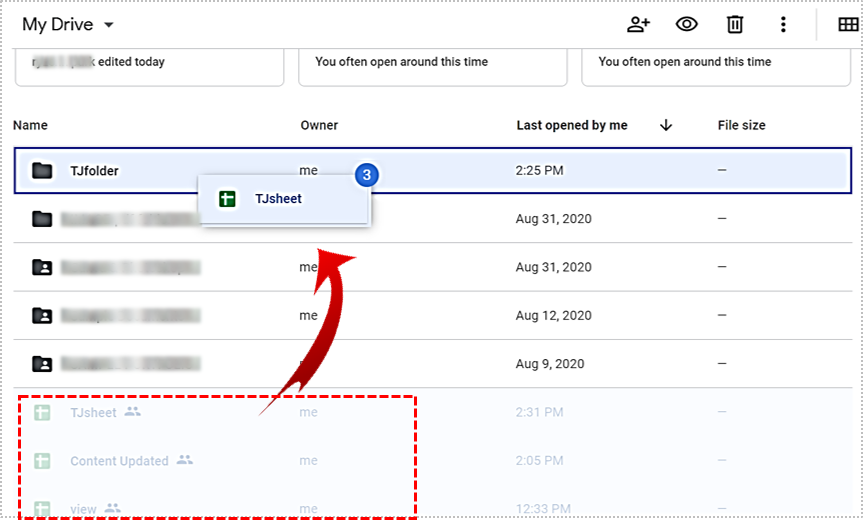
To move an existing sheet, click and drag the sheet to the preferred folder. You can move multiple files at once by pressing and holding the Ctrl key as you’re clicking to each sheet. Once you’ve selected the files, you can click and drag them to their destination.
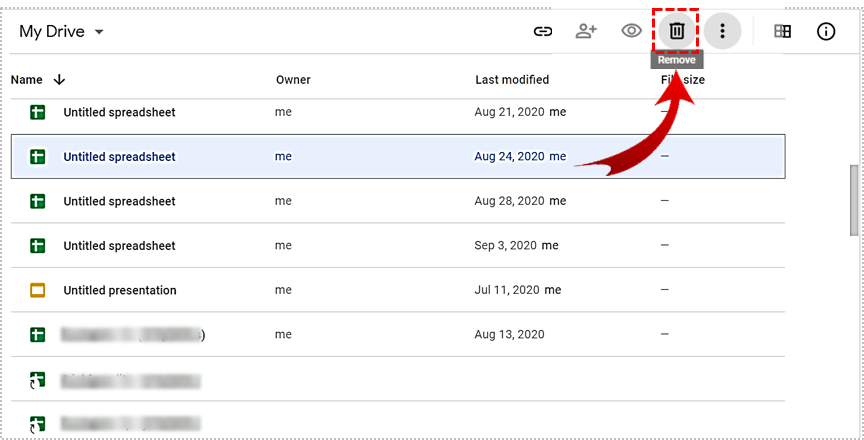
To delete a sheet, just move it to the Trash folder. You can do that by clicking the “Remove” button. Don’t forget to empty your Trash folder once in a while because the files in it take up valuable storage space.
Sharing Sheets
Sharing and collaborating on Google Sheets is pretty straightforward. Team members can edit the same file in real-time. You can share individual sheets as well as entire folders.
To share a sheet with your team members:
- Choose the Google Sheets file you want to share.
- Click the “Share with people and groups” button located in the upper right corner of the window.
- Enter the email address of your coworkers. This works best with Gmail addresses.
You have plenty of options when it comes to file-sharing. You can control what people can do with your file. Just assign them one of the offered roles: Viewer, Commenter, or Editor. Don’t forget to click the “Notify people” box, so that they receive an email notification.
Sharing Files and Folders via Shared Drives
Shared drives are shared folders where multiple people can easily upload, find, access and download shared files from any device. The files within a Shared Drive belongs to the entire team, even if the members who uploaded them leave the team itself.
Making Your Google Sheet Files Public
One of the options you have when you work with Google Sheets and Drive is to make a spreadsheet available online for a large audience. Publish your file and send a URL to people by taking these steps:
- Go to Google Sheets and open the file you’d like to share.
- In the main menu, click File> Publish to the web.
- Choose whether you want to publish individual sheets or the entire spreadsheet.
- Click Publish.
- Copy the URL and share it in any way you like.
To share a file from a shared drive:
- On your computer, go to drive.google.com.
- Click Shared drives and double-click the drive that contains the files you’d like to share.
- Find the Shared Drive settings at the top.
- Select “Sharing with non-members,” then click Edit.
- Click “Non-member of this shared drive can be given access to files in this shared drive”. Then click Apply.
Files and folders can be unpublished too. The owner keeps the right to remove the content from the web. Sharing permissions of team members can also be changed at any time.
At a Glance
Organizing Google Sheets into Google Drive folders has many advantages, as outlined in this article. Sharing options and other useful features make Drive a great home for all your Sheets, Docs, and other files.
Have you ever created folders for your Google Sheets? Have you shared some sheets and folders with your team members, or do you prefer to work alone? Share your experiences in the comments section below.


One thought on “How to Organize Google Sheets into Folders”