How to Save a Screenshot as a PDF in Windows 10

Everyone knows at least one way to grab a screenshot on a Windows 10 computer, so this part has always been easy. Many are also aware that they can easily change the image format of their screenshot from JPG to PNG and vice versa. But there’s one thing that many consider tricky – converting your screenshot to PDF.
Some people are not even aware that this is an option, while some don’t know their way around it. There is more than one way to do it, so if you’re experiencing difficulties, stick with us for a detailed walkthrough.
No Third-Party nor Online Tools
Various websites and online tools can convert files to PDF, but they require an internet connection, and the whole process can be unnecessarily time-consuming. There are also third-party tools that don’t need an internet connection, but they do require installations of programs you might never actually use.
That’s why we’re skipping those. There is no need when there are ways to convert your screenshots to PDF right on your Windows PC, using a built-in feature. That feature is a default PDF printer, and we’ll see how you can use it to convert all image formats to PDF.
If you haven’t heard of this feature, that’s because Windows was lagging behind Linux and Mac, who had a PDF printer as a default built-in feature for more than a decade. It took a while, but Microsoft eventually caught up and added this feature to Windows 10.
Microsoft Print to PDF should be active by default, but sometimes that’s not the case. So, let’s see how to set it up.
Set Microsoft Print to PDF as the Default Printer
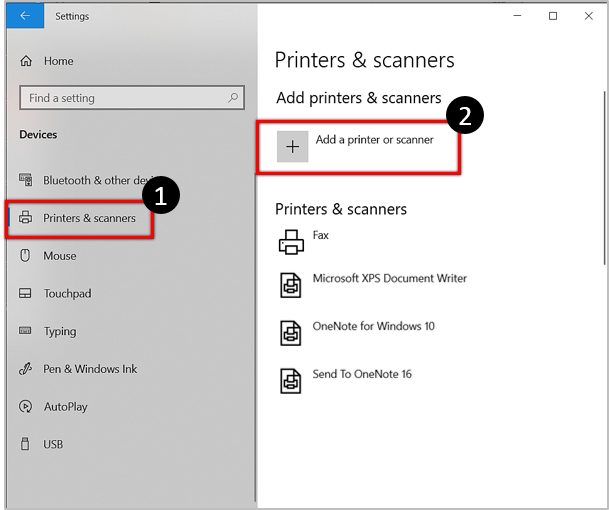
From the Start menu, navigate to the Settings page. Open “Devices” and then, in the left menu, select the “Printers & scanners” section. If Microsoft Print to PDF is already set as your default printer, you’ll see it on the list of your potential printing options. If you can’t see it, the next step is to choose the “Add a printer or scanner” option.
Once you choose that option, Windows will attempt to find the inexistent printer you’re referring to, and, of course, it won’t succeed. When it’s finished the search, you’ll be able to select the option “The printer that I want isn’t listed.” A secondary window will open below, containing options for finding printers. You need to choose the one at the bottom: “Add a local printer or network printer with manual settings.”

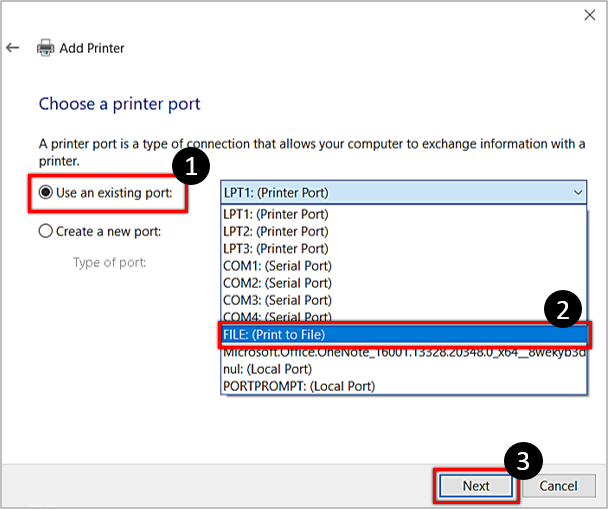
In the following window, next to the option to use an existing port, there will be the drop-menu. Open it and choose “FILE: (Print to File),” then click “Next.”
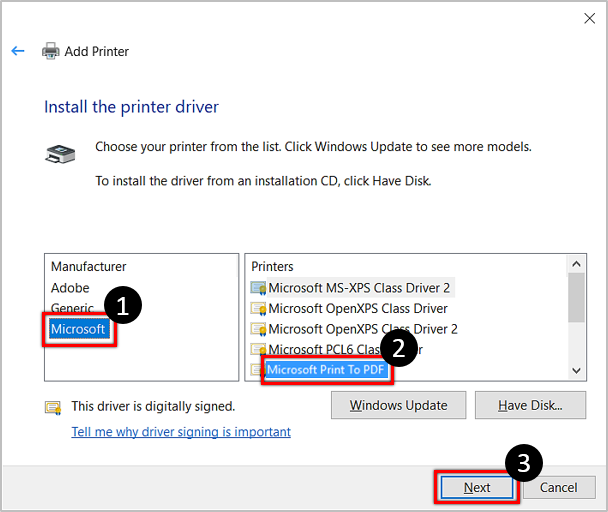
The following window will let you choose from the list of manufacturers and the list of printers. Choose Microsoft as the manufacturer, then scroll down the Printers list until you find Microsoft Print to PDF.
After you click “Next,” you’ll be given a choice to use the already-installed driver or to replace it. In order not to complicate things, use the current driver.
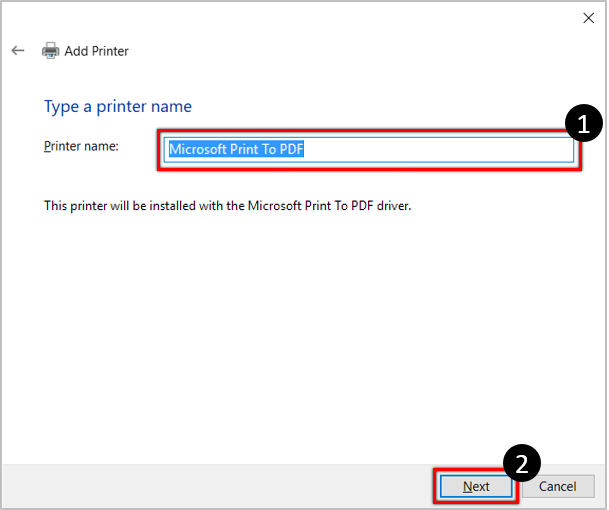
In the end, you’ll be able to name the print-to-PDF feature, and you should stick to its default name to make it easier to find.
Click “Next,” and Microsoft Print to PDF will become your default printer. Now that’s all set, let’s explore the ways of saving your screenshot as PDF.
Saving as PDF with the Photos App
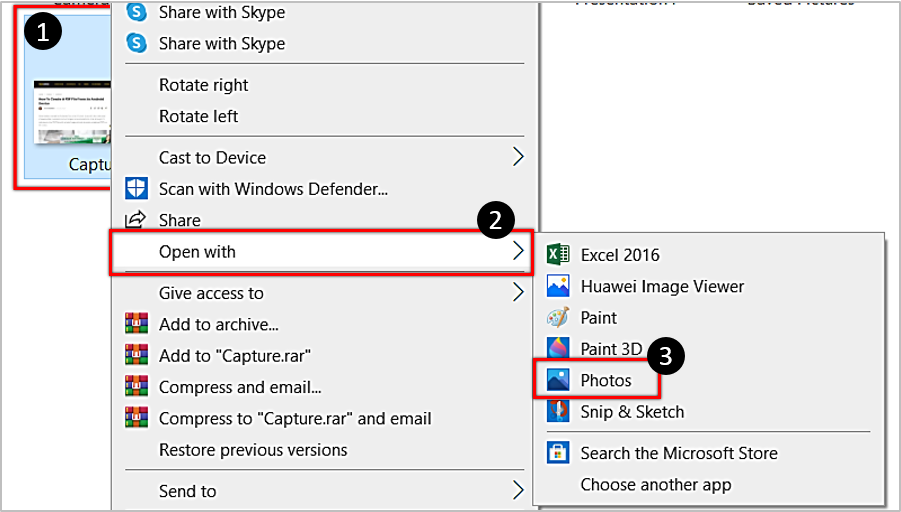
Now that Microsoft Print to PDF is your default printer, you should navigate to the location of your screenshot and right-click on it. Select the “Open with” option, then choose “Photos.”
Once you open your screenshot in this app, click on the “Print” icon. The new window will appear, and on the right, you’ll be able to choose the printer from a drop-down button. Of course, click on the “Microsoft Print to PDF” option.
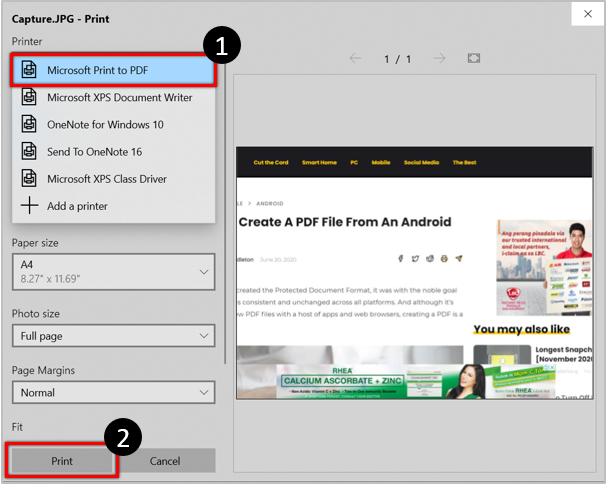
After that, you’ll be able to choose between Portrait and Landscape modes, which will determine how your screenshot will appear in the PDF. In the end, choose the “Print” option.
That way, you’ll save the new PDF file. The Documents folder is the default destination, and you’ll get a confirmation notification in the end.
Saving as PDF with the Paint App
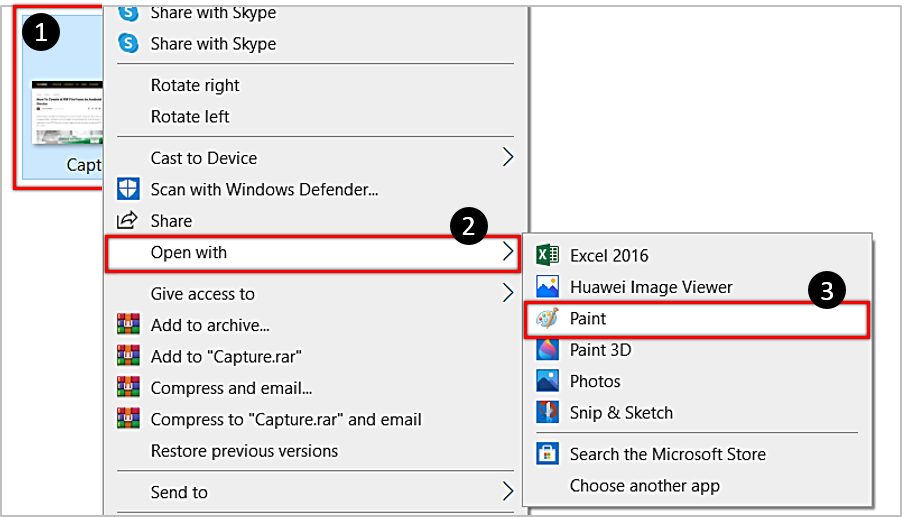
The Paint app can save your screenshot as PDF too, and the process is quite similar. The first step is the same: right-clicking on the screenshot and choose to open with the Paint app.
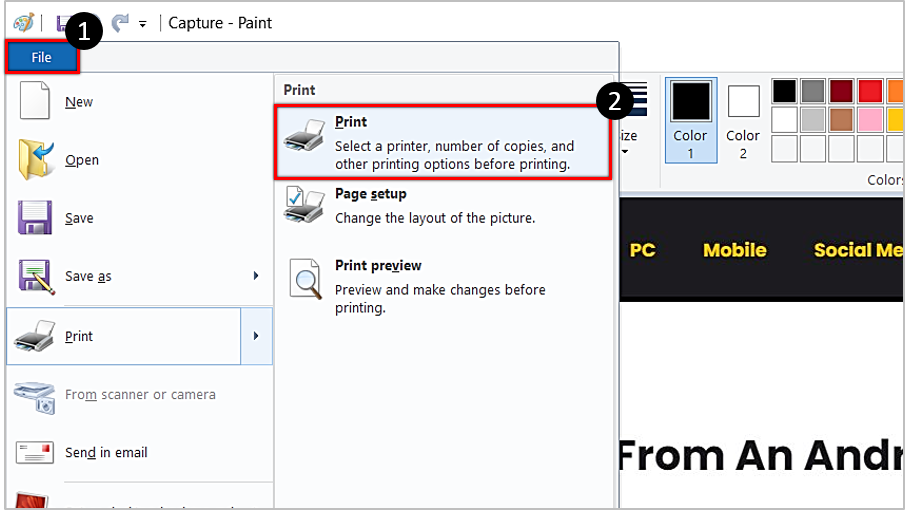
Once you’re in Paint, hit the “File” option at the top-left corner and choose “Print.” Again, in the window where you select the printer, pick Microsoft Print to PDF.
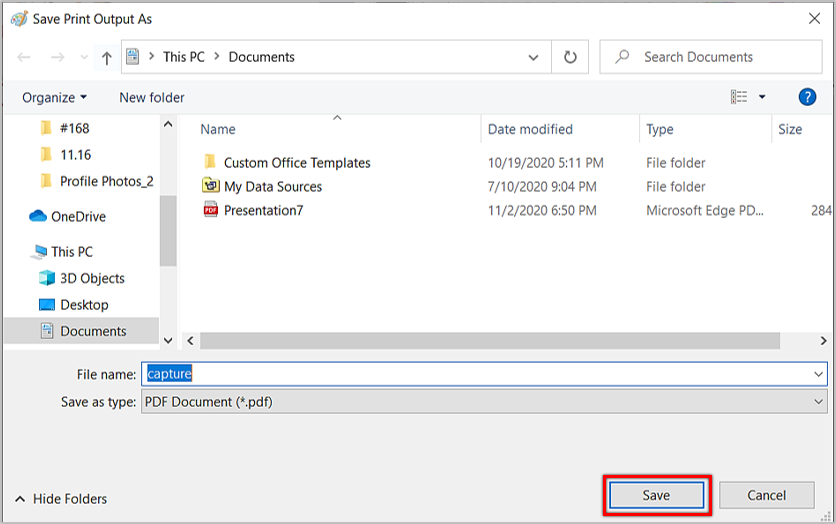
Then hit “Print” again, which will open a new window where you’ll name the PDF file and choose the location where you want to save it. After you do that, clicking on “Save” will complete the process.
Saving as PDF with Your Browser
You can also save your screenshot as PDF via your browser, though you’re not going to need internet access. The method is almost the same as the ones mentioned above, and it works on all browsers.
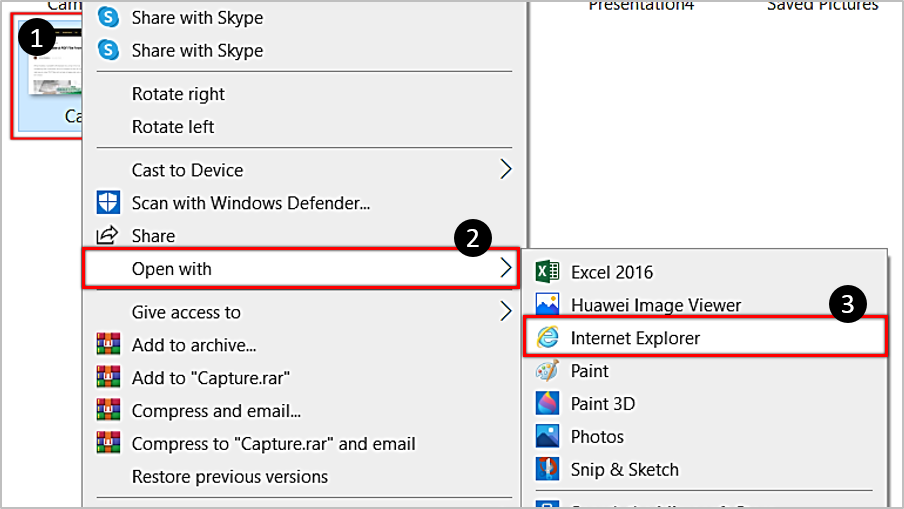
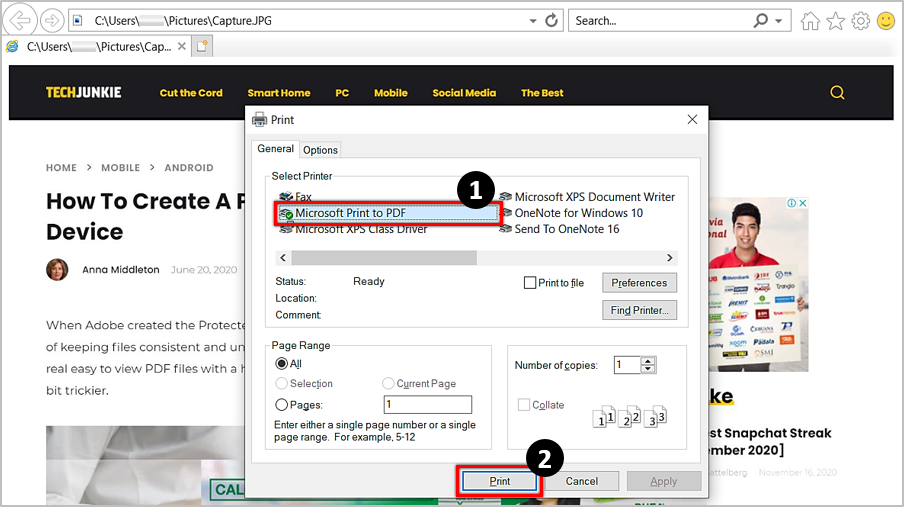
Again, right-click on your screenshot and open it with the browser of your choice. After the image loads up in a new tab in the browser, hit the Ctrl + P keyboard shortcut, which will launch the Print Window.
The remaining steps are the same: select Microsoft Print to PDF as your printer and hit “Print.” You’ll also be able to name the file and save it to a custom location.
Small Details
All three ways will enable you to save your screenshots as PDF in Windows 10 quickly, without the need for internet connection or third-party tools. Most prefer using apps over the browser, but that’s just a matter of preference. Maybe the Paint app has a slight advantage over the Photos app since it allows you to choose the destination where you’ll save the new PDF file.
What’s your favorite method? Also, if you know another way to convert a screenshot to PDF, hit the comments section.