How To Setup Wi-Fi Calling On Android

Wi-Fi calling is an Android feature which allows calls to be placed and received over Wi-Fi. Text messages can also be sent over Wi-Fi thanks to this feature. Wi-Fi calling is especially useful in areas where cellular reception is poor and a person needs to place a call.
If you have Wi-Fi calling enabled but are out of range of a network, your Android device will automatically switch back to the cellular domain.
There are three main methods for enabling Wi-Fi calling on Android. So how exactly can you access this functionality on your Android device?
Enable Wi-Fi Calling In Settings
Before we go any further please note that this feature will not work unless you are using a device which supports this feature. You must also have this option enabled through your carrier.
You can enable Wi-Fi calling by accessing your Settings app and then selecting More.
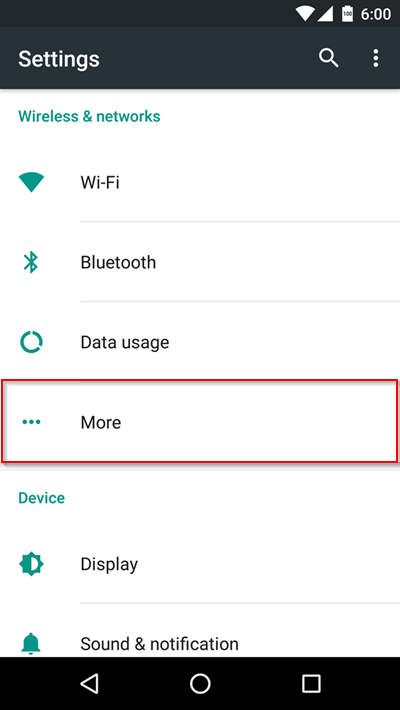
If your device and carrier settings are compatible you will see a toggle for Wi-Fi calling. Turn the toggle to the on position and you will be able to begin reaping the benefits of Wi-Fi calling.
2. Setup An SIP Account
SIP stands for ‘Session Initian Protocol’. It allows for the making of both voice and video calls over an internet connection. You can also send messages using the protocol.
In order to make use of this protocol on your Android device, you will need to first sign up with an SIP account provider. Luckily there are a few providers who provide this service for free.
In this article we will be looking at the service that OnSIP provides. We will be focusing on their free service which only allows SIP to SIP calling. OnSIP does however offer a paid version of their service which allows the calling of traditional phone numbers.
Head over to OnSIP and sign up for an account. After you have completed this process, you can then move to your android device in order to setup SIP calling on it.
First you need to access the settings within your Phone app. Do this by clicking on the row of 3 vertical dots in the top right hand corner of the app.

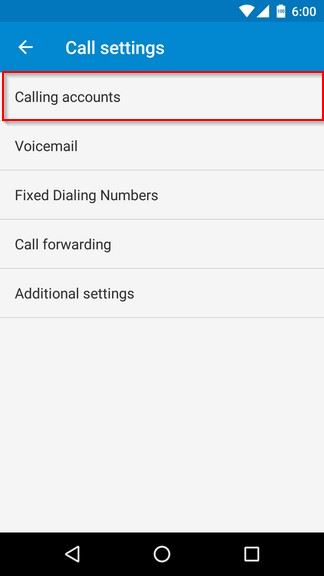
In Settings select calls.

Now select Calling accounts.
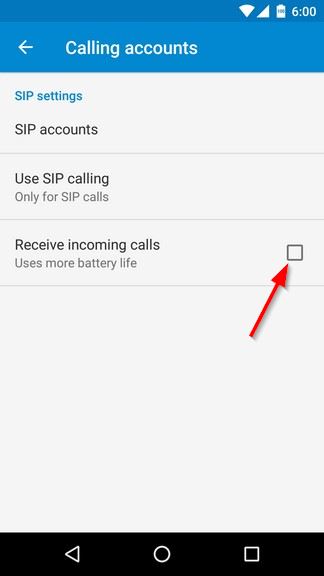
Make sure to select Receive incoming calls.
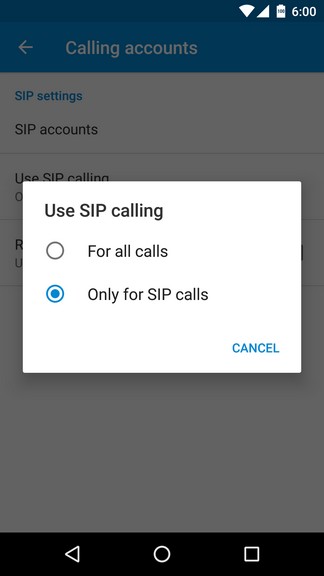
Under Use SIP calling it’s probably best to keep the Only for SIP calls option checked. Unless you have a paid account, if you select For all calls you will not be able to reach traditional telephone numbers.
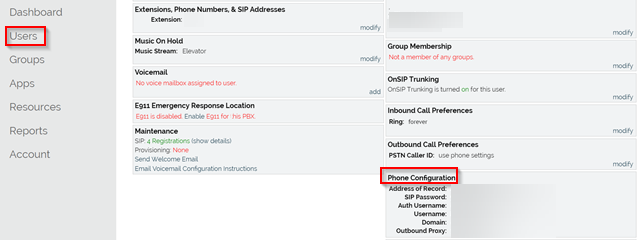
Next, go here and sign in to your OnSIP account in order to make sure you are entering the correct details for the next step. Click on Users and pay special attention to Phone Configuration.
Next on your Android device, under SIP accounts in your Phone app’s settings, hit the ‘+’ symbol in order to add your OnSIP account.
Populate the information based on your OnSIP account address and the previous step. Make sure to fill out the settings under Optional settings.
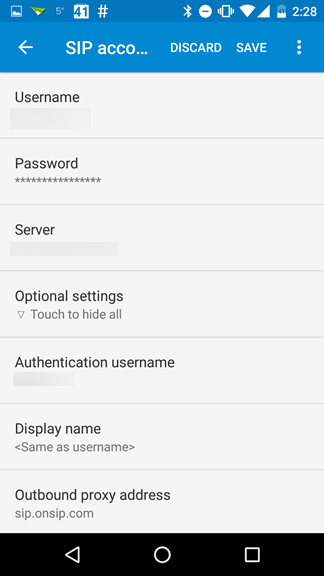
Hit Save and you are on your way to making free Wi-Fi calls!
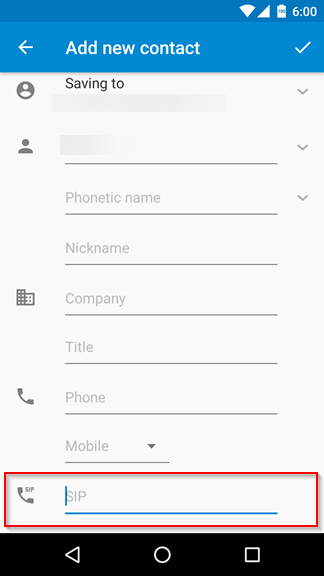
You can now add SIP contacts to your Contacts app.
 ‘
‘
Make sure to hit More and populate the SIP field when adding such a contact. When making a call to an SIP contact, it will be placed using your stock Phone app.

3. VOIP Apps
VOIP stands for Voice Over Internet Protocol. Apps such as Skype and Hangouts can also be used to place calls over Wi-Fi.
Final Thoughts
If you have a need to use Wi-Fi calling on Android, the above are 3 quite effective methods. You should note however that the first 2 methods are more seamless. They make use of built in Android capabilities.
However, please choose a method that is best suited for your needs and that is actually available for you to use.