


How to Remove Live Tiles and Get a Smaller Windows 10 Start Menu

Many longtime Windows users were happy to hear that the Start Menu was coming back for Windows 10 following a tumultuous hiatus in Windows 8. Now that Windows 10 is available, however, early adopters have discovered that the Windows 10 Start Menu isn’t quite what they remember. Many of the traditional Start Menu functions are still available in the Windows 10 Start Menu, but Microsoft has also brought Windows 8-style live tiles into the mix, which forces the Start Menu to be wider and larger than some users desire.
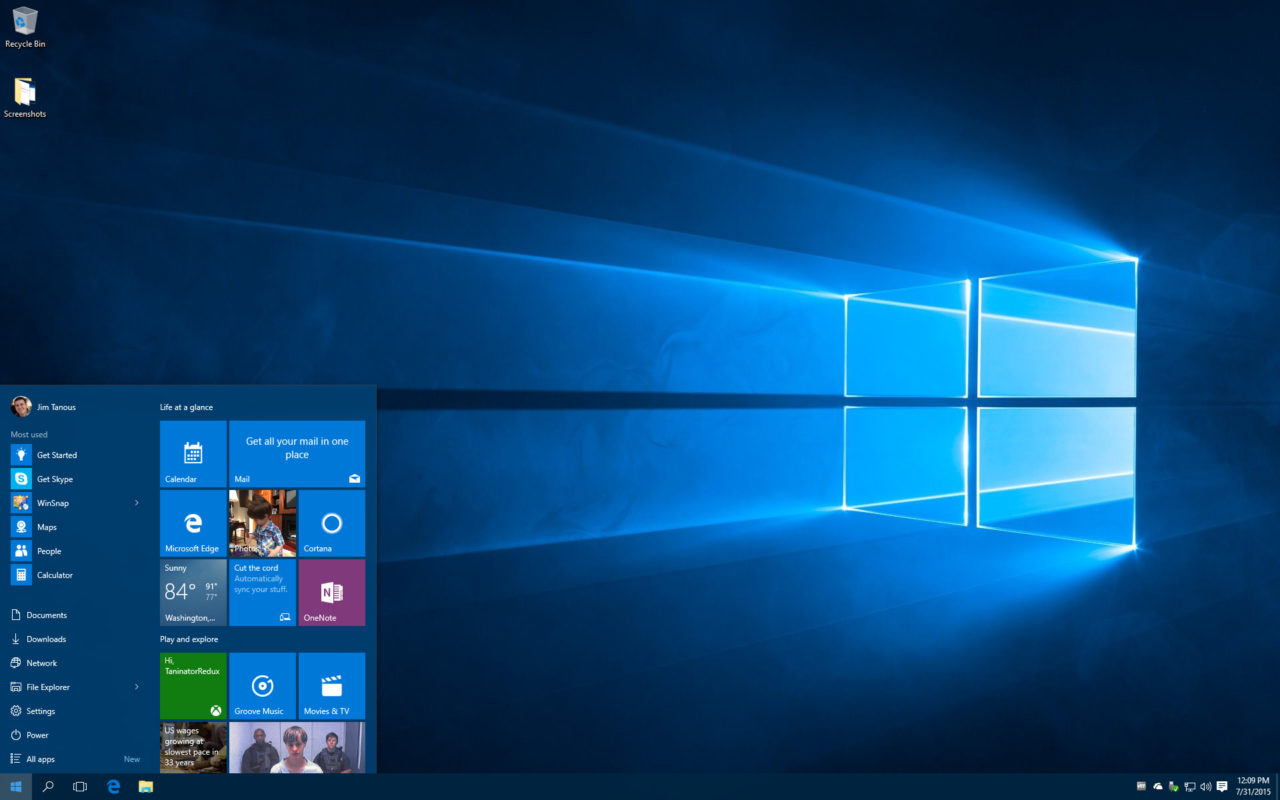
At its default size, the Windows 10 Start Menu is now wider thanks to the inclusion of Windows 8-style live tiles.
A new feature in Windows 10 is the ability to resize the Start Menu, but while you can make it comically large, you can’t shrink it beyond the boundaries of your live tile content. But don’t fret, fans of minimalism, as there is a way to get a smaller Windows 10 Start Menu, and the trick is to simply ditch the live tiles.
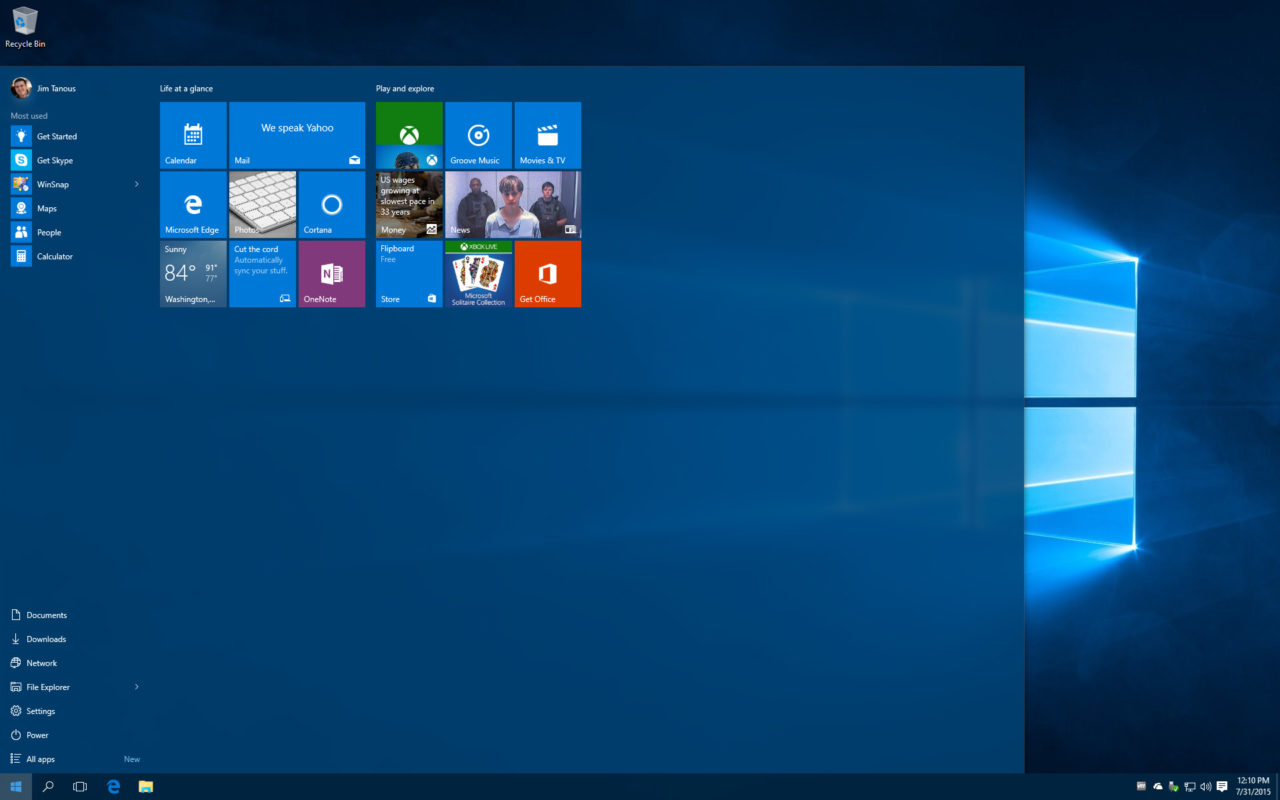
Users can resize the Windows 10 Start Menu, even to the point of absurdity, but can’t make it narrower than the width of the included live tiles.
To test this out, click the Start Menu (or press the Windows key on your keyboard) and then right-click on one of the live tiles. A menu of options will appear, letting you do things like resize the tile or change it to a static tile, but the option that we’re interested in is Unpin from Start. Simply left-click on this button and the tile will be removed from your Windows 10 Start Menu, leaving the remaining tiles to rearrange themselves and fill the gap.

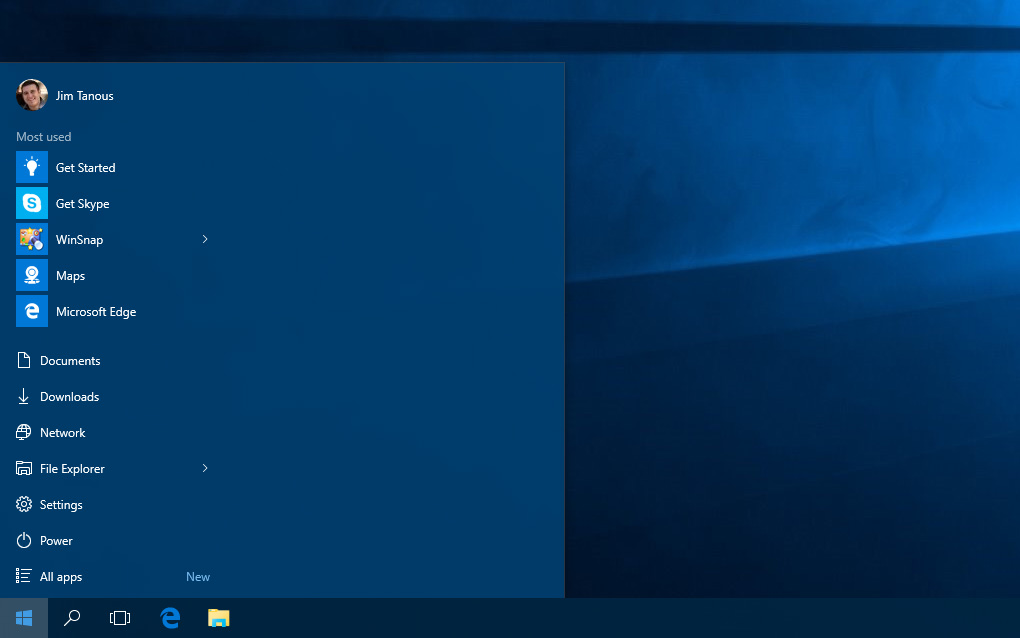
Users can remove tiles from the Windows 10 Start Menu, but all tiles must be gone in order to shrink the Start Menu.
The only bad news is that in order to resize the Windows 10 Start Menu to its smallest width, you’ll need to perform these steps for every Start Menu tile individually (we have yet to find a way to select multiple tiles at once; if you know how to do this, let us know in the comments!). There aren’t too many Start Menu tiles in a default Windows 10 installation, but repeating the Unpin from Start process a dozen or so times is a bit annoying.
Removing all tiles doesn’t automatically reduce the size of the Windows 10 Start Menu.
When you’re done, however, you’ll be left with a nice big empty space where all of your Windows 10 Start Menu tiles once resided. At this point, you can move your mouse cursor to the right edge of the Start Menu, position your cursor so that it changes to a double-sided horizontal arrow, and then click and drag the Start Menu all the way to the left.
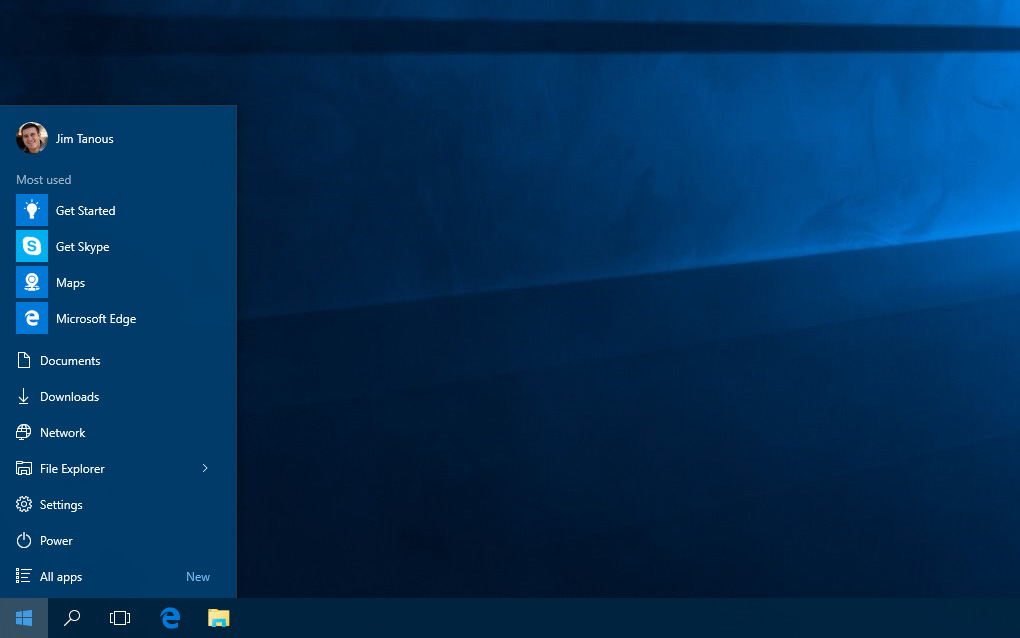
With the tiles removed, the Windows 10 Start Menu looks more like its predecessors, and takes up less space on the screen.
In the end, you’ll be left with a Start Menu that’s a single column wide (you can still adjust the height of the Start Menu by clicking and dragging its top side), and one that most closely approximates the appearance of the “traditional” Start Menu from Windows 95 through Windows 7. This small Windows 10 Start Menu isn’t a perfect replica of those that came before it, but it can get the job done and take up far less screen real estate while doing so. Keep in mind, however, that if you add any other items to your Start Menu (which you can do by right-clicking on an app and selecting Pin to Start), your Start Menu will immediately expand on the right side to accommodate the new item, and you’ll have to repeat the steps above to remove it if you want to shrink your Start Menu back down again.
Speaking of perfect replicas, if you find yourself truly missing the old Windows XP and Windows 7-style Start Menus, keep an eye on the Classic Shell project. This free tool was launched in 2008 to bring back missing UI elements in Windows Vista, and has since been updated to provide a host of customization options in subsequent versions of Windows, the most popular of which is preserving the traditional, or “classic,” Start Menu. A version that supports Windows 10 is nearing release, and those eager to test it out can download the release candidate today.


5 thoughts on “How to Remove Live Tiles and Get a Smaller Windows 10 Start Menu”
The fastest way to remove the tiles is by right-clicking on a tile and press spacebar.
Thanks http://www.tekrevue.com
-SagnikTech India
Absolutely ridiculous that I have to remove 20 uninvited & unwanted tiles one at a time every time I set up a new system. Is MS that desperate for us to use Metro Apps (yes, I said it) that they make it difficult to remove them. Why else remove the ancient ctr+click for multiple object selections.
Aaaahhhh!