How To Take Location Data Off an iPhone Photo
Something that might make you think twice before sharing your photos to social media is the fact the location information for those photos is recorded. This means that when you take a photo and post it, you’re broadcasting your whereabouts online for all to see. This includes those who could use this information maliciously creating a very real potential threat to your privacy.
“How does my location make it into my photos? I don’t add anything in manually.”
The culprit can be summed up into one simple word, geotagging.
“What the heck is that?”
Geotags are the geographical metadata added to every one of your photos taken with an iPhone. This feature is enabled by default on your Camera app and records geographical data as well as other forms of metadata whenever you snap a photo. It’s not a terrible feature to have, especially when searching for specific photos by location. However, when it comes to social media, sharing these photos may give away more information than intended.
“I’m not sure I like that. How do I disable geotagging?”
If the thought of sharing photos with geotagging written directly into the photo files makes you feel a bit uneasy, you do have the option to target and remove the information and protect your privacy. I will divulge to you a couple of easy tasks you can take in order to remove this sensitive information from your photos.
Prevent and Remove Location Information From Your iPhone Photos
You can prevent all future photos from being geotagged by disabling the geotag metadata on your iPhone. This will make it so that the information on your photos doesn’t make it to social media after posting.
To disable your iPhone from tagging the location data when you take a picture, you can:
- Launch the Settings app.
- Scroll down and tap Privacy. Should have a white hand on a blue background icon.
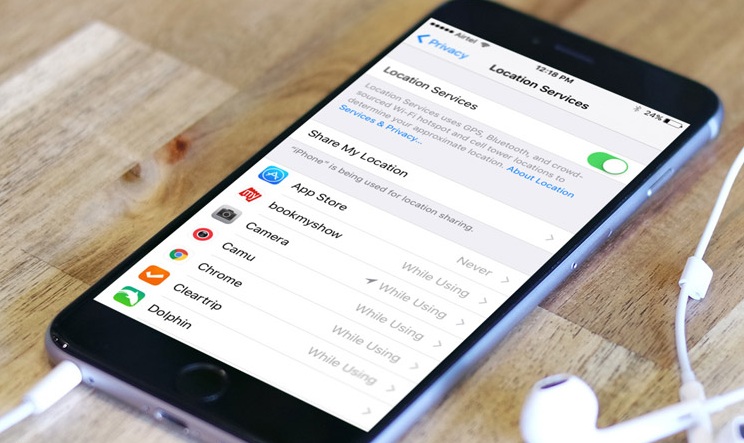
- Location Services should be at the top. Tap on it.
- In the list of used apps, locate Camera and tap on it.
- In the “Allow Location Access” section, tap on Never to disable geotagging.
- You’ll see a checkmark to the far right of Never when done properly.
One thing to note is that disabling the location services for the Camera app doesn’t remove the geotag information from photos you’ve already taken. You’ll need to strip the geotag information from all photos taken on your iPhone to remove all trace of where they were taken.
By turning off location service for the stock Camera app for iOS, you will lose the ability to filter photos/videos based on the location. Also, disabling it in this way will only work within that particular Camera app. Third-party camera apps will still add geotagging if not specifically turned off for that app. So if you use any third-party apps like Instagram or WhatsApp to take photos, they can still access your camera and take photos with the location data added.
If you’ve already taken a bunch of photos and would like to remove the geotag from them, you’ll first want to check each photo for location data.
- To see if a photo has been geotagged, you can:
- Launch your Photos app.
- Tap to open the photo you want to check.
- At the very top of the screen, if your photo has been geotagged, you’ll notice the geographical information. It will usually show as City – State with the date and time just below.
- Swipe up on the photo to reveal the “Places” display. You’ll be able to see the specific location on a street map of where the photo was taken.
- If the photo doesn’t have the location data, you will only see the date and time above the photo, and swiping up will not reveal a “Places” section.
Stripping The Geotag Information From Photos On iPhone
iPhone doesn’t allow us to view, edit, add or delete photo metadata without first using a third-party app. Apps like Metapho, CropSize, and Photo Investigator should do the help you out in this regard. If your focus is to remove the GPS or GEO metadata from your photos, you’ll need one of these apps. You can find them rather easily through the iTunes App Store.
For this article, I’ll be going through the steps you’ll need to take using the CropSize app. Once you’ve downloaded the app:
- Run the image editor on iPhone to instantly open your Camera Roll.
- Select the picture you want and add it to the editor.
- After adding the photo, you should see the main editing screen.
- Tap the Metadata icon toward the bottom of the screen in order to view or modify the metadata of the selected image.
- Tap the Information (“i”) icon at the top right corner to view the metadata details of the photo.
- The information panel will display a wide range of information on the photo, such as width, height, DPI, color model, color depth, orientation, resolution, date/time, manufacturer, camera model, camera software, EXIF version, exposure, shutter speed, aperture value, brightness value, ISO, focal length, Flash, sensing method, scene type, white balance, lens specification, lens manufacturer, lens model, GPS, latitude, longitude, altitude, etc.
- Look for Date Created and tap on it to change the date and time of a photo.
- You can edit out or add to the existing IPTC metadata of the photo. This is where the location data is stored.
- IPTC stands for International Press Telecommunications Council who are responsible for developing the standard for information that can be embedded into a digital photo.
- Things such as title, writer, headline, caption, keywords, creator address, city, state, country, postcode, phones, emails, URLs, credit, source, copyright, contact, instructions, city, state, etc. are editable.
- In one tap, you can also delete the GPS or GEO location tagging data.
Once all of the changes have taken place, you can export the photo from the image editor app into your Photos app as a new photo.
Remove Geotagging From Photos Using Your Mac
You can also check for the geotagging of your iPhone photos using your Mac if preferred. This works out great for any photos you may have transferred over.
If this is easier for you, locate photo geotagging on your Mac by:
- Launching the photo “Preview” by double-clicking on it.
- From here, you can press Command+I or go to Tools and click on Show Inspector to launch Inspector.
- Click on the information panel which appears as an “i” icon.
- A “GPS” tab will be present if the photo has been geotagged.
- Swap over to the “GPS” tab in order to see the geographical information attached to the photo.
- No “GPS” tab indicates that the photo has not been geotagged.
If you want to strip the location information from a photo on your Mac, you can:
- Double click the photo to launch Preview.
- Press Command+I or select Tools and click Show Inspector to launch Inspector.
- Click on the information panel which appears as an “i” icon.
- Enter the “GPS” tab and click Remove Location Info.
- No more location tagging to worry about on that photo. However, if you have many photos you want the geotagging removed from…
Remove Geotagging Information On Multiple Photos
A third-party app will be required in order to remove location information from more than one photo at a time. ImageOptim is amazing for this and can process the removal of geotags from photos in batches. ImageOptim works by compressing your images down to a smaller size and stripping them of EXIF data.
You can use ImageOptim to process all of your images before uploading them to social media. This ensures that none of the location data will make it to the world wide web. The process is insanely simple and it’s definitely one of the better applications that Mac offers, period.
In order to strip location data from multiple images using ImageOptim:
- Download the ImageOptim tool to your Mac computer.
- Once the download is complete, launch ImageOptim by double-clicking the icon.
- Gather all images you want to process by selecting them and dragging them into the ImageOptim window.
Once image processing is complete, you’ll know it by the green checkmarks located to the left of the image. The green check indicated that the image no longer has any EXIF data attached to it. To be sure that all GPS information has been removed, repeat the steps provided at the beginning of the section Remove Geotagging From Photos Using Your Mac.