How to Make Spacers in TeamSpeak

On TeamSpeak, spacers are usable rooms, but regular clients don’t have access by default. They allow for better room management and provide a better overview of all the communication on a server.
With this in mind, you do need to have administrative privileges to make spacers. Other than that, the entire process is pretty straightforward. Here’s what you need to do.
Creating TeamSpeak Spacers
Step 1
If you’re the server administrator, you can see and edit channels on that particular server. You’ll find them at the top of the TeamSpeak window.
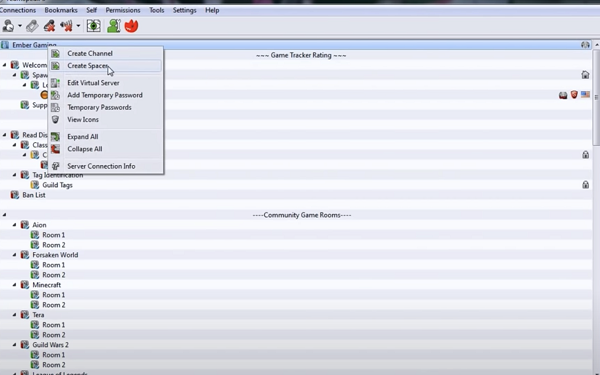
You right-click on the server nickname and select Create Spacer. The Create Channel window will pop-up, but don’t worry; you’re still in the right place.
Step 2
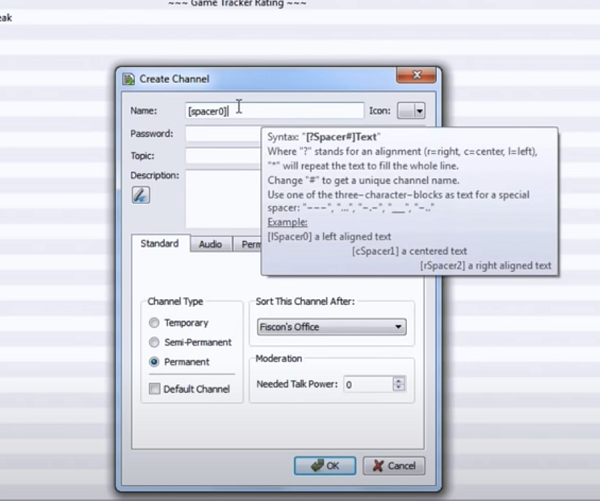
Inside the Create Channel window hover over [spacer 0], it’s the text in the bar next to Name. An informational window with available separate variables and symbols pops up. If you choose a variable that’s not on the list, the separator won’t work.
Step 3
For this article, we’ll use hashtags to give you a better idea of what you’re doing here. The variable in the Name bar looks like this – [#spacer#].
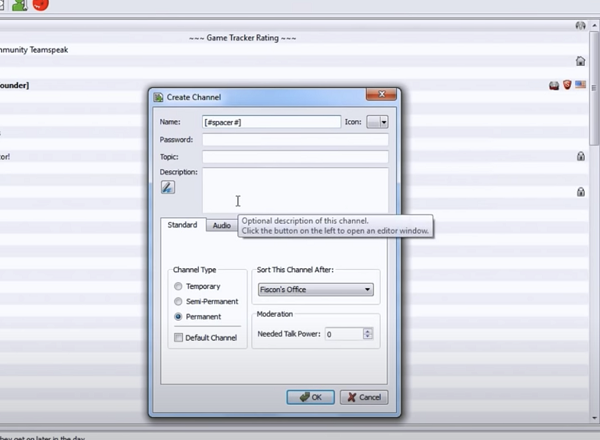
The first hashtag is there to show location, and you have three different options here. For example, type L in the place of the hashtag for left, and you get left alignment in the TeamSpeak window.
Following the same logic, C is for the center, and R is for right alignment.
Note: The commands for creating spacers aren’t case sensitive. We’ve capitalized letters for your convenience, though it’s okay to write the command like this – [cspacer#].
Step 4
The second hashtag is there to indicate the spacer number. For exemplary purposes, let’s dub the hashtag ID. Keep in mind that TeamSpeak doesn’t allow you to have two spacers with the same name/number.
That means that you need to change the number for every spacer you get. To make things easier for you, try to find a convenient way to label them if you need several spacers.
Expert Tip
You can use the asterisk sign to fill out the entire channel’s name. Highlight the first hashtag in the spacer command and switch it with an asterisk. Then, add some text behind it. For example, we’ll use TJ, and the command looks like this – [*spacerID]TJ.
Now, click Apply at the bottom window, and you’ll see that the entire spacer gets populated with TJ. Of course, you can do the same with any message or name of your liking. If you want a break in the text, you can use a separator symbol.
Important Notes
There are limitations where you can place spacers. The spacer you’ve created is a channel, but then you have sub-channels, and they can’t be spacers. When spacers become sub-channels, they lose effect, and the only thing that’s left is text.
The critical thing is not to make a spacer in a sub-channel.
Spacer Permissions
Once you’ve created a spacer, you can change its permissions. Right-click on the one you’ve made, select Edit Channel and then choose the Permissions tab.
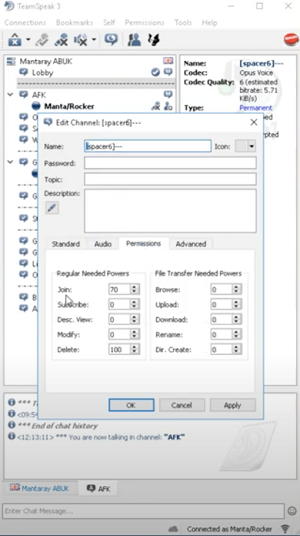
You can change quite a few things under this tab. For most intentions and purposes, it’s okay to tweak the value next to the Join option.
That’s the value that defines the Join Power for that particular channel. By default, it’s at 70, and you can decrease or increase it as you see fit. Feel free to leave all other values as is. Otherwise, you might compromise the channel communication.
Aside from Permissions, you also have Standard, Audio, and Advanced tabs. Leave those as is as well, unless there is a particular tweak you know will better the channel management.
Bonus Tips
When creating spacers, it’s vital to keep everything intuitive and clean. At best, you should add some categorization to make the navigation more comfortable. That’s because the guests and users of your server shouldn’t struggle with orientation.
The typical server tree has a sorting that starts with the Lobby, then moves onto the Public and Member Area. Finally, you have the Admin and AFK Area.
Some admins prefer to have the same name pattern in their spacers. To avoid “Channel name already in use” error, add supported characters to the spacer name.
If you struggle to find the correct characters, navigate to Window Accessories from the Start menu, then launch Character Map. You get the same result by googling Alt Codes.
To remind you, you can do all that from the Edit Channel window.
Spacer Here, Spacer There, Spacer Everywhere
Adding spacers takes some work, and you need to repeat the process for each one. You’re effectively programming the server layout to your preferences. And this significantly improves the look and feel of the channel tree.
Are there any other things you’d like to add to TeamSpeak? How many spacers do you need for your server? Share your thoughts with the rest of the TJ community in the comments below.