


How to Trim Videos with Quick Look in macOS Mojave
Back in the long long ago—in the dark ages of 2017, say—we had to use the Mac’s built-in QuickTime app if we wanted to trim videos. Because macOS Mojave is awesome, though, we no longer have to do that. In fact, we don’t even have to open a video file at all in order to cut off unwanted footage at the beginning or the end.
That’s because one of Mojave’s big new features was the addition of much more powerful tools in Quick Look. So if you’re running macOS Mojave or newer, here’s how to trim videos quickly using Quick Look!
Trim Videos with Quick Look
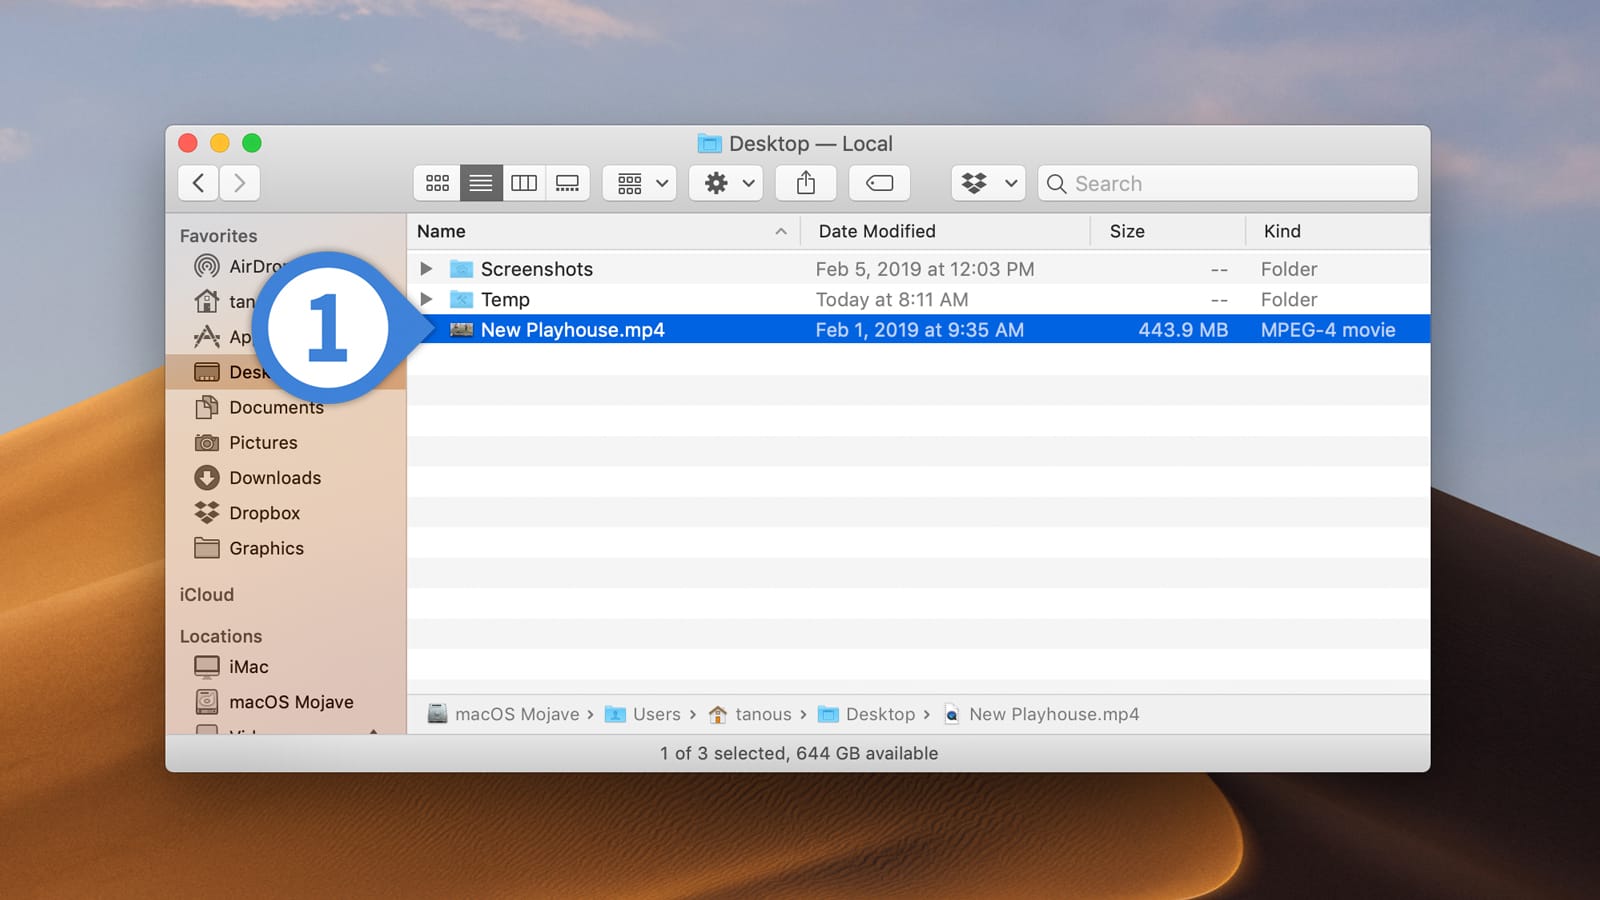
- Locate the video file you’d like to trim in Finder or on your Desktop and click on it once to select it. Note that the video file must be a type that Quick Look supports, such as an H.264-encoded .mp4 or .mov. It won’t work with non-supported formats like Windows Media (.wmv). With the movie selected, press the Spacebar on your keyboard. This will open Quick Look and give you a preview of the video file.
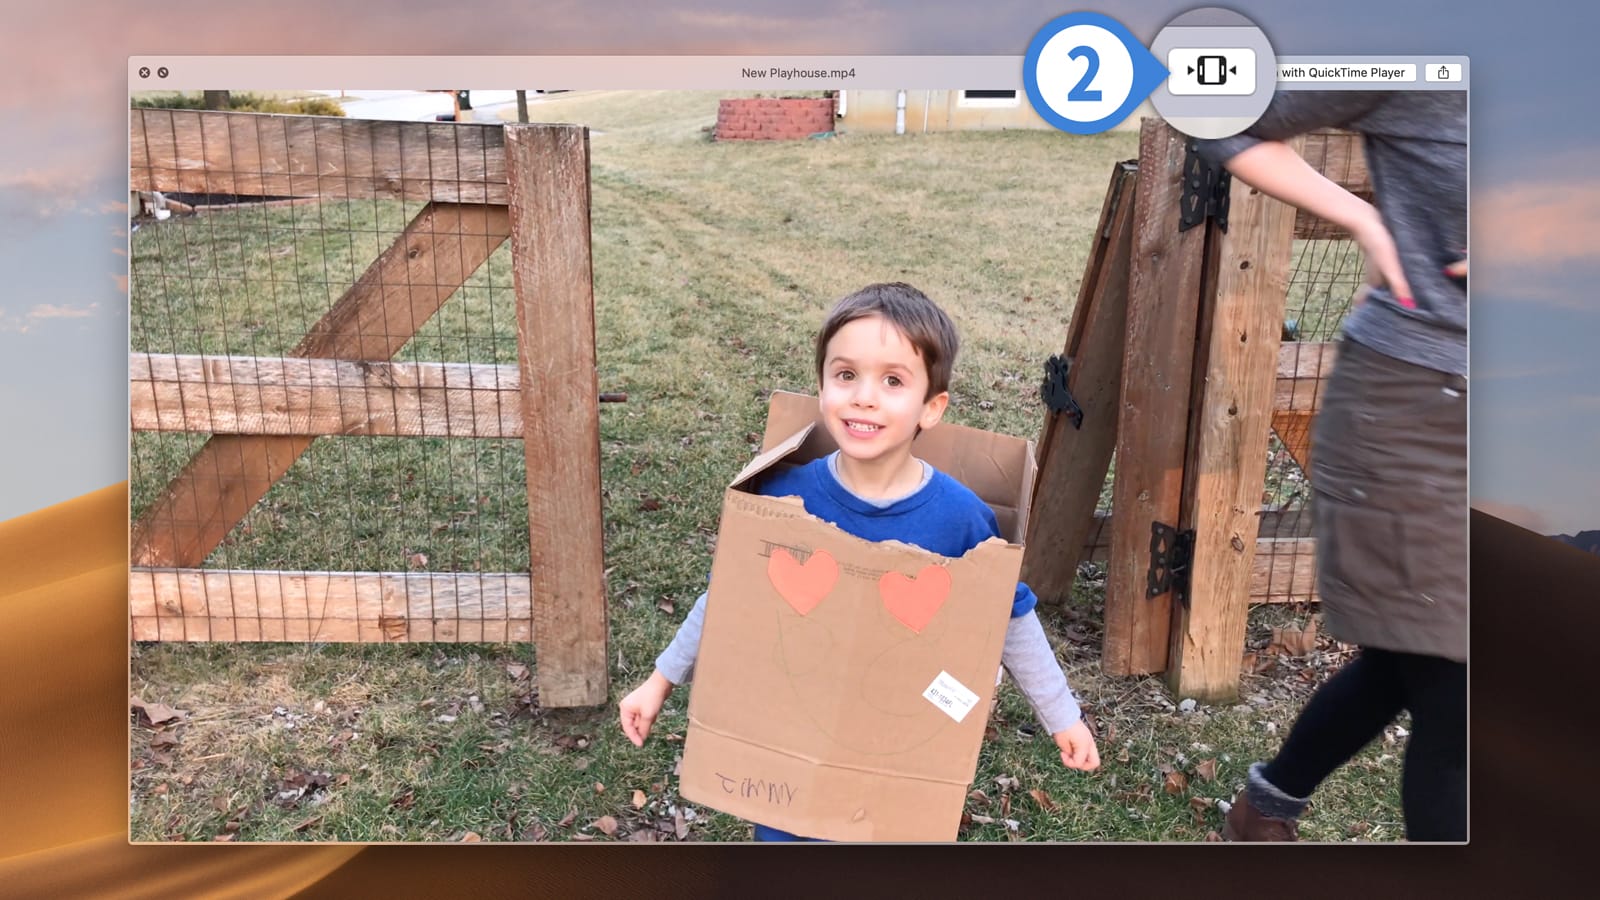
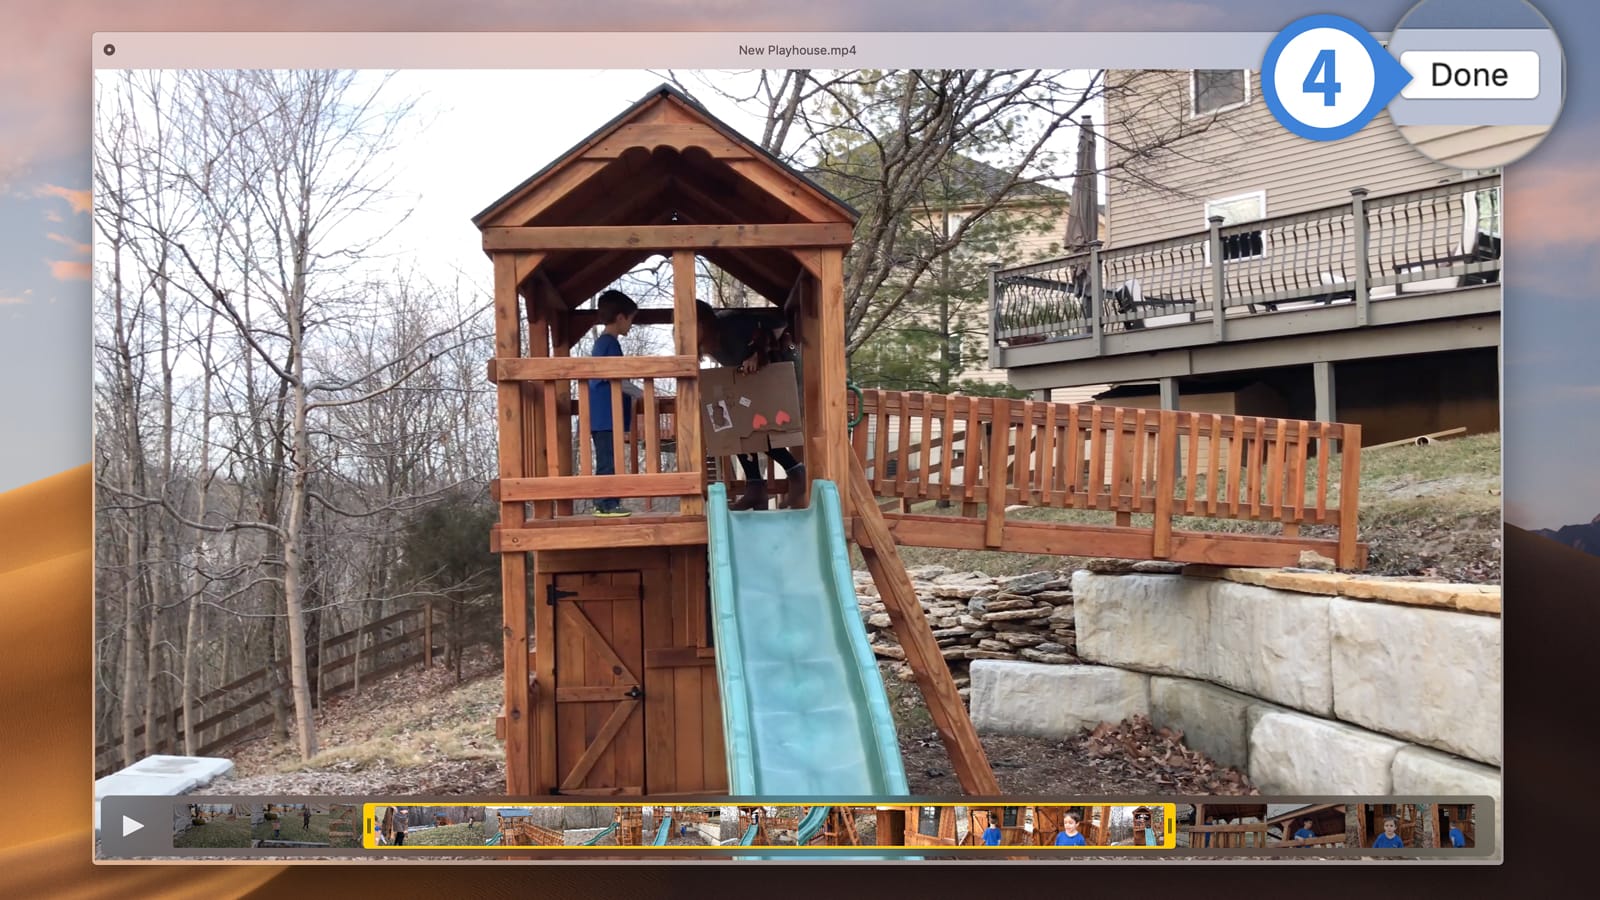
- When that preview window appears, click the trim tool icon at the top—it looks like a box with triangles on either side.
- A yellow box displaying your video’s timeline will appear at the bottom. Click and drag either end of the box to trim the beginning or end of the video. (If you drag the left end to the right, you’ll trim the beginning of the movie; drag the right end to the left, and you’re cutting off the end.)

- You can make multiple adjustments to either side. Once you’re done, press the Done button, and then decide how you want to save your trimmed video file.
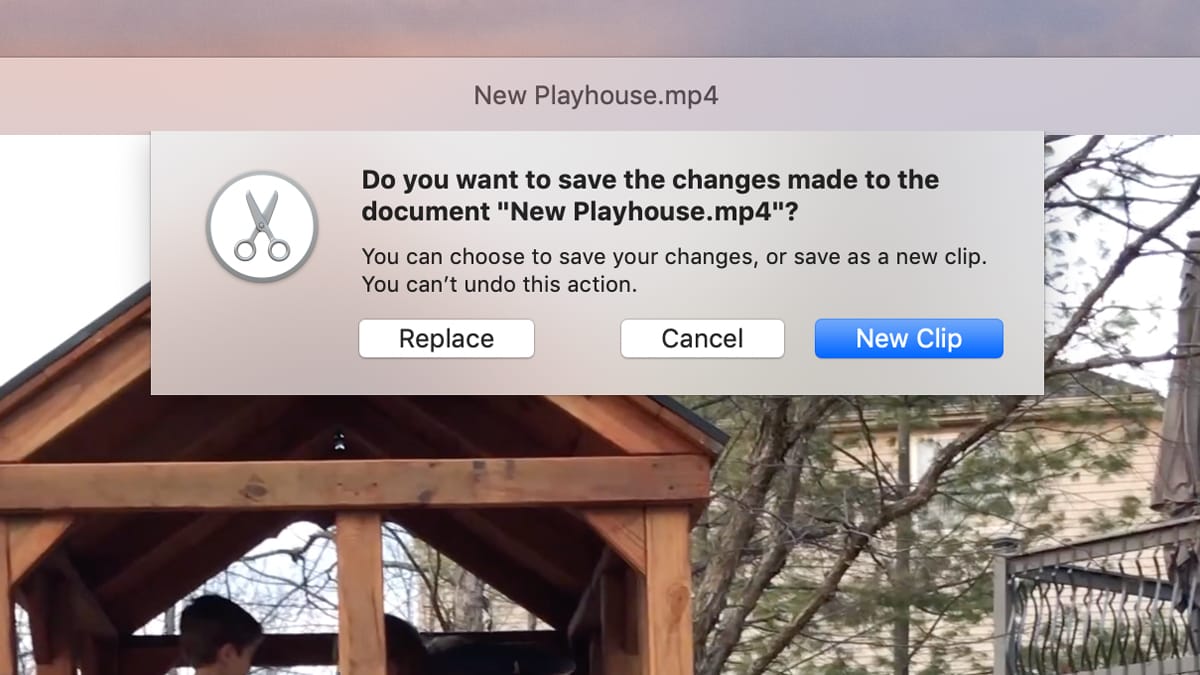
As you can see below, Finder gives you two saving choices—“Replace” and “New Clip.” Choose “Replace” if you don’t need to keep your original movie without the trimming. Picking “New Clip” will create a new file, and doing that will give you the option of naming it.
And you’re all finished! Now you can send your Aunt Martha the video you took of your baby without the accidental thirty seconds of your dog barking. Or what have you. I’m not gonna pretend I’ve never edited out the end of a video because of something obscene I said as I dropped the phone on my foot. Yes, that really happened.


One thought on “How to Trim Videos with Quick Look in macOS Mojave”