How To Turn Windows 10 into a Hotspot

It is well-known that you can create an Internet hotspot on a mobile phone that other people can connect to in order to use your mobile’s shared data. However, not so many people know that you can do the exact same thing on a computer that runs the Windows 10 operating system.
To make it simple, you can broadcast your WiFi network, cellular data connection, or Ethernet as a WiFi hotspot on your Windows 10. The setup is actually quite easy and takes only a few minutes.
This article will show you how to set up a WiFi hotspot on your Windows 10 computer.
Creating a Hotspot in Windows 10
In order to create a hotspot that other people’s devices can connect to, you have to do the following:
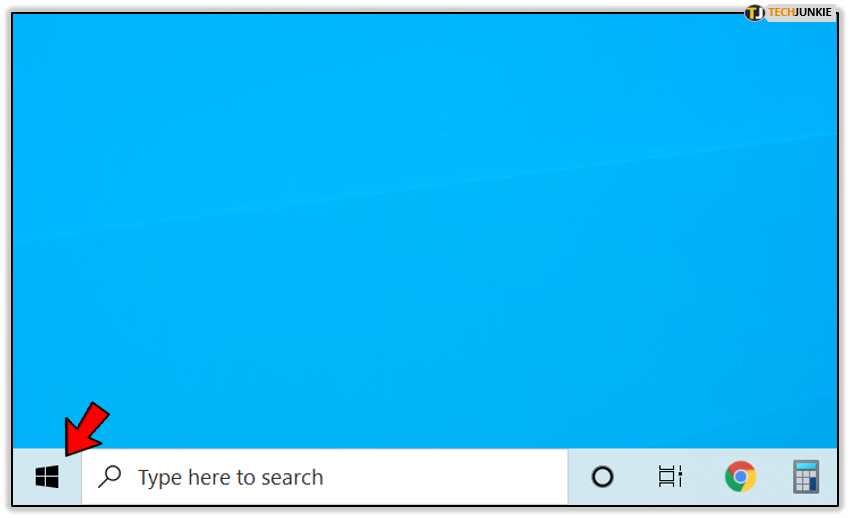
- Press the Start button in the bottom-left corner of your screen.

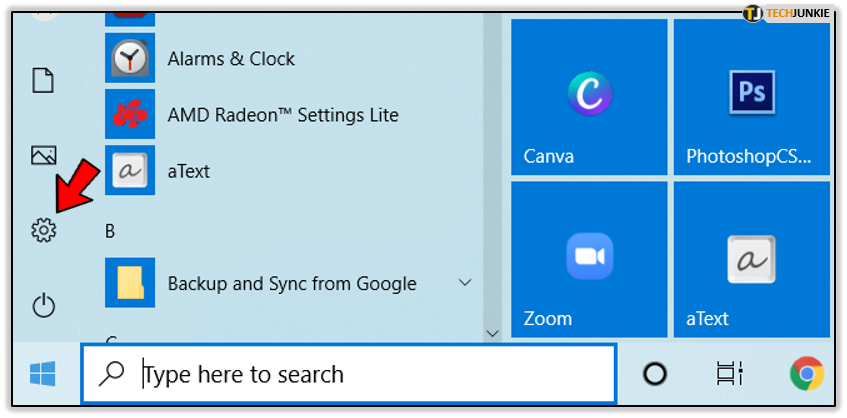
- Open your computer’s settings by clicking on the Settings gear icon – the icon is located on the lower-left side of the Start menu.

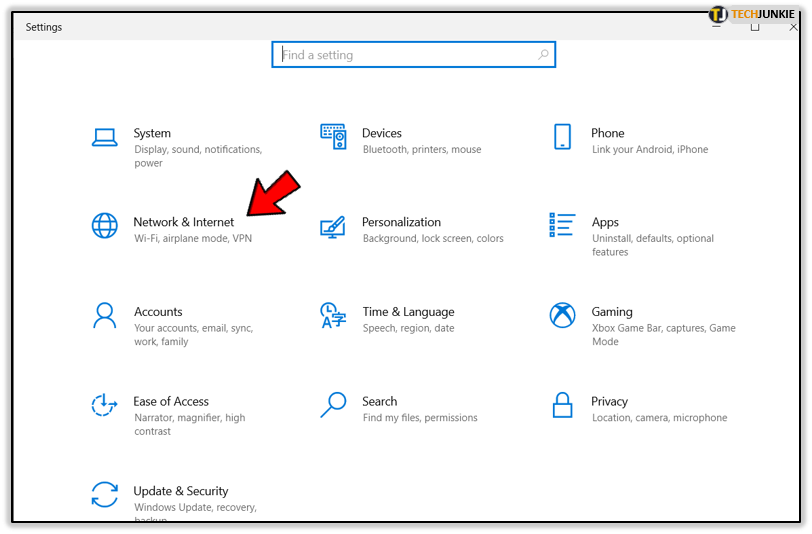
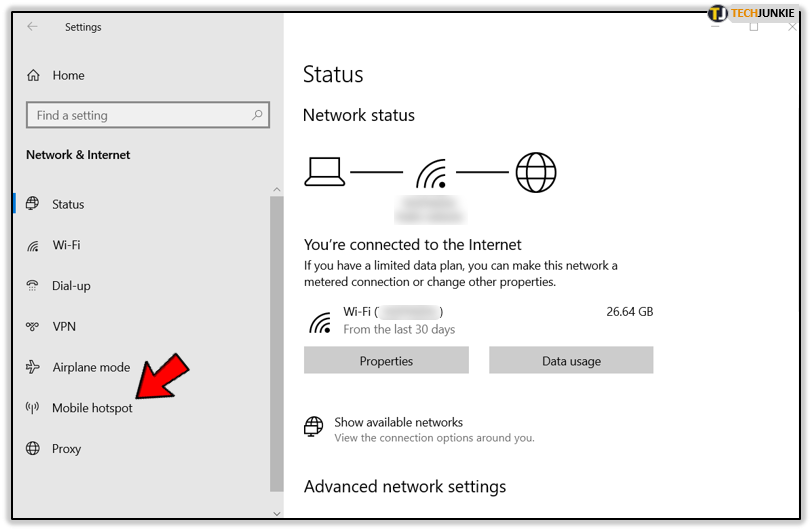
- Select the Network and Internet option. This will send you to a configuration window where you can change the settings regarding your Network and Internet.

- Click on the Mobile Hotspot option – this option is located on the left side of your screen, under the Airplane Mode. The Mobile Hotspot configuration will appear on the right side of your screen after you have clicked on this option.

- Choose your settings and apply.

Now you have to choose the correct settings for your mobile hotspot based on what you want to do. In case you just need a simple mobile hotspot for your phone to connect to, make sure that the Share My Internet Connection With Other Devices feature is toggled on. If this feature isn’t enabled, other devices won’t see your hotspot.
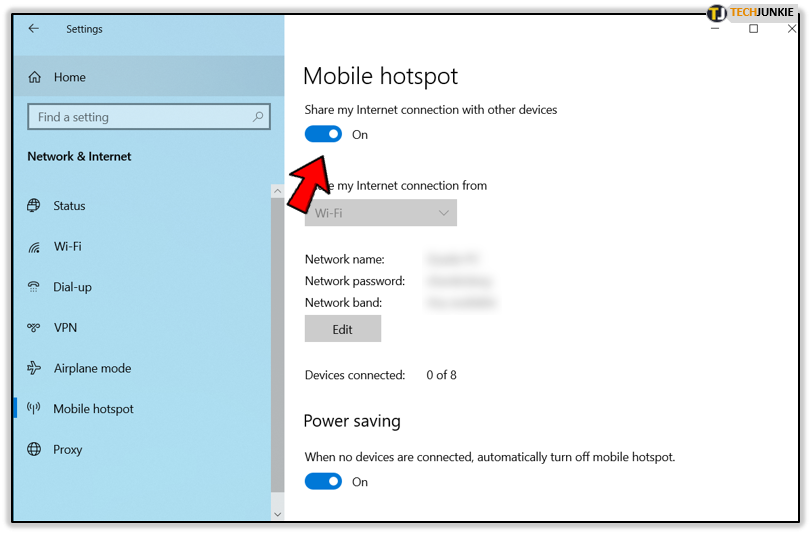
Then use the Share My Internet Connection From feature to choose which connection you want to share. You should select WiFi in this case.
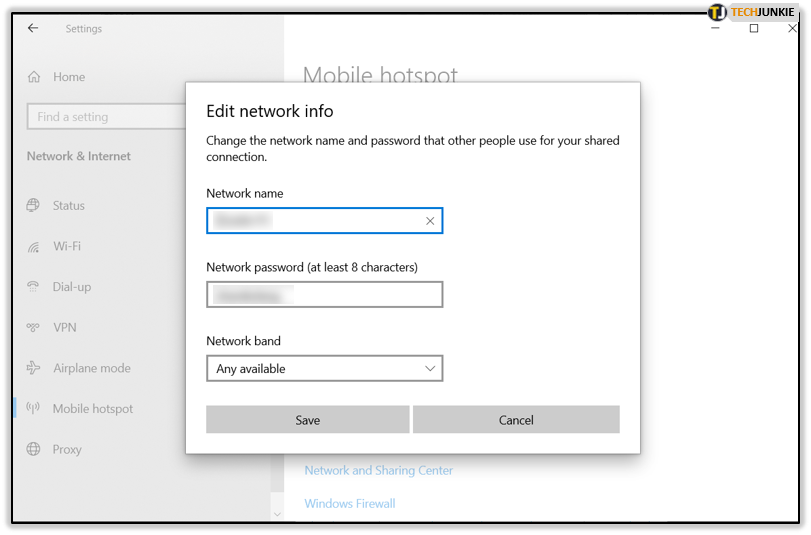
To set your own username and password for the hotspot you are about to share, click on the Edit button, which is located below the previous section.
If you want to open a hotspot on both your PC and mobile phone, enable the Turn on Remotely feature. However, both devices must be paired together via Bluetooth in order for this to work.
If the Mobile Hotspot Feature Is Missing, Here’s What You Should Do
In case you have followed all of the previous steps but can’t find the Mobile Hotspot feature in your Network and Internet panel, there’s nothing to be worried about.
In Windows 10, there is a way to create your own hotspot from scratch. However, this method involves a little bit more work. Here’s what you need to do.
Open your computer’s command prompt by clicking on Start, typing cmd in its search-bar and hitting Enter.
Once your command prompt is up and running, type the following command and hit Enter: netsh wlan show drivers. This command allows you to check whether your computer supports the virtual hotspot feature or not.
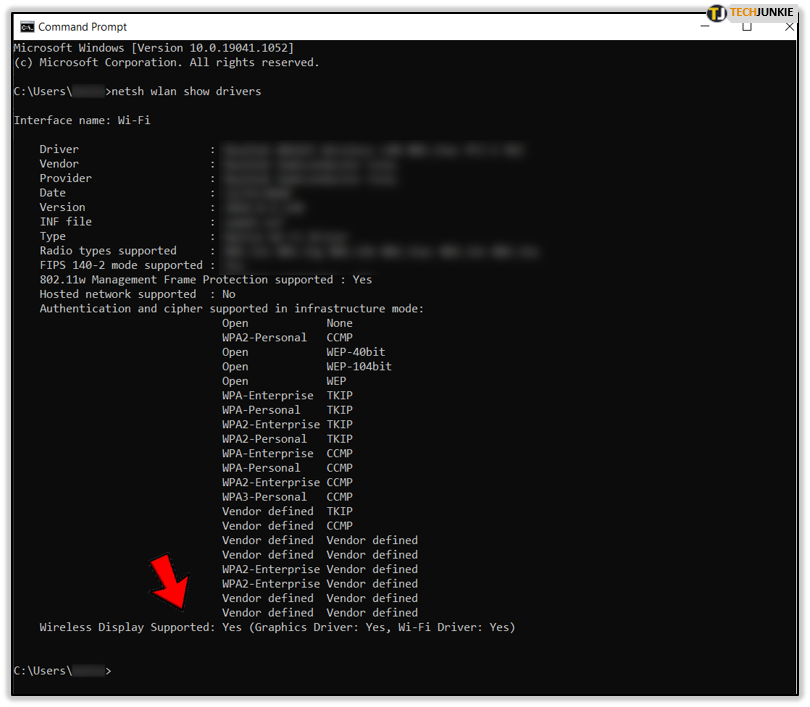
Make sure that you type everything correctly as you see it here. One small typo or missing blank space will result in an error. If nothing is displayed and you see an error message, it means that your computer doesn’t support this feature.
After that, type the second command but don’t press Enter immediately: netsh wlan set hostednetwork mode=allow ssid= key=.
This command allows you to set a name and password for your hotspot. Enter your hotspot’s username in ssid= username and its password next to key= password. After you’ve done that, press Enter.
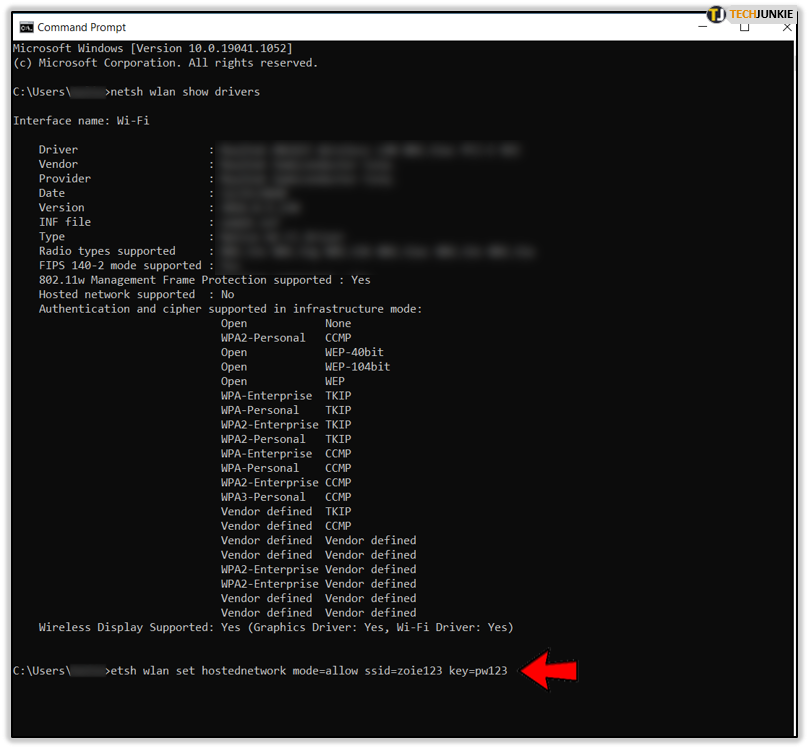
If everything was successful, a message will be displayed in your command prompt notifying you that your hotspot’s SSID and password have been changed.
The third command that you should use is the following: netsh wlan start hostednetwork.
After hitting Enter, you only have one more configuration to set up.
Open the Run program by pressing the Windows button and R key simultaneously. In Run’s search-bar, type nepa.cpl.
After clicking on OK, the Network Connections Window will be opened. Find the internet connection that your computer is currently using and right-click on it and select Properties.
Navigate to the Sharing tab and check the Allow Other Network Users to Connect Through This Computer’s Internet Connection checkbox. Confirm the changes by pressing OK.
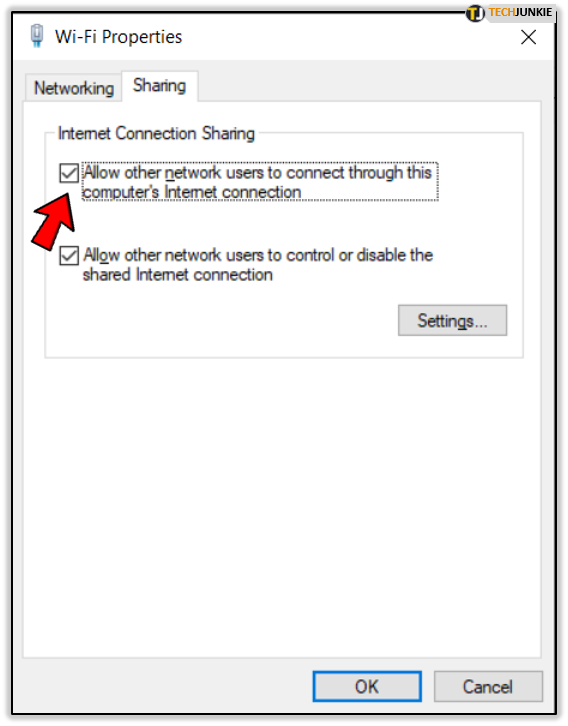
If you have done that correctly, your mobile phone will be able to see your hotspot’s SSID and connect to it.
To stop your hotspot, enter the following command into your command prompt: netsh wlan stop hostednetwork.
Enjoy Your WiFi Hotspot
That’s all that you need for creating a hotspot in Windows 10. Now you can easily connect your other devices to the same network and share your computer’s internet access.
Do you have an alternative method for creating a hotspot in Windows 10? Feel free to share it in the