How To Update Apps on Android
If you’re new to Android, everything may seem a bit overwhelming at first. Whether you’re new to smartphones or you’ve moved from iOS or Windows 10 Mobile, Android has a learning curve for anyone not used to the intricacies of Google’s mobile operating system. Luckily, once you have a handle on Android, it’s really easy to learn even the most complex tasks. Today, we’ll be looking at how to update your installed apps on Android. Making sure your apps are regularly updated will help protect against crashes, bugs, and security holes, keeping your device running fast and smooth. Apps regularly get new features added, too, which makes updating your app library on Android a no-brainer. Some of your system apps, like the phone dialer or the Google suite of apps, are also updated through the Play Store, the same way as your own user-installed apps. Plus, Android can even auto-update your apps for you, making the entire update system seamless. Let’s take a look at how all this is done in our guide to updating apps on Android.
Open the Play Store
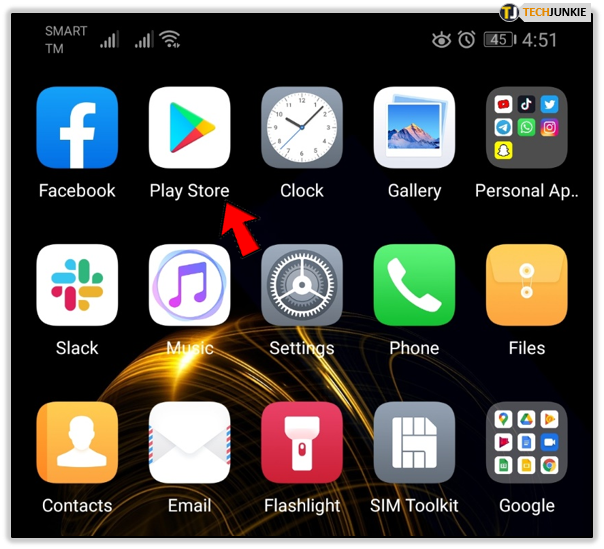
The Google Play Store is the equivalent to the App Store on iOS. It’s where you download all your apps, movies, music, and books onto your device. It’s gone through a lot of changes over the past few years, and each version makes the store a bit easier to manage and browse. If you haven’t used the Play Store much, you might not know how to open it. Typically, new Android devices will have an icon for the Play Store on the home screen of your device, but you may also have to open your app drawer to get to the icon. On my tablet, the icon is in my device’s dock. Just tap on the icon and the Play Store will open to the front page.
View Your App Updates
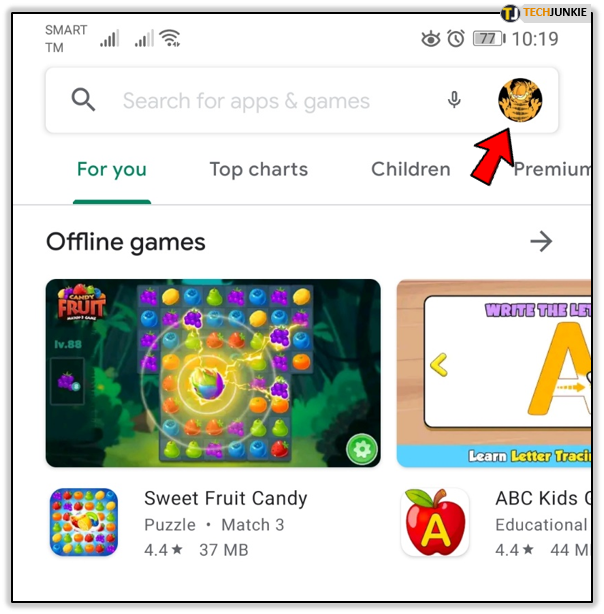
Most apps on Android use a sliding menu to navigate through the app, but on this new version of Play Store app sliding menu was already removed. In order to access the menu, tap your profile icon at the top-right corner of your display. This will open the menu, giving you plenty of options to choose from.
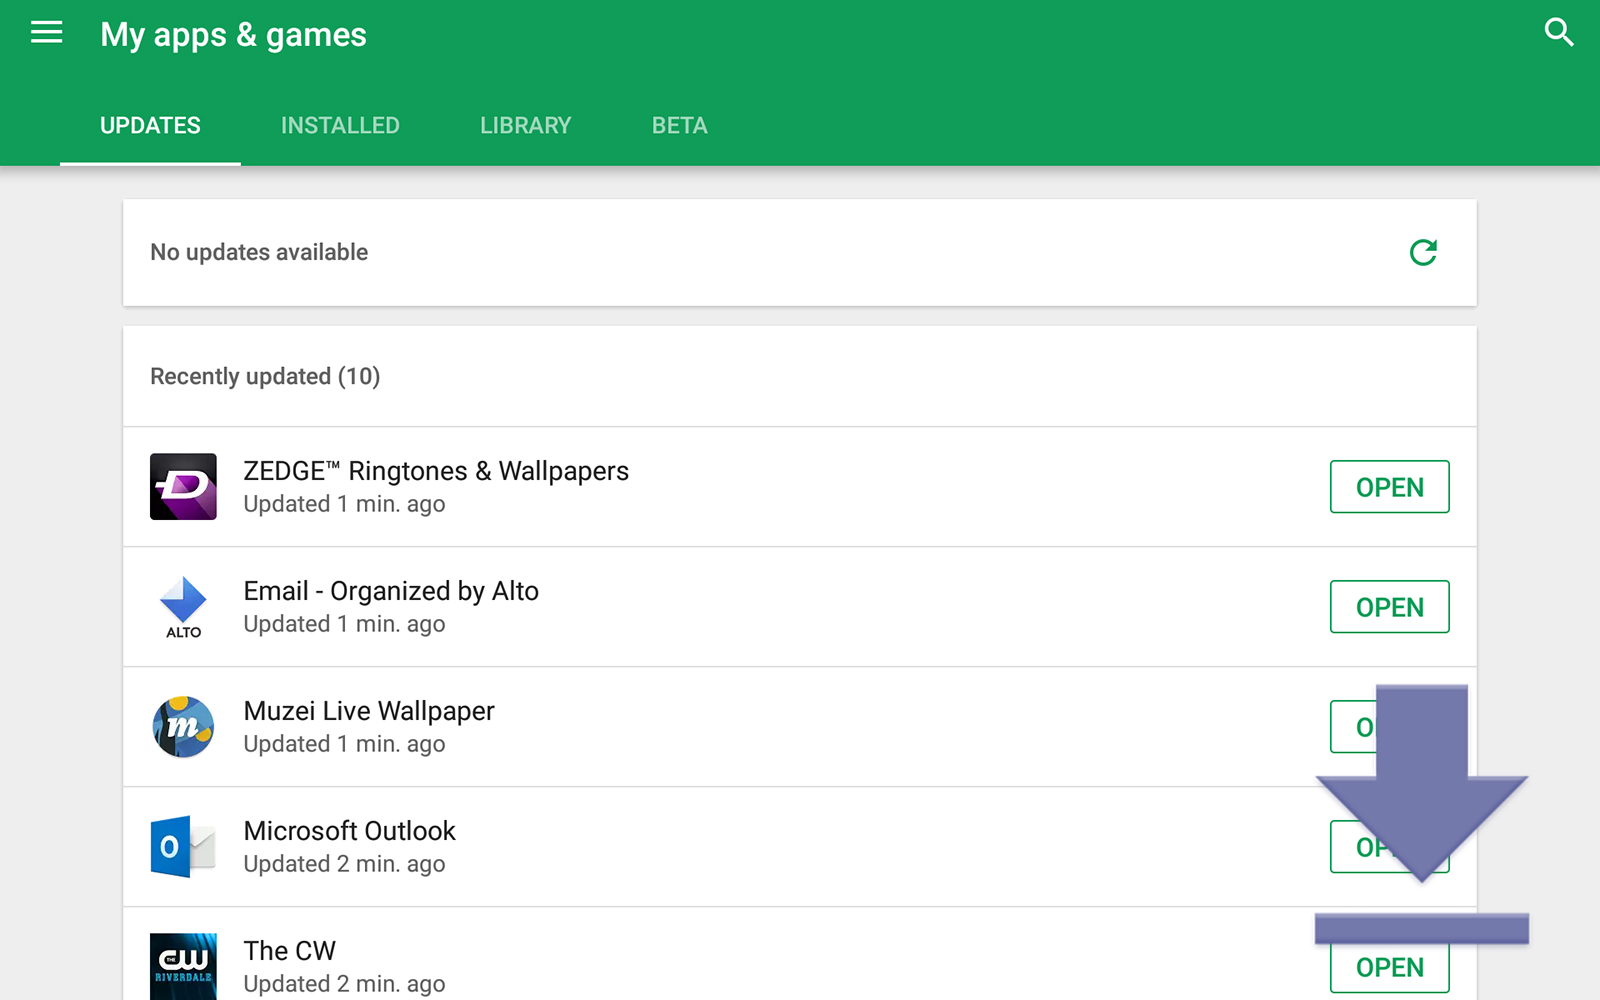
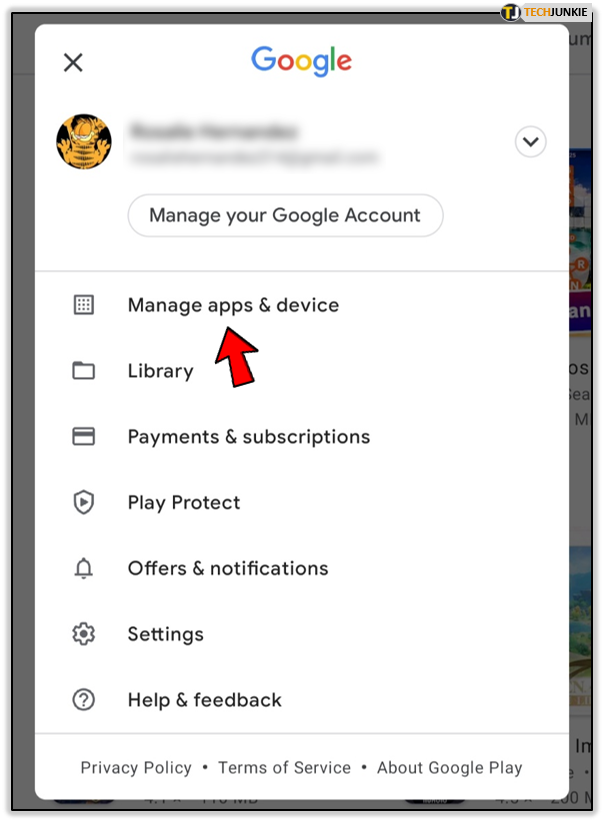
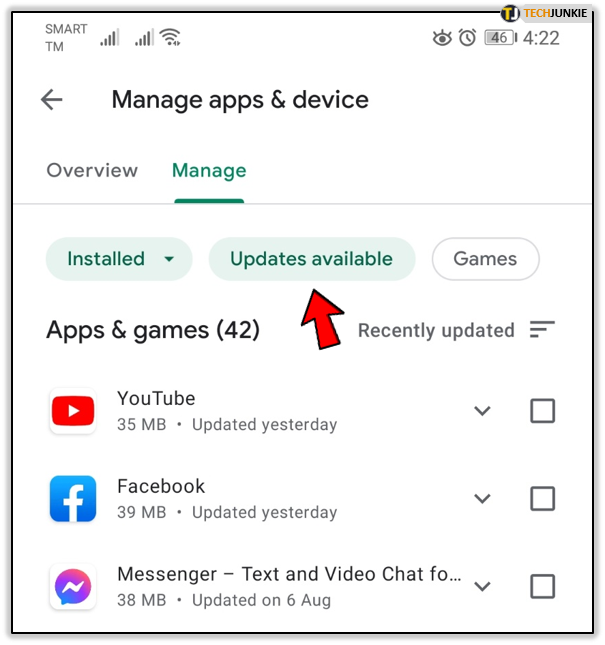
Select “Manage apps and device,” which should be the first menu selection from the top. This will take you to pages titled “Overview” and “Manage”. The Manage page has several options including Installed, Updates available, and, Games. The Installed tab which should already be selected once you enter this menu, will display every installed app on your device. The Updates available tab will display the apps which have updates pending installation. Finally, the Games tab will display any game apps currently installed on your device.
For our purposes, we’ll be sticking to the updates available tab, though it is good to know what the other tabs do. The Play Store will list every available update for your device. You’ll notice that each app has a button next to it that allows for a singular update.
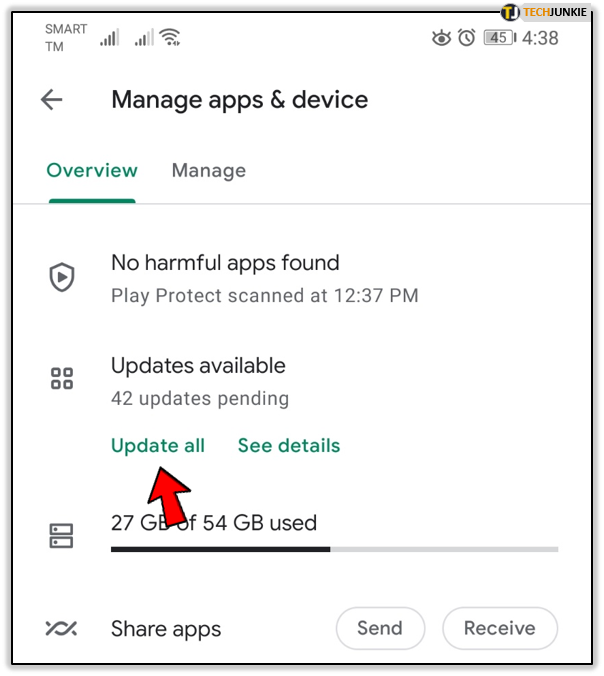
There’s also an option to update all the apps installed on your device in one fell swoop. On the Overview tab, select the “Update all” option. Typically, this is the button you’re going to want to use to update all your apps. Pressing the button will start the update process, with each update downloading and installing one-by-one down the list.
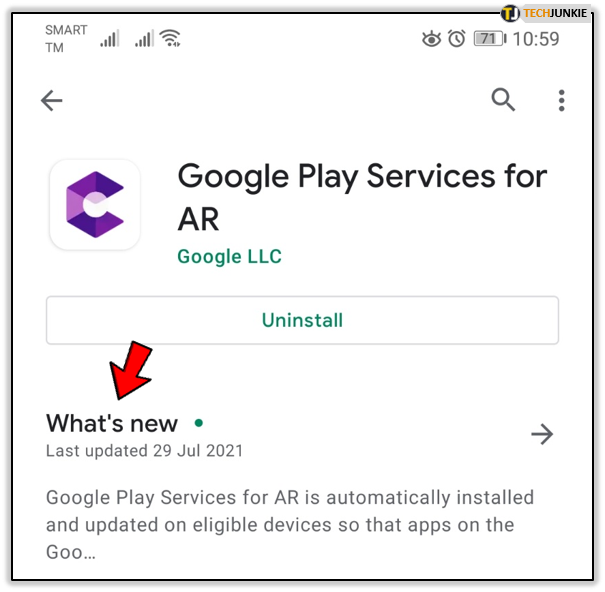
If you want to see what’s changed in each app update, you can select an app by touching it and reading the “What’s New?” list at the top of the app listing.


Auto-updating Apps
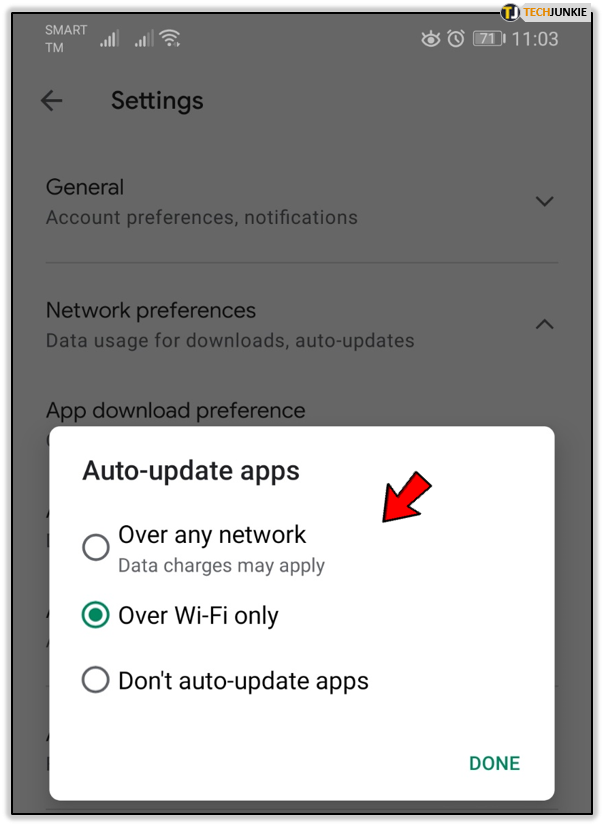
Most users will probably select to allow the device to auto-update applications, instead of having to do so manually. Luckily, it’s really easy to turn this on, if it isn’t already. Simply open the same menu as before, and select settings near the bottom of the list. There are a bunch of helpful settings in here, but for right now, we’ll be looking at how to make sure the option to auto-update apps is selected. Thankfully, we don’t have to dive too far into settings to find it. The second option at the top of the menu, under Network preferences, is “Auto-update apps.” Press this icon to view a pop-up. Here, you have two options to auto-update apps: Over any network and Over Wi-Fi only. Google Play warns data charges may apply when auto-update over any network will be selected but I find the app is pretty good about waiting until you’re on Wi-Fi to update. If an update ever does occur while you’re on mobile data, you can stop updates by viewing the same Updates display we viewed previously.
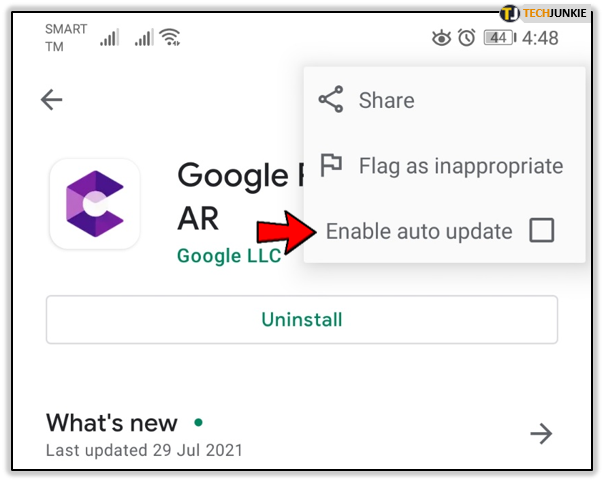
Once you’ve allowed apps to update automatically, you’ll typically see app updates roll out once every day or two. If you’d rather have complete control over when and what apps are updated, you can leave this setting disabled (or disable it if it’s already enabled). Finally, you can also turn off or on auto-updates on a per-app basis by visiting the app’s Play Store listing and tapping the triple-dot menu in the top-right hand corner, and selecting or deselecting “Enable auto update.”
***
Google and Google Play make it really easy to update apps quickly. Auto-updating apps are also a great way to keep your system up-to-date without having to worry about manually managing your library. The Play Store has come a long way since the days of the Android Market, and managing your library of apps has truly never been easier.