How to Add Custom Low Battery Alerts to Windows 11
While Windows 11 offers built-in low battery warnings, some users may want more personalized notifications. This is especially important for those who want to protect important, unsaved work from unexpected device shutdowns. Custom low battery alerts ensure that you receive timely warnings and can react accordingly to avoid any data loss.
Setting Up a Custom Low Battery Notification
The Task Scheduler is a built-in program that lets you set up responses to system events. You can use it to create your custom low battery warning.
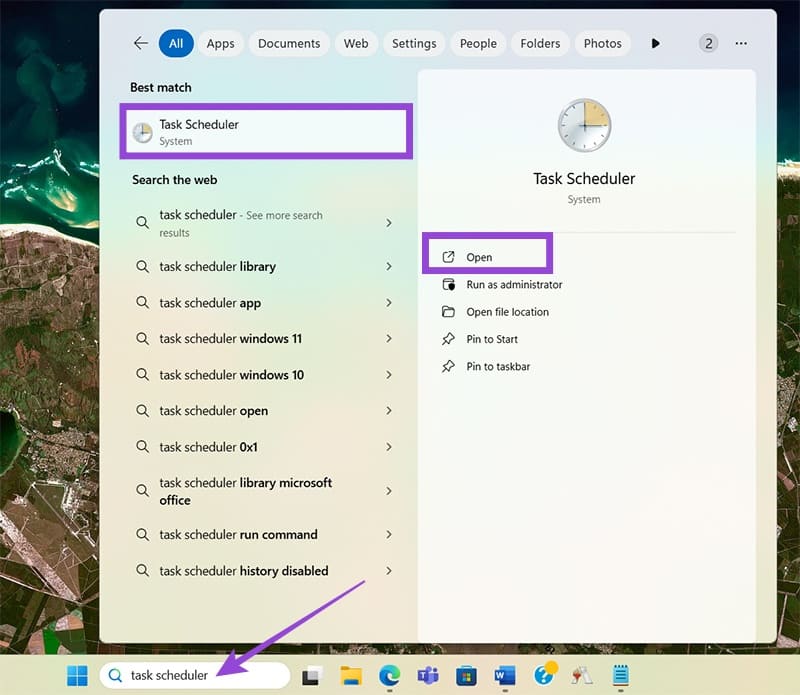
Step 1: Search for the ‘Task Scheduler’ in the search bar and open it.
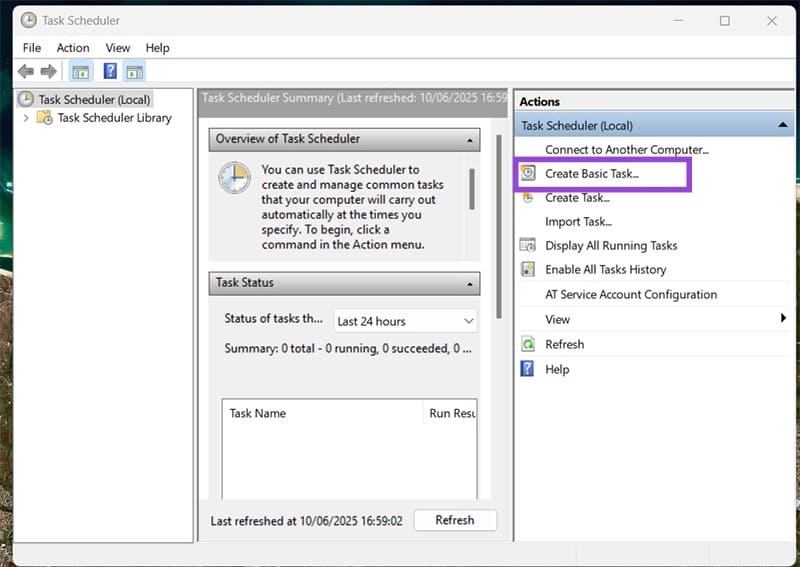
Step 2: Select ‘Create Basic Task’ from the right-hand panel.
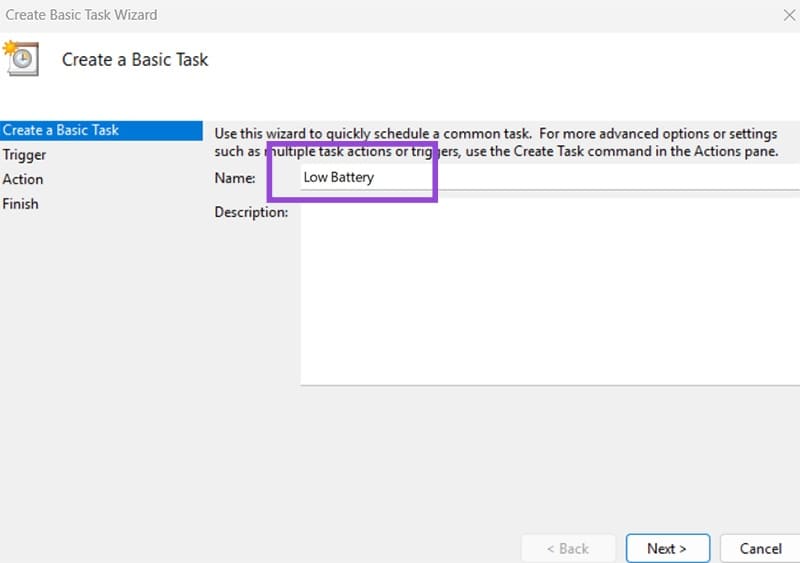
Step 3: Enter a name for the task then click Next.
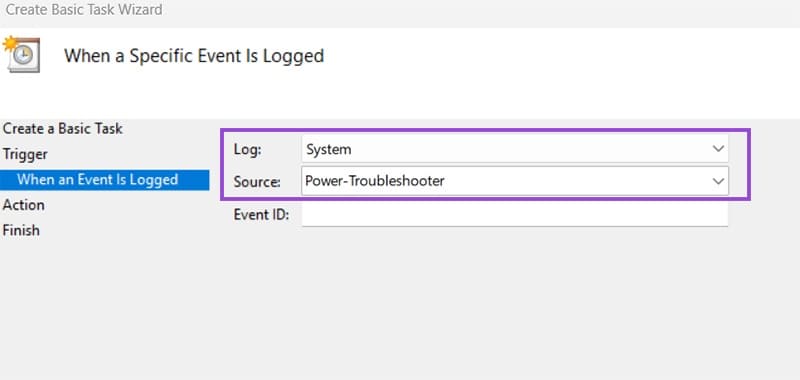
Step 4: Choose ‘When a specific event is logged’

Step 5: Under ‘Log’, select System.
Step 6: Under ‘Source’, select Power-Troubleshooter.
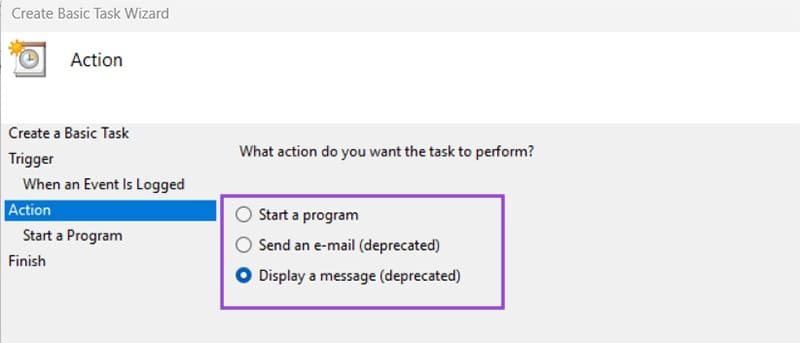
Step 7: Choose Display a message or Start a program for your triggered response.
- If you choose ‘Display a message’, enter the text you want to appear on-screen.
- If you choose ‘Start a program’, look for an audio file or a PowerShell file containing a code script that will run.
Step 8: Review and save the task.
Creating a PowerShell Script for Custom Low Battery Alerts
If you want a program to run when your battery reaches a certain level, you can use PowerShell commands to achieve this. This offers far more customization than just a pop-up appearing on your device, as you can enter any code to run.
Create a PowerShell Script
You must create the script and save it somewhere accessible before you can add it as a triggered event in Task Scheduler.
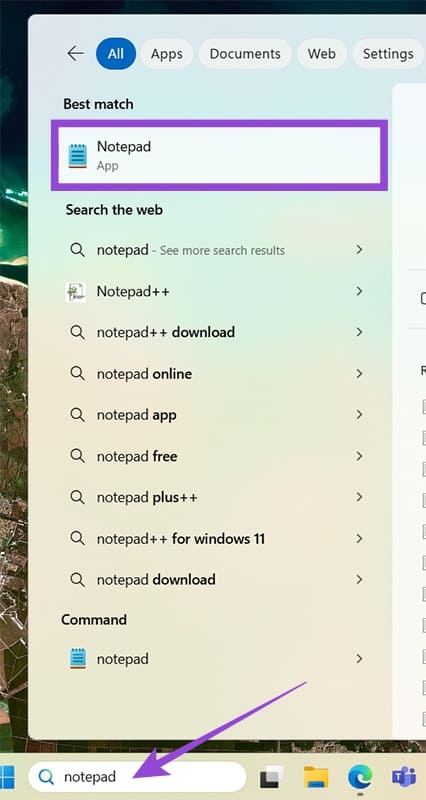
Step 1: Search for ‘Notepad’ in the search bar.
Step 2: Copy and paste the following script into Notepad:
$battery = (Get-WmiObject -Class Win32_Battery).EstimatedChargeRemaining
if ($battery -le 20) {
[System.Windows.MessageBox]::Show(“Battery is below 20%! Plug in your charger.”, “Low Battery Alert”, 0, 48)
}
You can edit the number in ($battery -le20) to whatever battery percentage you want and the code in the {} brackets to whatever script you want.

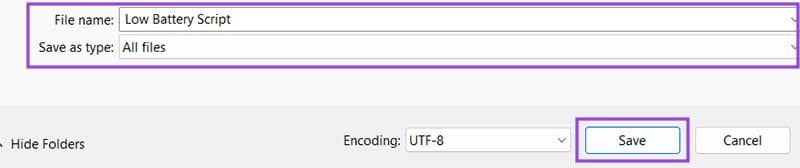
Step 3: Click ‘File’ then ‘Save as’ and give it a simple name.
Step 4: In the ‘Save as type’ dropdown, select ‘All files’, then save.
Adding the PowerShell Script to Task Scheduler
Now that you have the script, you need to schedule it to run automatically when your battery reaches the specified level.
Step 1: Open Task Scheduler from the taskbar.
Step 2: Click Create Basic Task.
Step 3: Name the task then click Next.
Step 4: Choose ‘When a specific event is logged’ as the trigger.
Step 5: Under Log, select ‘System’ and under Source, select ‘Power-Troubleshooter’
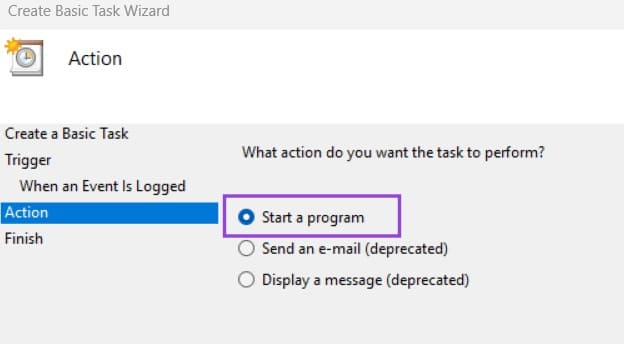
Step 6: Choose ‘Start a program’
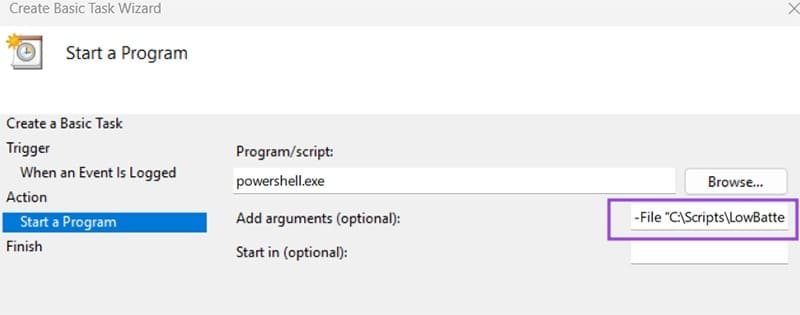
Step 7: In the ‘Program’ box, enter ‘powershell.exe’
Step 8: In ‘Add arguments’, type ‘-File “C:\Scripts\LowBatteryAlert.ps1’, replacing the file path with the one to your PowerShell script.
Step 9: Review and save the task.