How to Install a New SSD in a Laptop

Is your current HDD driving you mad with its agonizingly slow speeds? Or perhaps you need to increase the size of your current storage. No matter the reason, you’re currently looking at how to install SSD in a laptop and need some help in doing so. Not to worry, this article has you covered.
How to Install SSD in a Laptop – Our Guide

If you’re ready to get started, so are we. Let’s put new SSD in laptop.
Back Up and Clone
Sometimes you might need to install a whole new hard drive, or other times just add an SSD. If the former is the case, then the first thing you’ll want to do is either back up the data on your current laptop hard drive or clone it completely.
There are plenty of third-party utilities out there to help, but Clonezilla is a free and verified tool loved the world over. Be sure to have everything you need saved before the move, just in case.
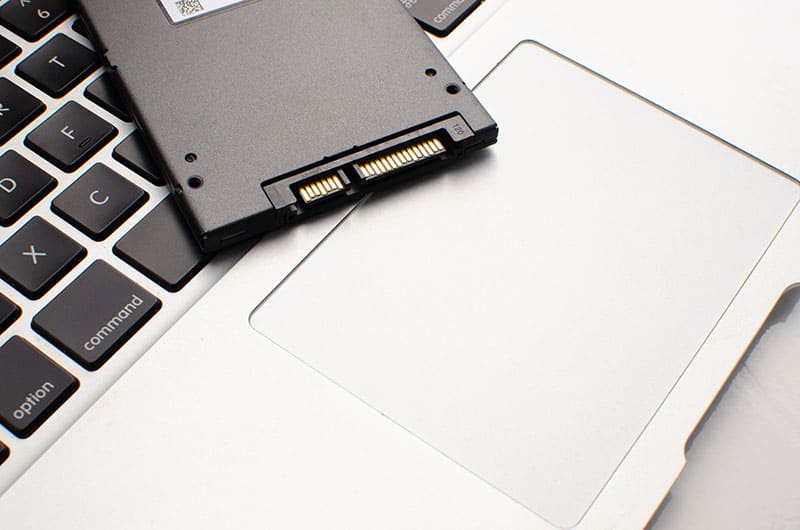
Choose Your Type of SSD Hard Drive
Not all hard drives are created equal, and not all connection points are either. While the size of the drive is up to you, the connection isn’t. Check your laptop model in your manual or the manufacturer’s website to see what interface your machine will accept, e.g., SATA or IDE; 2.5-inch or 1.8-inch. Keep in mind, sadly, that some laptop hard drives can’t be upgraded at all.
Another thing to consider is getting an external enclosure and adapter for your SSD drive in order to clone your current hard drive to it, as you would a regular external drive.
Precautions When Installing
We know you’re eager to get started, but an ounce of prevention is much better than the cure when it comes to internal computer work. Before you get started, keep these important tips in mind:
- Make sure your laptop is shut down completely, and the power cord is disconnected from it. Remove your battery and hold down the power button for a while (anywhere up to one minute) to ensure all remaining charge is drained.
- Ensure your laptop is on an anti-static mat before you begin working. In fact, try to avoid carpets entirely when possible, and wear EDS wrist strips if possible. Any static discharge can harm your machine.
- Don’t touch the connectors to your SSD or open the drive to prevent damage.
Installing the Drive
Now you’re ready to replace the hard drive:
Step 1. Place your laptop face down on a work surface and ensure, once again, that you’re grounded.
Step 2. Unscrew the back panel of your laptop and lift it off, placing it to one side.
Step 3. Undo any screws, pull tabs, and brackets holding your old hard drive in place.
Step 4. Gently remove the old hard drive, and avoid lifting it at a steep angle to prevent falls and accidental damage.
Step 5. Now, place the new SSD drive into the same place. Some laptops will have primary and secondary M.2 slots specifically for SSD cards. You can clip these in directly, making sure to screw them in afterward.
Step 6. Replace the panel and the laptop battery.
Boot It Up
Once you’re done with your installation, you’ll need to boot up your machine. A new SSD, especially a cloned one of your old drive, will need to be set as your primary drive in your BIOS. On boot, press your BIOS key (different for every manufacturer) and find the boot menu, set your new SSD as the primary boot drive if necessary, and Windows should load as normal, if much faster.