


How to Create QuickTime Screen Recordings in macOS

macOS has a built-in program—called QuickTime Player—that can play back many types of audio and video files. But many Mac users don’t know that QuickTime is also darned handy when you want to create different types of recordings instead of just play them. For example, QuickTime lets you make audio recordings using your Mac’s microphone, or video recordings with your webcam.
But QuickTime also lets you make screen recordings. That is, full-motion videos of your Mac’s screen, which is great for creating tutorials, demonstrating troubleshooting steps, or sending instructions to a less technically savvy family member. So, while QuickTime is great at many things, this article will focus on using it to create screen recordings on the Mac!
Launching QuickTime
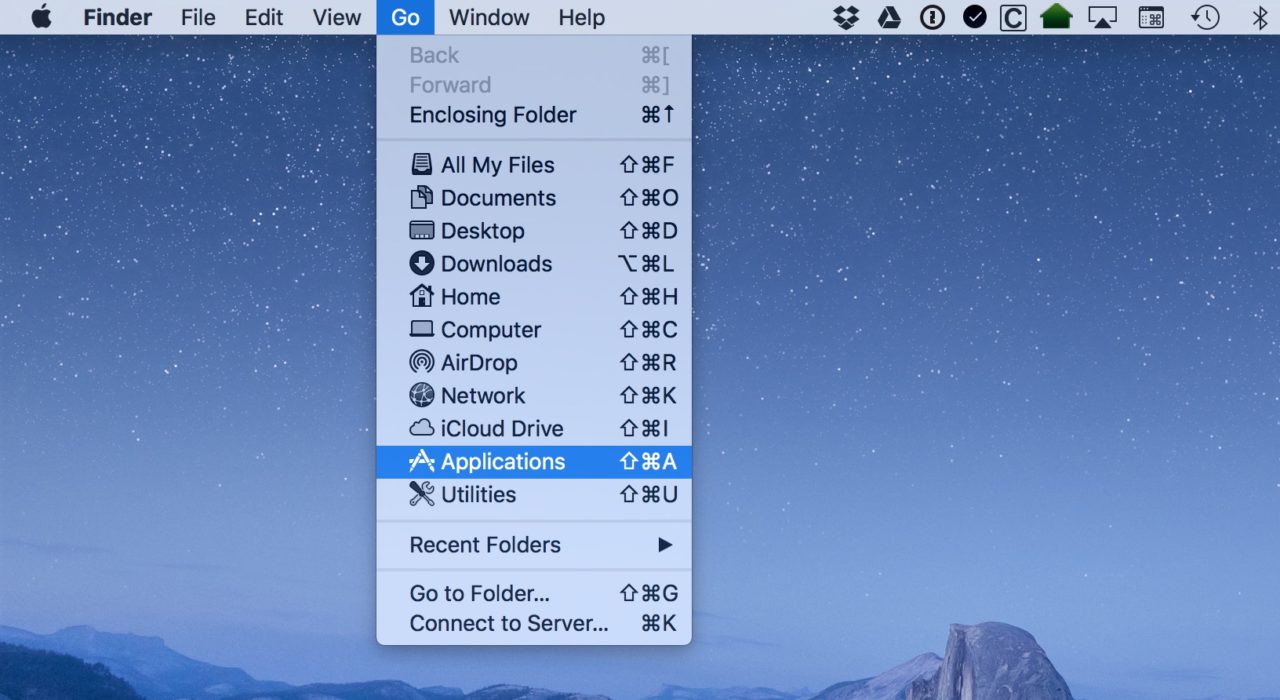
For those unfamiliar with QuickTime, the first step is to find the app on your Mac. By default, QuickTime is installed in your Applications folder, which you can navigate to by clicking Finder and going to Go > Applications from the menu bar. Alternatively, you can use the keyboard shortcut Shift-Command-A in Finder to jump directly to the Applications folder.
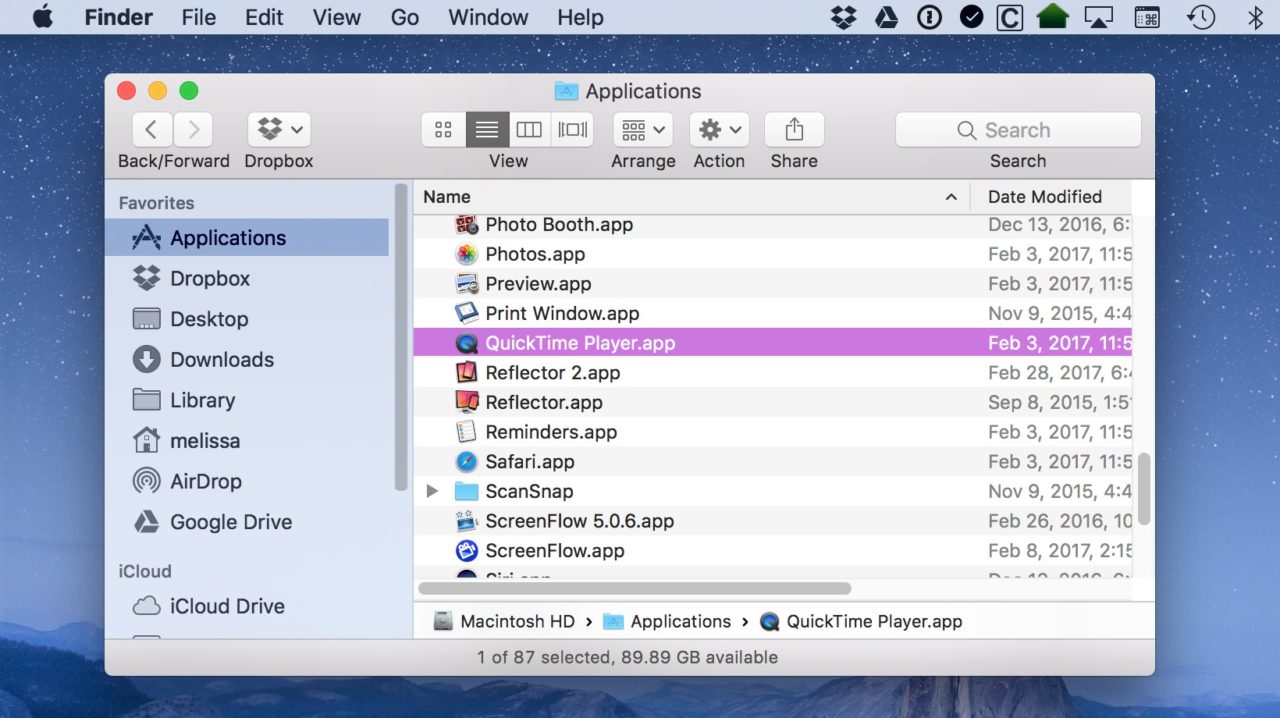
Once the Applications folder displays in Finder, scroll down until you find QuickTime Player.app and double-click to launch it. Note that you can also launch QuickTime directly from Spotlight by searching for it.
QuickTime Recording Options
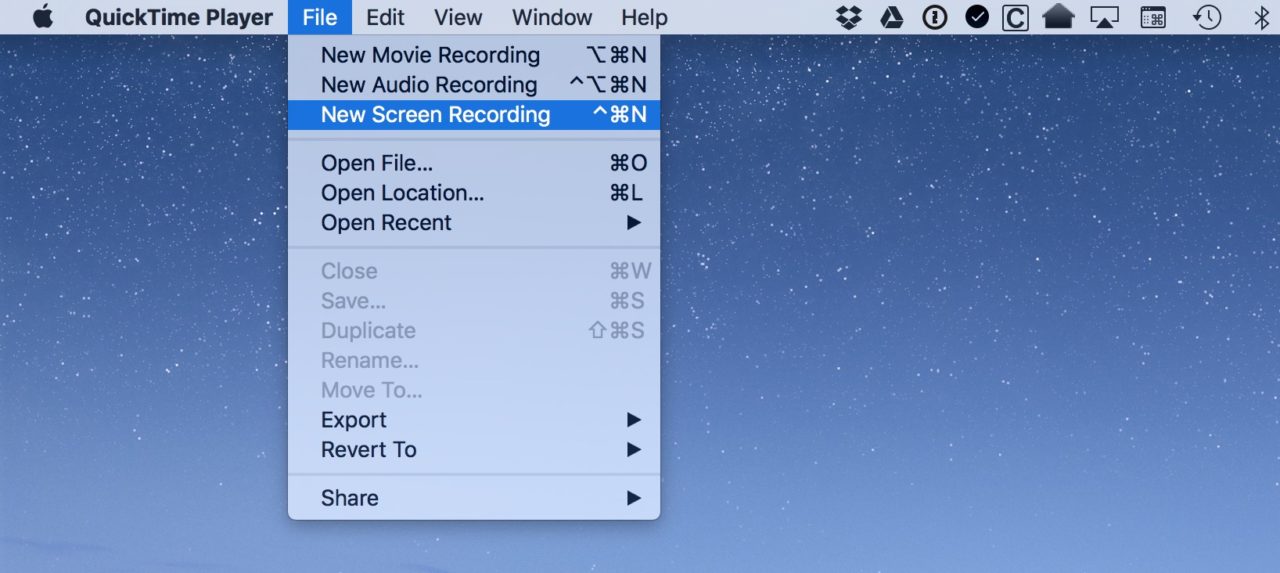
With the app open, you’ll find the QuickTime recording options under the File menu at the top of the screen:
Here’s a brief overview of each QuickTime recording option.
New Movie Recording: this will create a movie recording using your Mac’s webcam, or any attached USB camera. Use this mode to record a video of yourself talking to the camera, or whatever your camera is pointed at.
New Audio Recording: this creates an audio-only recording using your Mac’s built-in microphone, or any supported attached recording devices, like an external USB microphone. You could use this mode, for example, to record yourself for a podcast, record narration for a slideshow or movie, or record a meeting (as long as you have the permission of the participants, of course).
New Screen Recording: the topic of this tip, and a mode that lets you record your Mac’s screen with optional audio from your Mac’s built-in microphone or a supported USB audio device.
Making QuickTime Screen Recordings
So, let’s get started with creating QuickTime screen recordings. Using the steps above, select File > New Screen Recording from QuickTime’s menu bar. Alternatively, you can launch QuickTime and use the keyboard shortcut Control-Command-N. A new Screen Recording window will appear:
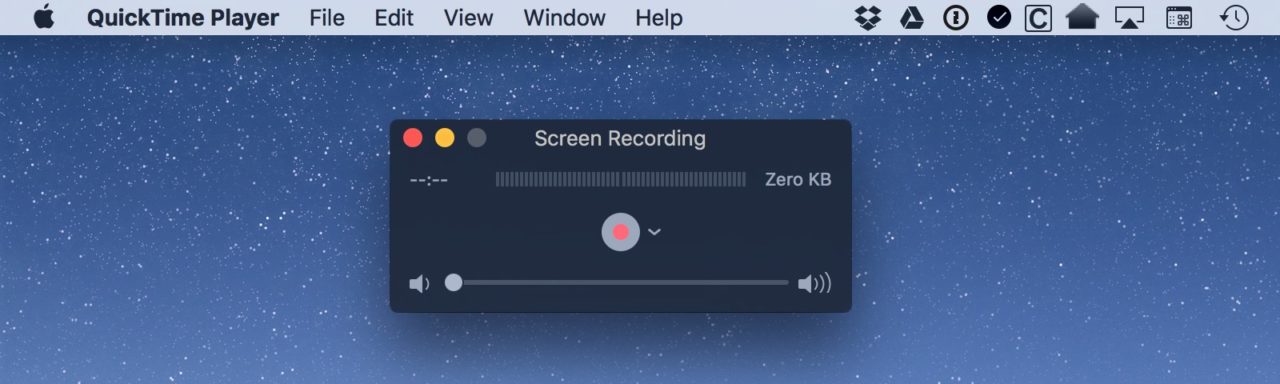
This simple little window is where the magic happens. The center red button is how you’ll start your recording, but first, be sure you check how your preferences are set! Do so by clicking on the small downward-facing arrow next to the record button.
![]()
There are only two choices there: “Microphone” and “Options.” With “Microphone,” you can control whether your screen recording has any audio—choose “Internal Microphone” if you want to be able to discuss what you’re doing on-screen while you’re doing it. If you have a supported external microphone or audio device connected, you’ll see it listed here, too, and can select that for your audio input instead.
The “Show Mouse Clicks in Recording” option, though, is pretty cool if you want your audience to know exactly when and where you’re clicking your mouse or trackpad. What this option does is put a circle around your cursor whenever you do click during your recording, like this (the white box is edited into the photo to point out the circle; only the circle appears in the recording):

So set up the mic you’d like to use, turn mouse clicks on (or off), and you’re ready to go. Press the red button, and QuickTime will give you a heads up of what’s about to happen.

As the QuickTime dialog states, you can click once (anywhere) to begin recording your full screen. But if you only want to take video of a portion of your screen, you can instead click and drag to draw a box around that section. Doing either of those things will start your recording, which you can monitor via the icon in your menu bar.

Now, go ahead and perform the actions you wanted to record: troubleshoot an issue, launch an application, follow steps to create a tutorial, etc. When you’re done, click the QuickTime icon in your menu bar to stop the recording. QuickTime will then process your recording, create the video file, and open it for you on your desktop. Review the file to make sure you captured what you wanted, and use the built-in QuickTime trim function to cut parts at the beginning or end.
Saving & Sharing Your QuickTime Screen Recordings
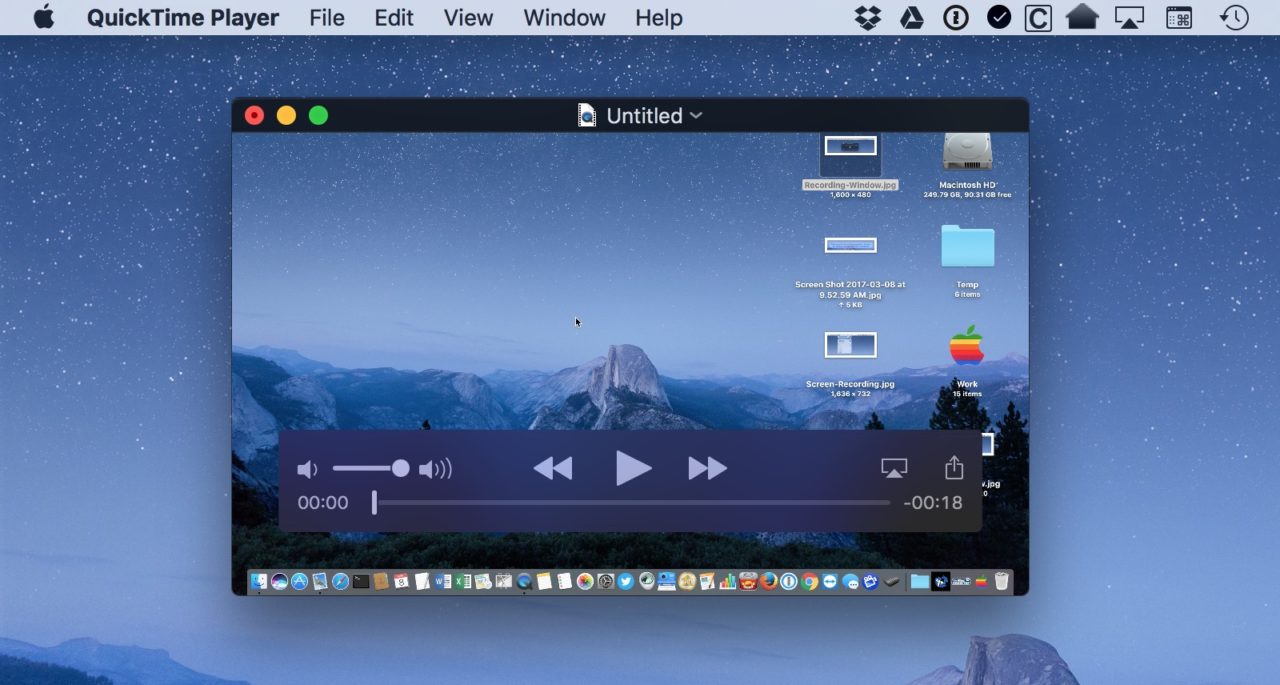
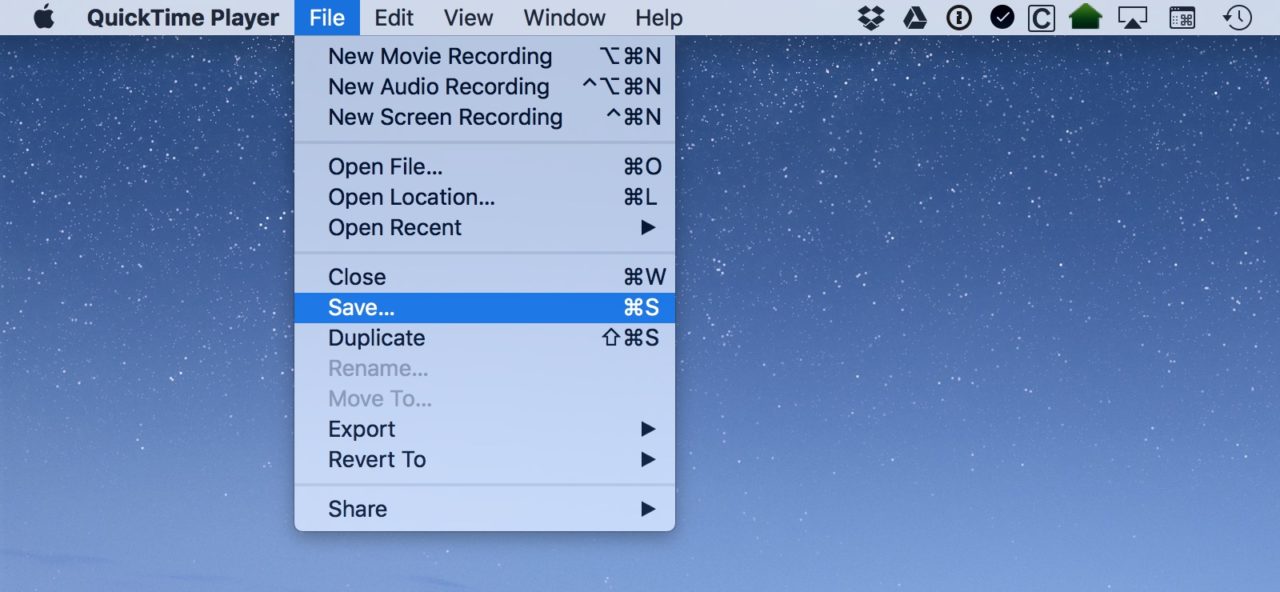
If you’re satisfied with your recording, the last part is to save or share it. To save the recording, click File > Save from the menu bar and choose your desired filename and location.
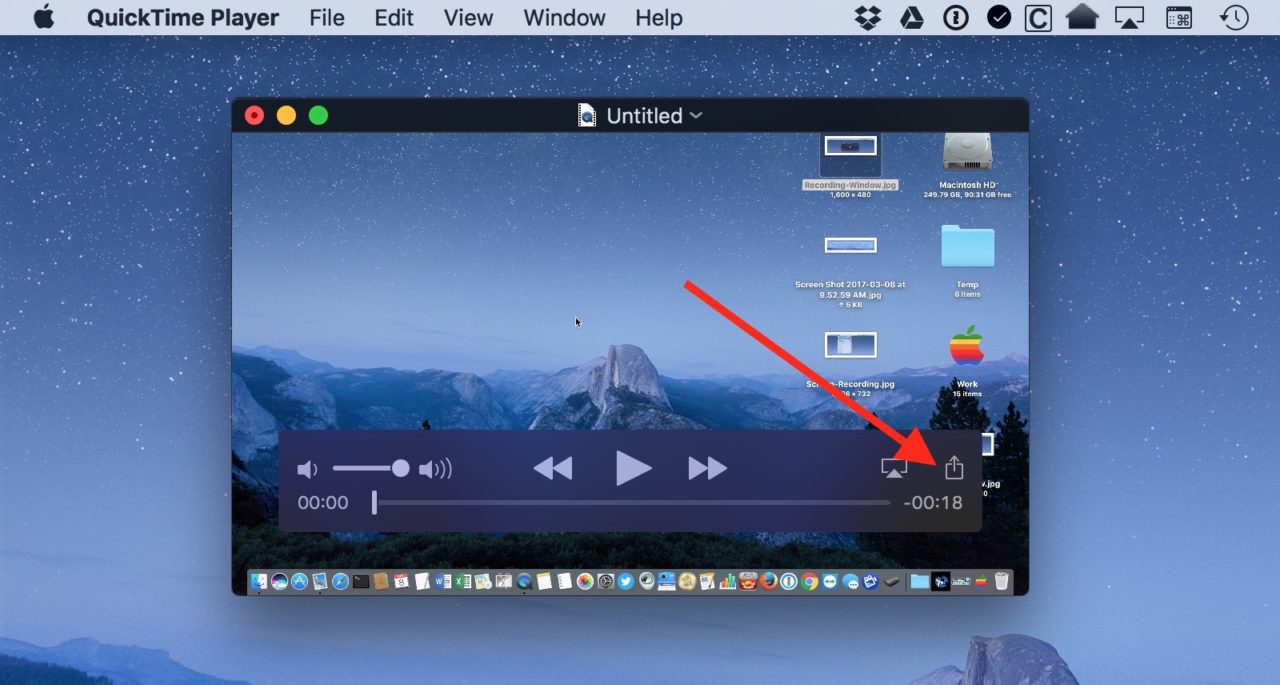
If you prefer to share your video via email or iMessage right away, click the Share button in the QuickTime playback controls to both save and upload the video to your desired recipients immediately.
One more thing! Be aware that these screen recordings can create very large files, so if it turns out that your creation is too big to email, you could choose instead to upload it to a file-sharing service like Dropbox. Depending on your Mac and the version of the operating system you’re running, you may be able to use Apple Mail’s built-in Mail Drop feature as well.
However you end up sending your recording, though, your recipients will have a very easy way to see exactly how to do whatever you’d like to show them. I’ve found that for visual learners especially, this is incredibly helpful…not to mention incredibly impressive. And goodness knows we can all do with being impressive now and again!


