


Apply Auto Enhance to Multiple Images in Photos for Mac

The Photos app in macOS has a cool feature called Auto Enhance, which can automatically adjust white balance, brightness, and color saturation with a single click. The Auto Enhance feature tries to make these adjustments intelligently in order to improve the look of your image, and while it’s not always perfect, it can be a good place to start when editing your pictures in Photos.
To use Auto Enhance on a single image, simply double-click an image to open it, and click the “magic wand” icon in the upper-right.

Click the Auto Enhance icon once to instantly apply the effects to your image. Here’s an example of what the Auto Enhance feature can do, with the original image on the left and the enhanced image on the right:
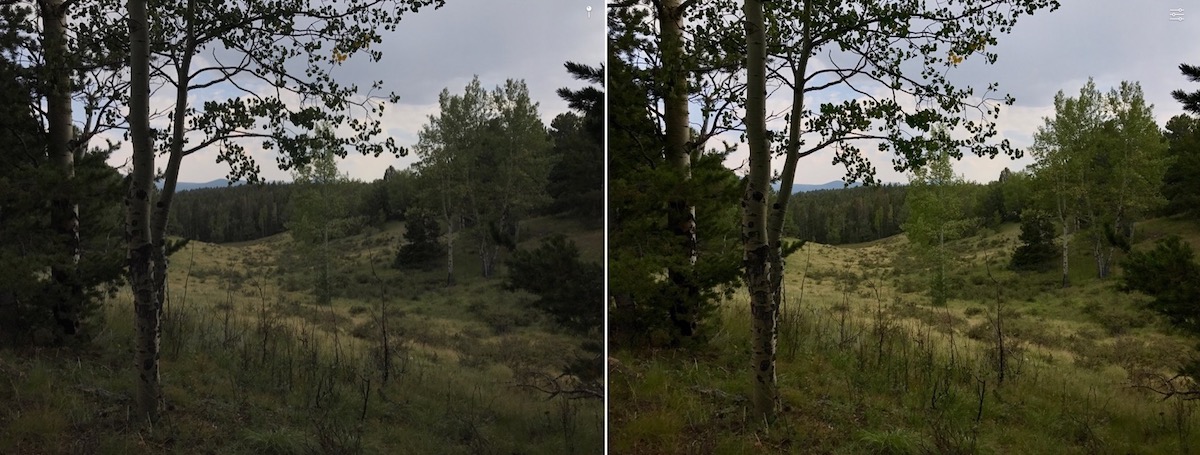
The original image (left) and the auto enhanced image (right).
The effect is subtle on this not-so-great picture of mine, but the enhanced one does a much better job of capturing what a beautiful overcast day that was. So much so that I want to go out on a hike right now! Anyway, don’t worry if you don’t like the Auto Enhanced result; just click the Auto Enhance icon again to undo the changes.
That’s all great for enhancing photos one-by-one, but what if you want to apply Auto Enhance to a bunch of photos at once? Here’s how.
First, launch the Photos app and find the images you want to edit. In my example, I’m going to use those three rocky landscapes near the bottom of the window below.
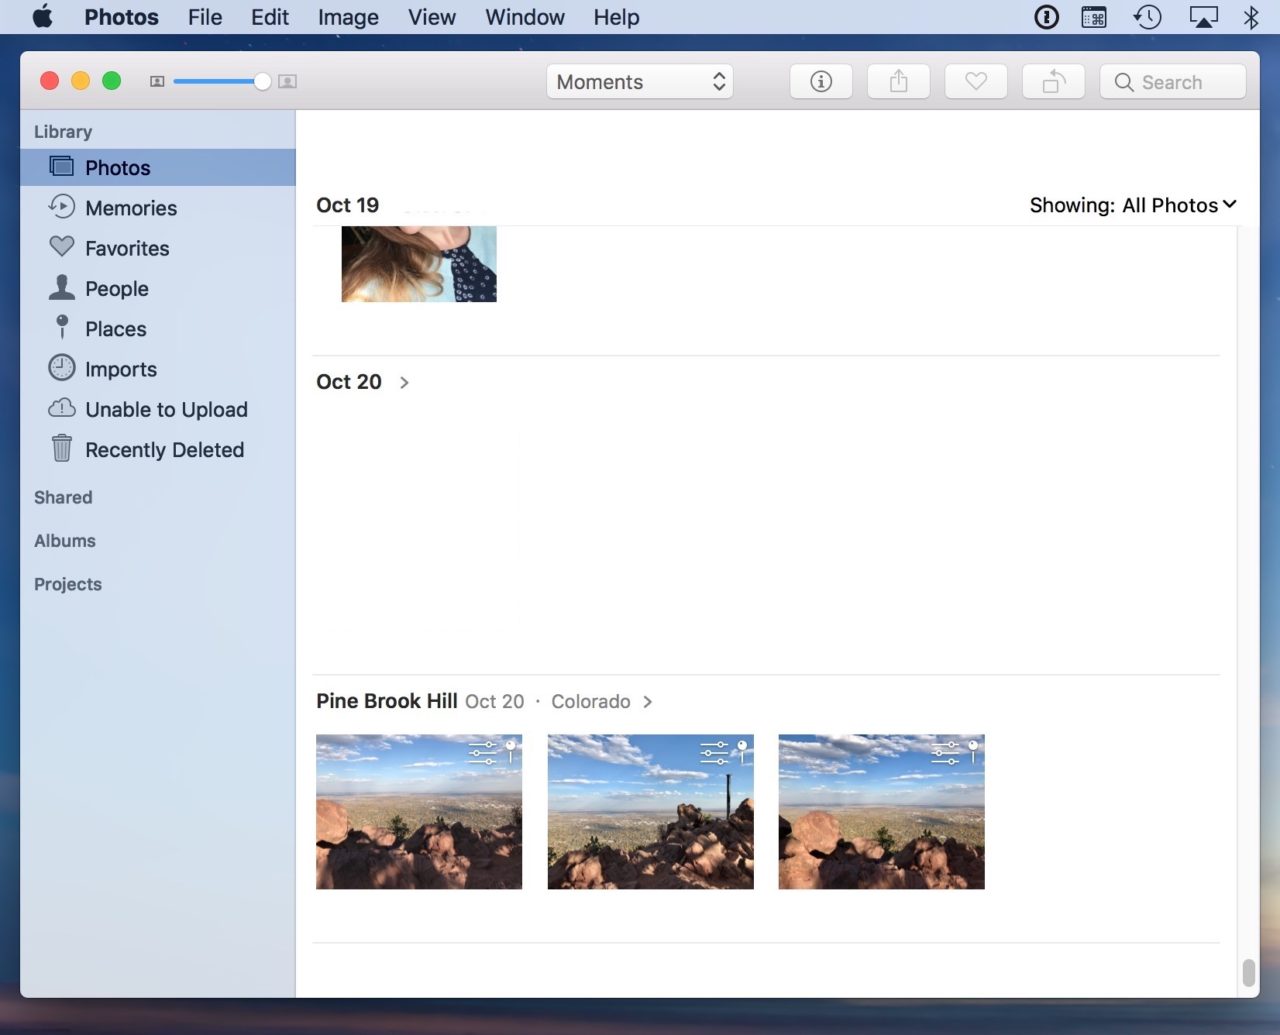
You next need to select those images. To do so, hold down the Command key on your keyboard and click on each one. You can also use your mouse to click and drag multiple images, or hold the Shift key to select a range of sequential images (hold Shift and click the first one, keep holding Shift and find and click the last one).

With your images selected, head to Image > Auto Enhance from the menu bar at the top of the screen.
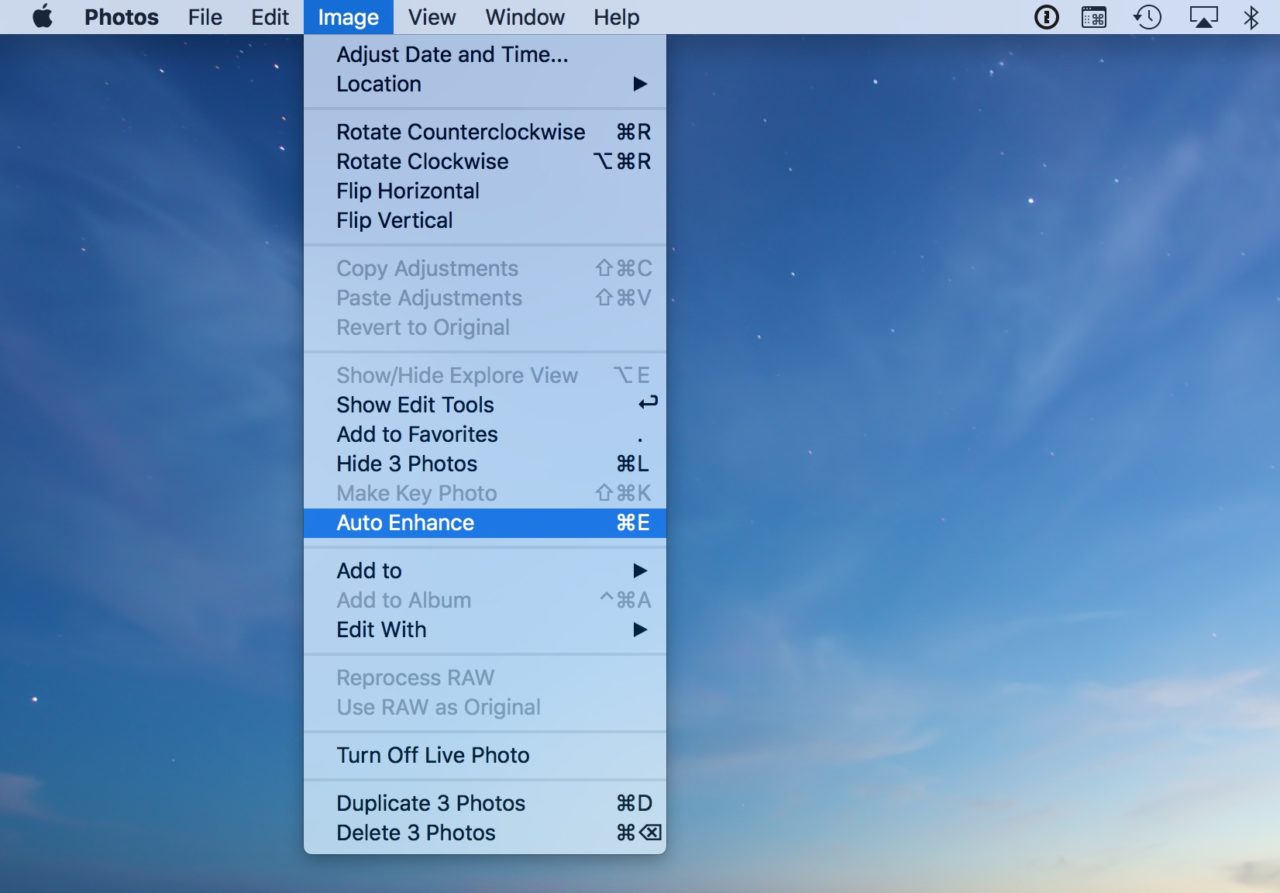
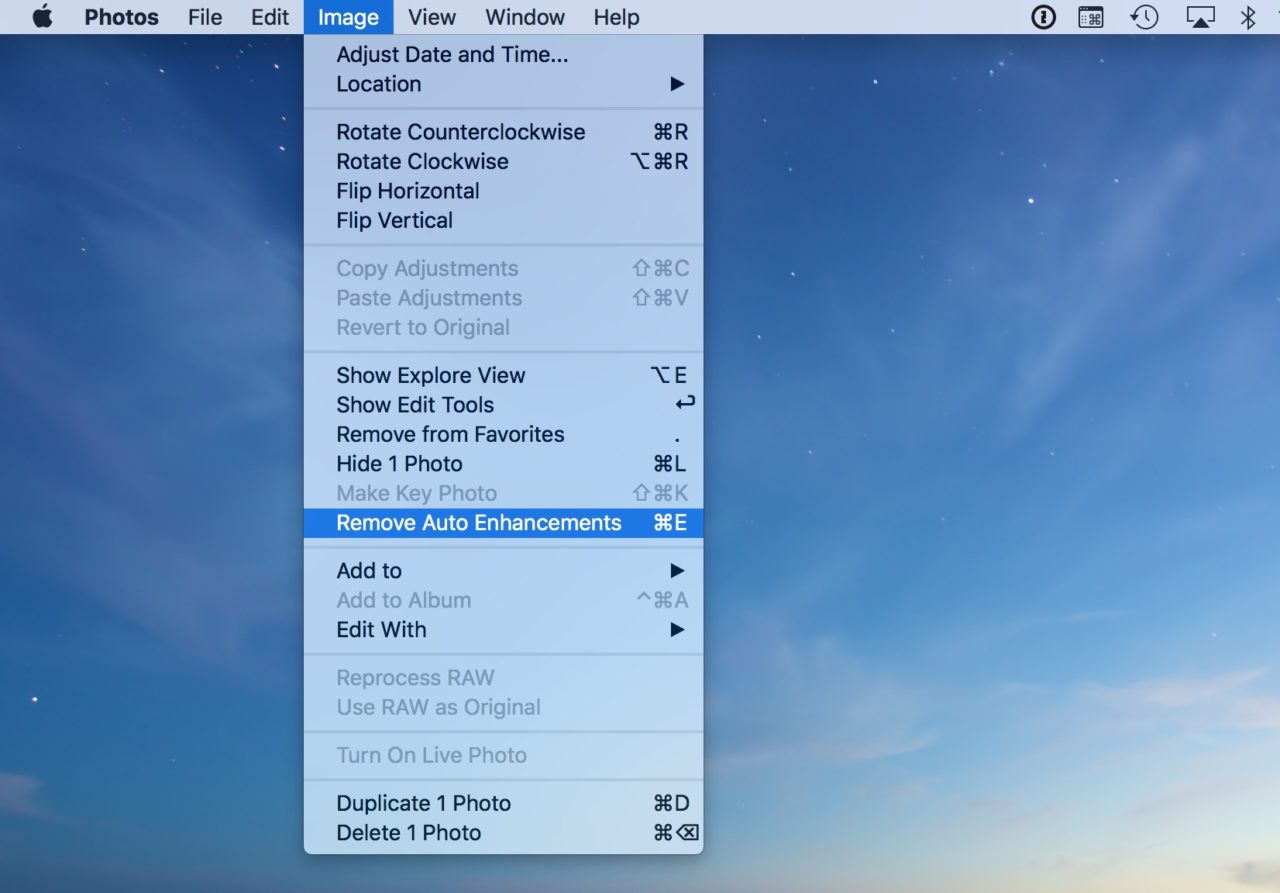
If you’d prefer, you can also use the associated keyboard shortcut, which is Command-E. But after you do either of those things, you’ll see the applied enhancements on each of the photos you chose! And one more thing: Remember that these changes are nondestructive, meaning that you can come back to Photos at any point, open a picture you enhanced, and pick Image > Remove Auto Enhancements to revert that change.
In any case, you’ll end up with better-lit, more colorful pictures to share. You have my permission to pretend that they came straight out of your camera like that. But if you’re still not happy, you can continue to manually tweak your photos while using Auto Enhance as a starting point.


One thought on “Apply Auto Enhance to Multiple Images in Photos for Mac”
That sucks Apple!