Can’t Read From the Source File or Disk Errors in Windows – What To Do
If you read my piece ‘How To Fix ‘Can’t Read From The Source File Or Disk’ Errors’, you will already know that the errors can be caused by a mismatch of file systems. It can also be caused by disk errors. From the number of TechJunkie readers who contacted us about that last reason, disk errors are more common than I thought. That is what prompted this post.
Rather than repeating that original tutorial, I’m going to concentrate on repairing disk errors and getting that file copied across. I will use a tool built into Windows called CHKDSK. It has been around for many versions of Windows and is actually very good at identifying and repairing issues with your hard drive.
If you see ‘can’t read from the source file or disk’ errors and the file systems match between the drives, it could be errors stopping things working properly. That’s where the Windows Check Disk Utility comes in.
Windows Check Disk Utility
CHKDSK is the Windows Check Disk Utility and is a very efficient tool for error checking on hard drives. As it’s a Windows tool, it only works on Windows drives and it understands how Windows formats and partitions hard drive space. It works on both HDD (traditional hard drives) and SSD (new solid state drives). Although care should be taken to only use it when absolutely necessary on SSD.
In an ideal world, you would run CHKDSK once a month or every couple of months as preventive maintenance. You would do this along with clearing dust off your fans, removing dirt from the inside of your PC, running a registry cleaner and defragmenting your hard drive (HDD only not SSD). You all do that every few weeks right?
The tool checks the hard drive, sectors, partitions and data. As Windows writes data to a hard drive in a very specific way, the tool can quickly identify if anything is wrong, or going wrong. It can either automatically repair it or prompt you to manually repair it.
Running CHKDSK
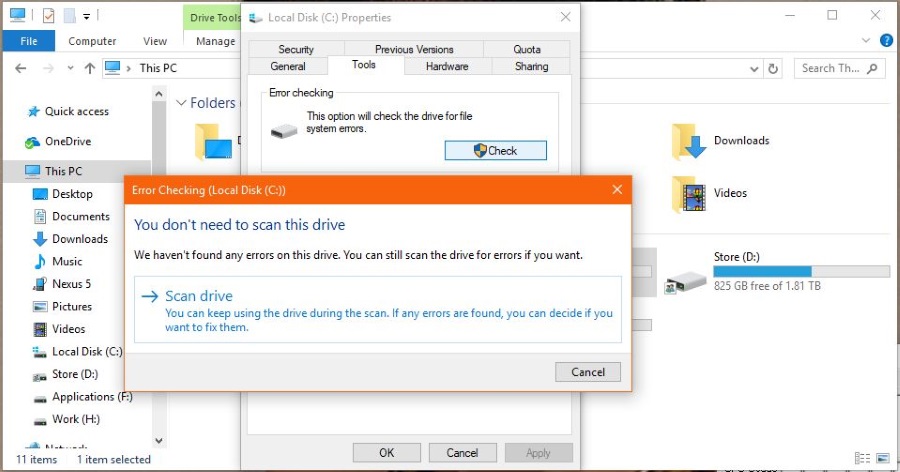
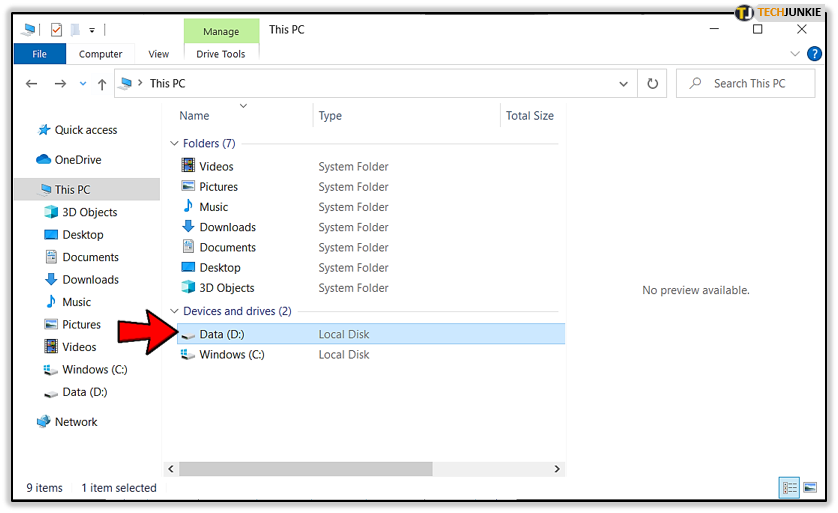
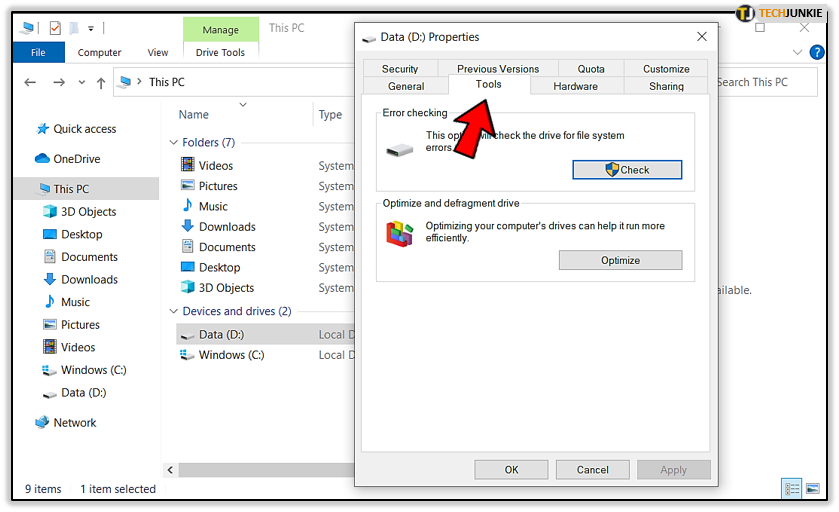
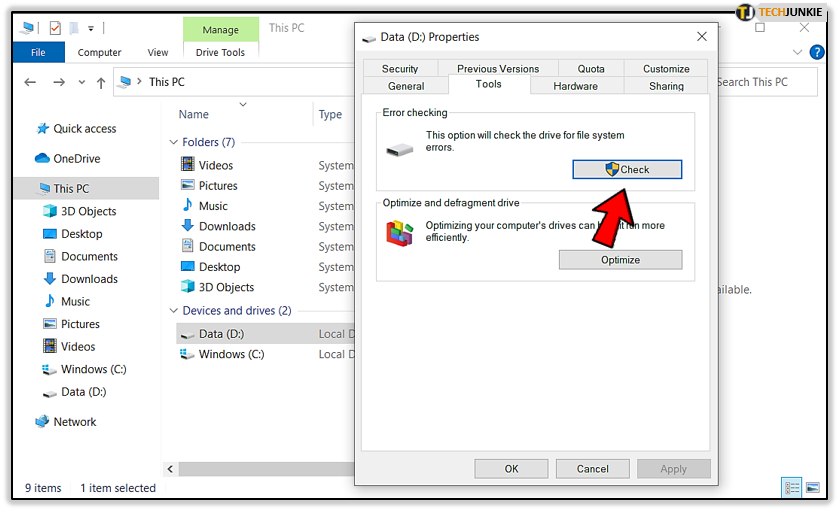
Basic disk checking can be run from Windows Explorer.
- Highlight the drive you want to check.

- Right click the drive and select Properties and the Tools tab.

- Select ‘Check’ by Error checking.

- Select Scan drive in the popup window and allow the process to complete.


If Windows has been set to check disks periodically, you may see the message ‘You don’t need to scan this drive’. That’s good news. Otherwise, let the process complete and fix any errors.
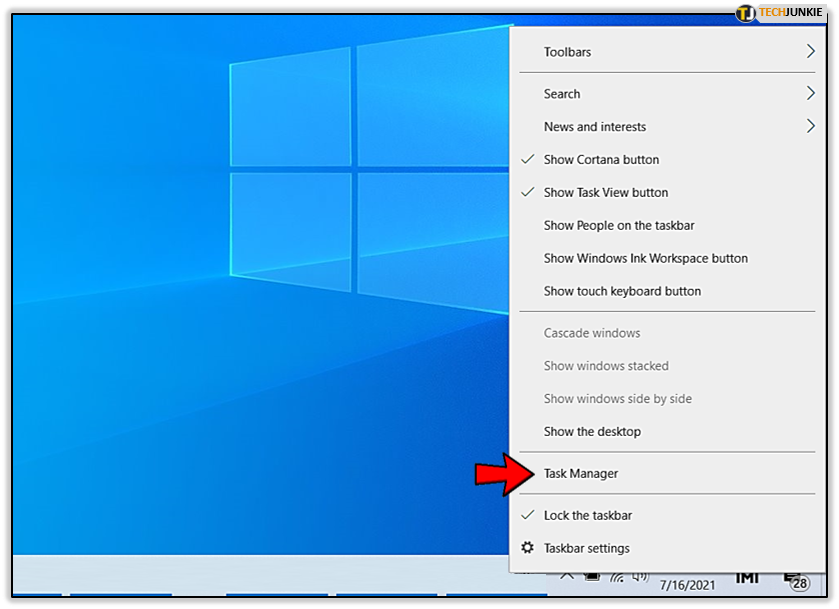
You can also run CHKDSK from an elevated command prompt. You can use a series or switches to get it to perform a number of checks or tasks.
- Right click the Windows task bar and select Task Manager.

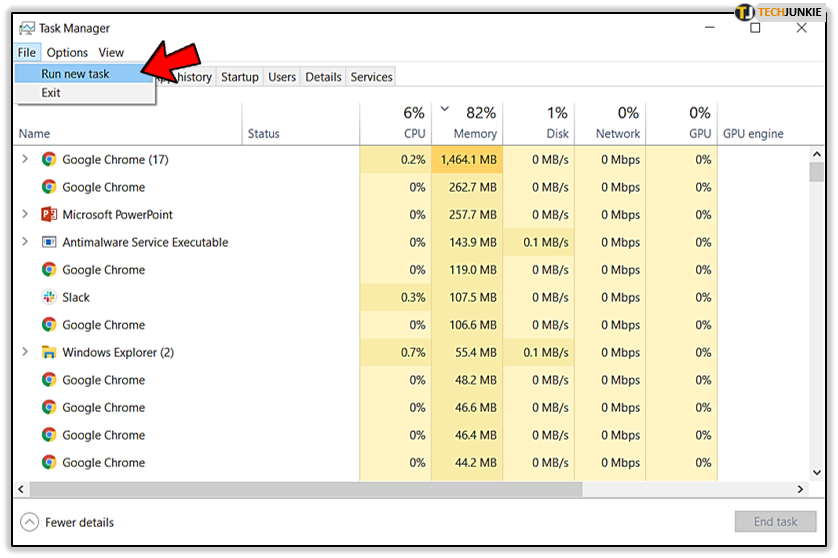
- Select File and Run new task.

- Check the box next to ‘Create this task with administrative privileges’ and type ‘cmd’ into the window then hit OK.
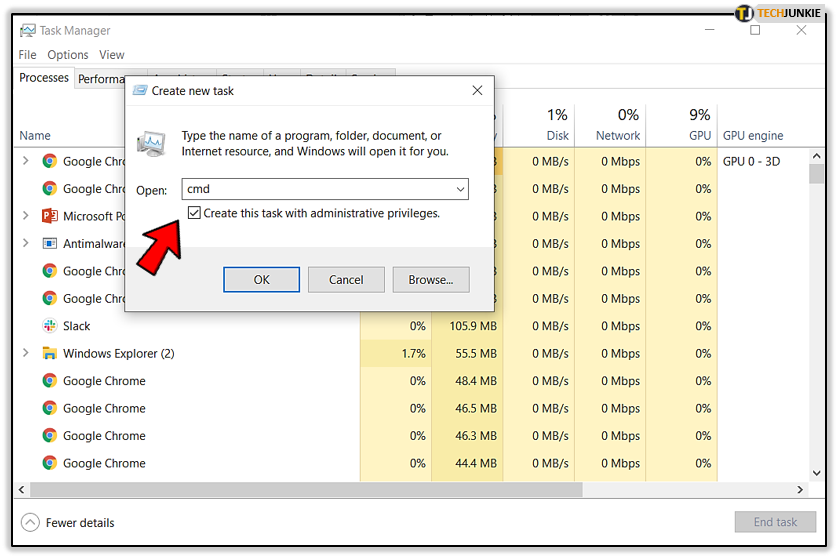
A black command line window should now appear. The elevated part of the command prompt is the creation using administrative privileges. Usually, the command prompt has user privileges to protect aspects of Windows. Admin privileges have more power but also more potential for damage.
To run CHKDSK, type ‘chkdsk C:’ and hit Enter. Change C: for whatever drive you’re using to copy files from. If you are copying from your C: drive, it may prompt you to schedule the check for the next restart. That’s fine.
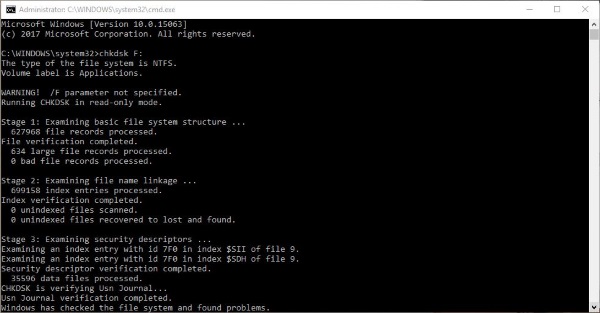
This basic check will highlight any bad sectors or errors on your disk. If you’re running CHKDSK for the first time, it might be useful to leave it at that so you can see exactly what’s going on. Once you have run it a few times and are comfortable working with it, you can add switches to automate some aspects of the tool.
Here are the most common switches:
- /F Automatically fixes errors found on the disk.
- /V Displays disk cleanup messages if any.
- /R Locates bad sectors and recovers any usable data.
- /X Forces the volume to dismount first if necessary. Rarely used unless you’re using RAID or NAS.
- /I Performs a minimum check of index entries.
- /C Skips checking of cycles within the folder structure.
- /L:size Sets the log file size.
- /B Re-evaluates bad clusters on the volume.
To use a switch, just add the letter after the command. For example, you would type ‘chkdsk /f /v’ to perform a check while automatically fixing errors and showing any cleanup messages that appear. You can use one, some or all of these switches as you see fit, just not all at the same time as a couple will contradict each other.
If you see ‘can’t read from the source file or disk’ errors and the file systems match, the cause could be disk errors. You can buy third-party disk maintenance tools or you could use the perfectly good one contained within Windows now you know how to do it.