


How to Change the Default Calendar Alerts on Your Mac
Most Mac users know that they can use the built-in Calendar app to keep track of their appointments and events, and a great feature of the Calendar app is that it can automatically alert you prior to a scheduled event.
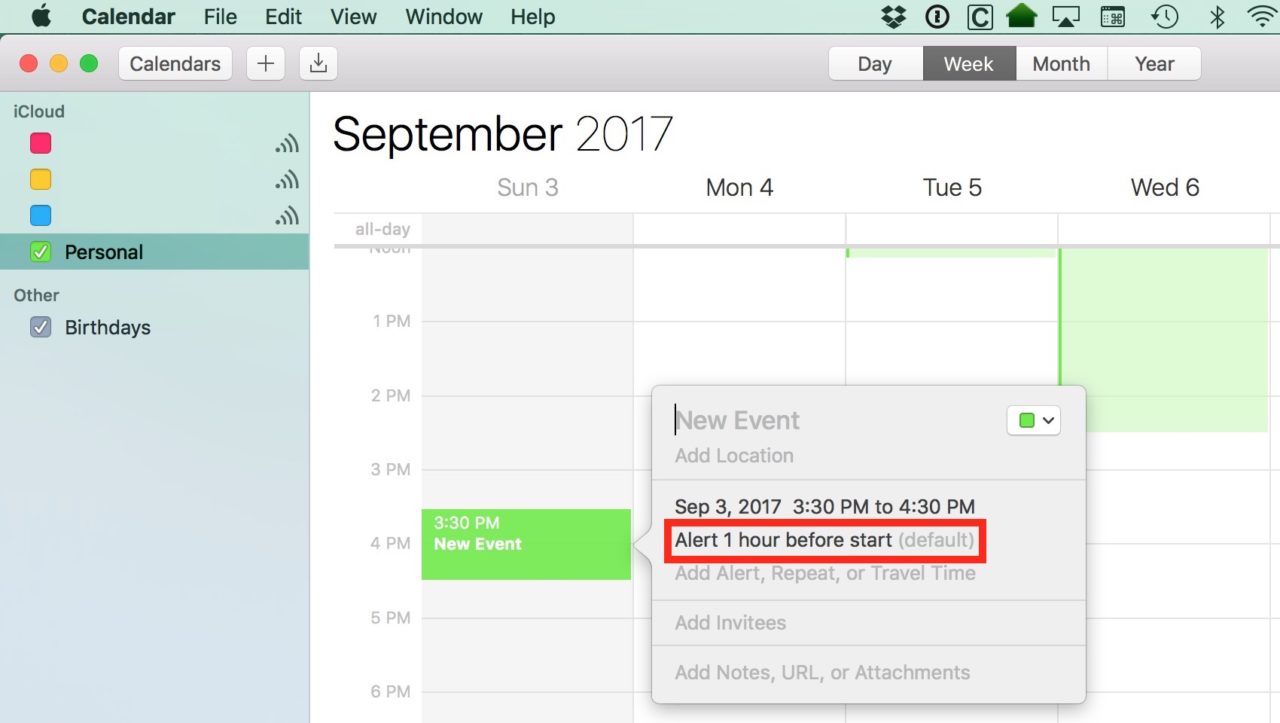
You can manually adjust the number and timing of the alerts for events as you create them, but the Calendar app also includes a default alert setting that can be automatically added to all of your events, even those of different types, such as birthdays. The issue is that these default alert settings may not be ideal for every user. Thankfully, you can change these default Calendar alert settings. Here’s how it works.
Accessing Calendar Preferences
To adjust the default Calendar alert settings, first launch the Calendar app, which is located by default in your dock. If it’s not there, you can also find it in your Applications folder.

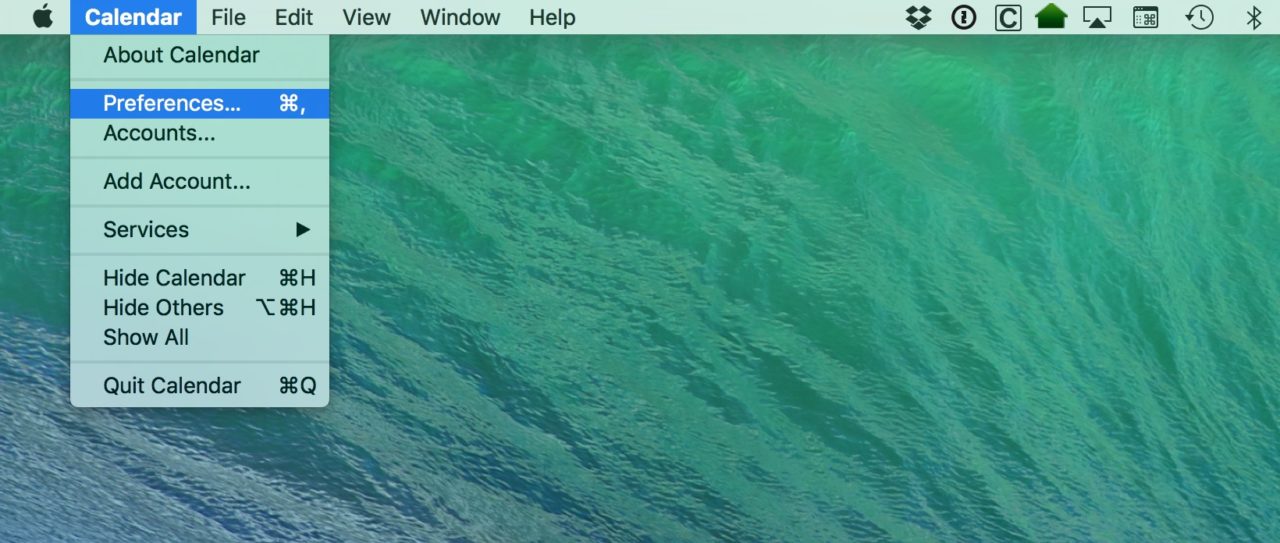
Once the Calendar app is up and running, head to Calendar > Preferences from the menus at the top.
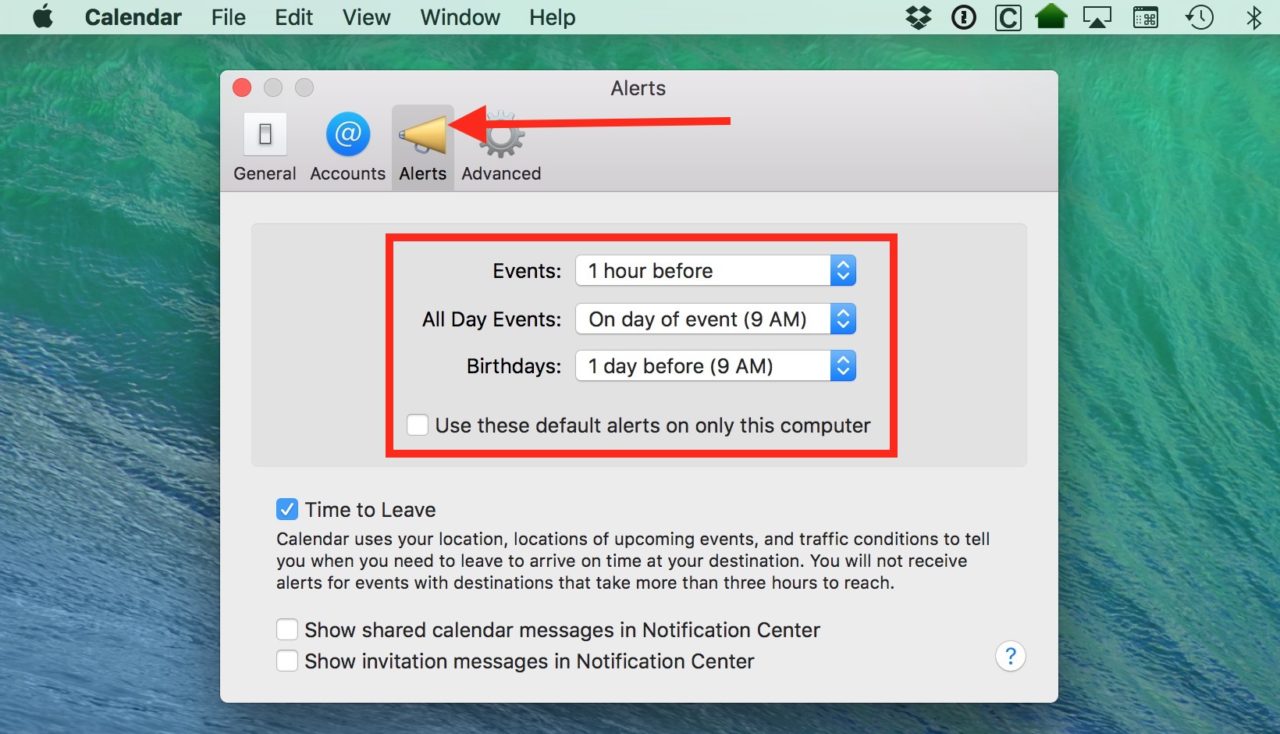
This will open the Calendar Preferences window. Select the Alerts tab from the top to see the default alert options:
Three Types of Calendar Events
The drop-down menus highlighted by the red box above represent the default alert time for each of three types of events. The first, “Events,” are standard events, including multi-day events, that have a specific start and end time. The second, “All Day Events,” are events, again including multi-day events, that do not have a specific start and end time and are marked with the “All Day Event” checkbox.
The third, “Birthdays,” are birthdays automatically added to your Calendar from your Contacts app. That means that the default alert setting will only affect contacts for which you have added a date to the “Birthday” field. If, however, you’ve manually added birthdays to your Calendar without using the Contacts app (for example, by creating custom all-day events for each birthday), then those entries will be affected by the default alert value for “Events” or “All Day Events” depending on how they were created. You don’t need to change your birthday-tracking method if you don’t want to, but just be aware that the “Birthdays” setting here won’t do anything for you if you don’t have birthdays stored in the Contacts app.
Changing the Default Calendar Alerts
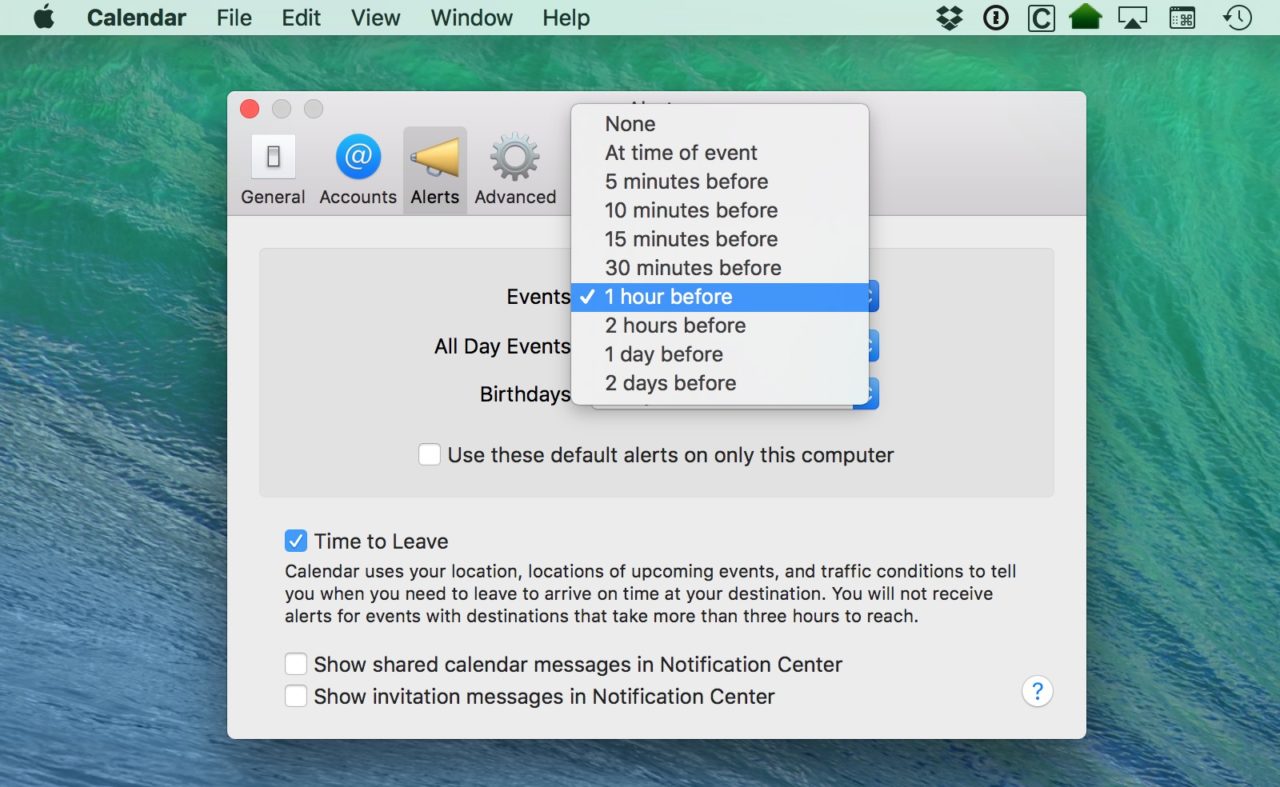
Now that you understand the three types of Calendar events, you can change their default alert setting. Clicking the drop-down menu for each type of event will reveal your choices, which range from an alert that occurs at the exact time an event starts, to as far as two days prior to the event. You can also choose “None” to disable default alerts for a certain event type.
Once you’ve made your default alert settings, locate the checkbox below labeled Use these default alerts on only this computer. This lets you decide whether your default alerts will apply only to your current Mac or whether you’d like them synced to all of your iCloud devices.
To test your new default alerts, close the Calendar Preference window and create a new event in your Calendar app. New events will automatically be configured with the default alert time you configured earlier.
Remember, however, that these changes are only the default values. Regardless of what you configured, you can still always manually change the alert settings of an event when you create or edit it.
Calendar Alert Notifications
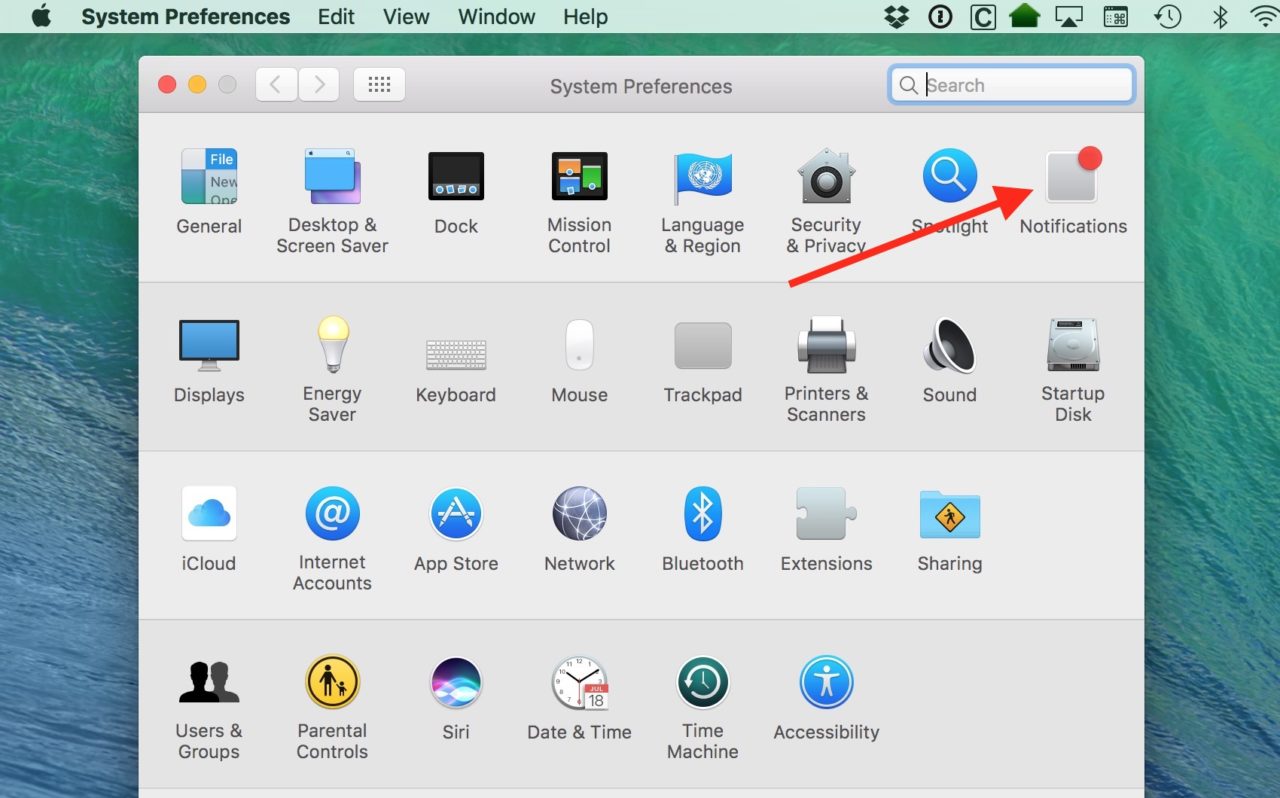
The steps above allow you to change the timing of Calendar alerts, but what about how those alerts actually look and work? Those options are accessible separately in the Notifications settings. Just head to System Preferences > Notifications.
From there, find the Calendar entry in the list on the left:
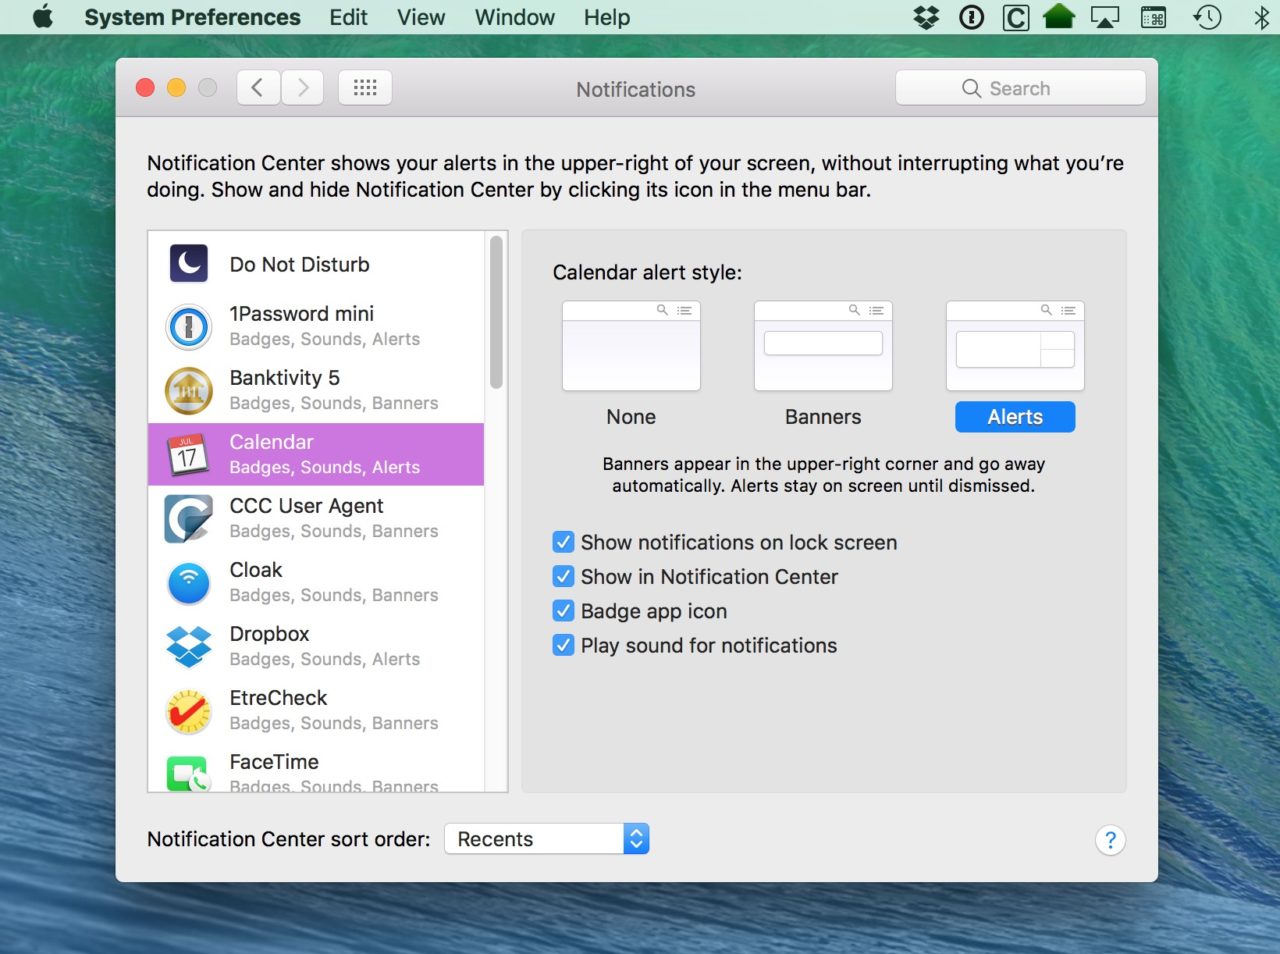
Here you can choose what Calendar alerts will look like on your Mac, and how they’ll function. For example, you can choose a “Banner” style that appears and automatically goes away after a few seconds, or you can opt for the “Alerts” style, which won’t go away until you intentionally click on it (I like this style best because it helps prevent me from missing an important Calendar alert if I happen to be busy or away from my Mac when the Banner-style notification appears.
You can also choose whether your Calendar notifications make a sound, show up in Notification Center, or mark your Calendar icon with a badge in the Dock. Regardless of what you choose, just make sure it’s something you’ll notice. Otherwise, all of those changes you made to your default Calendar alert times will be for nothing!


