


How To Create a Fillable Form in Word

Data entry can be quite a tedious process, one that is often subject to mistakes. In order to avoid data input mistakes, you can create custom fillable forms in Microsoft Word?
Such forms save a lot of time because not all the info needs to be entered manually. Instead, much of the data relies on the prescribed lists you’ve made earlier, which allow you to select answers from predefined options rather than enter them manually from scratch. Another great advantage of fillable forms over manual data entry is a significantly reduced risk of errors.
Here you will learn how to create a fillable form in Word in just a few simple steps.
Creating a Fillable Form in Word
In order to make a form in Word that can be filled out, you need to take a template and then work on it by adding various different content control options like drop-down lists, text boxes, check boxes, and so on. Here are six easy-to-follow steps that will help you make a fillable form in your Word documents.
Step 1
The first thing you need to do is enable the Developer tab. In order to do so, go to the “File” tab, where you will need to click on “Options”.
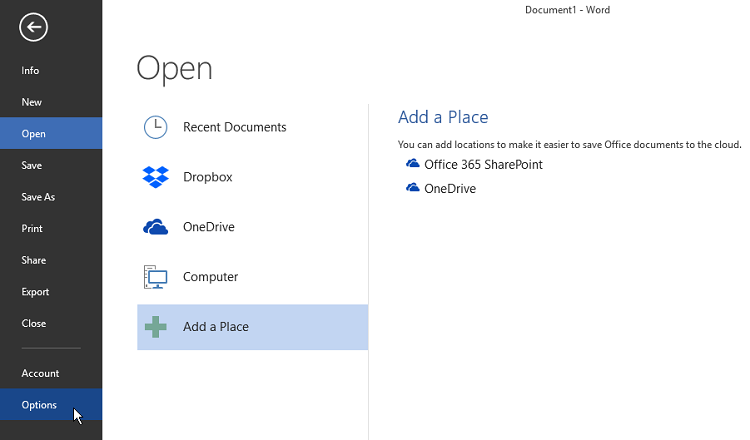
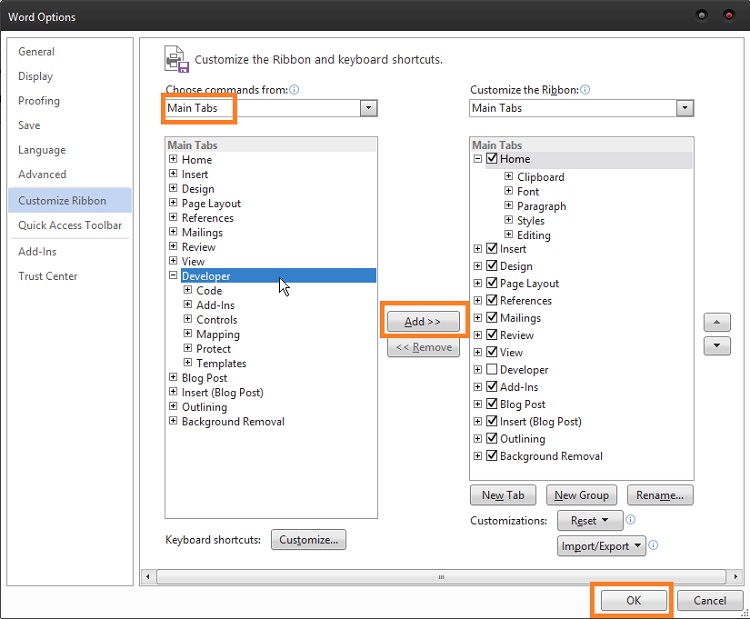
From the drop-down menu under the “Customize Ribbon” section, select the “Main Tabs” option, check “Developer”, and then simply click on the “OK” button.
Step 2
Once you’re all set, you can either use a form template you’ve downloaded from the internet or you can start from scratch by using a completely blank template. In order to do so, go to the “File” tab once again, click on the “New” button, and then select the “Blank document” option.
Step 3
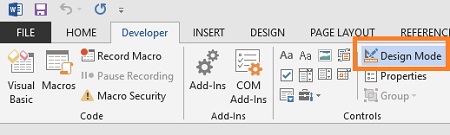
In this step, you will add content to your blank document and create a fillable form in the process. To get started, you need to go to the Developer tab, and then select the “Design Mode” option.
Once you do so, you will be able to insert different elements. Just click on the area where you want to insert the forms and then follow the guidelines for each specific element.
Inserting a Text Control
From the Developer tab, simply choose from the two available options – “Plain Text Content Control” or “Rich Text Content Control”. The former can only contain text, while the latter may also include pictures, tables, and hyperlinks. What’s more, whereas all plain text has the same formatting, rich text allows you to use different fonts, as well as styles (bold, italic, underline, etc.), colors, and sizes.
Inserting a Picture Control
Go to the Developer tab, and then selected “Picture Content Control”. If you need to make further adjustments, you’ll find precise guidelines in the next step.
Inserting a Building Block Control
To insert a building block control into your document, go to the Developer tab and then make a selection from the group of icons labeled “Controls”.
Inserting Combo Boxes and Drop-Down Lists
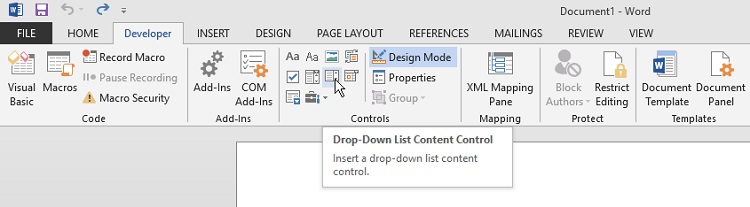
Combo boxes can be easily inserted into your forms by choosing the “Combo Box Content Control” option from the Developer tab. To insert a drop-down list, select “Drop-Down List Content Control” instead.
Inserting a Date Picker
To add a date picker to your form, choose the “Date Picker Content Control” option from the Developer tab.
Inserting a Check Box
To insert a checkbox in your Word document fillable form, go to Developer tab and then select the “Check Box Content Control” option.
Step 4
In case you need more control over your content, you can also click on any of the elements you want to customize. With the element selected, go to the Developer tab and then click on “Properties” to fine-tune the controls.
Step 5
Once everything is set, you might want to make your document easier to fill out by adding instructional text to the form inside it.
This can be done rather easily from the Developer tab. Simply choose “Design Mode” and then click on the content where you want to place the instructional text. Once you’re done editing, you just need to switch off the “Design Mode” in the Developer tab.
Step 6
If you don’t want your document edited by anyone else but you, select the form that you want to protect, then go to the Developer tab, and select the option labeled “Restrict Editing”.
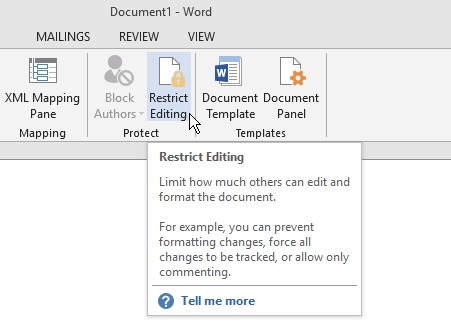
Click on “Yes” and then on “Start Enforcing Protection” to finalize the process.
Conclusion
Creating, editing, and protecting your fillable forms in Word documents is easy. You will also have access to numerous customization options, so you can fine-tune the form to your preferences.


