


How to Create RAID Volumes in OS X El Capitan
Disk Utility received its first significant makeover in years as part of the recent OS X El Capitan update, and while Apple hopes the new design will make the app easier to understand and use, the new version of Disk Utility is missing at least one crucial function: RAID support.
RAID — a redundant array of independent disks — is a technology that allows users to combine multiple physical disks into a single virtual volume in one of several ways that can increase capacity, increase speed, increase redundancy, or some combination of the three. A deeper look at RAID is beyond the scope of this tip (for a quick overview, check out this video from Techquickie‘s Linus Sebastian), but the key point is that the ability to create and manage software RAID volumes — something that was possible in previous versions of Disk Utility — is no longer available in OS X El Capitan.
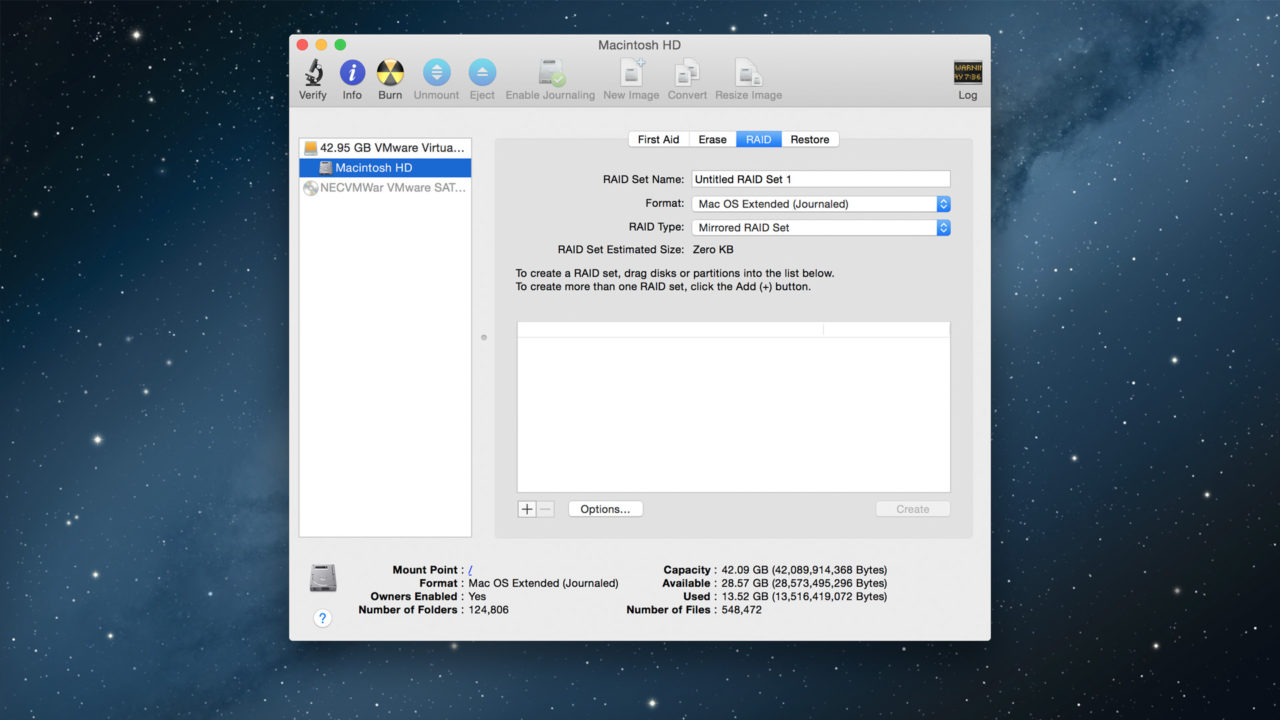
Previous versions of Disk Utility included the ability to create and manage RAID volumes.
While El Capitan’s version of Disk Utility may be missing this important feature, the good news is that users can still perform many RAID functions via Terminal. The process isn’t as simple as the old Disk Utility GUI, but for users running Apple’s latest desktop operating system, it’s the next best thing to investing in third party software SoftRAID.
To illustrate how users can manage RAID volumes in OS X El Capitan, we’ll use an example in which we want to create a 2TB RAID 0 volume from two 1TB SSDs, labeled TB1 and TB2. The first step is to determine the disk number of each drive you wish to include in your RAID, as we’ll need this information for the Terminal command that will eventually create the RAID volume. We can obtain this information in one of two ways: via Disk Utility or via the diskutil command line function.
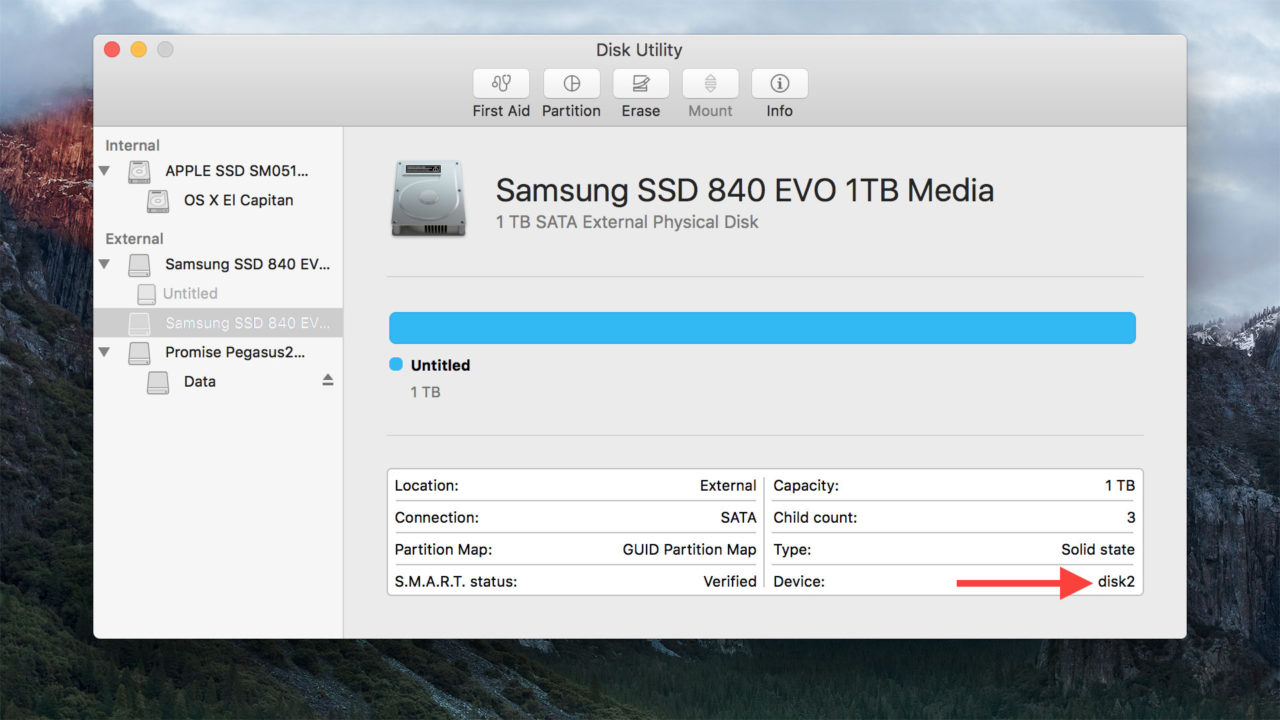
Looking at GUI method first, launch Disk Utility and select the first disk that is destined for your RAID volume. In our example, we’re using two Samsung 840 EVO SSDs, so we’ll select one of the disks, not volumes, from the Disk Utility sidebar on the left. With the disk selected, find the Device box on the right side of the screen and note the disk number. In our case, our SSDs are disk2 and disk3.
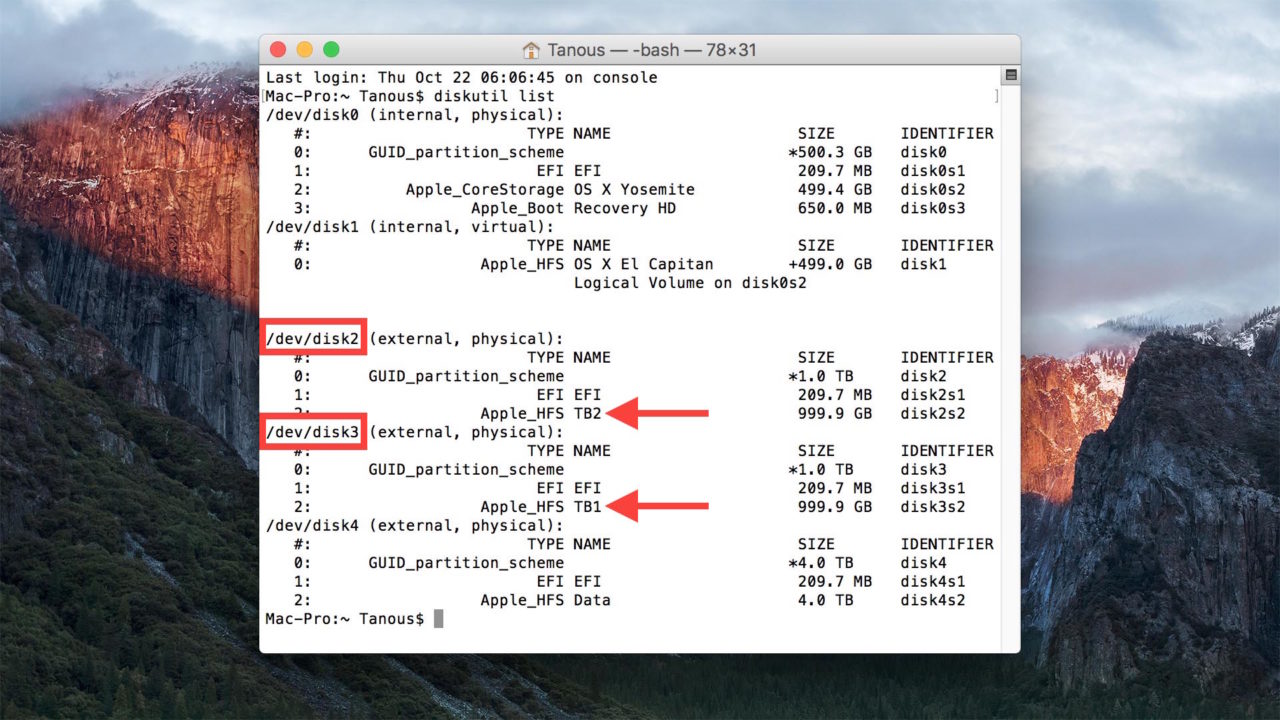
If you prefer to stick with Terminal, you can run the diskutil command to identify your Mac’s disk numbers. Just launch Terminal and enter the command diskutil list. You’ll get a list of each disk and volume currently connected to your Mac, along with other information such as partition scheme and name. The disk number for each disk is located on the first line of each entry. In our case, we see our 1TB disks with the TB1 and TB2 volumes and we can confirm that we’re working with disk2 and disk3.
Be careful to select and verify the correct disk, as the next steps will erase any data on the drives. If you pick the wrong disk number — something that could be easy to do if you have many attached drives — you could accidentally wipe your data. So, as always, be careful and double-check your information before proceeding.
With the correct disks identified, it’s time to build your RAID volume. Even though the GUI method for creating RAID volumes is now gone in OS X El Capitan, you can still access the basic underlying technology in OS X to perform most functions: appleRAID.
Part of the diskutil command, appleRAID can be used to create and manage RAID 0 (striped), RAID 1 (mirrored), and JBOD (concatenated) volumes. To use it, you’ll need to enter all of the RAID configuration info manually, including the type, name, and file system format.
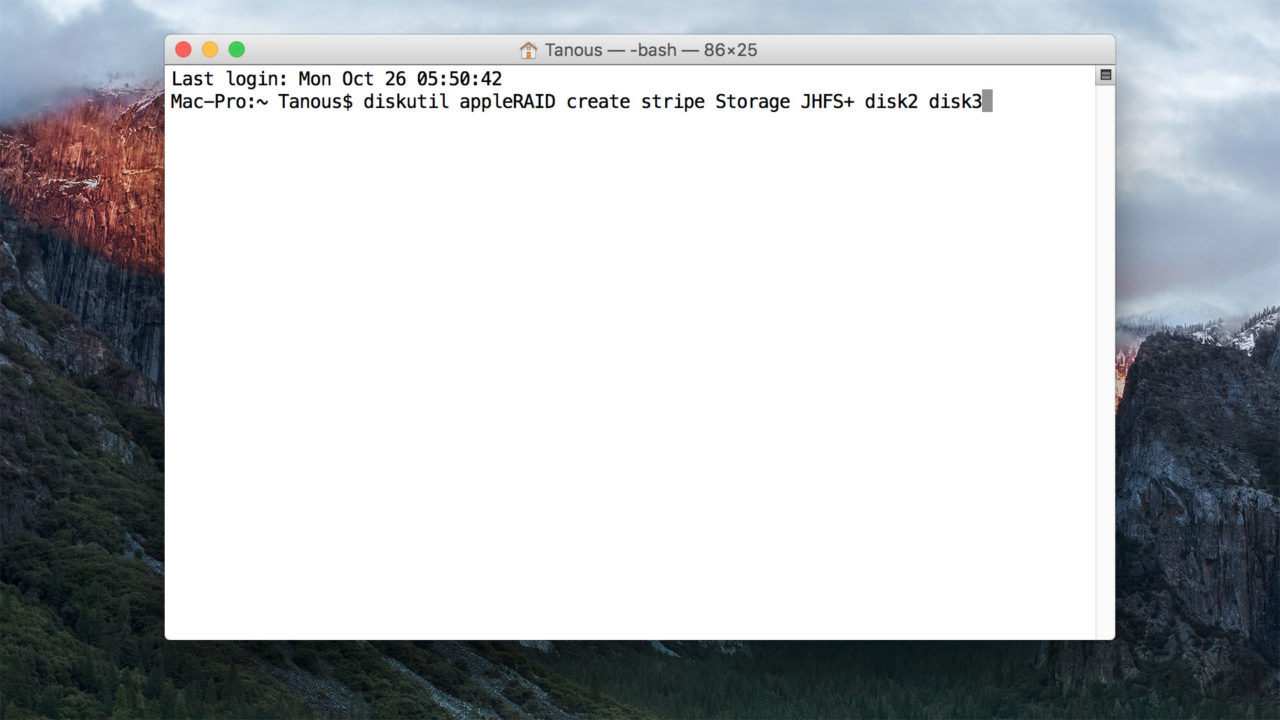
Continuing our example, we want to create a 2-disk RAID 0 volume called “Storage” with a Journaled HFS+ file system. Recalling that our two SSDs are disk2 and disk3, we’ll enter this command in Terminal:
diskutil appleRAID create stripe Storage JHFS+ disk2 disk3
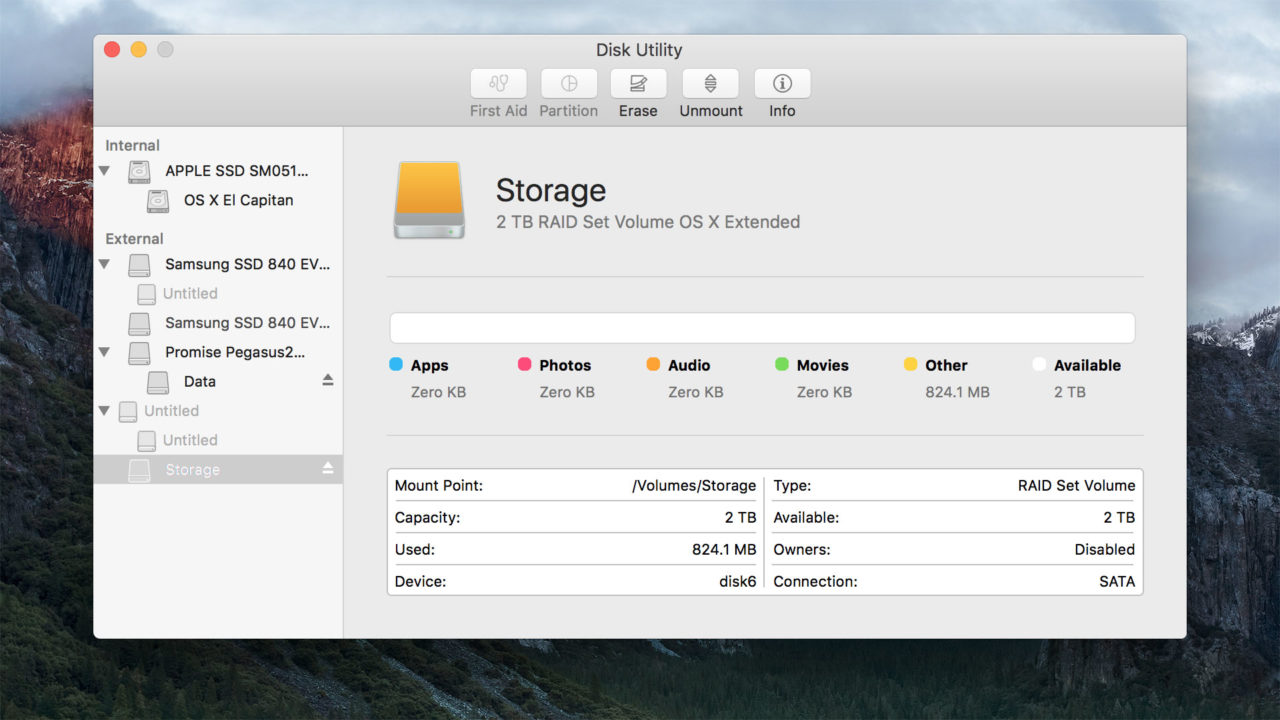
The command will process for a few moments, and will automatically mount the new RAID volume when the operation is complete. If you head back to Disk Utility, you’ll now see your new RAID volume listed in the sidebar, although you won’t be able to modify it without returning to the command line.
As another example, if we instead wanted to create a RAID 1 volume called “Backup,” we’d use this command instead:
diskutil appleRAID create mirror Backup JHFS+ disk2 disk3
There are many additional functions that can be used with the appleRAID command, such as issuing manual or automatic rebuilds, setting timeout values, and adding or removing disks. To see them all, check out the appleRAID section of the diskutil manual page.
While these Terminal commands will suffice for simple RAID volumes, it’s important to note that we don’t know what Apple’s future plans are for RAID support in OS X, and that it would be unwise to rely on Apple’s own solutions for mission critical RAID volumes. It is therefore recommended that users with more advanced RAID needs check out third party solutions such as the aforementioned SoftRAID for software-based RAID volumes or, if your Mac supports it, one of the many hardware-based RAID solutions.


13 thoughts on “How to Create RAID Volumes in OS X El Capitan”
I need 2 seperate logical disks made from RAID 0, one disk 100GB for System and programs, and second disk 411Gb for data.?
It is posssible to do it in Terminal , on EI Captain system?>
Please do not advice any seperate softvare like SOFT Raid, ive been trying , iim not able to do it from it.
Need help and advice in the case.
https://forums.macrumors.com/threads/no-raid-option-in-disk-utility-for-new-disks.1824436/
Great guide, mount 3TB in mirror 1!
with the command
“diskutil appleRAID create stripe Projects JHFS+ UUIDofMirror1 UUIDofMirror2”
(to get the UUID’s of the mirrors use “diskutil appleRAID list”)
by stripping 2 mirrors, the RAID should be able to handle the failure of 1 drive, and possibly 2 (if one failed in each mirror) – a slight advantage over RAID5 using an Apple RAID card from a Mac Pro, and in my testing, the performance was comparible for Reads & Writes – and no batteries to fail/need conditioning or replacement without the Apple Mac Pro RAID card.
“diskutil appleRAID list | grep ‘Failed'”
if no result is returned, then there is no failure – if there is a failure it tells you what disk it is.
I have found that maybe 10-20% of the time an indicated failure isn’t actually a driver failure, but just a sync issue between the 2 drives – you can force a rebuild with the existing drives which will take a few hours – so far none of the ones I’ve forced a rebuild on has had a failure again.
I determine if its an actual drive failure by deploying “SmartMonTools” onto the Macs so I can run the command
“smartctl -t short disk#” with # being the disk indicated (only takes 2-5 minutes usually)
use “smartctl -l selftest disk#” to check the results of the test.
If the short test passes , a long test may be needed which will take a few hours, if the long test passes, then I just do a rebuild with the existing disk as i mentioned above.
Replace the * and ** with the disk numbers.
For the other commands in terminal, type
diskutil AppleRAID
to see all of the sub-commands. You can get help on each of those subsubcommands with, for example,
diskutil AppleRAID repairMirror
For autorebuilding (I’ve not tried this on 10.10 or 10.11) set the AutoRebuild property to 1 and then check it’s set
diskutil appleRAID update AutoRebuild 1 disk#
diskutil appleRAID list
Started RAID operation
Unmounting proposed new member disk2
Error: -69888: Couldn’t unmount disk
Any ideas?
-Rob