Critical Steps to Setting Up Windows 11 After a Fresh Install or Upgrade

If you’ve just done a clean install of Windows 11 or upgraded Windows, you might find that some aspects of your operating system don’t run as before. That’s because Windows default settings don’t match every use case. You might need additional power, or you may also want to adjust how many notifications you’re getting.
Beyond performance and responsiveness, you also need to access your documents if your device is ever lost or stolen. That’s why we’ve brought together this list of three ways to set up Windows 11 after installation or upgrade that help you get the most from your machine.
Set Up Windows After Installation: Three Must-Dos
No. 1 – Adjust Your Power Settings
Step 1. Decide whether you want to prioritize performance or battery duration. Start by opening settings by pressing the Windows key + I or using the search bar.
Step 2. Click “System,” then “Power & battery.”
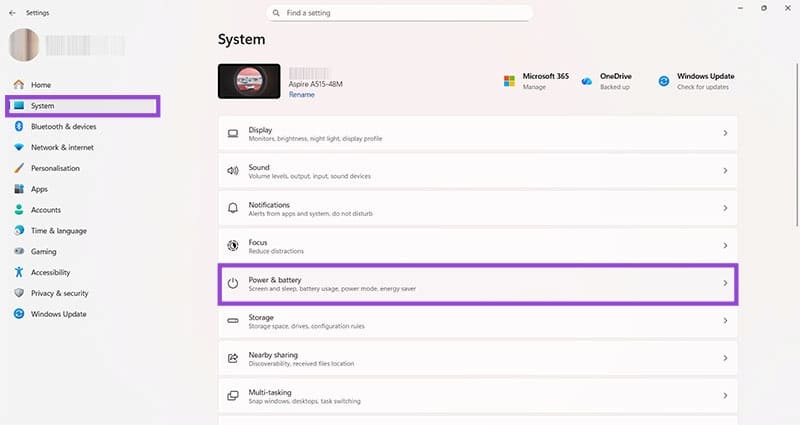
Step 3. Click the drop-down menu arrow next to “Power Mode.”
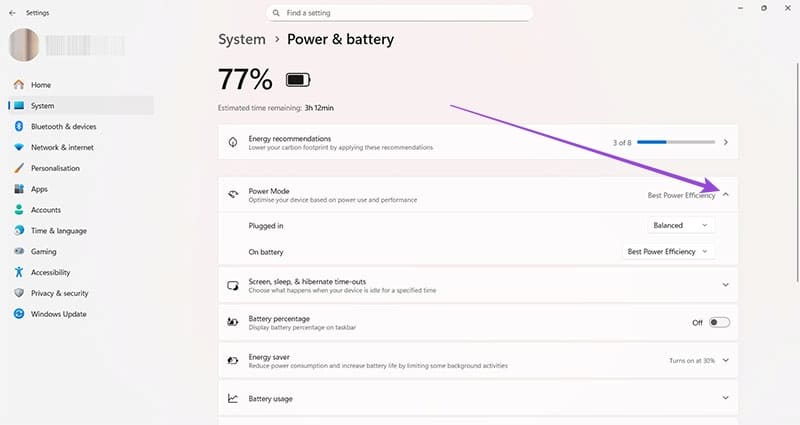
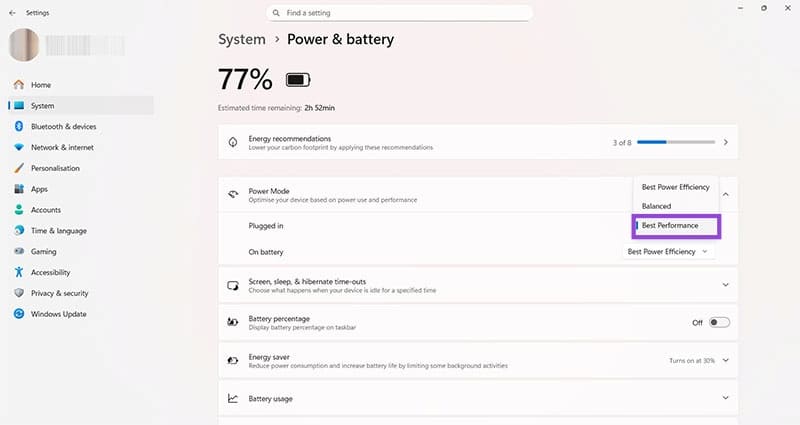
Step 4. Determine what power mode the PC or laptop is currently running. The default is usually “Balanced.” You can change this to “Best Performance” to give you extra power or “Best Power Efficiency” to extend your battery life. You can also choose different options based on whether your laptop is plugged in or using its battery.
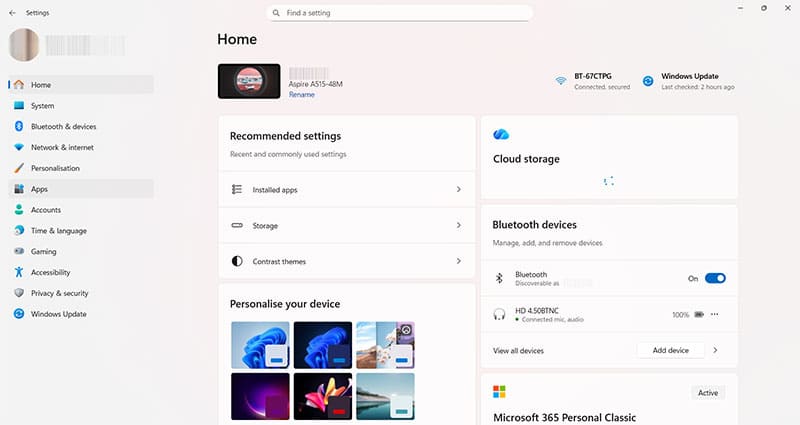
No. 2 – Streamline Notifications
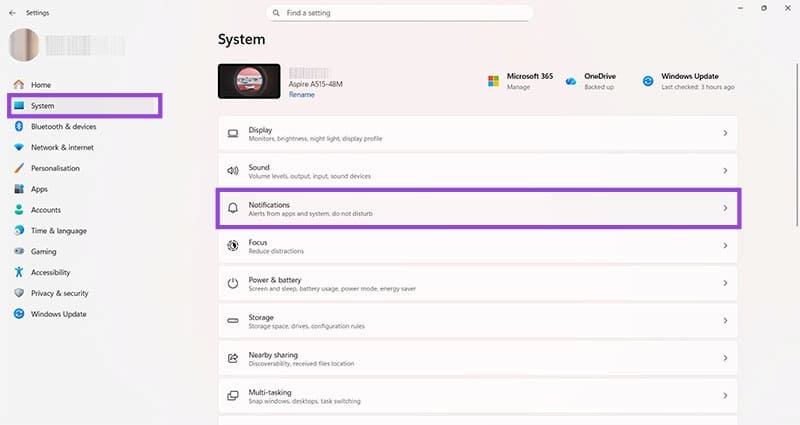
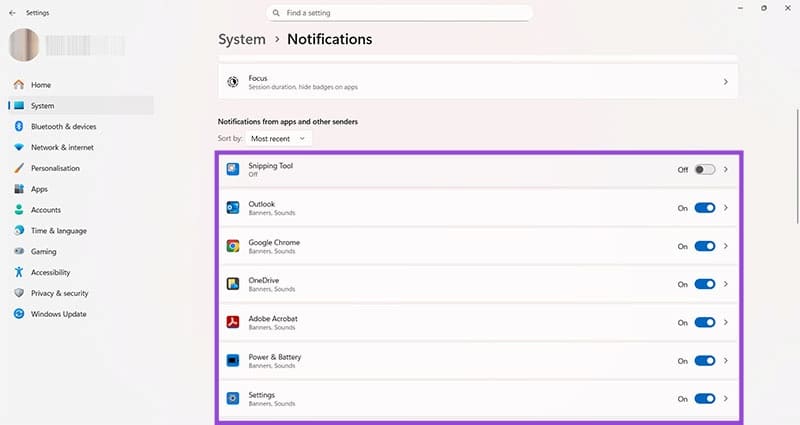
Step 1. By default, Windows shows you notifications for pretty much everything that happens on your PC or laptop. Adjust these to your liking by opening “Settings,” then going to “System > Notifications.”
Step 2. View the list of apps and tools and switch notifications on or off as required.
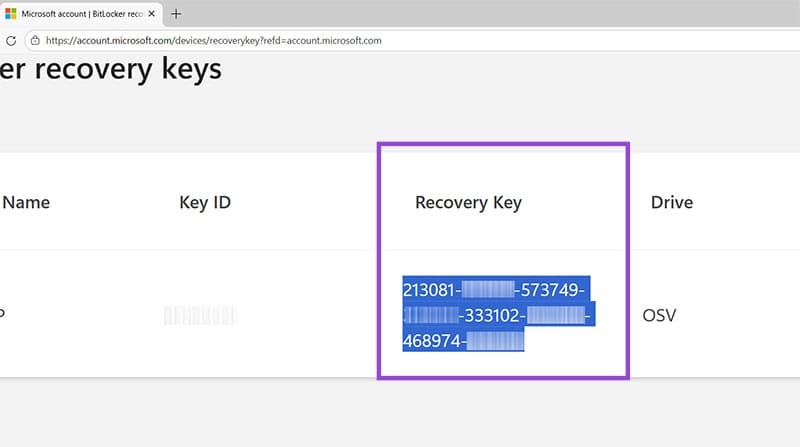
No. 3 – Back Up BitLocker Recovery Key
Your BitLocker recovery key is a way to get all your documents and folders back if your device was lost, stolen, or destroyed, or if there was a major hardware or software change. You must ensure that your BitLocker recovery key is backed up to the cloud, so you can find it and use it if necessary.
Step 1. Open “Settings.”
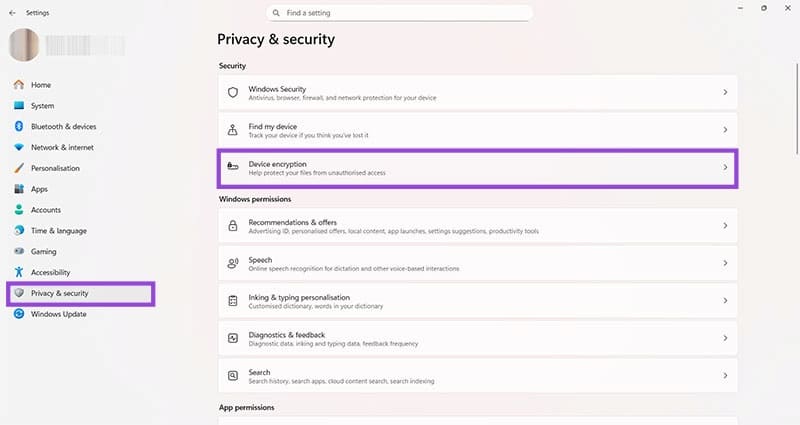
Step 2. Head to “Privacy & security” and then click on “Device encryption.”
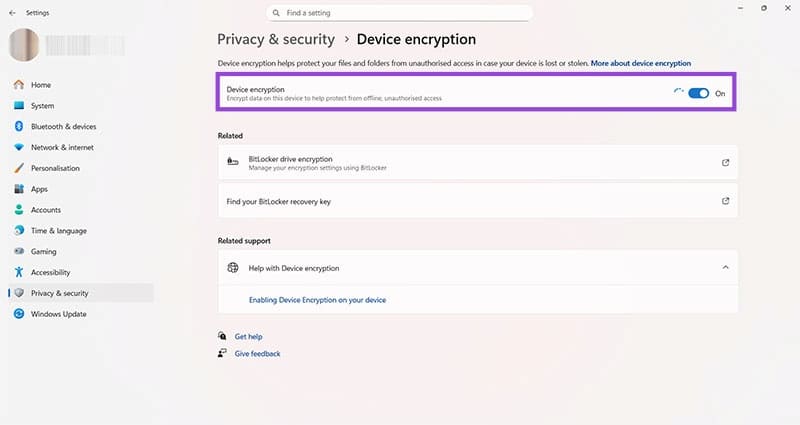
Step 3. Switch device encryption on to ensure the best level of security for your on-device files.
Step 4. Open a browser window and go to account.microsoft.com/devices/recoverykey. Sign in with the Microsoft account details you use on your Windows PC.

Step 5. Make a note of the long Recovery Key and keep it somewhere safe, either in a cloud-based folder or on another device outside of the PC you are encrypting. In this way, if you can’t access this PC, you have a way to get your files and folders back.