


How To Disable Fast User Switching in Windows 10
Fast User Switching is a Windows feature that means well. Like many features, the intent was to make life easier for users but it often has the opposite effect. If you would like to disable Fast User Switching, this tutorial will talk you through it.
As the name implies, Fast User Switching is designed to allow different users to quickly switch between accounts on the same machine. The idea was to enable someone to log into a computer without the previous user logging out. The system would keep the two users separate and would ensure anything executed by individual users would remain unique to that user.
The trouble comes when the previous user has left a resource-intensive program running or when you want to shut the computer down. As a separate user, you cannot close the programs hogging resources and you cannot shut down the computer without the potential for that previous user losing anything they haven’t saved.
If your colleagues or family are conscientious and always close everything down before logging out and always save their work, all is good in the world. If they don’t, Fast User Switching becomes a bit of a pain.
Disable Fast User Switching in Windows 10
When you disable Fast User Switching in Windows 10 it doesn’t mean another user cannot log in and use that computer. It just means that the previous user has to log out first and the second user log in completely separately. It slows down a changeover but it ensures the computer resources are entirely yours to use in that session.
You can use the registry or Group Policy to disable Fast User Switching in Windows 10. Windows Home users will need to use the registry. Windows Pro or Enterprise can use Group Policy.
If you still use Windows 7 or Windows 8, you can use these same steps to disable Fast User Switching. The process is exactly the same.
Disable Fast User Switching in Windows 10 using the registry
The registry is a database of settings that Windows uses to work. Therefore any mistakes you make when working in the registry can have far reaching consequences. If you’re not comfortable making changes to the registry, create a system restore point first.
- Type ‘restore’ into the Cortana/Search Windows box and select System Restore.
- Select Create in the System Properties window that appears.
- Give the restore point a name and select Create.
Depending on the size and number of drives you are backing up, this process could take a little while. It is usually a good idea to run system restore automatically so you always have a recent version to rebuild your computer should anything happen.
Once the restore point has been created:
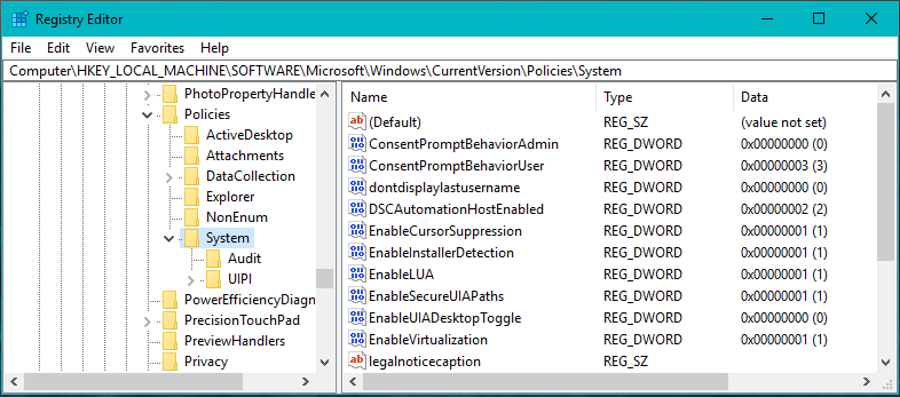
- Type ‘regedit’ into the Cortana/Search Windows box and select Registry Editor.
- Navigate to HKEY_LOCAL_MACHINE\SOFTWARE\Microsoft\Windows\CurrentVersion\Policies\System.
- Right click an empty space in the right pane and select New, DWORD (32-bit) Value.
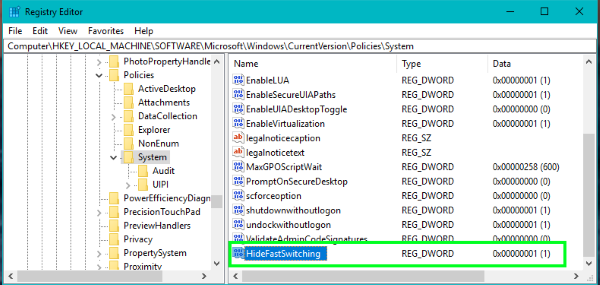
- Name it ‘HideFastSwitching’.
- Double click your new DWORD, give it a value of 1 to activate it and then select OK.
Once you reboot your computer, Fast User Switching will be disabled. If you find you cannot live without it, navigate back to your DWORD key and change the value to 0 to disable it. You will need to reboot again for the change to take effect.
Disable Fast User Switching in Windows 10 using Group Policy
Group Policy Editor is only accessible in Windows Pro and Enterprise versions but is easier to use than the registry. If you have either Pro or Enterprise, this is the best way to disable Fast User Switching.
- Type ‘gpedit.msc’ into the Cortana/Search Windows box and select Group Policy Editor.
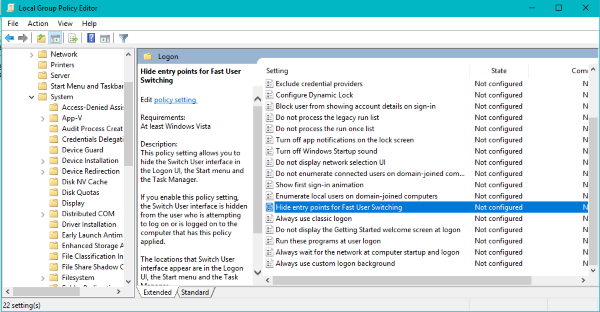
- Navigate to Computer Configuration\Administrative Templates\System\Logon in the new window.
- Find ‘Hide entry points for Fast User Switching’ and double click it. A new window should appear.
- Select Enabled in the top left of the new window and Apply and then OK.
You will need to reboot your computer for the change to take effect. Once rebooted, Fast User Switching will no longer work. If you want to undo your changes, repeat the above steps and select Disabled where you Enabled, reboot and try again.
As mentioned at the top, when you disable Fast User Switching, you do not disable the ability for other users to access the computer. You just disable the system that allows you to share the computer resources between users all at once. You can still log in using the login screen and can still share the computer. You will just have to log out properly or reboot and log in from the login screen as you would normally do.


One thought on “How To Disable Fast User Switching in Windows 10”
Since when is hiding and disabling something the same thing?
The heading says Disable Fast User Switching yet all answers show how to “HIDE”.
I don’t know about you but hiding and disabling something is not the same thing.