


How to Disable the Recycle Bin in Windows

The Windows Recycle Bin has been storing the deleted files of Windows users for more than 18 years. It helpfully keeps deleted data accessible and recoverable in the event that a user changes his or her mind. But it also means that the files it contains are still taking up space on the hard drive. While it’s easy to empty the Recycle Bin often, some users may prefer to disable or bypass it altogether. Here’s how to disable the Recycle Bin in Windows. Note that our screenshots reference Windows 8, but the same steps apply to Windows 7 as well.
Temporarily Bypass the Recycle Bin
Before we kill the Recycle Bin entirely, it may be useful for some users to know how to simply bypass it on occasion when dealing with a few isolated files.
To delete a file in Windows directly, highlight it in Windows Explorer and press Shift-Delete. Instead of the file being instantly whisked off to the Recycle Bin, you’ll get a confirmation box, asking you if you’re sure you “want to permanently delete this file.” Take this warning seriously; absent data recovery software, once you delete a file with this method, it’s gone.
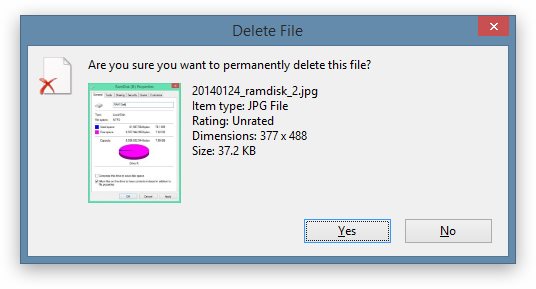
Press Yes to confirm and the file you highlighted will be permanently deleted without an intermediate trip to the Recycle Bin.
This method may be ideal for most users, as it allows the permanent deletion of select files while still maintaining the benefit of the Recycle Bin for standard tasks and file management.
Disable the Recycle Bin Entirely
If you don’t want the Recycle Bin to operate at all, you can turn it off on a drive-by-drive basis. To configure this, head to your Desktop, right-click on the Recycle Bin, and choose Properties.
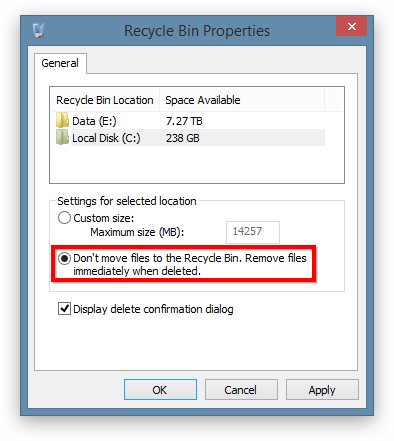
You’ll see a listing for separate Recycle Bins for each drive mounted to your PC. Highlight the drive you want and check the box “Don’t move files to the Recycle Bin.” Press Apply to enable the change. Any existing items in the Recycle Bin will remain there, but any files you delete after making this change will be permanently deleted, without the warning confirmation mentioned in the first section, above. You can enable a delete confirmation dialog, however, by checking the box “Display delete confirmation dialog.”
You’ll need to configure each drive separately, so repeat the steps above for each drive you wish to modify. Alternatively, you can also manually specify a maximum size for each drive’s Recycle Bin. This way, you can save space by setting a small sized Bin to capture documents and other small items, but still allow for the permanent deletion of large files like videos.
Remove the Recycle Bin From Your Desktop
The steps above disable the Recycle Bin deletion process, but the icon for the Recycle Bin will remain on your Desktop. If you truly wish to scrub all signs of the Recycle Bin from your workflow, you can also remove it from your Desktop.
Unlike user files and icons, system icons like the Recycle Bin can’t be removed from the Desktop by pressing the delete key. Users need to toggle their visibility in the Control Panel.
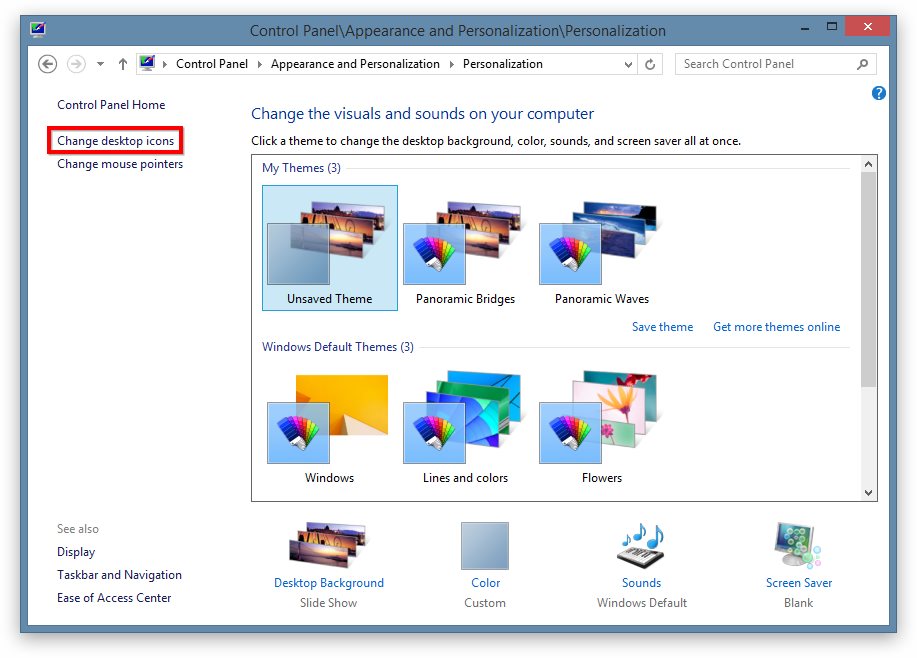
You can find the applicable settings in Control Panel > Appearance and Personalization > Personalization > Change Desktop Icons. Alternatively, users can access this menu directly by searching for “desktop icons” from the Start Menu (Windows 7) or Start Screen (Windows 8). When searching, look for “Show or hide common icons on the desktop.”
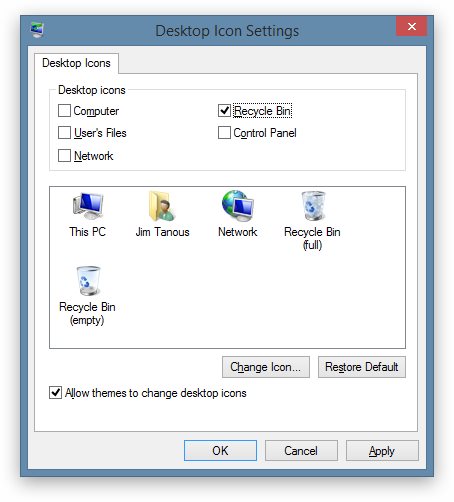
In this menu, users can both choose custom icons for the system desktop items, as well as toggle their appearance on the Desktop. Simply uncheck the box for any Desktop icon that you want to remove and press Apply. Your Recycle Bin icon will be instantly removed from the Desktop.
Note that you don’t need to disable the Recycle Bin in order to hide it on the Desktop; you can keep the Recycle Bin working in the background, but still keep your Desktop free of any icons. If you need to access the Recycle Bin once it’s hidden, you can search directly for it using the Start Menu or Start Screen.
To restore default settings, simply head back to the Desktop Icon Settings menu and check the box once again.


One thought on “How to Disable the Recycle Bin in Windows”