


How to Disable the Windows 10 Lock Screen
Unless you’ve configured your PC to log in automatically, you’ll see two screens when you boot or log into your Windows 10 PC: the lock screen and the login screen.
While similar, the login screen is the one you see after selecting your account (if there are multiple accounts on the device) or clicking the mouse or pressing a key on the keyboard. It’s the screen where you actually enter your password.
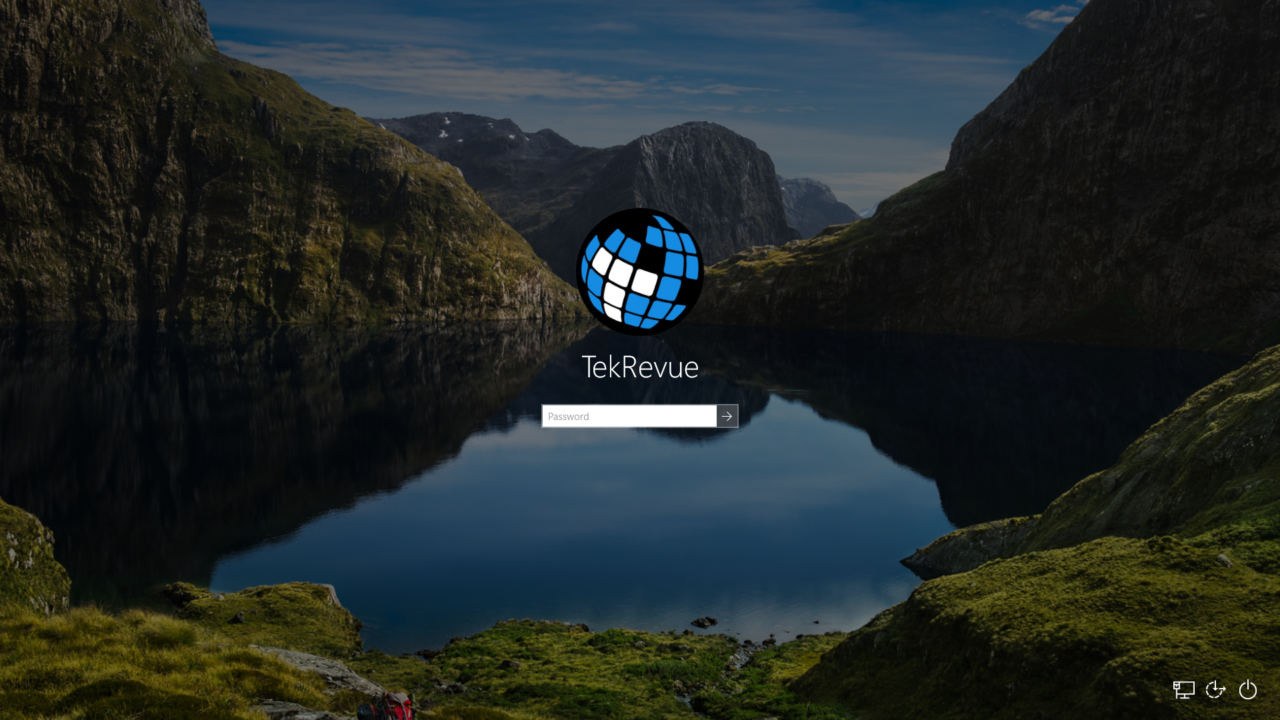
The Windows 10 Login Screen
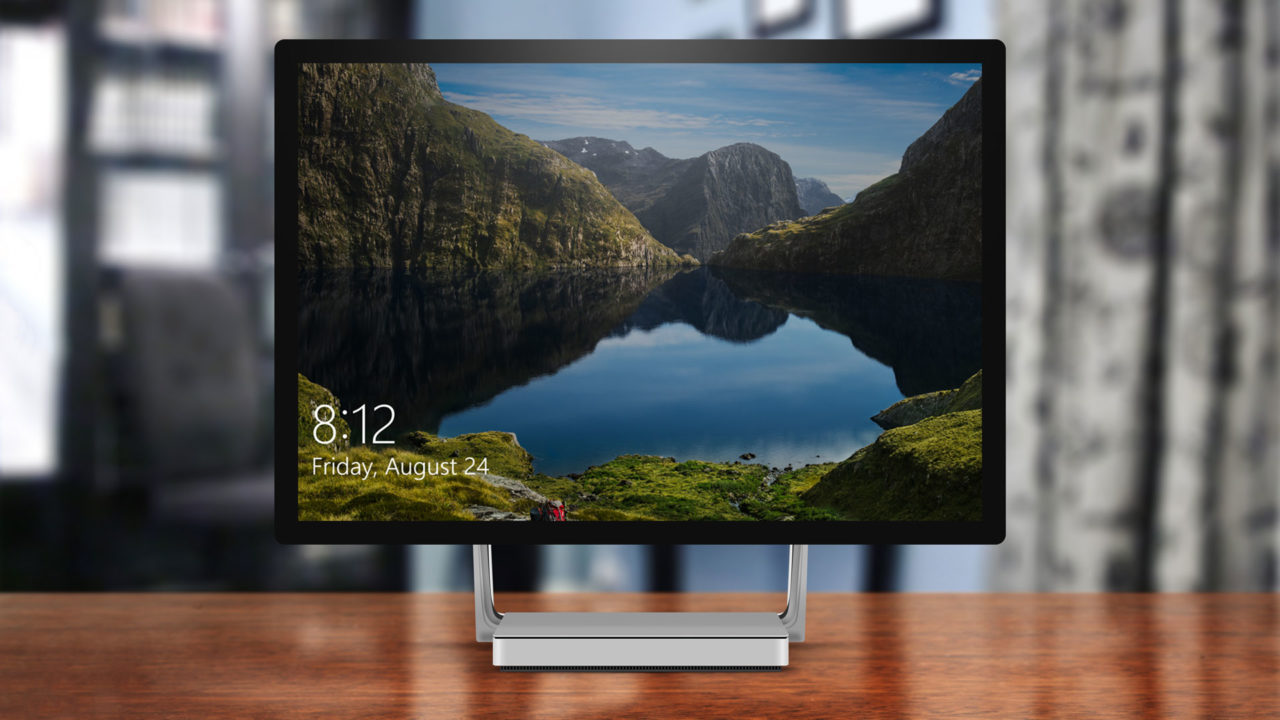
The lock screen, on the other hand, is what you see when you first boot, wake your PC, or immediately after locking it. The Windows 10 lock screen displays the time and can be configured to also display helpful information like the weather or email message notifications.

The Windows 10 Lock Screen
For some users, however, the lock screen isn’t really useful and simply represents an extra step between sitting down in front of your PC and being able to actually use it. If you’re one of these users, here’s how you can disable the Windows 10 lock screen so that you’ll jump directly to the login screen instead.
Disable Windows 10 Lock Screen via the Registry
First, let’s make clear that we’re talking about only disabling the lock screen, not the login screen. This just helps you log into your PC faster without needing to dismiss the lock screen first. It doesn’t help you log into your PC without needing to enter the password (although there’s a way to configure that if desired).
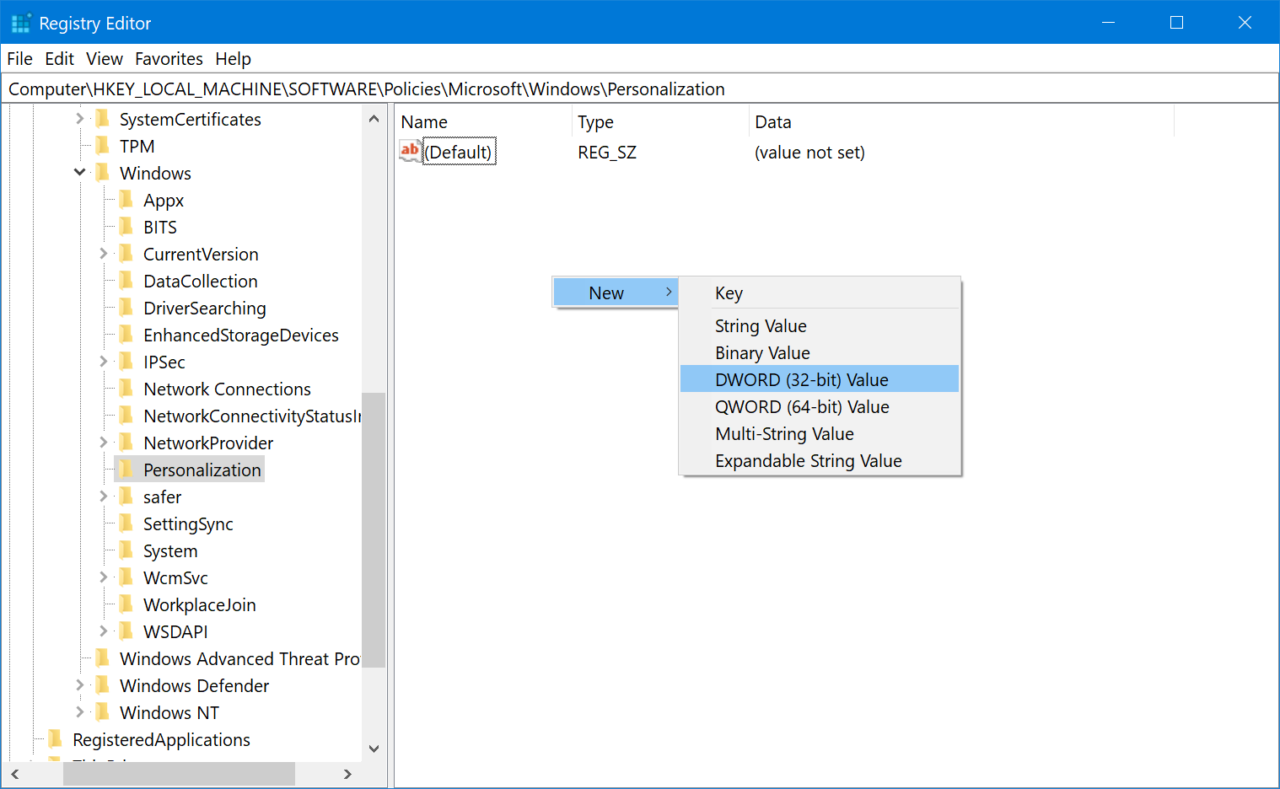
So, to disable the Windows 10 lock screen, first launch the Windows Registry Editor. You can do this either by searching for regedit from the Start Menu, or by opening the Run dialog (right-click on the Start Button and choose Run), typing regedit, and selecting OK.
With the Registry Editor open, navigate to the following location:
HKEY_LOCAL_MACHINESOFTWAREPoliciesMicrosoftWindows
Under “Windows” check to see if you already have a key named “Personalization” and, if not, create it by right-clicking on Windows and choosing New > Key.
Select the newly created or existing Personalization key from the navigation tree on the left and then right-click in a blank space on the right side of the window. Choose New > DWORD (32-bit Value).
Name this new DWORD as NoLockScreen and then double-click on it to open the editor. Enter the number “1” in the Value Data box and then press OK to close the window.
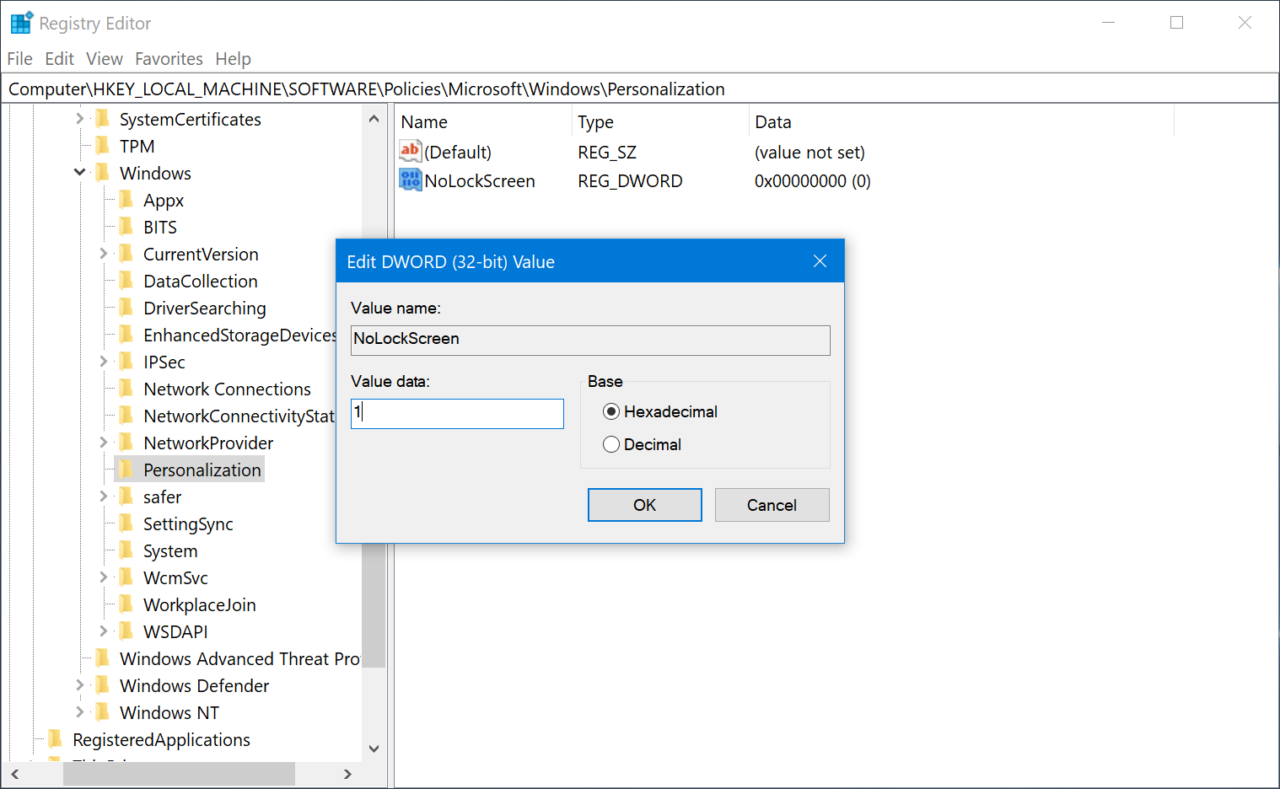
You don’t need to save anything or reboot; the change will take effect immediately. With this new registry value created, you’ll see the login screen and password prompt immediately when logging in or waking the PC from sleep. If you want to re-enable the lock screen, head back to the aforementioned location in the Registry Editor and either delete the NoLockScreen DWORD or set its Value Data to 0 (zero).
Note that Microsoft is regularly updating Windows 10 and, as a result, this method of disabling the lock screen may not work after applying future Windows 10 updates. This method works with the latest public version of Windows as of the date of this article’s publication, which is Windows 10 Build 1803. Be sure to check your Windows 10 build version if you find that this method no longer works in the future.


One thought on “How to Disable the Windows 10 Lock Screen”