


How to Edit the Power User Menu (Win+X Menu) in Windows 10
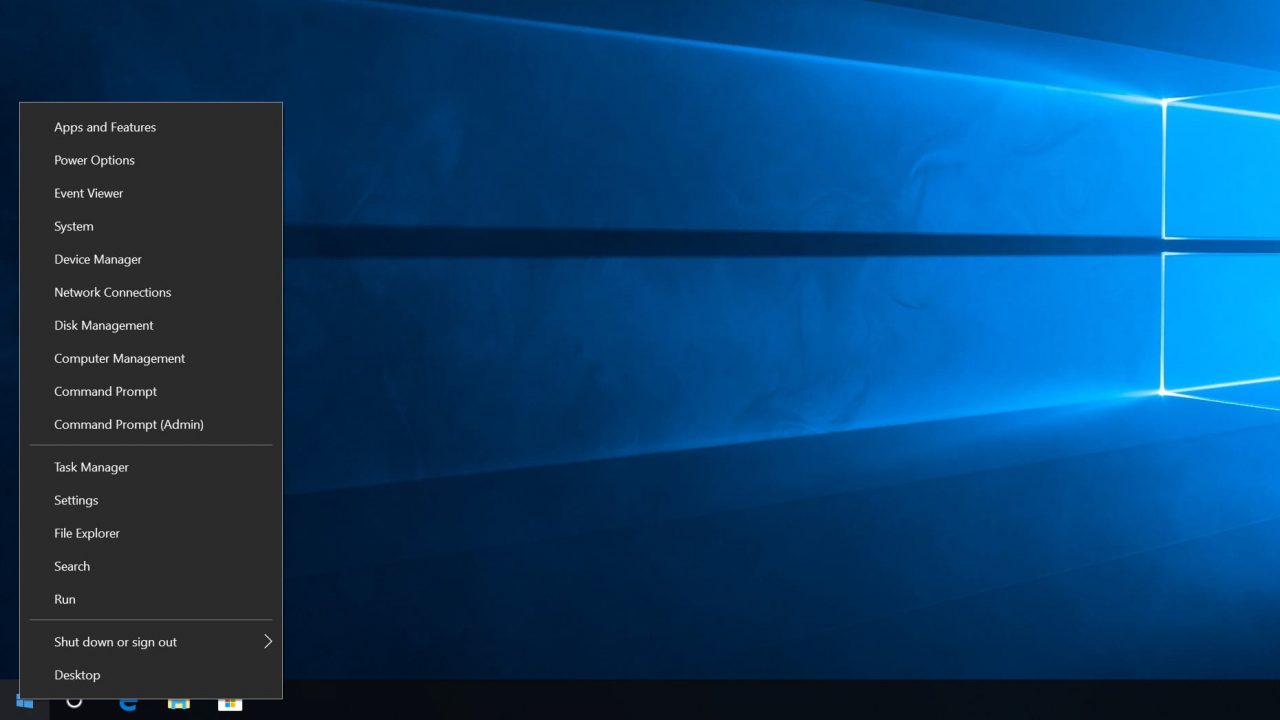
The Windows 10 Power User (or Win+X) Menu is a pop-up menu containing handy system functions. You can activate the Power User Menu by right-clicking on the Start Button or, as its alternate name describes, using the Windows Key+X keyboard shortcut.
While there are many useful default entries in the Power User Menu, one limitation is that there’s no easy built-in way for users to edit the menu’s contents. This is intentional on Microsoft’s part because the company didn’t want this menu to become “another Start Menu” filled with shortcuts and entries installed by either the user or third party programs.
Fortunately, some third party tools enable the editing of the Power User Menu. This is useful for adding programs or tools you use frequently in your workflow, or even re-adding entries that Microsoft has removed over time. One example of this latter use is the legacy Windows Control Panel. Earlier versions of the Power User Menu from Windows 8 and even the first few versions of Windows 10 included the Control Panel as an item in the Power User Menu.
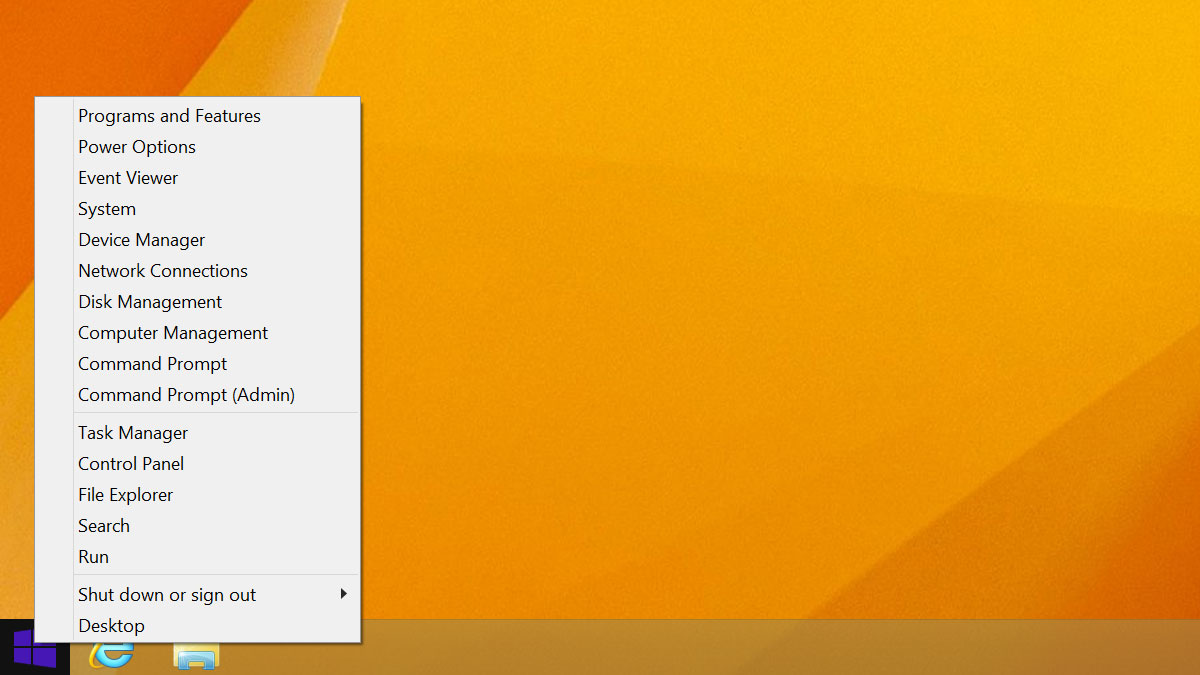
Older versions of the Power User Menu included an entry for the Control Panel.
Unfortunately, recent builds of Windows 10 removed this entry. The Control Panel is still accessible in the latest builds of Windows 10, but you need to search for it via the Start Menu rather than having quick access to it in the Power User Menu. With the ability to edit the Power User Menu, we can add the Control Panel back in its rightful place, or add almost any other application we need.
Editing the Win+X/Power User Menu
- Head to Winaero and download the free Win+X Menu Editor tool.
- Extract the contents of the file’s ZIP archive, run WinXEditor.exe, and accept any User Account Control prompts.
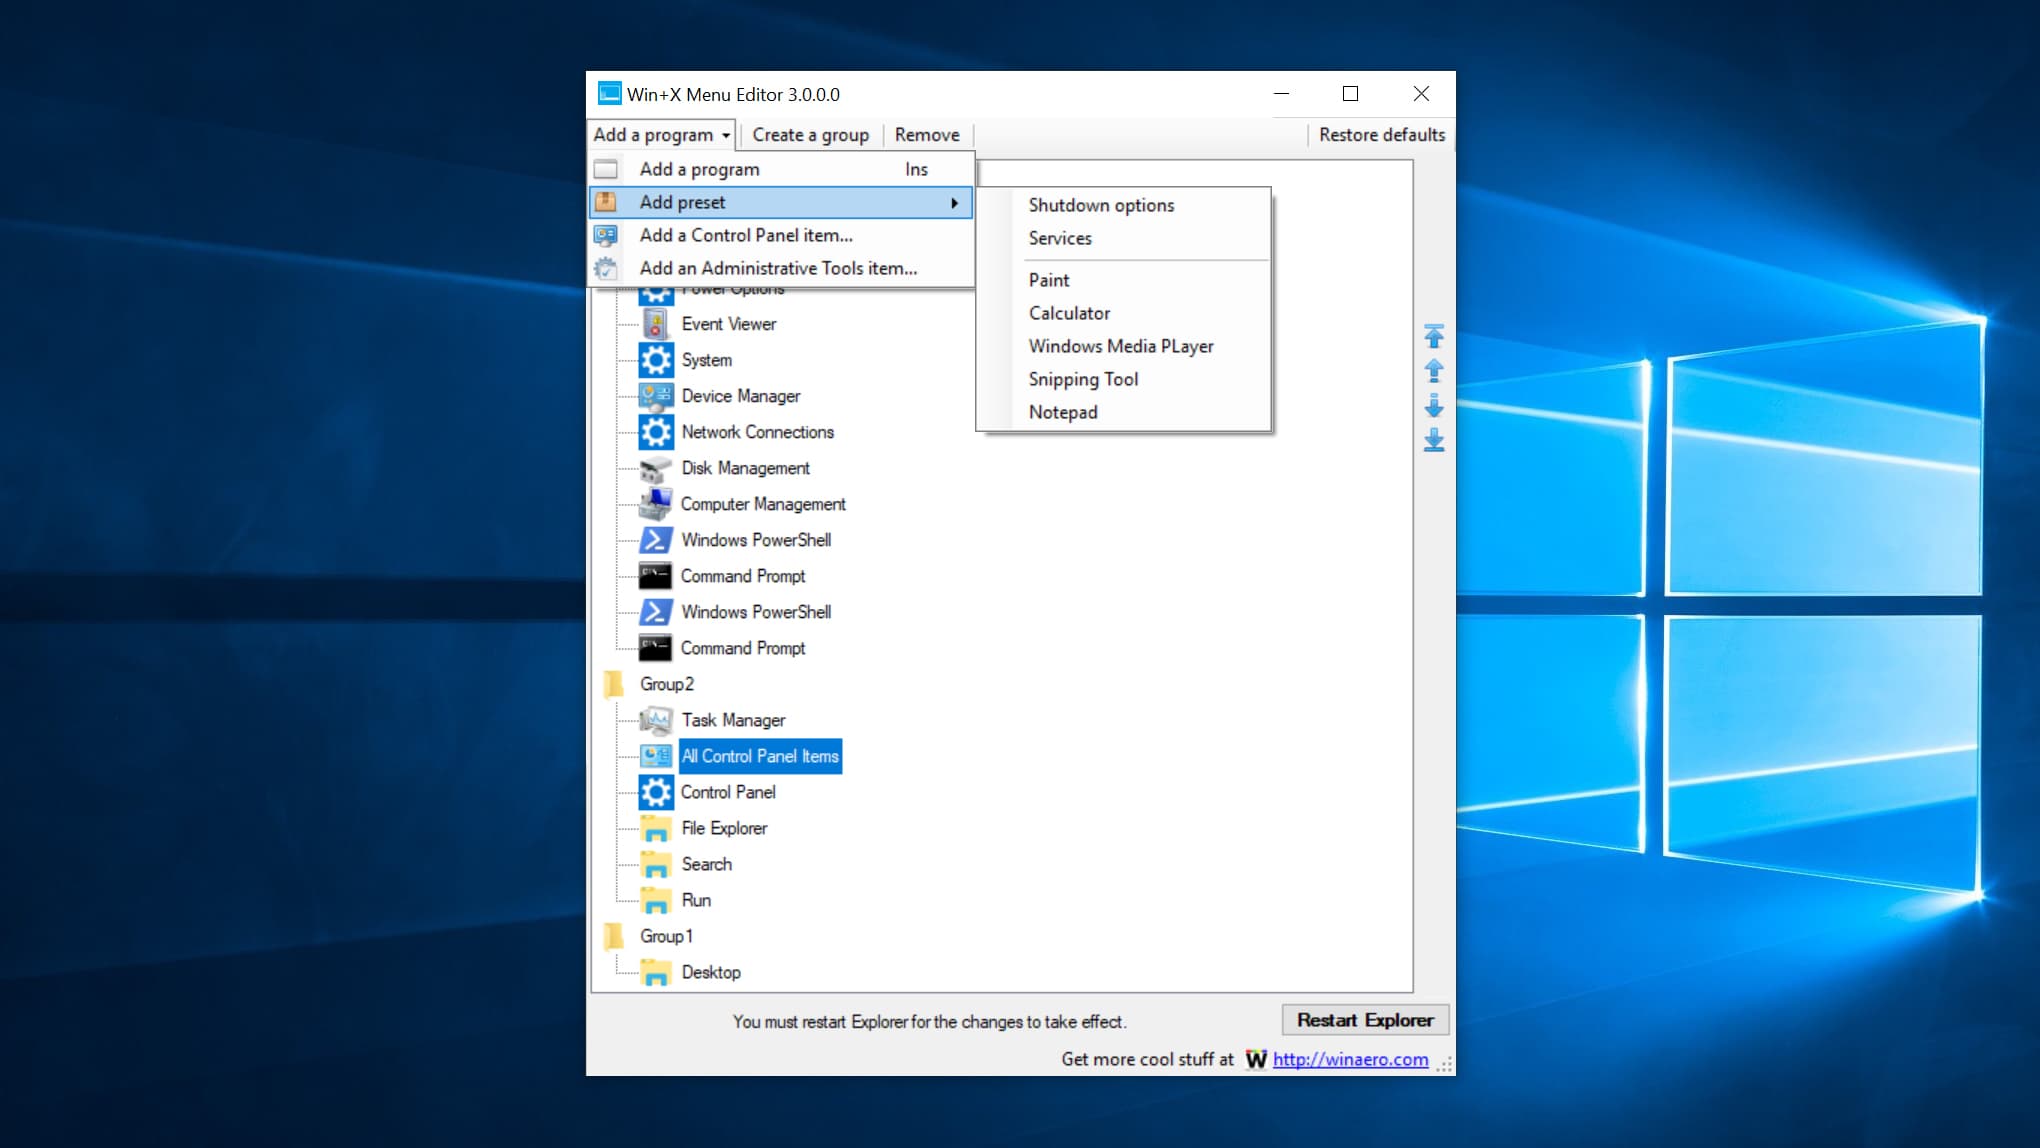
- With the Win+X Menu Editor open, you’ll see the default layout of your Power User Menu contents divided into Groups. You can add a new Group or add, rearrange, or delete items from an existing group using the menu options at the top of the Editor’s window. For example, clicking inside Group 2 and choosing Add a Program > Add a Control Panel Item lets us add a link to the top-level Control Panel (All Control Panel Items). Alternatively, we could have added a direct link to a particular section of the Control Panel, such as System Info.
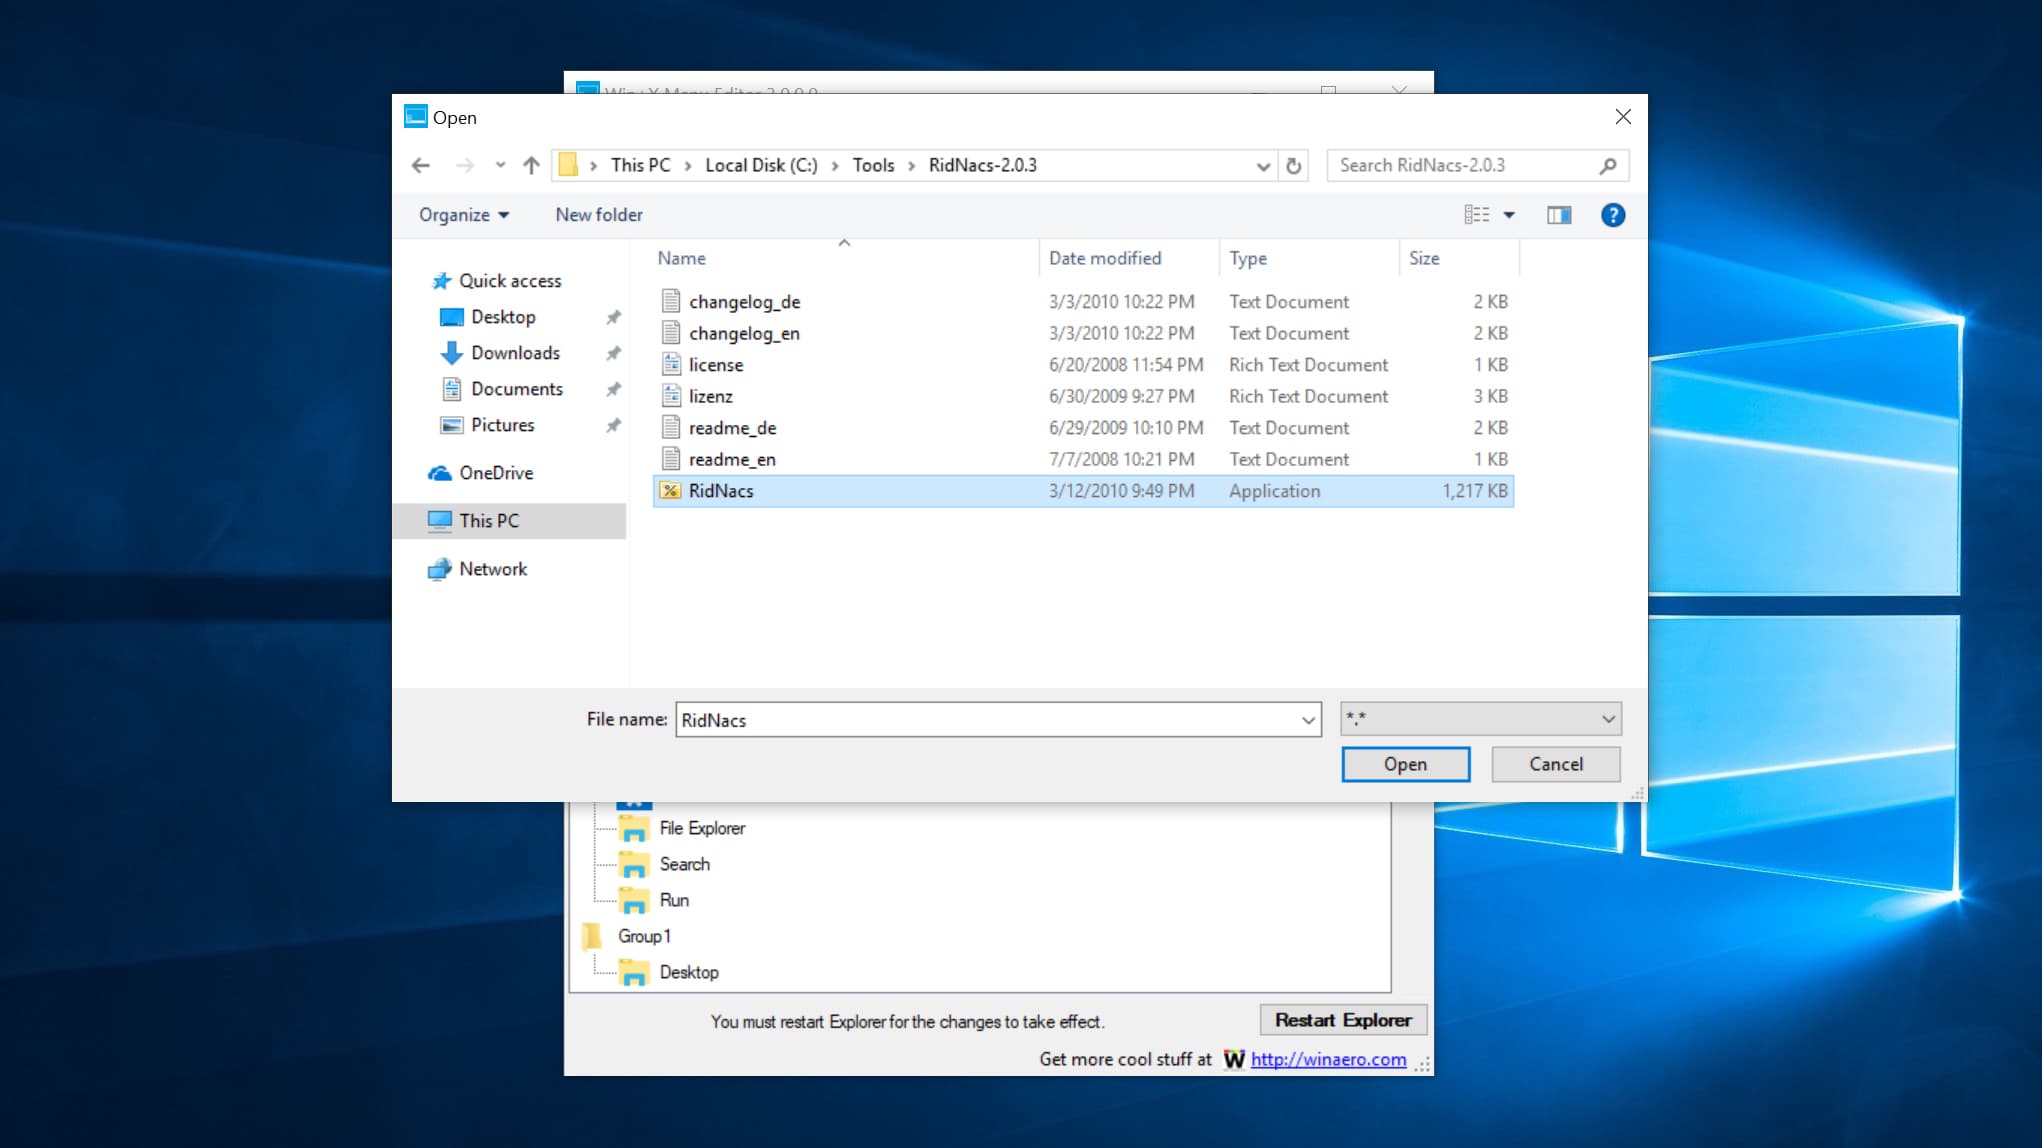
- To add a third party program to the list, choose Add a Program > Add a Program, which opens a file selection window where we can navigate to any app or utility. In our case, we’d like to add the incredibly useful RidNacs to our Power User Menu.
- Once you’ve added or removed your desired entries, you can rearrange their order or group by using the blue arrows on the right side of the Editor window. You can also right-click on any entry to edit its name, which is helpful if you’re adding things like scripts or integrated Windows tools.
- With everything finalized, click Restart Explorer to implement the changes.
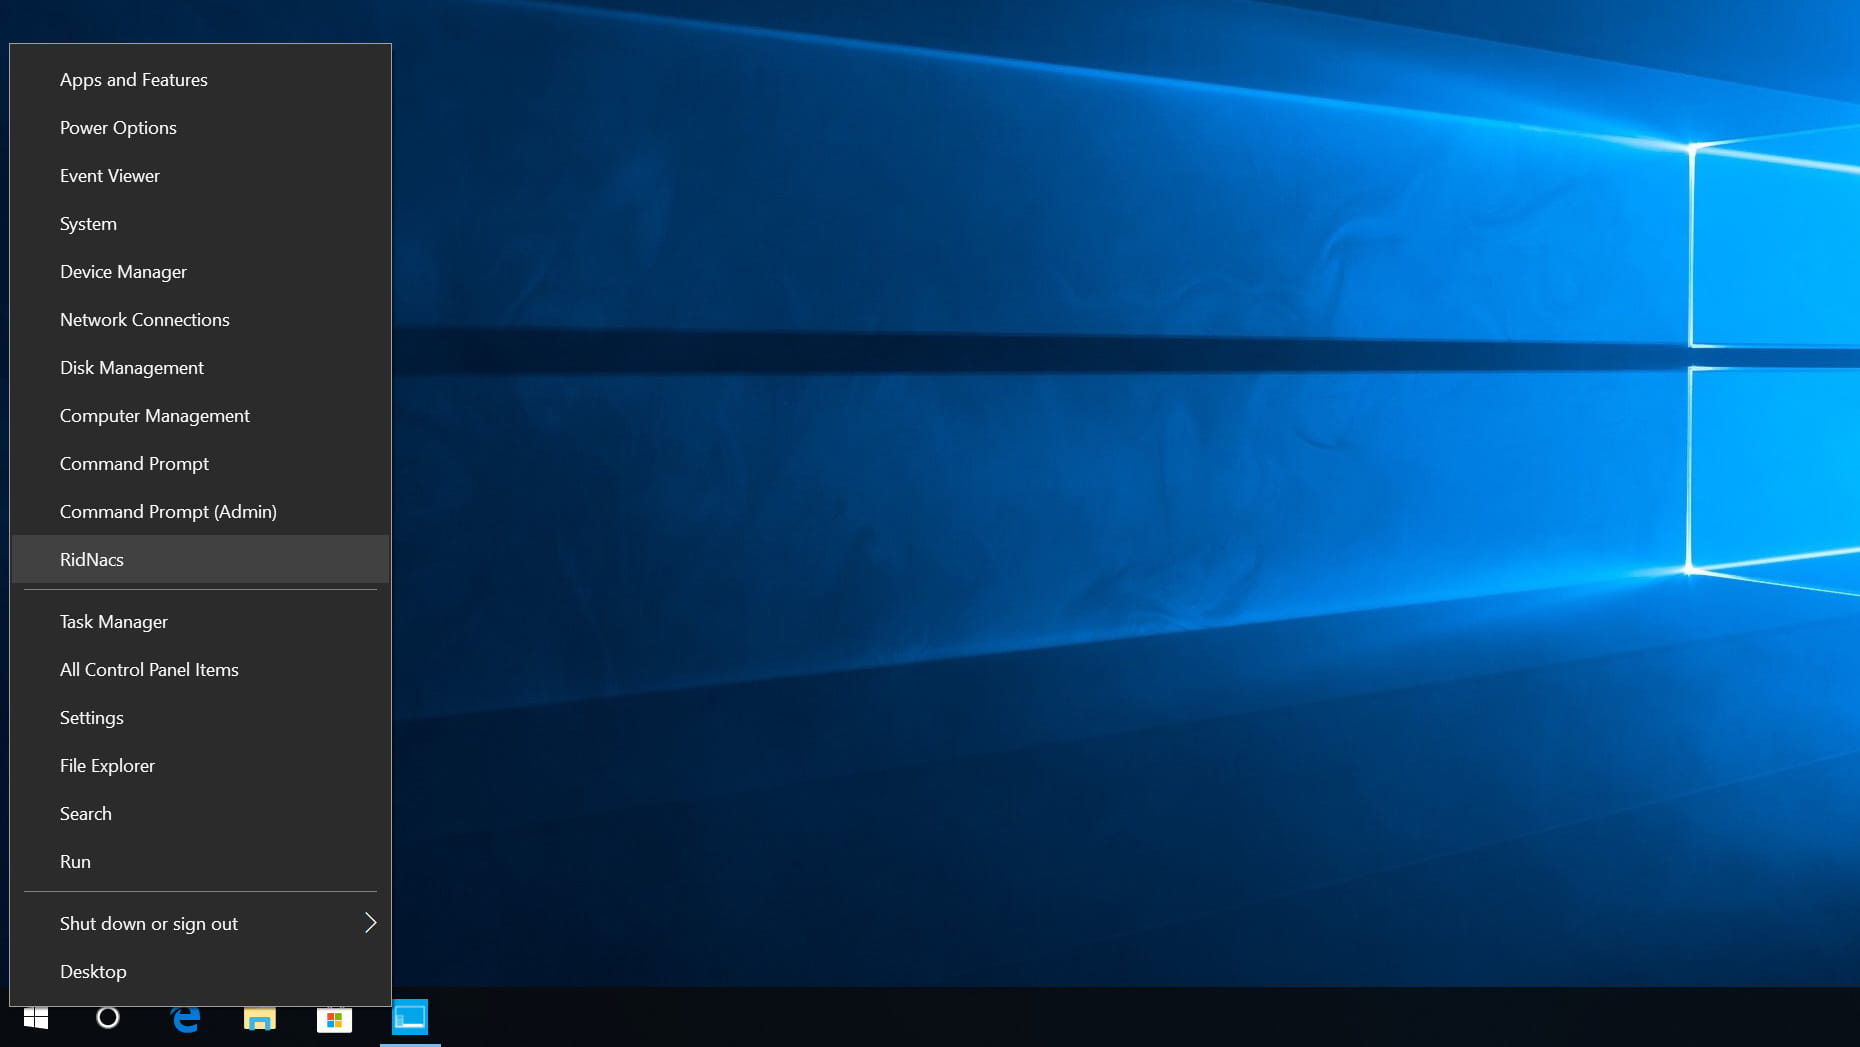
You can now access the Power User Menu by right-clicking on the Start Button or pressing Windows Key+X and you should see your changes. From here, you can continue to edit the menu in the future by repeating the steps above or, if you think you’ve gone too far and want to revert to the default layout, you can click the Restore Defaults button in the Win+X Menu Editor interface.
Just remember that you’ll need to restart Explorer each time so be prepared to lose your place in any open File Explorer windows or dialog boxes dependent on the Explorer process.


