


How to Extract Images from a Pages File on the Mac

If you’ve created a Pages document on your Mac with a lot of embedded images, then you may need to know how to extract them all at once. This is handy if, for example, you added a bunch of pictures to a file and then lost the originals, or if you would like an easy way to gather previously used images for a new document.
The way this works is kind of weird, though, so first of all make sure you have a backup of the Pages document if you need to keep the original. This process shouldn’t hurt it, but I want you to be prepared in case it does cause an issue!
To make a backup of your Pages document prior to extracting its images, either use Time Machine to back up your whole Mac to an external drive, or open the document in Pages and choose File > Duplicate from the menus at the top to save out a spare version.
Extract Images from Pages Document
Once you’re all backed up, follow these steps to extract the images from a Pages file:
- Locate the Pages file in the Finder. If you don’t immediately know its location, you can use the Finder search function to search by filename or tag.
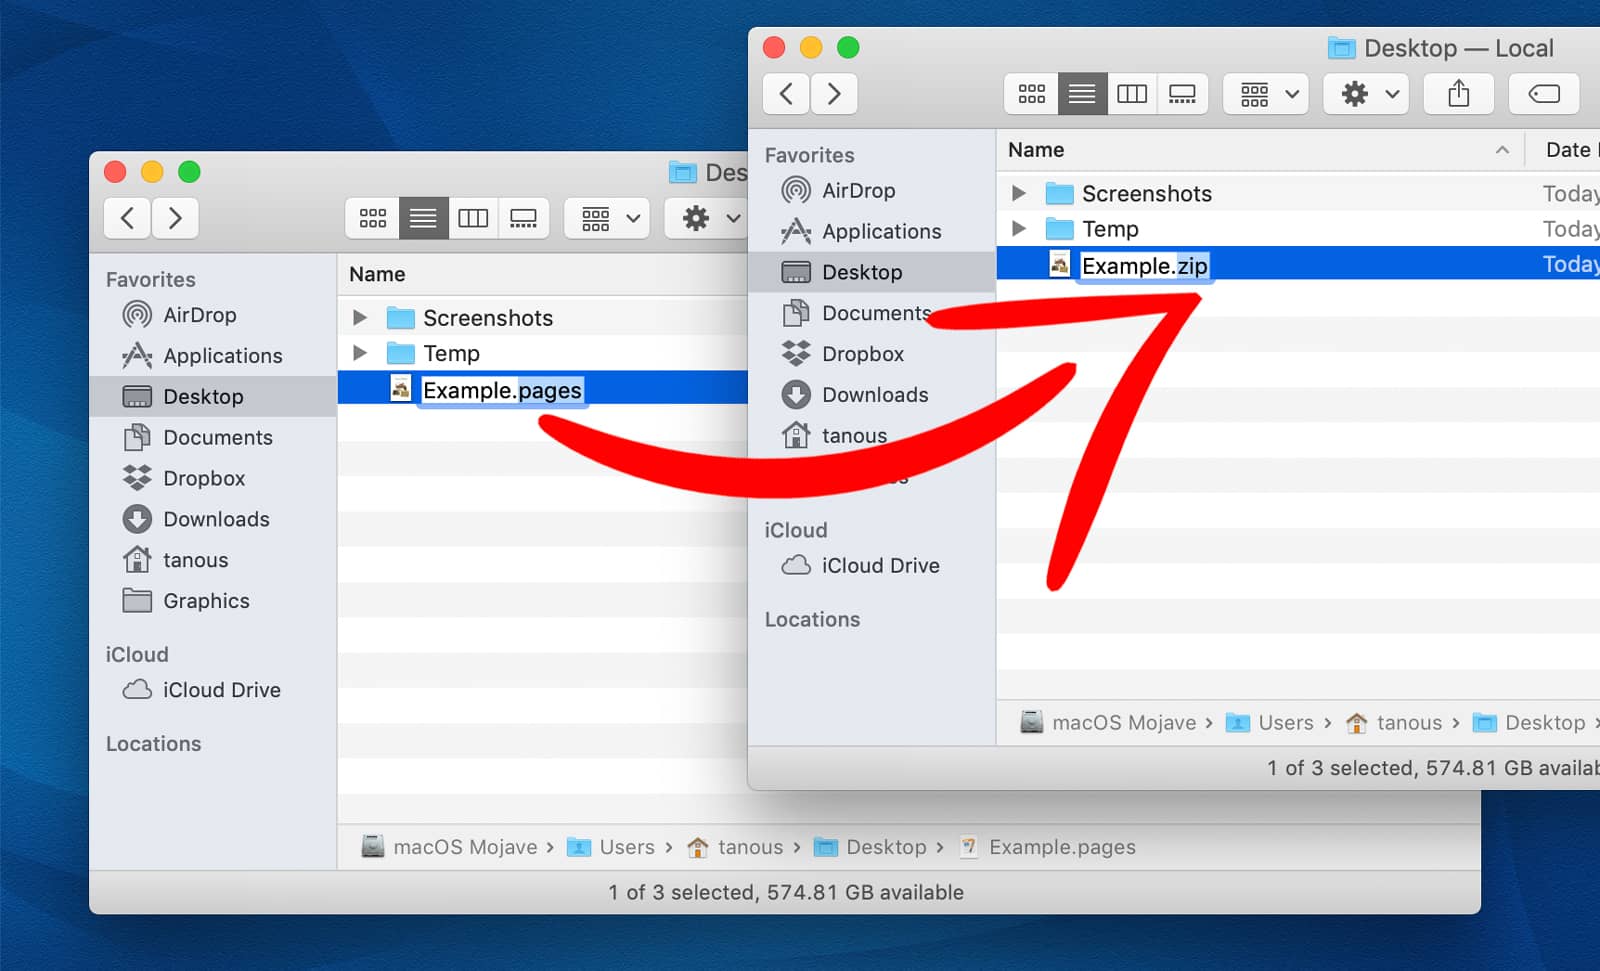
- Once you find the Pages file, use your mouse or trackpad cursor and click once to highlight it. Then, press the Return key on your keyboard to enter the renaming mode. Change the file’s extension from .pages to .zip. This should work even if you can’t see the file’s “.pages” extension at the end of its name; just type “.zip” at the end if that’s the case. If you do see “.pages” at the end, replace it with “.zip.”
- Press Return to confirm the change, then confirm the change when prompted.
- Next, double-click the now “zip” file to extract its contents and open the extracted folder that appears. The folder will have the same name as the original Pages document.
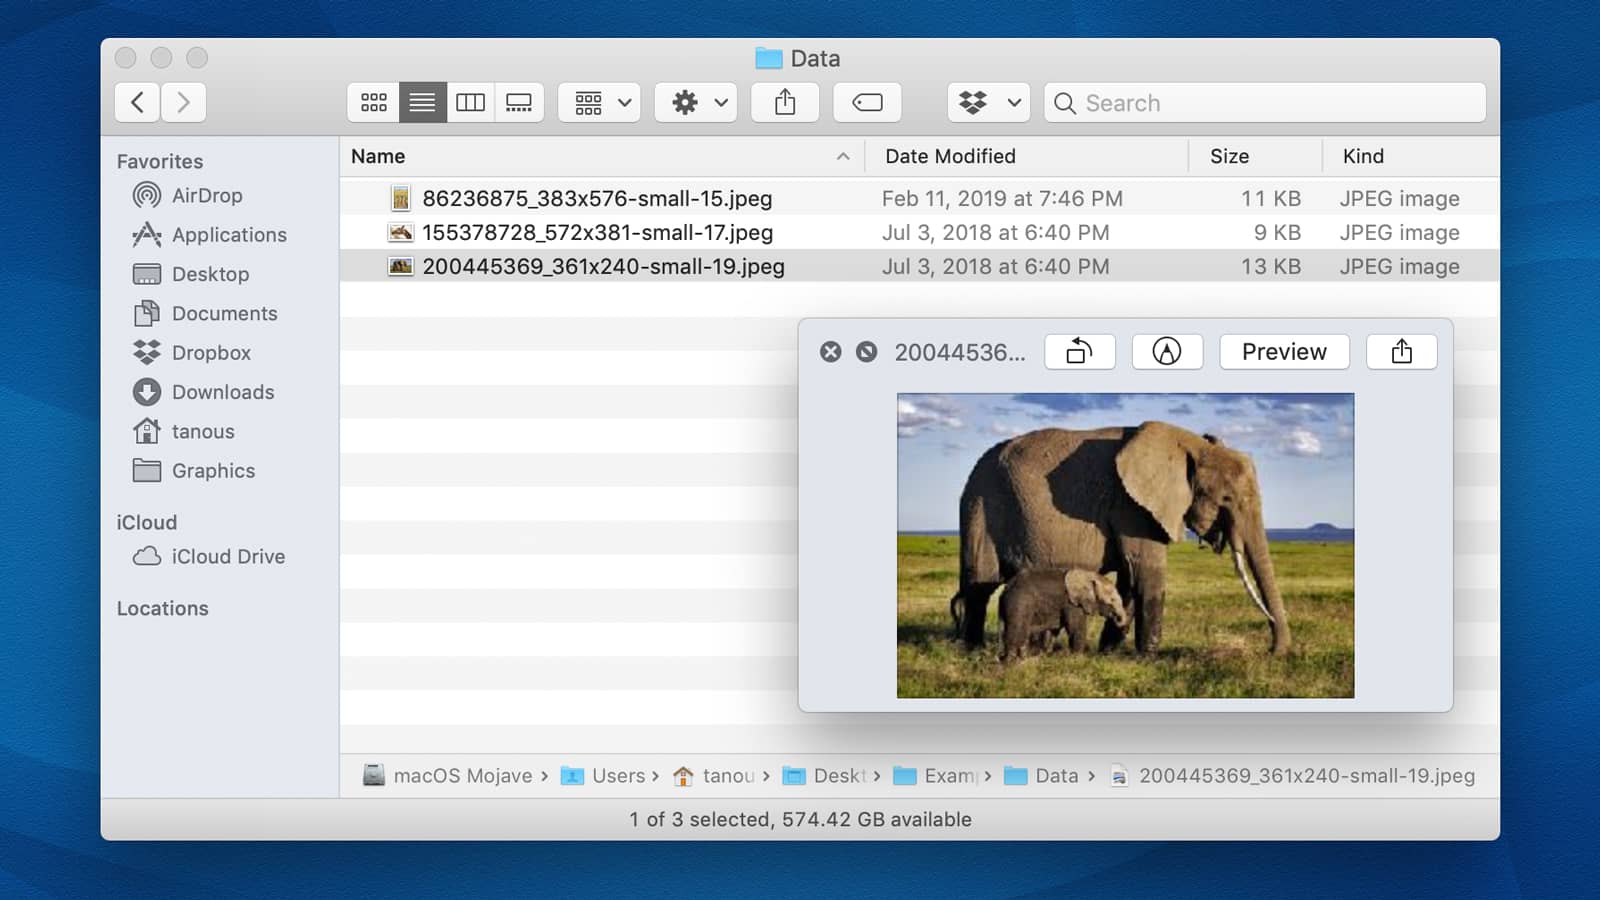
- Within that new folder, look inside the “Data” subfolder, and you’ll find both small and large versions of each image that the Pages file had embedded. From here, you can copy or move the images to another location, or insert them into your latest document or presentation.
If you want to go back to the original Pages version of your file after you get your photos out of that folder, you can either use the duplicate you created above or change the file’s extension back from “.zip” to “.pages,” which should just return it to its original glory.
Extract Images from Microsoft Word Document
Now, this works with Microsoft Word files, too, but not if they’re in their native format. In order to extract images from a Microsoft Word document using this same process, you need to convert the file to Pages first:
- Find the Word file in Finder, and instead of double-clicking to open it in Word, right- or Control-click on it and choose Open With > Pages.
- When the file launches within Pages, choose File > Save and then pick a place to save it, which will create a new version of the file as a Pages document.
- Find that new version wherever you saved it to, and then follow the steps above.
With this method, you don’t necessarily need to create a backup of your Word document first, since the process of converting it via Pages creates a duplicate copy for you, leaving the original Word file intact.


One thought on “How to Extract Images from a Pages File on the Mac”