


How to Make a Movie in Google Photos

Google Photos is a powerful app to store and edit your images. But did you know that there’s also an option to make a movie? Up until recently, the movie feature was only available on tablet and smartphone devices, but now you can make a clip on your computer, as well.
This write-up provides you with a detailed guide on how to create a Google Photos movie, regardless of your device. As the steps for Android and iOS are the same, we’ve included all required actions in one section.
Creating a Google Photos Movie
The following advice assumes that you’ve already downloaded the Google Photos app and signed into your account. The same goes if you’re using Google Photos from a browser.
PC/Mac Method
Step 1
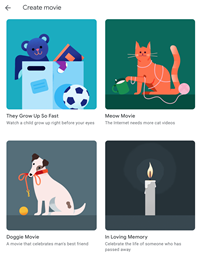
Once you log into your account, click on the three vertical dots in the upper right corner of the screen to access the More menu. Choose Film from the drop-down list and the next window provides you with ten themes to choose from. The themes are named, which gives you an idea of the movie template you’re getting, plus there are tips about what images to choose for the template.
Step 2
After you choose a template, click on the “Get started” button. However, at this point, there’s a chance that you might stumble upon a problem. If there aren’t enough face groups on your account, you won’t be able to utilize the movie template.
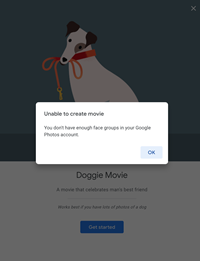
The quick fix is to enable face grouping from the settings menu. Go back to the main window, click the hamburger icon, select Settings, and click “Group similar faces.” Then, select “Face grouping”, and make sure that it’s enabled. Now, you can go back to the movie templates and make your videos.
Step 3
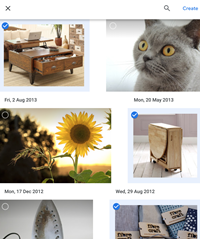
With the face grouping issue out of the way, proceed to select the images you’d like to use in your clip. There’s no right or wrong way to do this, but you’ll want to follow some logical order or specific sequence to make sure your clip tells a story. Hit Done when finished and the movie is ready to go.
How to Make Collages and Animations
Google’s collage tool is super-simple to use. Again, you click the three vertical dots and select Collage. Click on the images you’d like to use and hit Create in the upper right corner. The only limitation here is that you don’t get to choose the collage template; Google selects one based on the image resolution and aspect ratio.
The same method applies for animations, only you click on Animations instead of Collage. The problem is that the animation moves fast and there’s no way to slow it down. This tool works best when you shoot image bursts of a single subject and want to create a cartoony loop.
iOS/Android
Step 1
Launch the Google Photos app and tap the Assistant option at the bottom of the screen. The menu is similar to the one on desktop. Here you get to create a movie, collage, or animation.

Step 2
Tap Movie and select one of the provided templates. They’re the same as on desktop but you also get a blank thumbnail to make a video from scratch. Tap one of the options, select the images, and Google will have the movie ready in a few seconds.
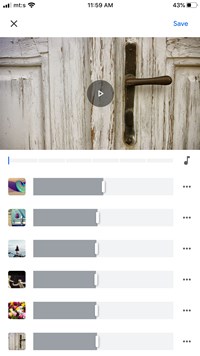
Step 3
A great thing about the mobile version is that you get some creative freedom to rearrange the clips, change their duration, and use different music. When you’re happy with the results, hit Save and you’re done.
Important Notes
You can also make edits after you finish the video. Select a clip and tap on the sliders icon to open the editing window, then reorder the videos, change music, and import additional ones if necessary.
Google Photos allows you to incorporate up to fifty videos and photos to generate one movie. The method to make a collage or animation is the same as described in the desktop section, so there’s no need to reiterate it here.
You don’t get to choose the template for collages, but the app allows you to apply filters and make small edits to the entire collage. The same goes for animations, even if there’s still no way to slow it down.
What Happens When You Delete a Photo or Video?
The simple answer is: nothing happens – your video stays unaffected. If you delete a clip or photo that’s in a Google Photos movie, it won’t be automatically removed. Google creates duplicate files which are saved separately as a clip, so there’s no need to worry about corrupting the videos. The only way to remove an item from a Google Photos movie is to edit the clip itself.
And the Oscar Goes to…
Making Google Photos movie is simple, quick, and, above all, fun. There are some limitations to the features, but this is image storing and management software, not a video editing tool. As such, it does a great job of creating cool clips.
How often do you use apps to patch together a movie? Do you post them on social media? Drop a comment below and share your preferences with the rest of the TJ community.


