How to Clear Windows Update Cache
Windows Updates are a vital way to keep your operating system up-to-date, healthy, and safe. That said, updates can be large and annoying, and make it difficult to restart your computer should anything go wrong while downloading or installing.
If you’re looking to begin your updates with a clean slate, this article will show you a few ways of how to clear Windows Update cache.
The Downside of Updates
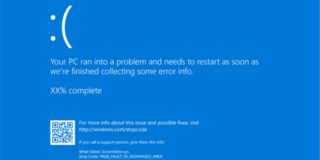
Windows Updates, typically released every month, are automatically scheduled on your machine. Depending on your computer and internet connection, the updates may take a while to download and install. If anything goes wrong during this process (blackout, loss of connection, etc.) your update files run the risk of being corrupted.
The temporary files stored in the cache can also take up plenty of space. If the room on your hard drive is already limited, this can be a problem.
Thankfully, Windows makes it easy to solve this by freeing up your Update cache.
Clearing the Cache
Here are several ways to clear your Update cache:
Important: Stop Windows Update
An important first step for all solutions is to stop any Windows Update activity. This prevents further downloads and corruption. It’s simple to do:
1. Open the Run dialog (Win + R) and enter “services.msc.”
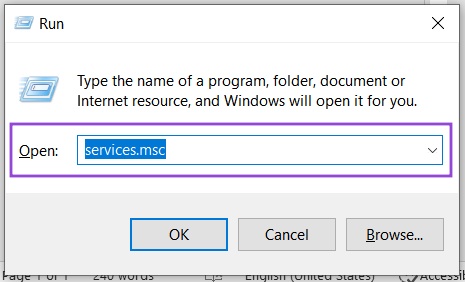
2. To run as Administrator, press (Ctrl + Shift + Enter) instead of clicking the “OK” button.
3. In the Services window, navigate down to “Windows Update” and right-click it.
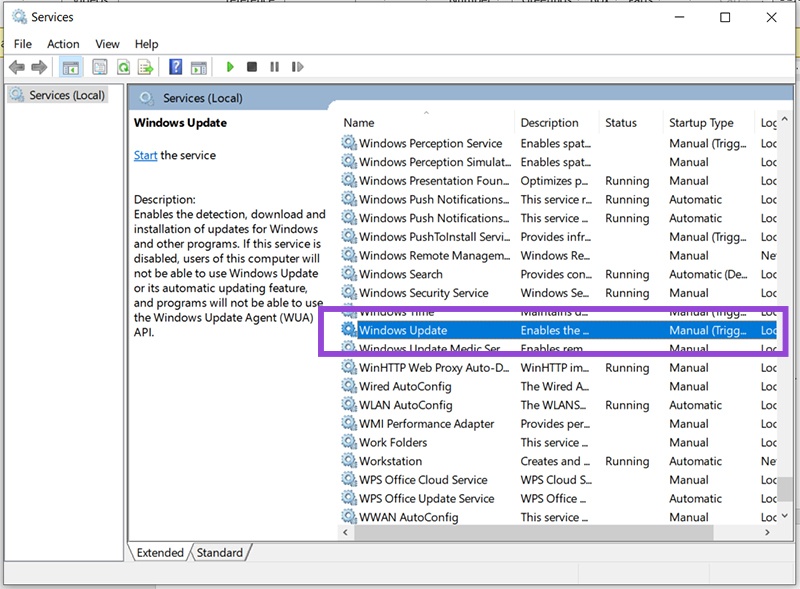
4. Select “Stop” from the context menu. The process should then stop.
How to Clear Windows Update Cache with Explorer
You can use Windows Explorer to quickly and cleanly delete all files. Don’t worry about bulk deleting files and folders; Update will re-download and rebuild any deleted data. Here’s what to do:
1. Open the Run dialog (Win + R) and enter “C:\Windows\SoftwareDistribution\”
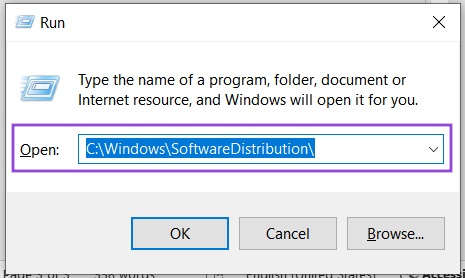
2. In the new window that pops up, select all the files and folders and delete them. You can press (Shift + Del) to delete them without sending them to the Recycle Bin.
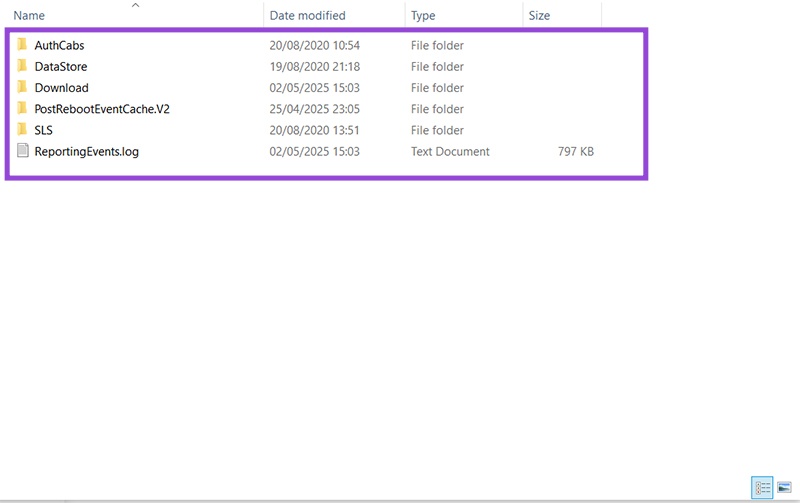
3. Your files should be deleted and the cache cleared.
Using Command Prompt
Command Prompt is a powerful tool for getting most things done on Windows, provided you know what to type. Clearing the Update cache is also possible using this prompt. Here’s how:
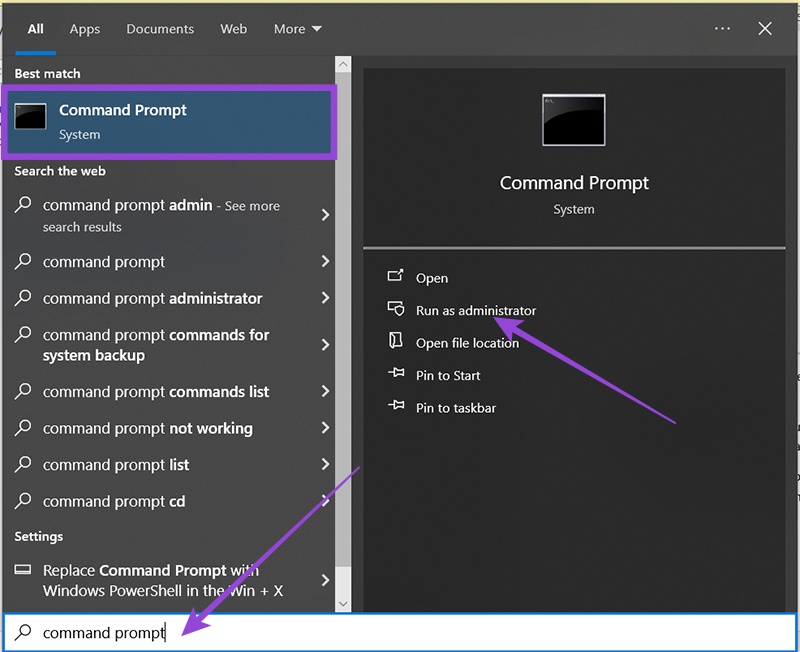
1. Type “Command Prompt” into the search bar.
2. Open the app as an Administrator. Right-click the app and hit “Run as administrator.”
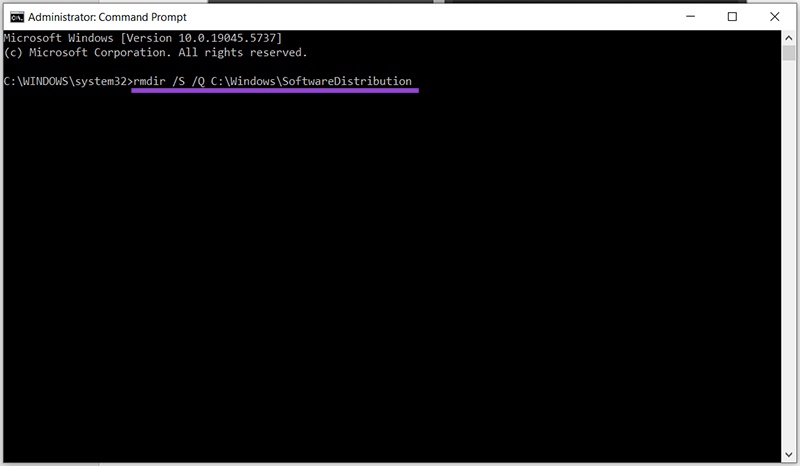
3. In Command Prompt, type: “rmdir /S /Q C:\Windows\SoftwareDistribution” and press “Enter.”
4. You can restart the update process by typing: “net start wuauserv” and hitting “Enter,” then “net start bits” and “Enter.”
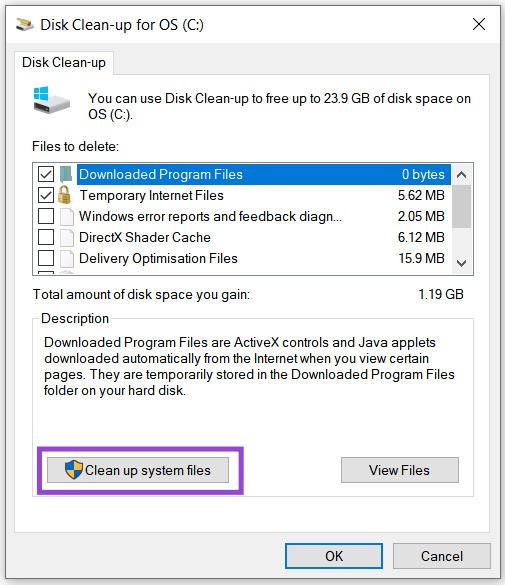
Disk Clean-up
The Disk Clean-up utility is yet another handy way to free up space and get rid of corrupt files. It’s as easy to use as the Windows Update:
1. Open Disk Clean-up from the search bar and right-click on it to run as Administrator.
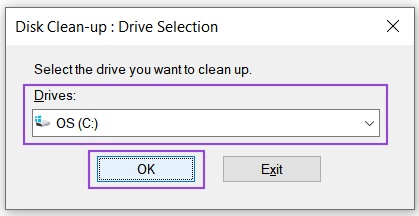
2. Select the main drive that Windows is installed on and click “OK.”
3. The utility will calculate the space and time needed to free up your drive before opening.
4. Once open, click the “Clean up system files” button.
5. The drive will scan again and open a new window. Check the “Windows Update Clean-Up” (and any other files you want gone), then hit “OK.”
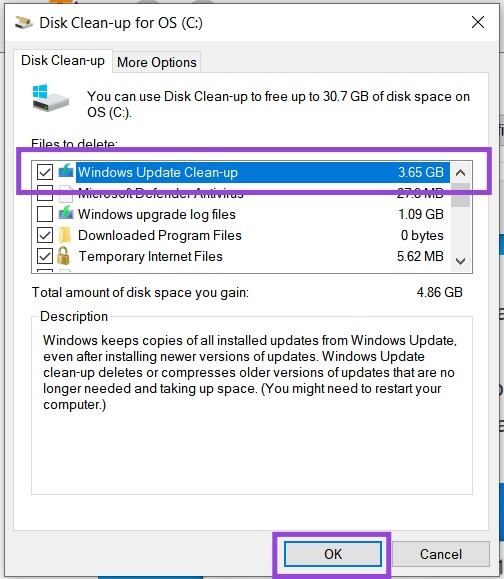
6. The utility will then clear your cache.