How to Fix Error Code 0x80070005 on Windows 11

Updating your operating system is good. It keeps your software and apps running smoothly, patches out bugs, updates security, and avoids compatibility issues. That said, updates themselves can go wrong. Today, we’re looking at how to fix error code 0x80070005 that affects Windows 11 updates, specifically those for the OS software and the Microsoft Store.
We’ve assembled a few fixes for you to try that’ll hopefully have your updates running smoothly once again.
It’s All in the Registry
Error code 0x80070005 is related to permissions. If it appears, it means whatever you’re trying to update, you don’t have permission to do so. Whatever the scenario it appears in, it has one root cause: trouble in the Registry. This is where Windows keeps all low-level settings and configuration data for your machine. Problems in the Registry can make your PC unstable. Ones that cause this error include:
- Your current account doesn’t have Admin privileges
- An error on Microsoft’s end
- Malware infection
- The Registry is corrupted or damaged
- Windows Update has failed while in progress
How to Fix Error Code 0x80070005 on Windows 11
Below, we’ve got a few fixes to try for different aspects of error code 0x80070005. Before you attempt any, be sure to retry your Windows Update or Microsoft Store installation a few times, restart your machine, run a virus scan, and check your internet connection.
Enable Administrator Permissions
Permissions are a key part of this error, so a first step is to ensure you have an account with Admin privileges enabled. You can do it in Command Prompt. Here’s how:
Step 1. Open the Run Dialog (Win + R) and type “cmd” into the box, and hit “OK” or “Enter.”
Step 2. Once in Command Prompt, type “net user administrator /active:yes”, then press the “Enter” key.
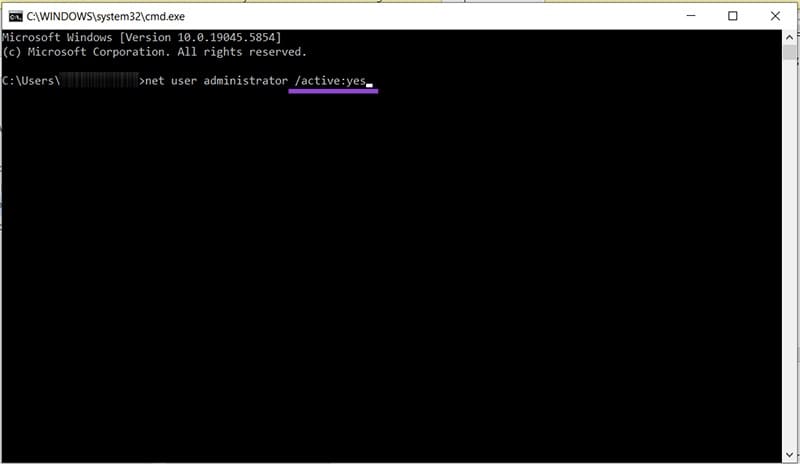
Step 3. Restart your machine and log in with the same account. Privileges should be enabled.
Turn On App Readiness
The App Readiness Service prepares apps for first-time use and, as such, runs validation checks, confirms compatibility, and requests login details. If permissions are a problem, this might be an answer. Here’s what to do:
Step 1. Open the Run Dialog (Win + R) and type in “services.msc” into the box and press “Enter.”
Step 2. Navigate down until you see “App Readiness.” Double-click it

Step 3. Change the “Startup type” to “Automatic” in the box next to it. Under the “Service status” subgroup, click the “Start” button to begin the service.
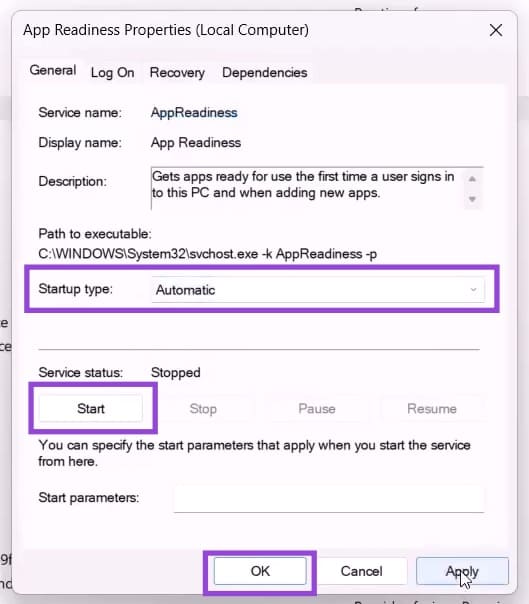
Step 4. Press “OK” to confirm.
If your Windows Update still isn’t working, you can try restarting your “Background Intelligent Transfer Service” in the utility. Simply right-click it and select “Restart” from the context menu.
Get Rid of Update Files
If your Windows Update has failed halfway or has left files behind, these may cause permission conflicts and error code 0x80070005. Thankfully, you can clear these quite easily with the Disk Cleanup tool. Here’s how:
Step 1. Enter “Disk Cleanup” into the search bar and choose the option that pops up.
Step 2. After scanning your drive, the tool will open its main window.
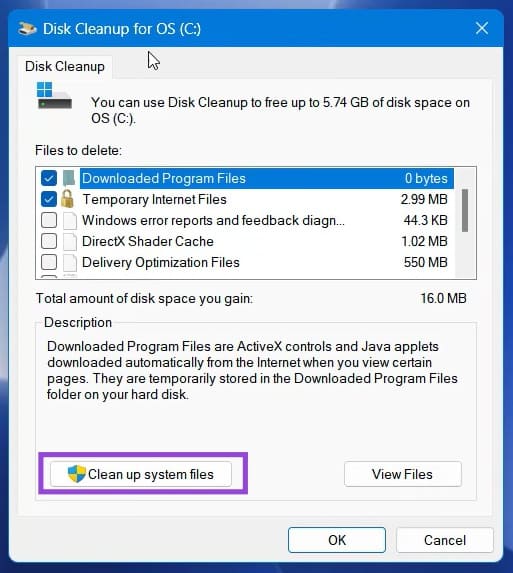
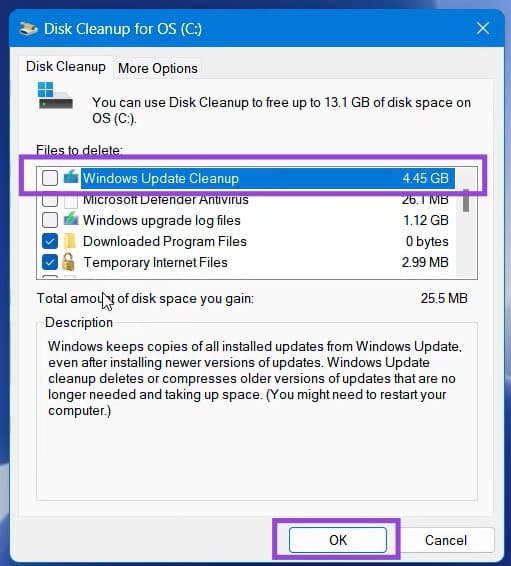
Step 3. Click the “Clean up system files” button, and the tool will recalculate all space on your drive.
Step 4. Once this is done, check the box next to “Windows update cleanup” and press “OK” to begin deletion.
Step 5. Once done, try the update again.
Repair Microsoft Store
If you get this error code while updating or installing from the Microsoft Store, the app might be corrupted and in need of repair. You can do this in Command Prompt:
Step 1. Open the Run Dialog (Win + R) and type in “cmd” before pressing (Ctrl + Shift + Enter) to run as Admin.
Step 2. In Command Prompt, type in “wsreset” and press “Enter.”
Step 3. Restart your machine and try again.